
After a midday trip to Kings Lynn, with Teresa, to visit three antiques shops, I decided I wanted to build a one-day workshop project.
I considered doing a saw bench. But I think that’ll be next, and it’ll be a two-day project, I reckon. Instead I settled on a saw-rack. I was inspired by James Wright, but made mine smaller, simpler, and rougher, knowing I’d be painting it, not leaving it in raw wood form.
This is one of my many ‘jazz’ style workshop/DIY projects, inasmuch as I didn’t really plan too much or at all, really – I just grabbed what was to hand, and improvised. So nothing was set to a certain length, and then measured, etc.
Of course I did measure and reference parts relative to each other, e.g. when finding the width for the grooved saw-rest beam. And the overall size was determined first by the length of my longest saw, giving an approx. height of the frame, and second by a guess-timate of what width I might want, based on currently having five or six saws that’ll probably wind up in here.
As it is, there’s room for nine saws of a similar size to most of the ones I currently have. I may need to add a second blade-rest beam, lower down, for shorter saws. I only have one such at present, and it’s still mid-restoration, awaiting sharpening, and possibly even further handle strengthening.
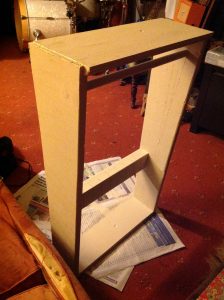
The top and sides are plywood, the bottom is chipboard, and the beam and dowel are soft white woods, probably pine. As mentioned above, I just worked with whatever scrap wood I had on hand. And I had very little choice, since not much of my available wood was appropriately sized or shaped.
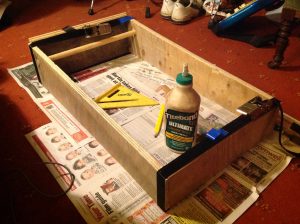
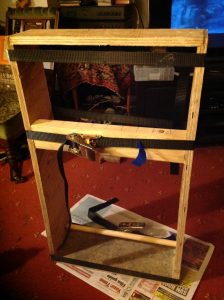
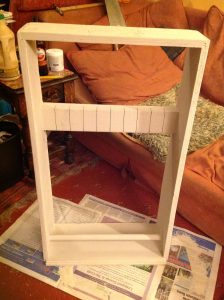
As can be seen from pictures at the top of this post, I didn’t have long enough clamps (another future project!), so had to ‘clamp’ this using ratcheting straps or belts.
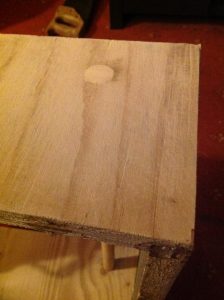
The top and bottom panels are currently just glued to the sides using routed out dado joints. The dowel handle-rail is set in circular holes. And the blade-rest beam is butt-joints glued up, with two additional thin custom wooden dowels in each end, also glued in, to strengthen the joints.
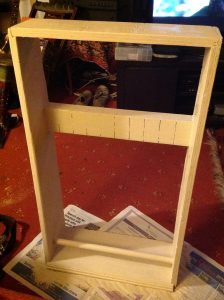
And finally, whilst Teresa watched The Lord of The Rings: The Fellowship of The Ring, I glued up, drilled holes for and inserted dowels, did a little sanding, and then painted the thing in a Valspar off-white called, rather nicely I think, Elk Antler.
I had to clean out the paint from the blade-rest channels, which was fiddly and time consuming, and will possibly need doing again, if I apply a second coat of paint. Actually they’re only the width of the recently restored rip-saw’s kerf, and will likely need opening up a bit more anyway.
Mounting this and getting some saws into it will have to wait till tomorrow. But I’m pretty chuffed, as I did actually build (and even paint) a project from start to finish, in just one day. Indeed, really in just the latter half of the day.
Admittedly it’s a bit rough and rustic. But hey, it’s just a box for storing saws. And besides, I learn something – often quite a bit, thanks to my many mistakes! – on each new project, so it’s all good. Pictured above is how it looks now, at 23:24, or close of play for today.