
This morning some brass plated saw-screws arrived from Thomas Flinn & co. Straightways I embarked on mounting the two blades for which I’ve so far made new handles.
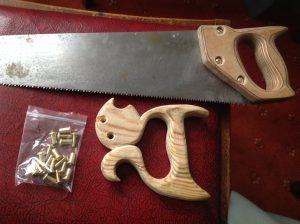
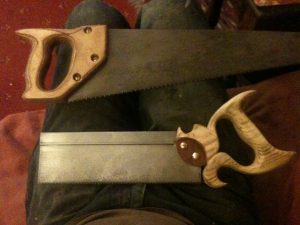
I’ve made both handles considerably thicker than the plastic ones they’re replacing, firstly for comfort in the hand, and secondly to try and ensure some strength. The larger rip-saw handle went on no trouble.
But the more intricate and delicate tenon-saw handle proved much trickier. I started out on the latter by drilling the holes for the nuts in three different diameters, as I had on the rip-saw handle: 5mm for the thinner threaded male bolt; 7mm for the fatter female counterpart; and 12mm to recess the split-heads into the handles. This had worked well in the plywood. But when it came to the much softer wood (some kind of pine, I think?) of the tenon-saw, well, read on..
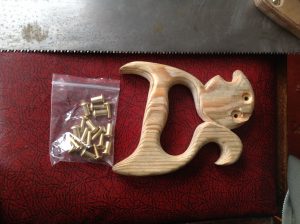
I was too inaccurate in my hole drilling – the various diameter holes didn’t align correctly – and the wood did prove to be too soft, with the golems perilous… eh!? That’s predictive text for you!!! With the holes perilousy close to the outer and therefore more fragile edges.
Consequently the handle broke in several places, with tear-out, and on top of that the male and female parts failed to mate. Total failure! Oh well, you live and learn! And I’m not to be that easily defeated. I have a cunning plan…
Some considerable time later, and in tandem with repainting the back wall of the workshop, I tried to remedy the broken, ill-fitting tenon-saw handle. I decided to use a much harder wood. I don’t know what the wood I’ve used is – it’s a scrap a local carpenter gave me many moons ago – but it’s got a very fine dense grain, and is a nicely contrasting darker colour.
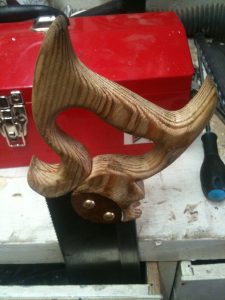
I’ve attempted to make it an aesthetically pleasing addition, albeit the the two curves, despite being cut by the same 68mm radius hole cutting bit, didn’t mate satisfactorily. Attempts to correct this with a rasp and files failed. So I just slopped in loads of glue, to fill any gaps.
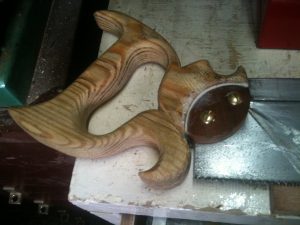
Due to the awkwardly curved shapes, I couldn’t come up with a way to clamp the two pieces that didn’t cause alignment problems. In the end I simply stood the blade on end, vertically, and let the handle glue-up held in place by gravity. This joint may, as a result of this, be weak, and fail the instant I start sawing. I’m considering adding some little dowels, or screws, to address this.
I do like how these two saws look now. Certainly they’re looking much nicer than they did with their original plastic handles, and the blades rust-free and cleaned up. It still remains to actually sharpen the teeth. Then comes the moment of truth… using the blighters!
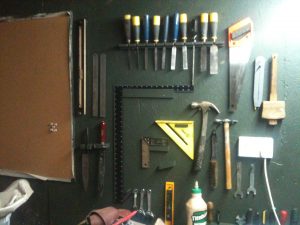
As alluded to above, I also (partially) repainted the rear wall, in a dark grey-green, called ‘peacoat’. The wood is OSB board, which I used on account of it being cheap. I was considering leaving the raw chipped timber look on display. But it was too much in my small and cluttered workshop. So I painted it white.

But I didn’t really like that either. Sure, white gives a light, spacious, calming effect. But it also left the OSB texture too visible for my tastes. That doesn’t show on the pic above so much. But when working in the shed, I found it annoying. I decided that this time I’d go for a darker colour – some kind of grey – in the hope that the OSB texture might recede a bit, and the tools and other stuff might pop a bit, visually.
Due to the massive amount of clutter, I didn’t clear the whole area, as I had done when I’d installed the OSB and painted it white. This time I simply (ha!) worked around all the stuff that’s there; I still have about 30-40% of the lower wall to finish. That’ll have to wait until I can clear a load more stuff out, temporarily.
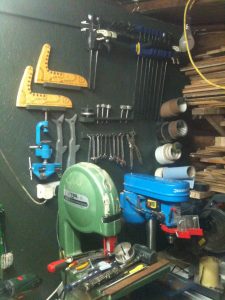
But I think I’m pleased with the new and very different look. Next I need to get a few cabinetry type pieces made, which I intend to paint in a lighter buff type colour. So much to make and do!