

I have a tiny shed that I use as a workshop. It’s just behind where I was stood when I took the pic of the garden, above. The shed interior is a total mess. There’s way too much stuff, and not enough storage. So I’m always working in chaos. It’s probably quite dangerous.
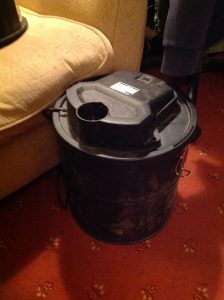
Then there’s all the dust and wood shavings, etc. So, as mentioned in a previous post, I decided to try my hand at making a ‘shop-vac’, influenced by guys like Marius Hornberger and Cosmas Bauer. Mine is nowhere near as good or well made as either of their comparable ones. And I made a real pigs ear of it, at almost every stage. They say you learn from your mistakes. I should be learning plenty!
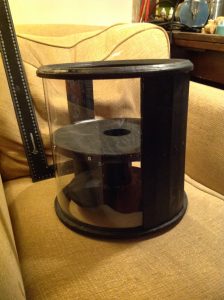
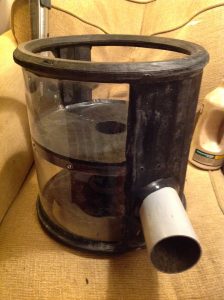
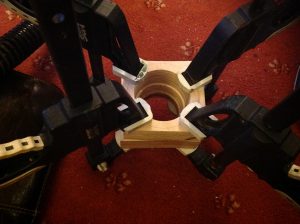
Getting th polycarbonate walls in was the biggest headache. And I ought to have added the air-intake port earlier. It was a pig to cut the circular hole at the right kind of angle. And then I had to file the entryways, until the tube fitted as I wanted it to. It ended being a bit of a sealant covers a multitude of sins type scenario. And the port shouldn’t have been quite so long either. Now it’s in place, it’s hard to see ho I can cut it shorter, without damaging the seal/glueline.
But it is at least more or less finished and assembled, as pictured above, and functioning. Just about. Suction is a touch wimpy. And the hose that came with the vacuum blocks up too quickly and easily.
So, I’ve made a second adaptor. The first was a step-down adaptor, from 68mm – the entrance port in the vac – to whatever smaller diameter the hose that came with it is (I forget!). I pick up the shop-vac thread again with this theme further down the post.
Next came a brief interlude as I popped out to do a few errands, and returned to wander around the garden a bit, before popping into the shed to contemplate tidying up and decorating in there. Instead of which I took a load of photos.
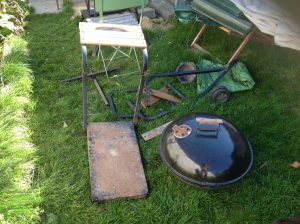
I’m intending to restore the BBQ pictured above, and reassemble it. It’s very, very rusty at present, and so corroded in certain areas that it won’t currently go back together properly. Plus the wood parts (two little shelves, either side of the main BBQ bowl) are rotten, and need replacing. I’m thinking it’ll make a good heat source for tempering metal, if/when I get around to making some marking knives and suchlike, as well as cooking.
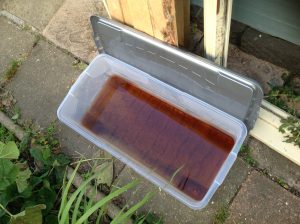
Whilst I was snapping away I thought I may as well document the new vinegar bath arrangement I came up with, for soaking and rust-removal with the saw-blades I’m currently restoring, even though all the blades (and a few other odds and sods, e.g. some old files and rasps) had been removed when I took the snap. So all that’s in the white vinegar, apart from the vinegar itself of course, is dirt and rust particles.
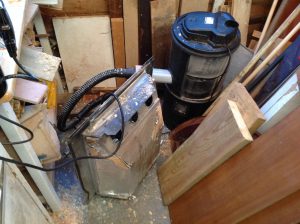
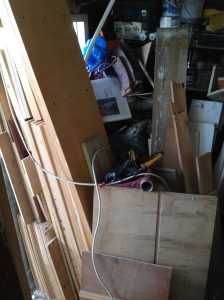
This is the view immediately to the left of the door, looking back towards the corner, and one of the windows I made, to replace the torn flapping plastic sheet that I’d inherited from the previous owner. Under the piles of wood and assorted junk, there’s actually a pretty hefty top-loading kiln, that I got off FreeCycle a while back. Another resto’ project for some time in the future!

Here’s a small section of relatively well organised tool storage. Note the banana-shaped handle on the bigger of my two hanging hammers. Somehow I bent the bloody thing, either whilst hammering something in, or, possibly, whilst trying to remove very stubbornly stuck nails or screws.
I think I did it when I was replacing our back garden passageway gate. The old gate, an awful thing made of scrappily knocked together decking material, was held solidly shut by wildly overgrown ivy. After hacking the ivy away, the old gate fell to pieces as I tried to remove it. It had not only been held in place, but was also held together, by the ivy!
It was during this work, I believe, that I bent the hammer. I have already straightened it a little, but I stopped at a point where it didn’t seem to be improving, as I didn’t want to snap it in two! Anyone got tips on how I might un-bend the bugger?
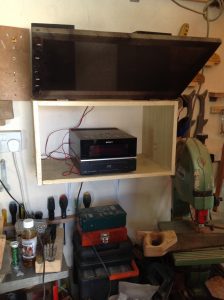
One of my many half-arsed mini-projects was this box to hold and protect a small stereo. I had meant it to be just wide enough to accommodate both the speakers and the stereo itself. But it wound up being about one centimetre too narrow, widthways. This renders the dust-filter on the front flap – made from an old pair of Teresa’s tights! – a bit pointless, since it’s thr to protect the speakers as much as the stereo. Still, it keeps most of the dust of the latter, at least.
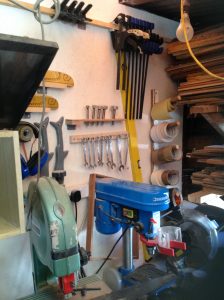
Here’s a view of the right hand side of the shop, another relatively well organised droplet In the ocean of chaos, where you can see my small underpowered bandsaw, bench drill-press, and crappy little chop-saw. Just visible upper right are my lumber racks.
My slightly better Rage chop-saw died on me, and needs repairing. I replaced the carbon brushes, which had worn away to almost nothing, and one of which had split. But the motor still refused to work. I’m considering getting Rage to mend it, as their pricing is fairly reasonable.

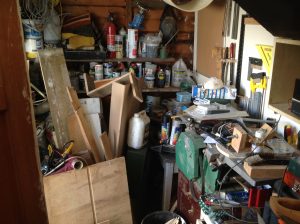
The above picture shows pretty much how most of the workshop is most of the time. There’s just too much stuff and not enough or well enough organised storage. It’s a battle I’m working on, and gradually getting to grips with.
Actually I’ve already removed lots of floorboards, intended for use in our house (and recycling as furniture), and doors and widows (for the greenhouse I’m building, and our art/music studio, etc.) outside temporarily.
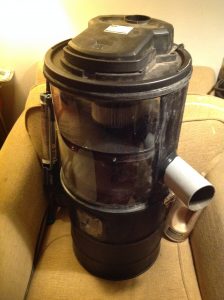
So, back to the vac’; pictured below is adaptor MkII.
This new one, which salvages a sliver of the previous step-down model, is a step-up adaptor, going from 68mm to 100mm, the diameter of some flexible ducting I bought today from ScrewFix. The new adaptor is gluing at present.
I did try duct-taping the flexible duct to the 68mm port, but the size discrepancy was too big, and the tape simply refused to adhere to anything. Too much dust, I think!
I’m hoping that later today I’ll be able to attach the new wider hose, and see if the vac will ‘hoover’ up anything… TBC.
Well, I’m pleased to say that the bigger hose does work. I attached it to the adaptor with an adjustable metal circular screw-clip collar thingy (hats th proper name got these doodads?). I had to widen the aperture on the pipe inlet end of the adaptor, using a recently acquired half-ounce profile rasp, to get it to fit.
It’s too late for a pic, as I’m on the couch with Columbo now. ‘Just one more thing…’