Phew! This is, I think, astonishing. Musical perfection. Beautiful chords, on what sounds like a Rhodes. A triangle. And a beautiful half-time shuffle, with fab roto-tom fills.
T-shirt du jour:


renaissance man
Phew! This is, I think, astonishing. Musical perfection. Beautiful chords, on what sounds like a Rhodes. A triangle. And a beautiful half-time shuffle, with fab roto-tom fills.
T-shirt du jour:

A Chinese lady in Waterside Antiques had this groovy bag. Trying to find one to buy in the UK isn’t proving easy! Apparently it’s based on illustrations by one Alison Oliver, for BabyLit, a series of books that render classic literature in a form for babies!
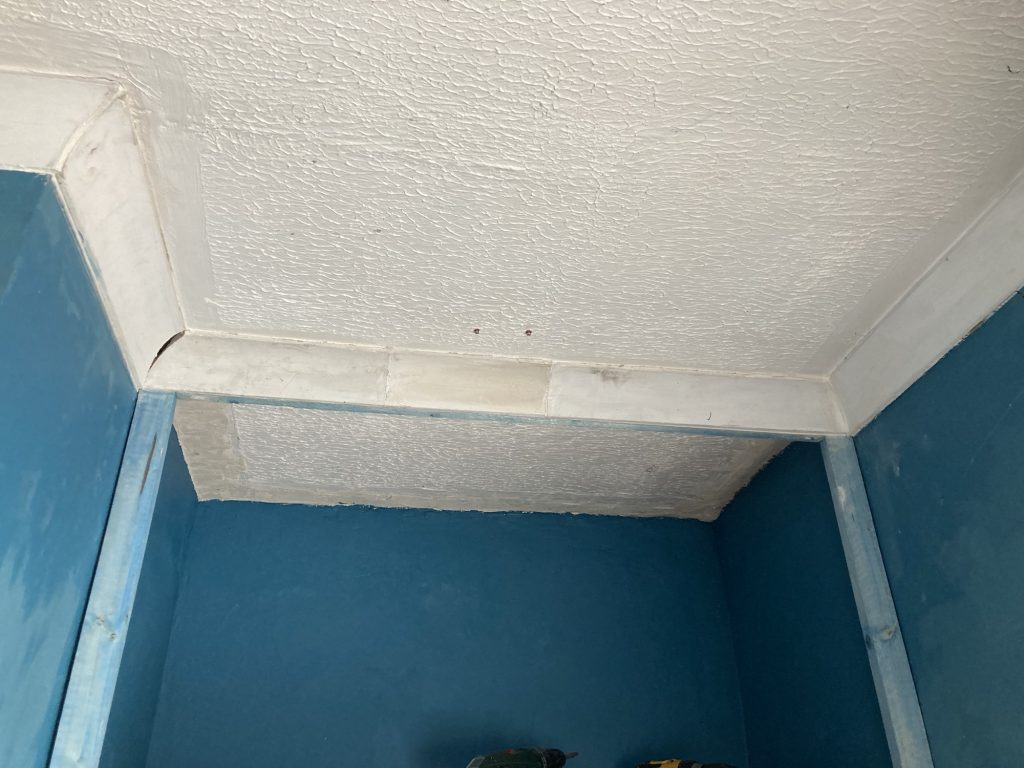
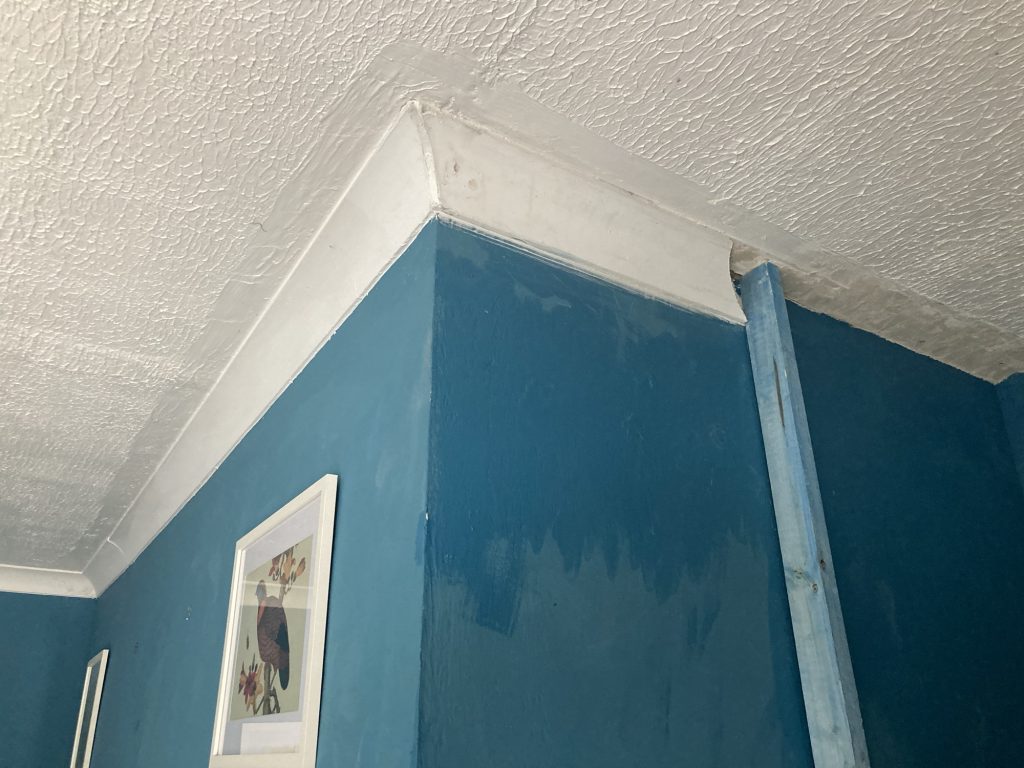
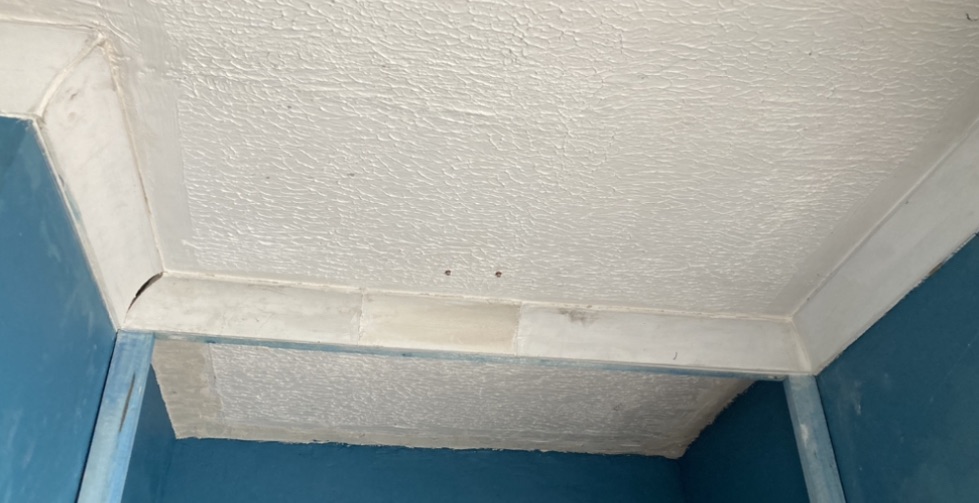
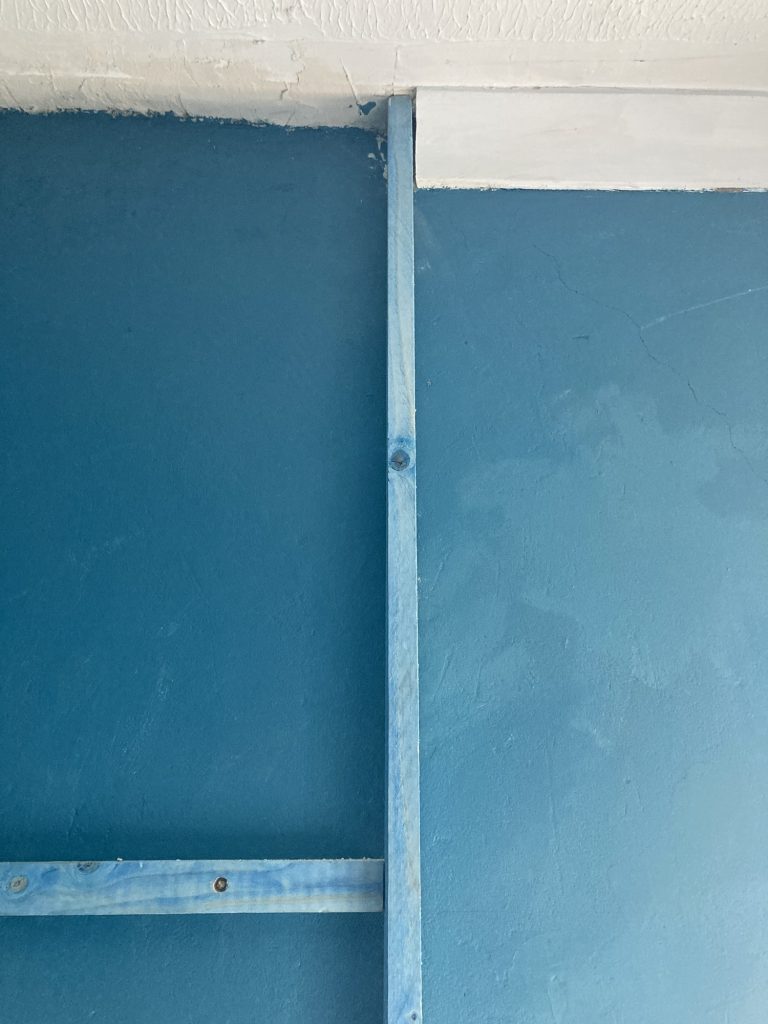
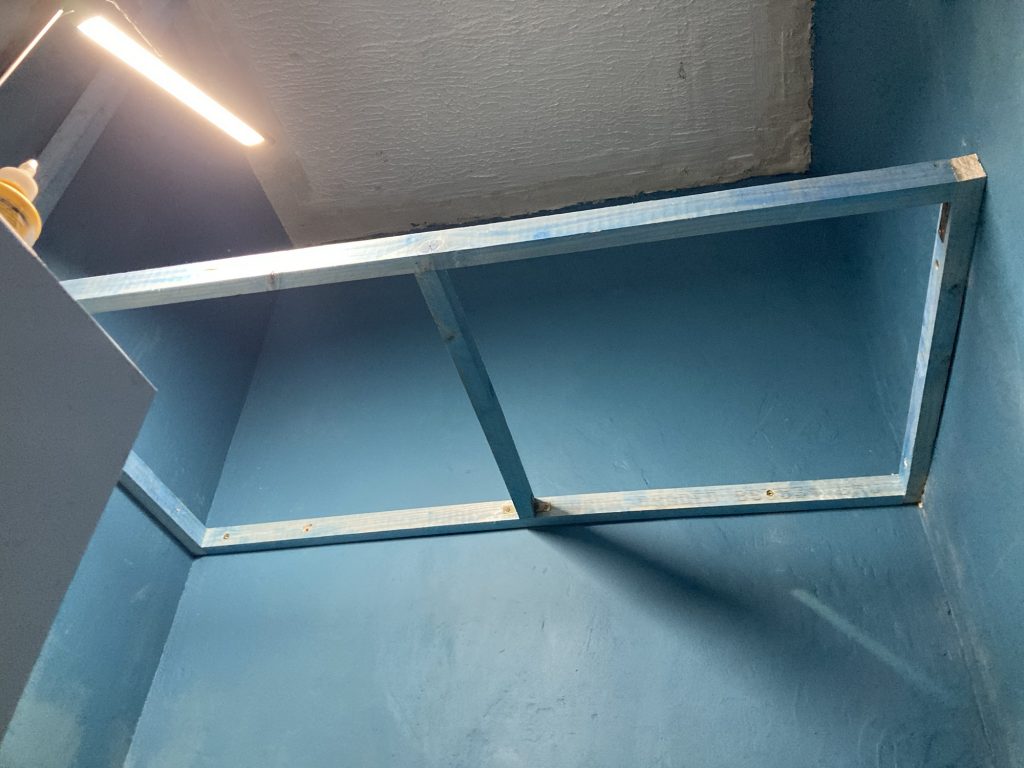
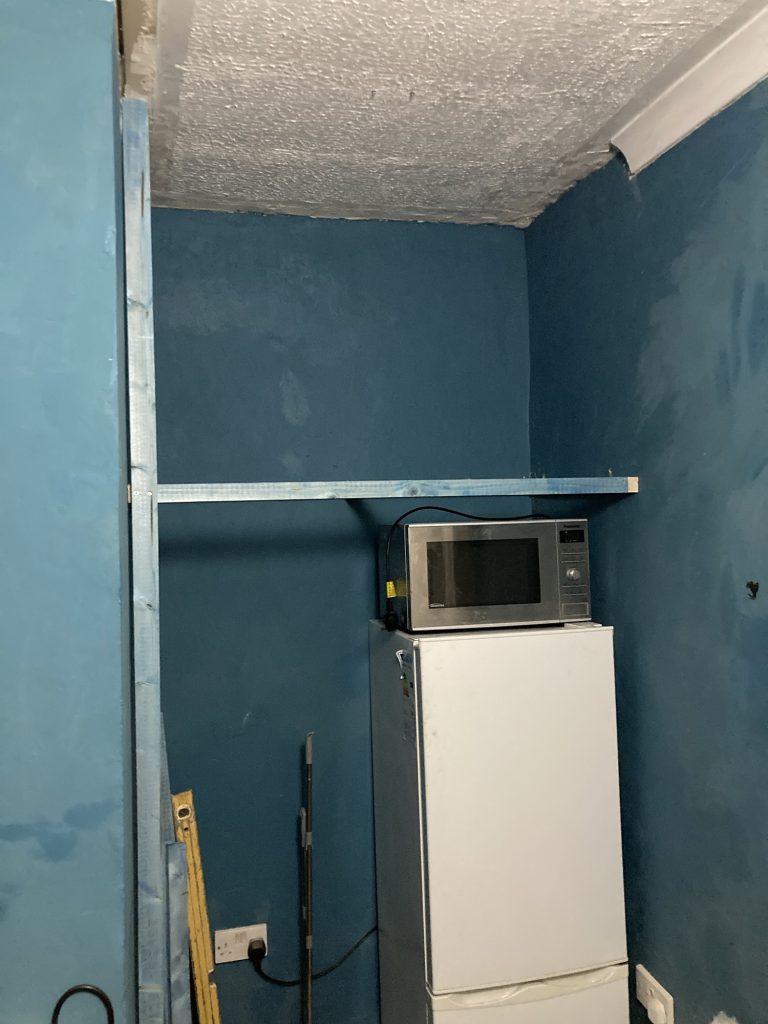
This morning I reinstalled the coving, forward of its old position.
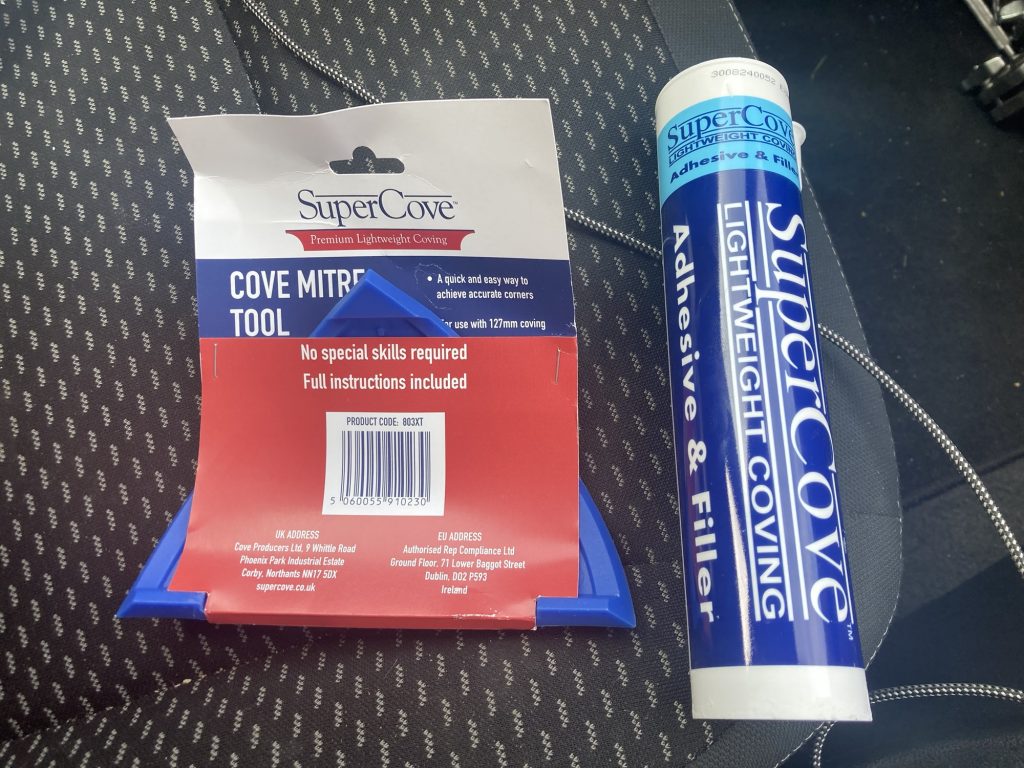
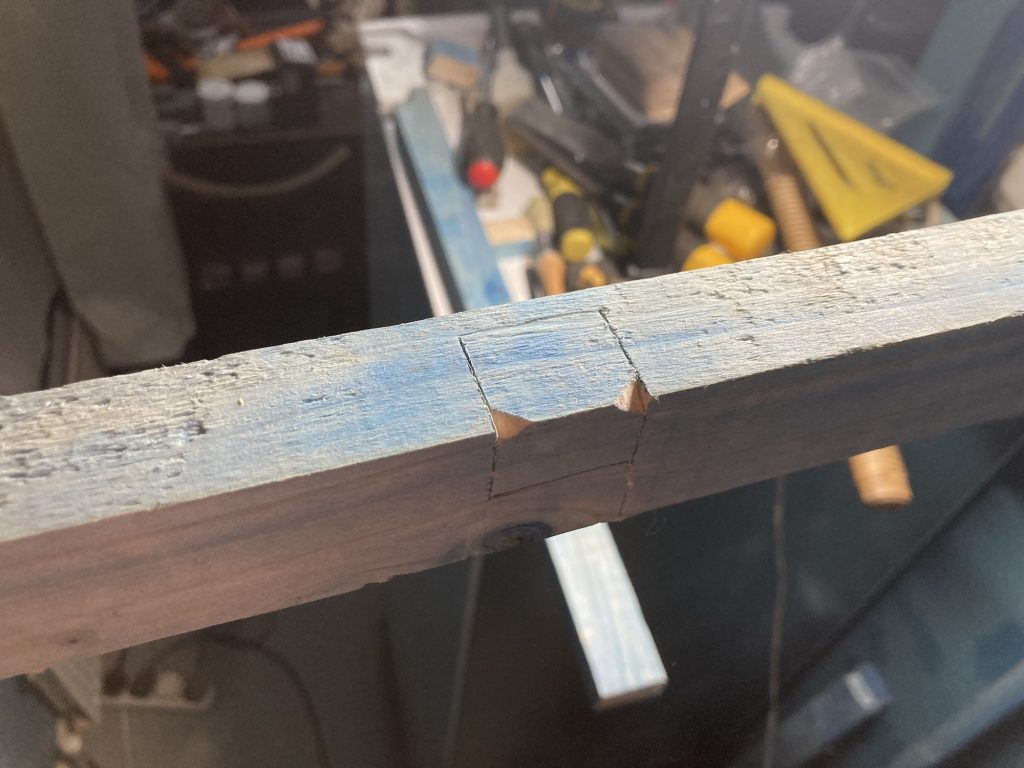
I purchased the above, from Screwfix. I have to confess that the plastic mitre guide didn’t really work as well as I’d hoped. It did get me most of the way there. But I had to finesse it (hardly the right word for my amateurish bodging!).
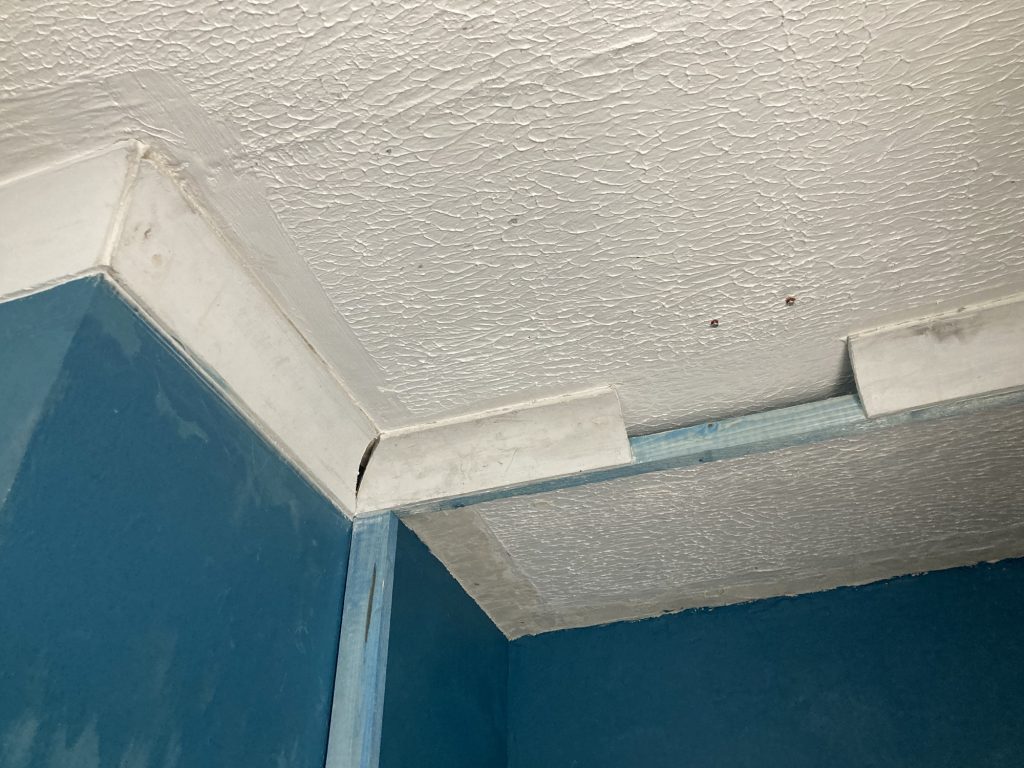
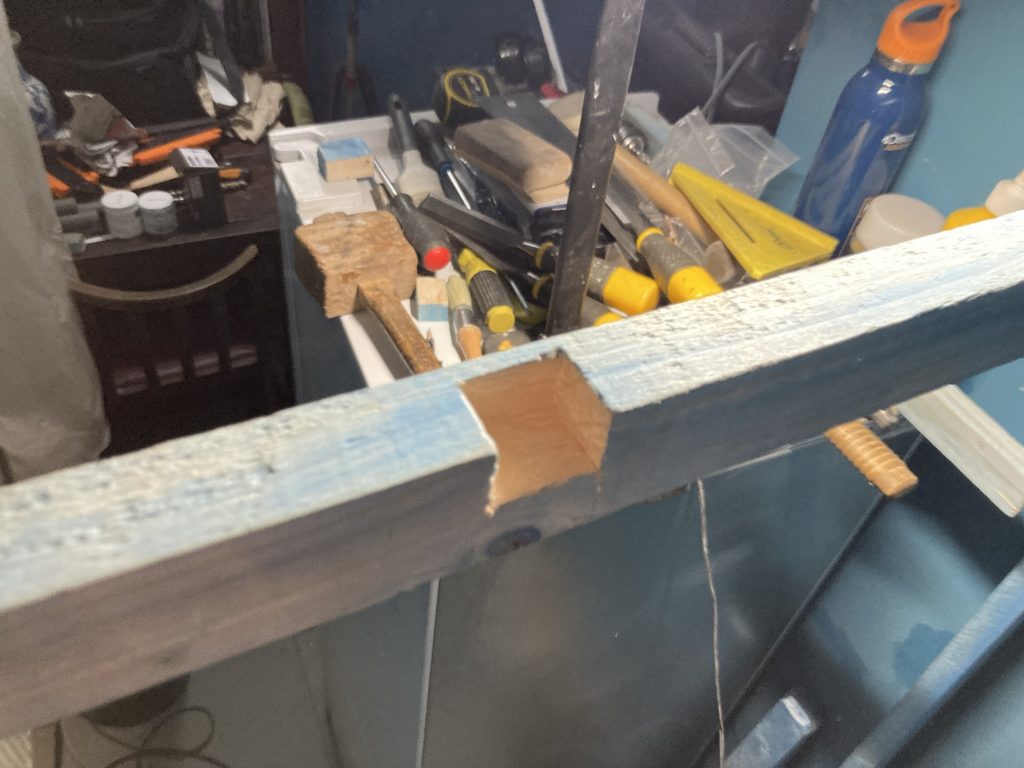
The pic atop this post is how it looks now. I just need to fill in this annoying gap (above). The following images show how I got there.
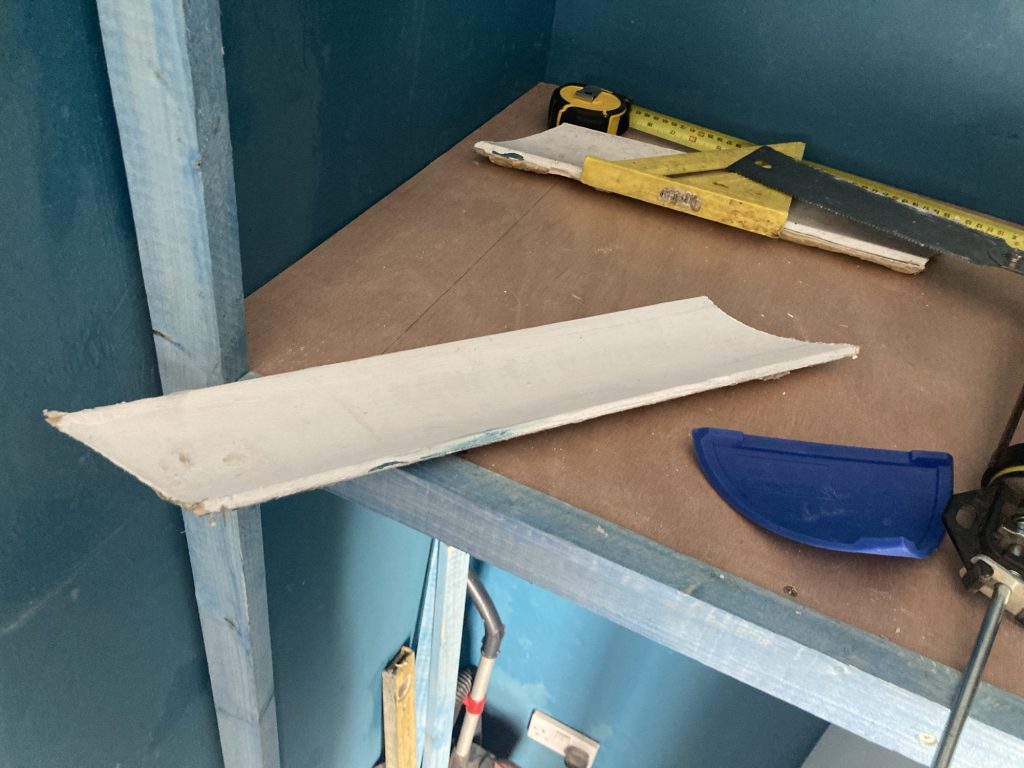
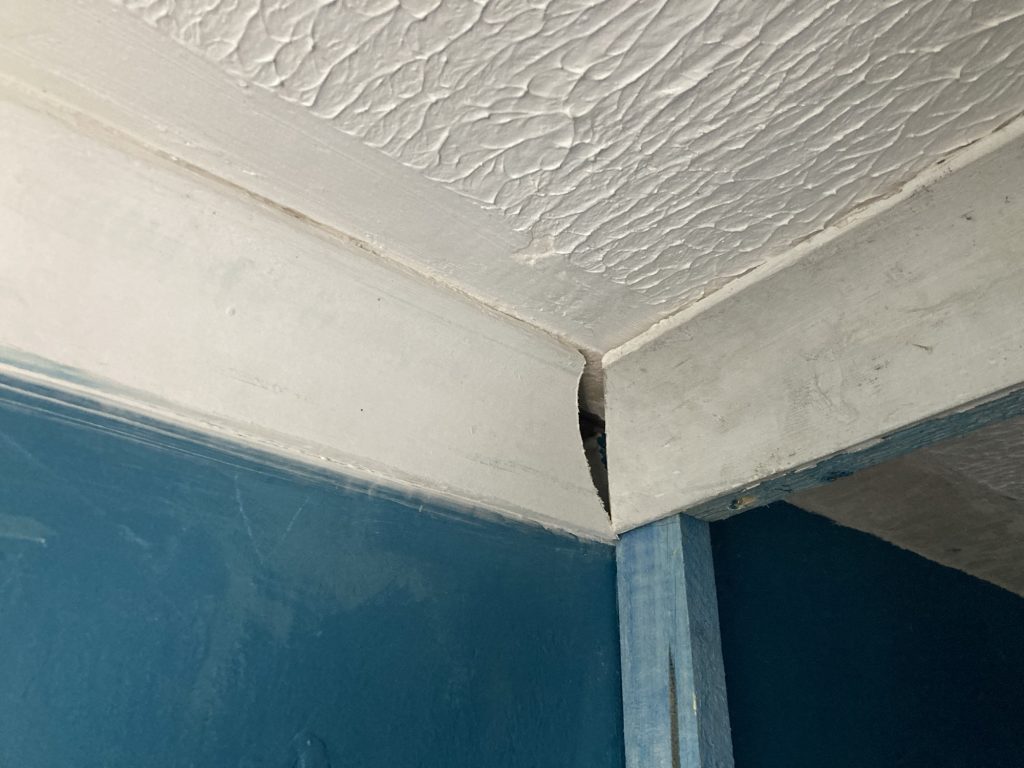
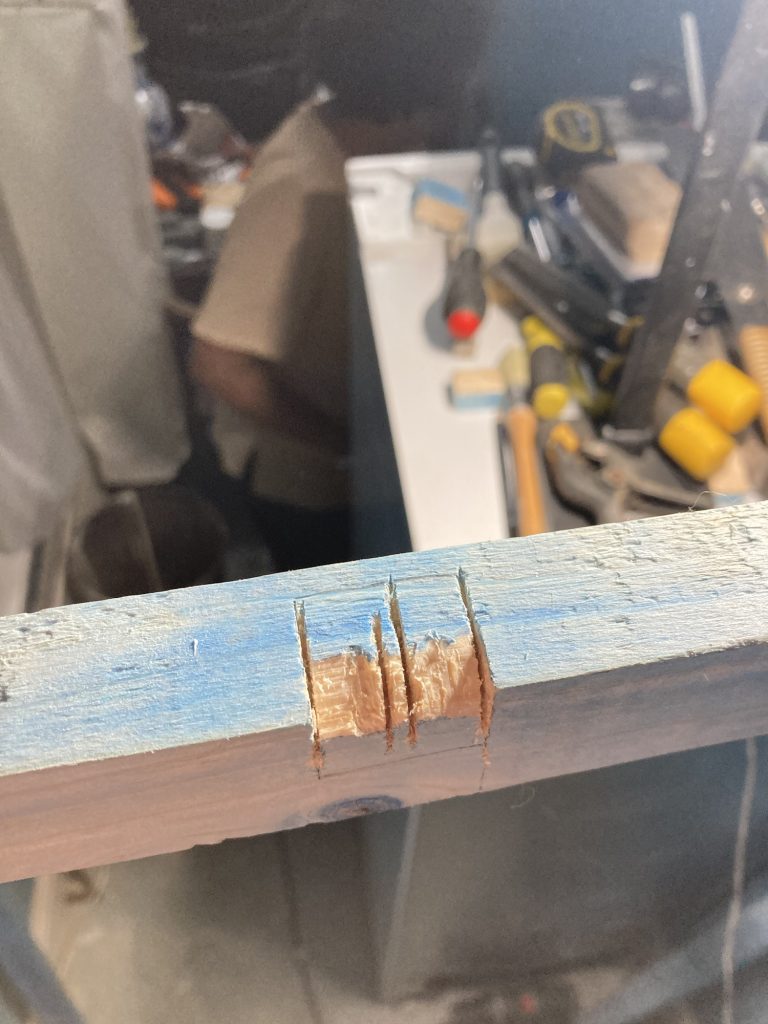
I just used the mitre guide, without thinking too hard, to make the first cut – above – and thought ‘fab, that was easy!’ But I soon discovered all was not as intended.
I managed the join a little better on the second go.
This pic reveals the shortcomings of the first cut. Still, never mind. Live and learn, etc.
Rather than buy new coving, as I’m poorer than the proverbial church mouse, I’m re-using what I took down. That broke into shorter sections, during removal. So this final span required three pieces.
I’m takin a short rest break. After which I’ll may try and fill in the aforementioned irritating gap. It’ll need a lick of paint, to refresh it. Not sure if we have any ‘flat white’?
Another perhaps more pressing step is to measure up for the vertical dividing panel. I was going to get that at West End DIY, this art’noon. But Simon, the only one there who can cut stuff to order, was’nae in.
So I bought the ply at Ridgeons, now known as Huws Gray.

I did get some white paint at West End DIY, for undercoating this unit, and tarting up certain other areas, such as the coving that I shifted forward.
This still needs another vertical at the back, to secure the dividing panel along all edges.
I might pop out to Wickes this evening? To get the last bit(s) of timber, and – more or less (structurally, at any rate) – finish this project off. Then it’ll be time to start filling, sanding, and painting.
Final phase for today…
I did pop to Wickes. And bought two more roof battens. They’re ideal for this job. I added a length to the rear of the vertical partition. So that’s now secured on all four edges. The whole thing feels incredibly solid.
Certain steps were quite fiddly. Like cutting the skirting profile into the bottom of this final upright. But patience and persistence got me there in the end.
Antonio and Sofi visited this afternoon, dropping off some of Antonio’s stuff. He’s going back to Spain (again!), for a brief work do, over the weekend. He moves in on Monday… Crikey!
The day after yesterday, aka today… Just back from a long early morning delivery shift. Pooped!
Prob’ do some more work on this project today. But before that, some chill time. Meanwhile a couple of pics:

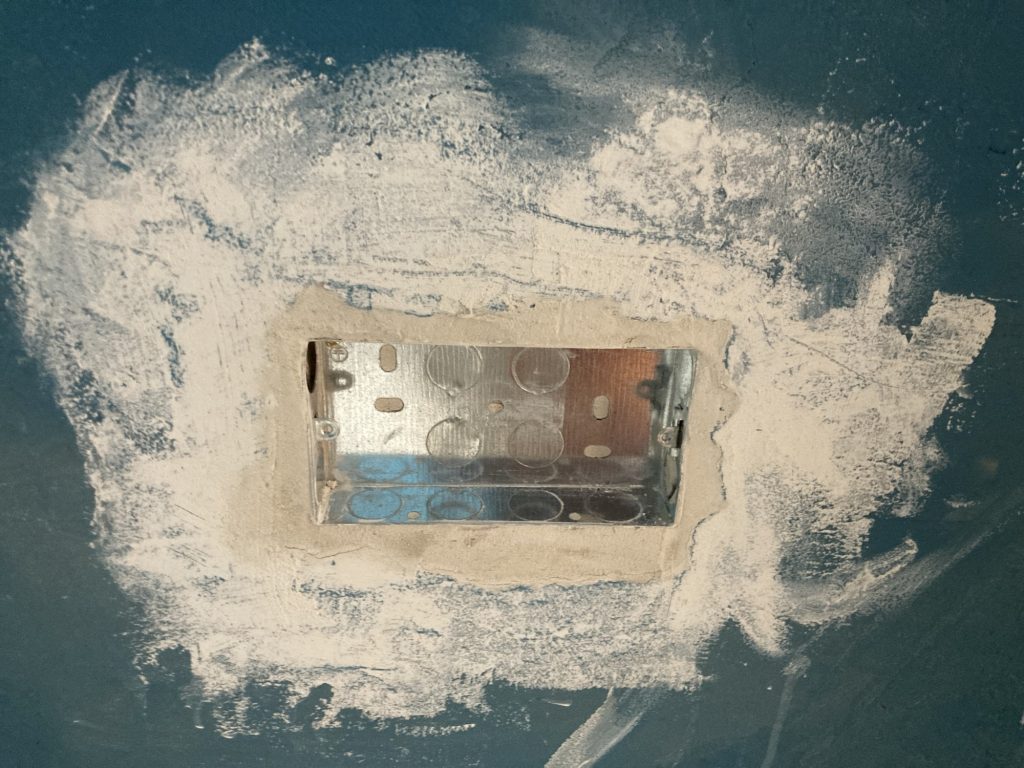
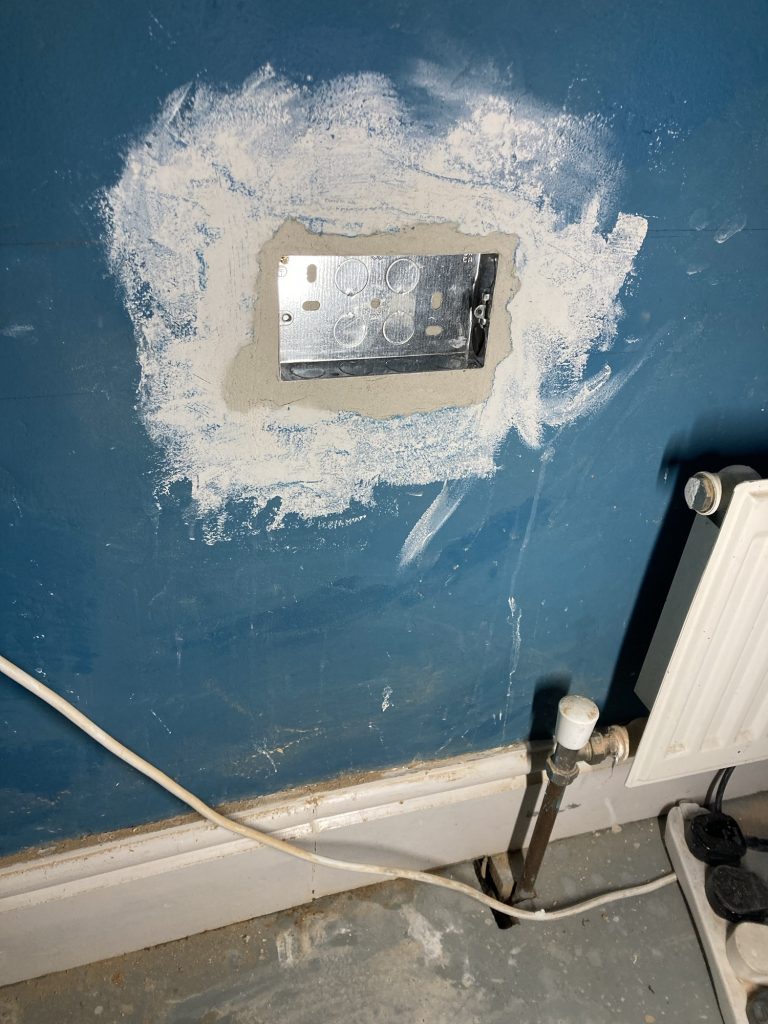
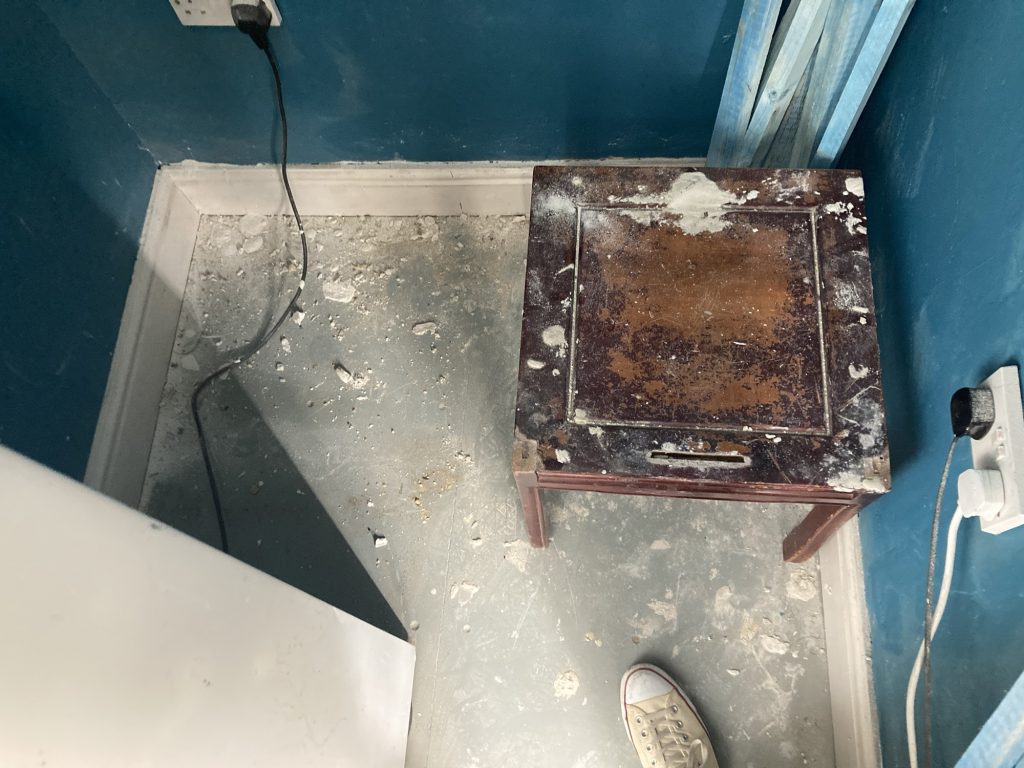
And the new socket box. I need to install a grommet. And sand and paint the surround. Then I’ll probably temporarily cap it off with the face, for now.
Some time later…

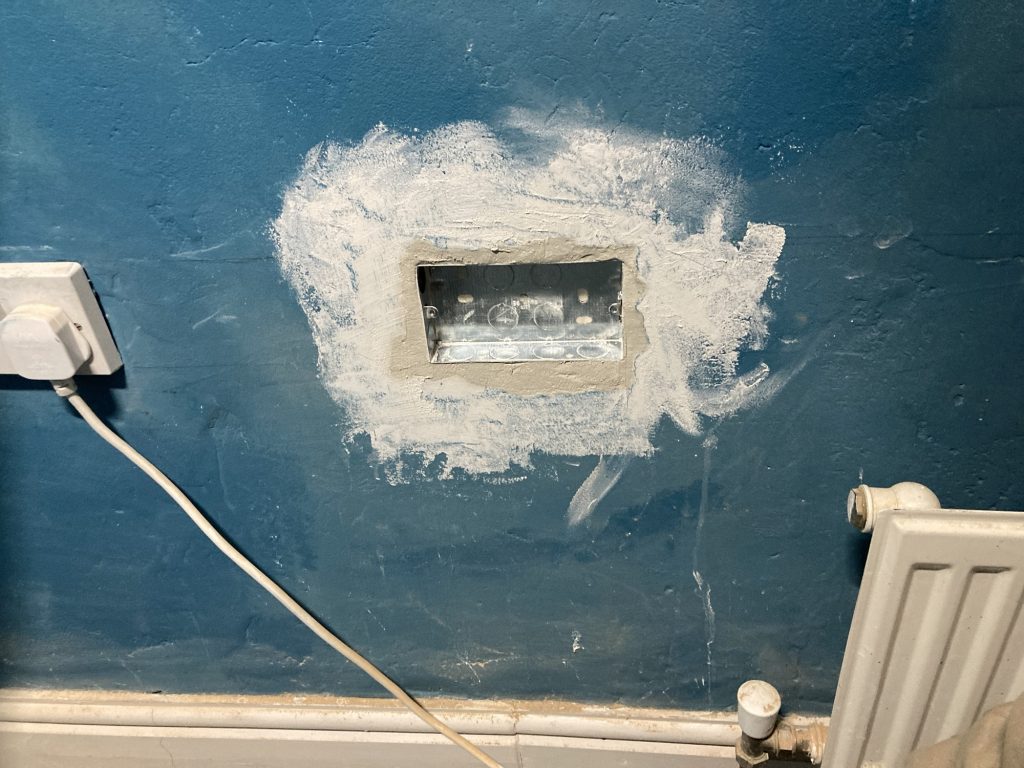
So… sanded and painted the new socket surround. I’ll mount the plastic face-plate (soon as I find it!).
Meanwhile, I bought a sheet of 3-ply, and I’ve been trimming it to the irregular size and shape of the shelf-frame. Nearly there:
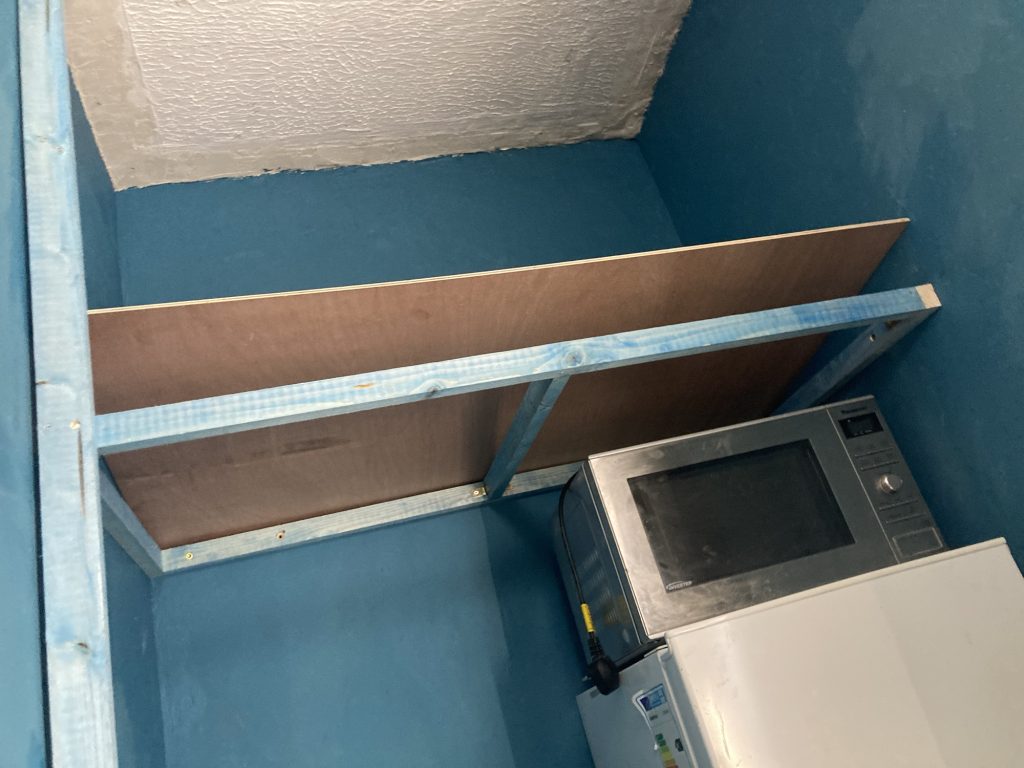
Having another little workman’s tea break, now. Once this shelving part is done, I’ll return to vertical elements, including the space-dividing wall, and clothes-hanging poles/rails.
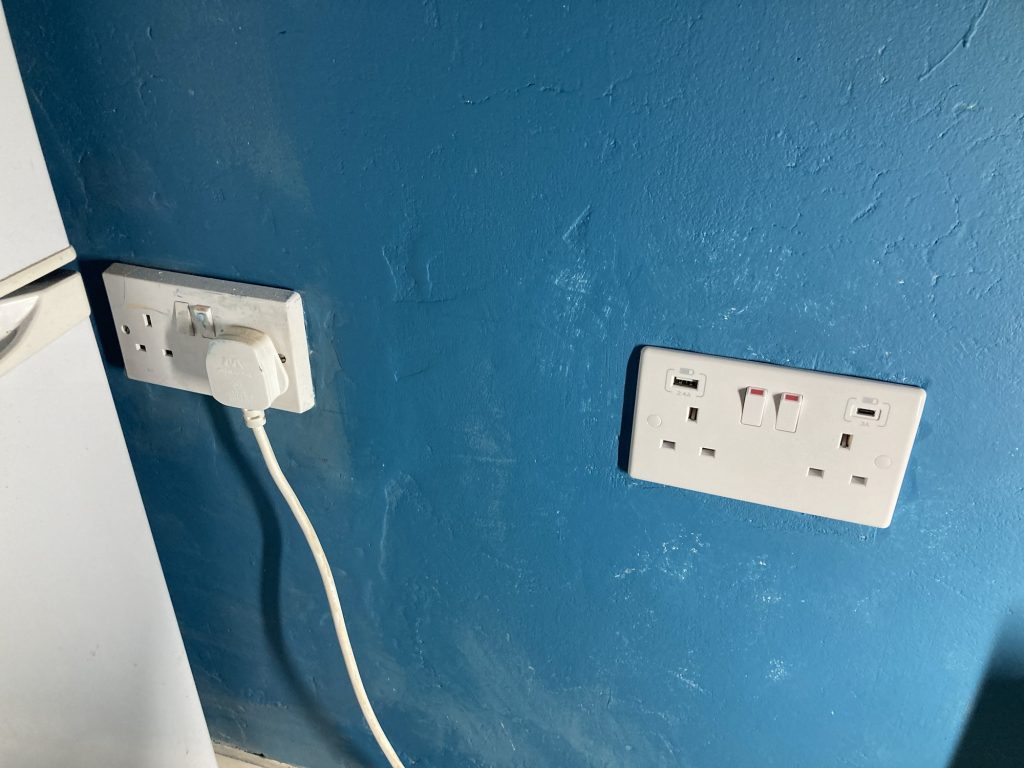
Found the face-plate, and got that on. It’s not wired in yet. That’s partly ‘cause I’m not sure if I ought to come off the plug at left, or – if poss’? – directly off the ring main.
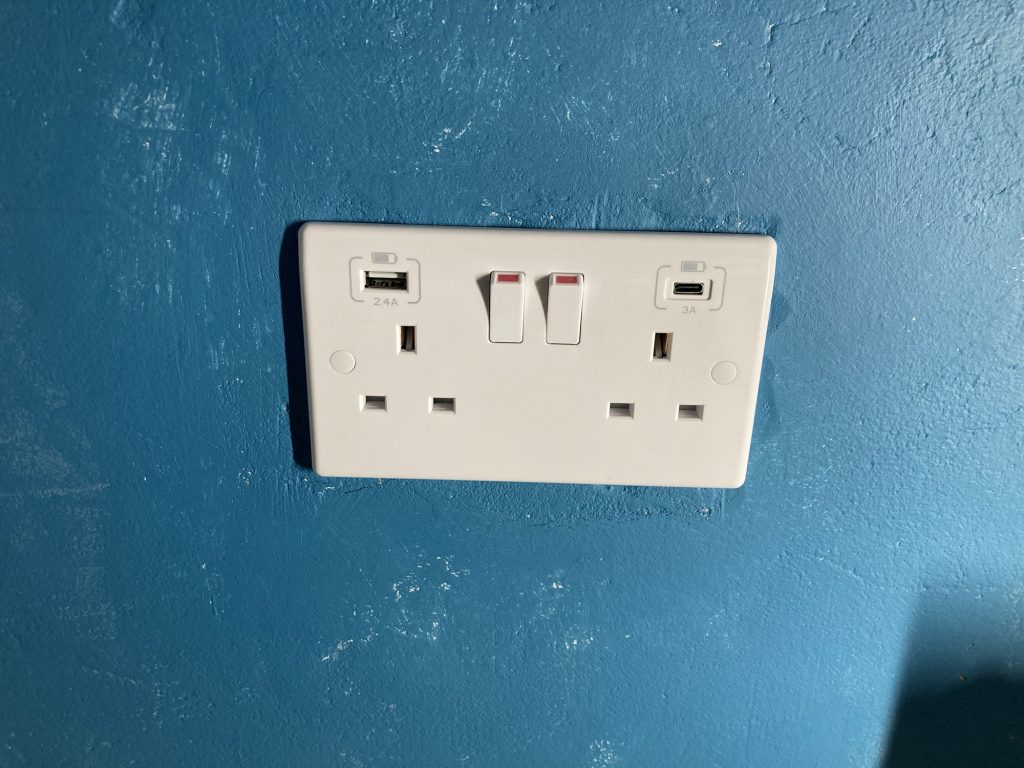
This’ll be handy when it is wired in: it’s lower profile that the older ones. Plus it has two USB ports.
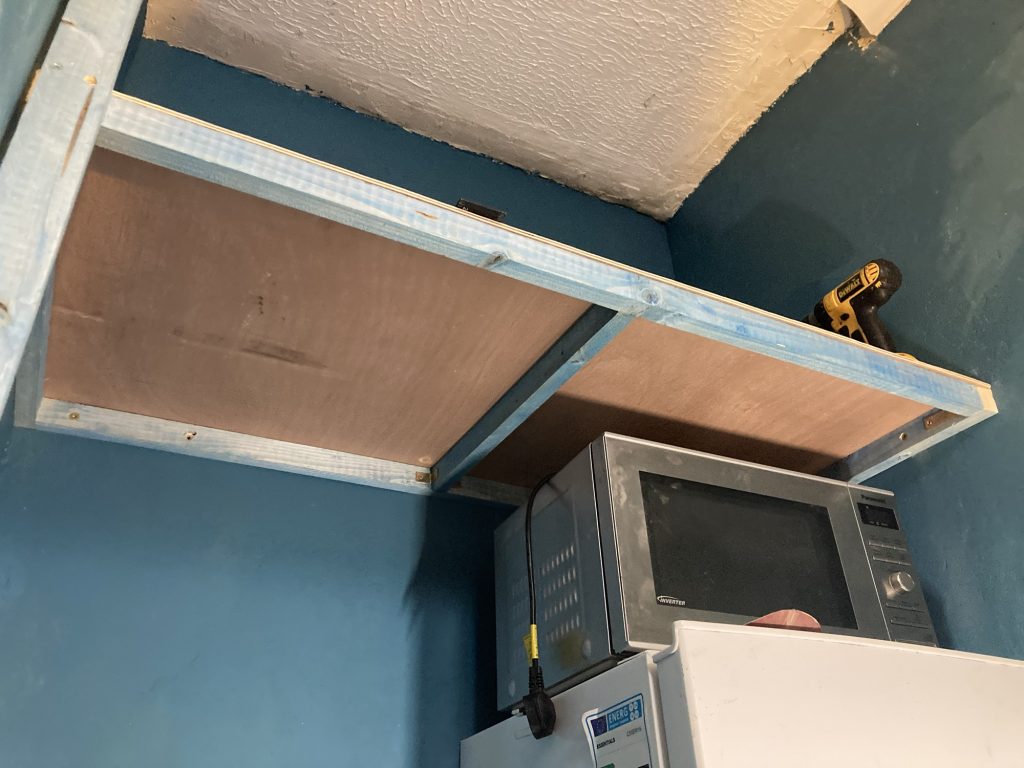
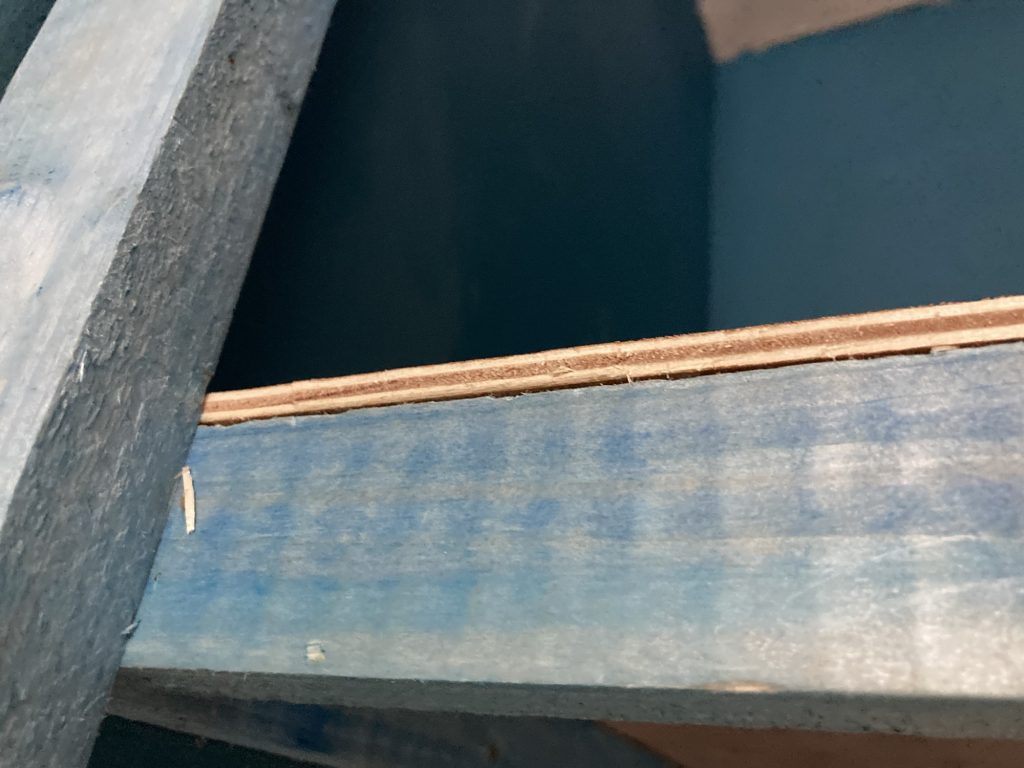
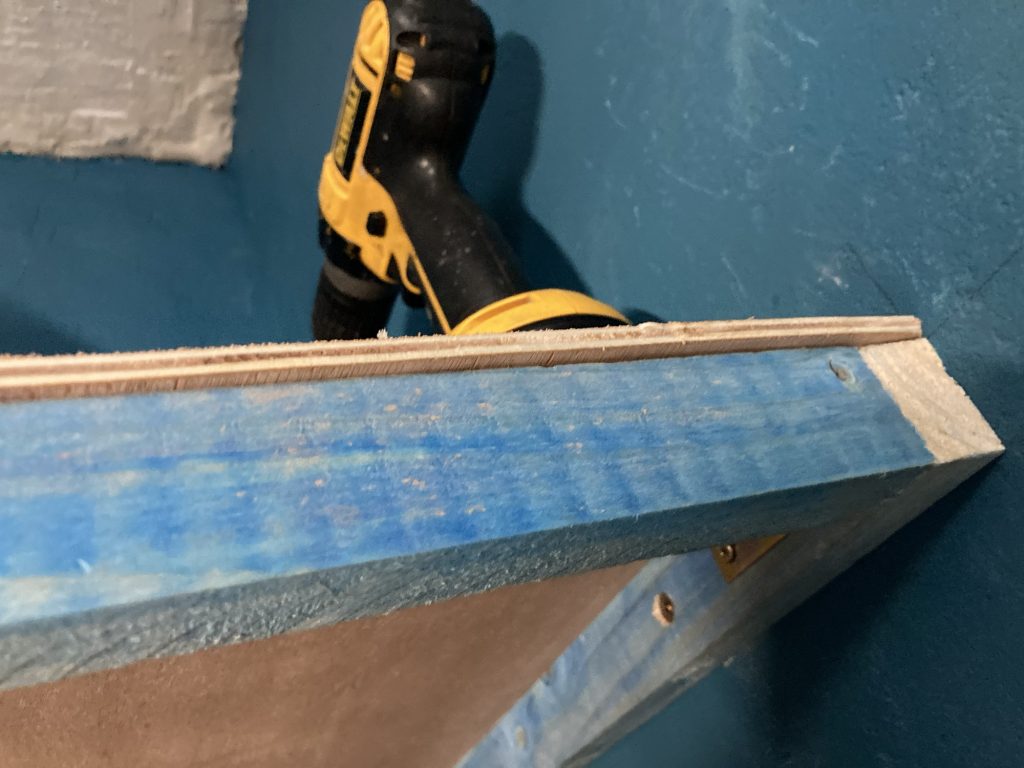
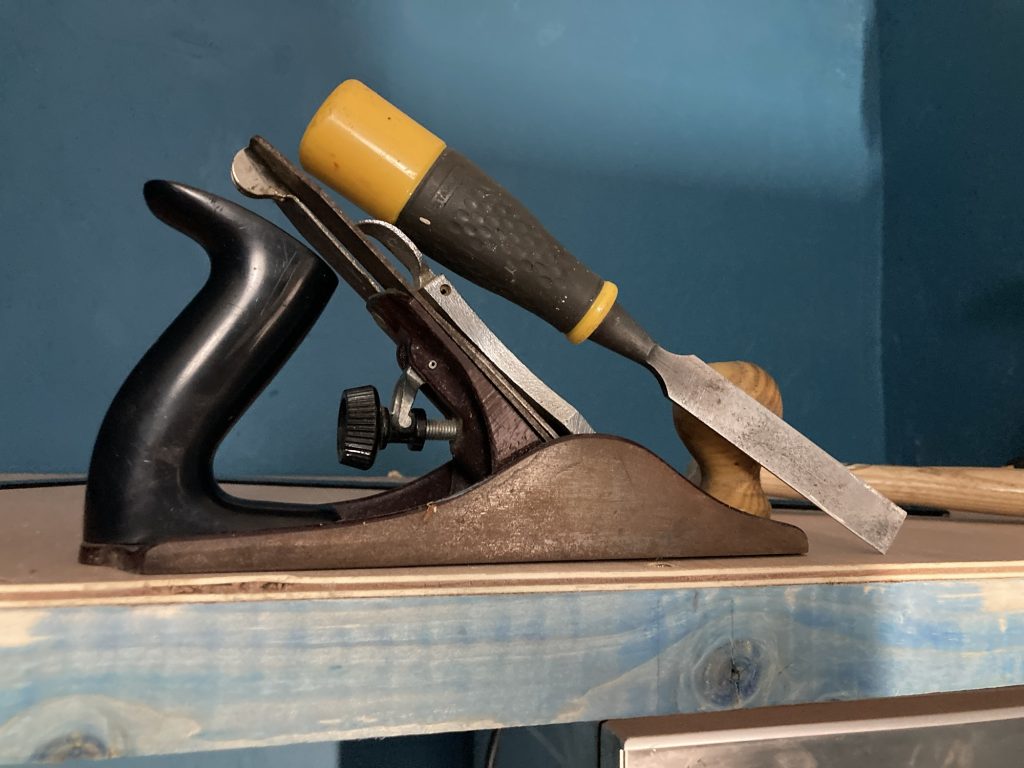
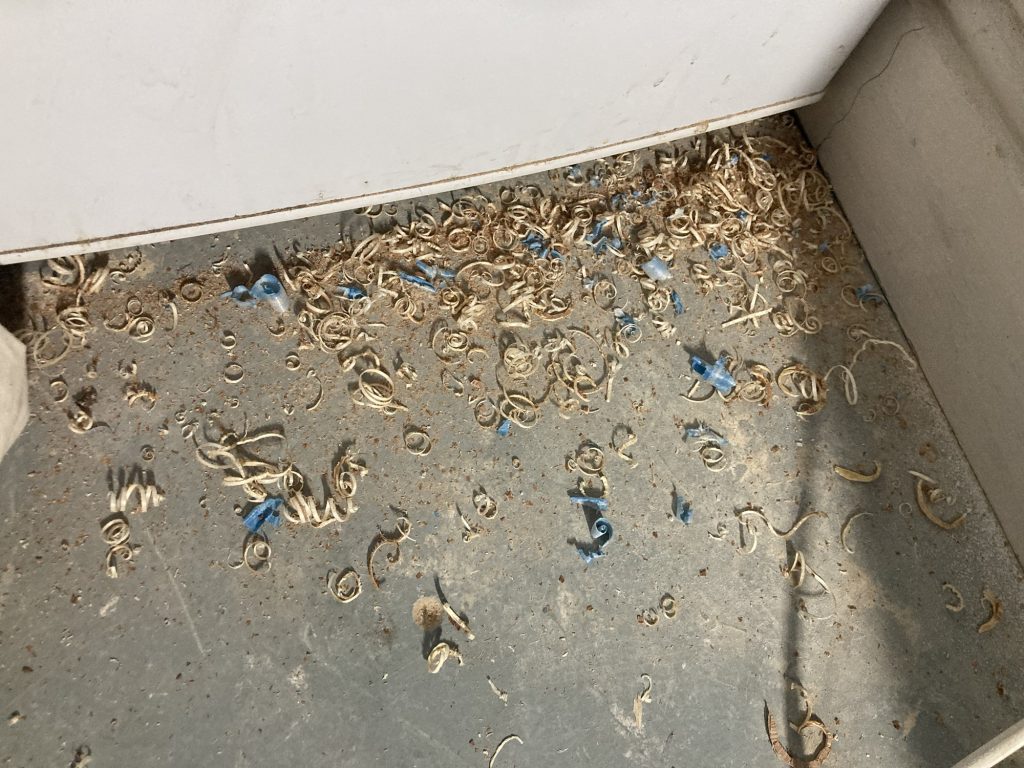
After some fiddling, I got the plywood shelf to more or less fit. As can be seen below, it needed planing and chiselling a bit to get it flush along the front edge. I went old school, with hand tools, for that part. Fun!
This will probably be hidden anyway, with a cross-member.
I’m hoping – and I firmly believe – that this will support the weight of any stuff guests or tenants need to store.
Time to stop for dinner.
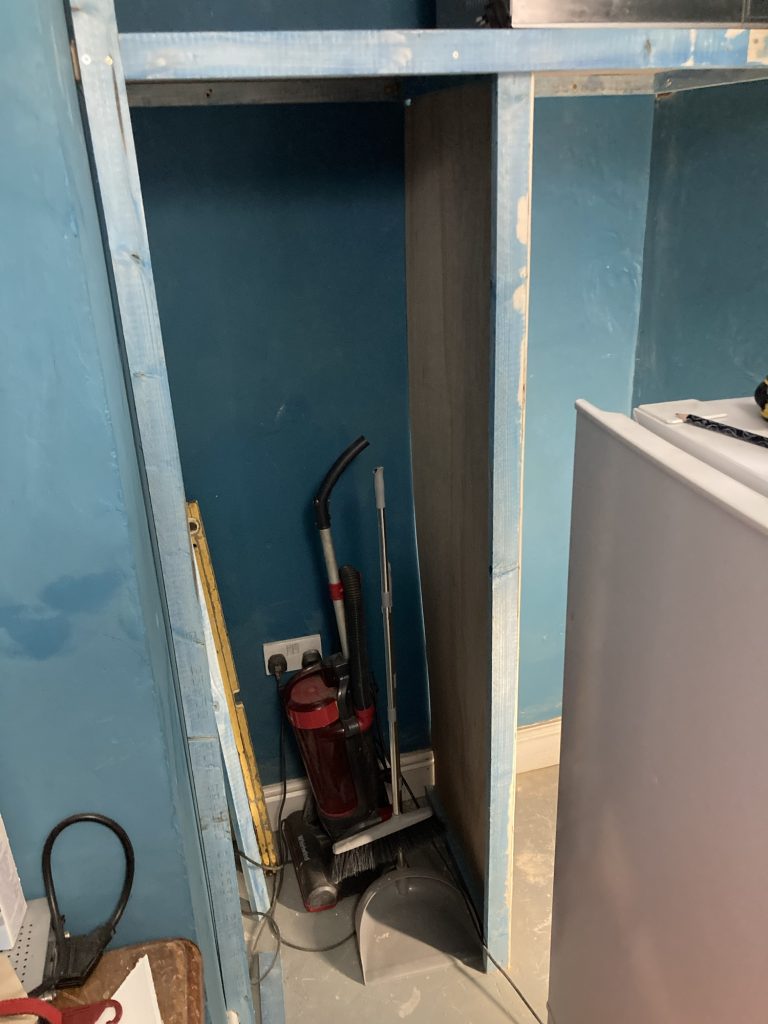
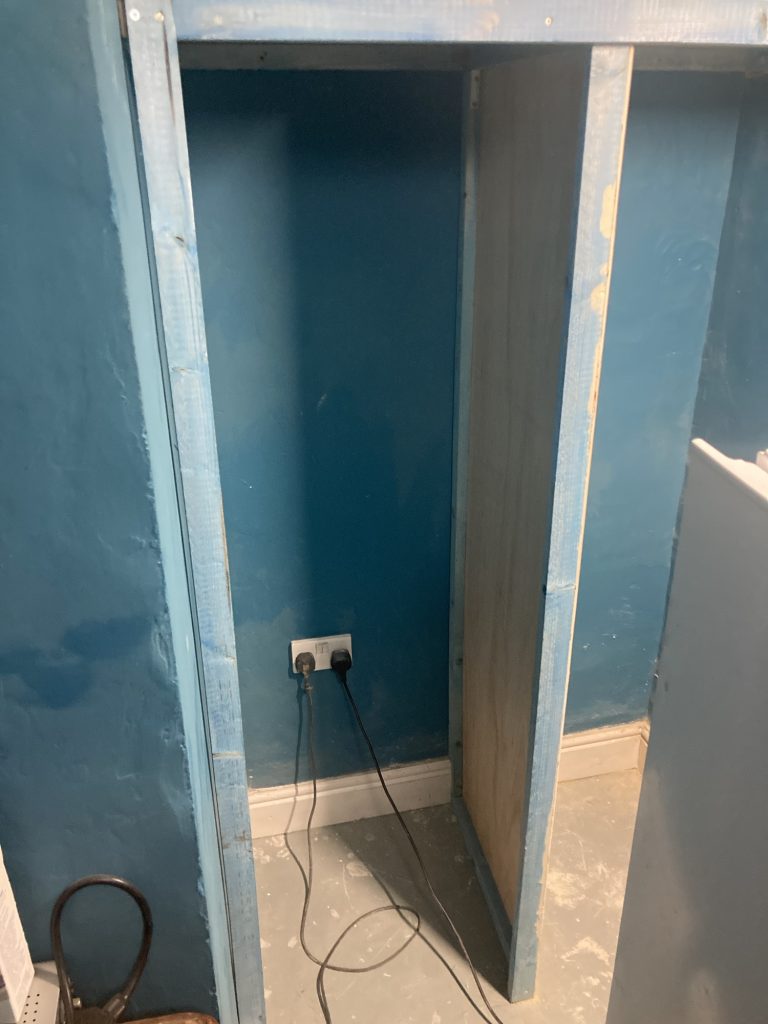
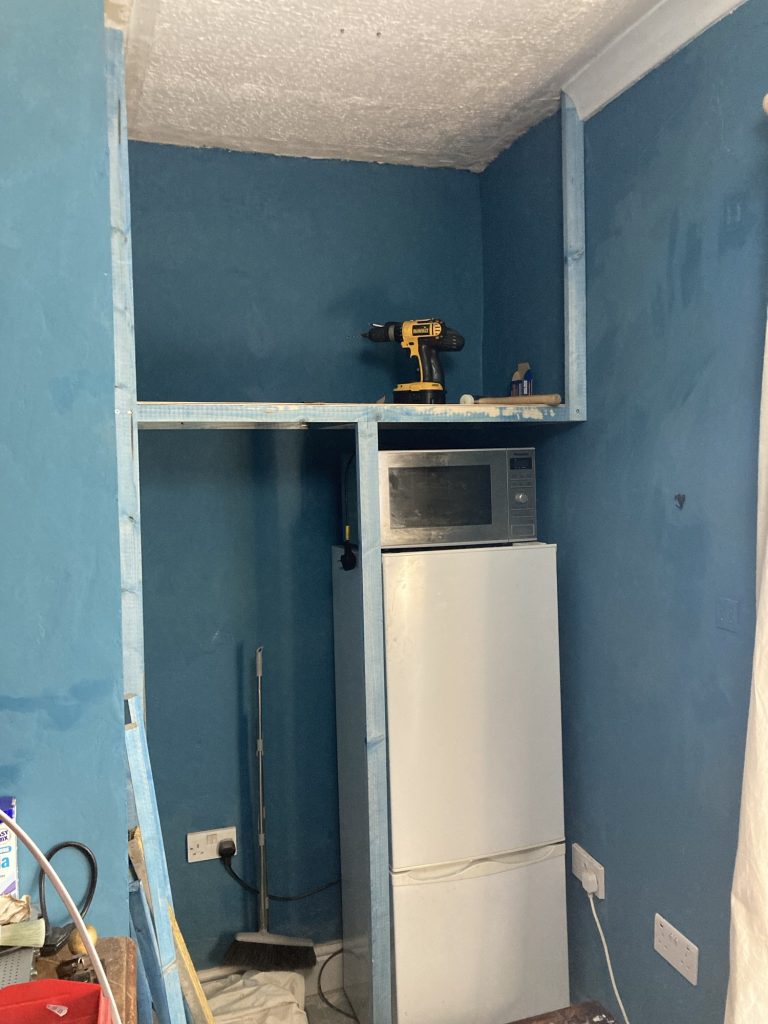
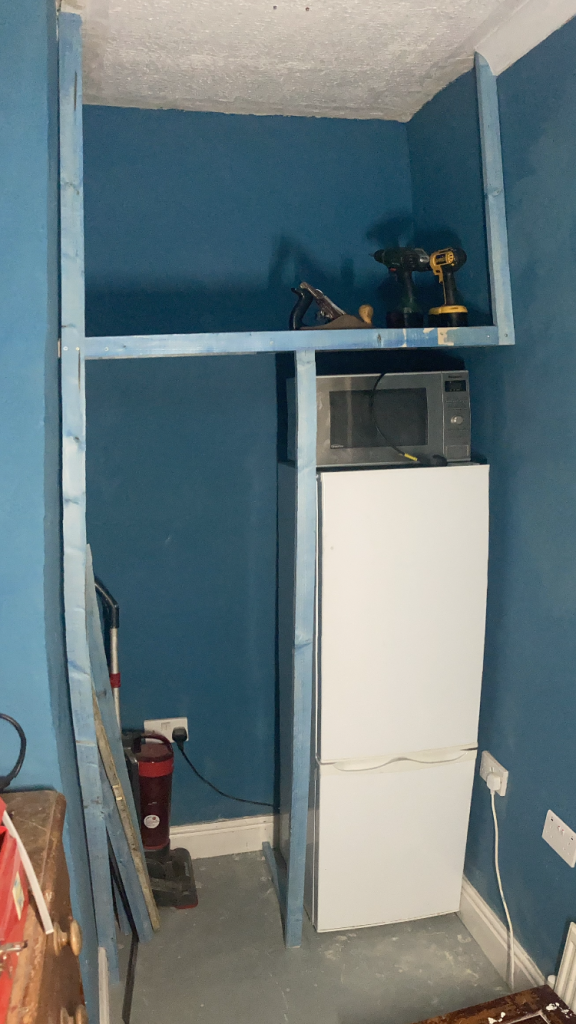
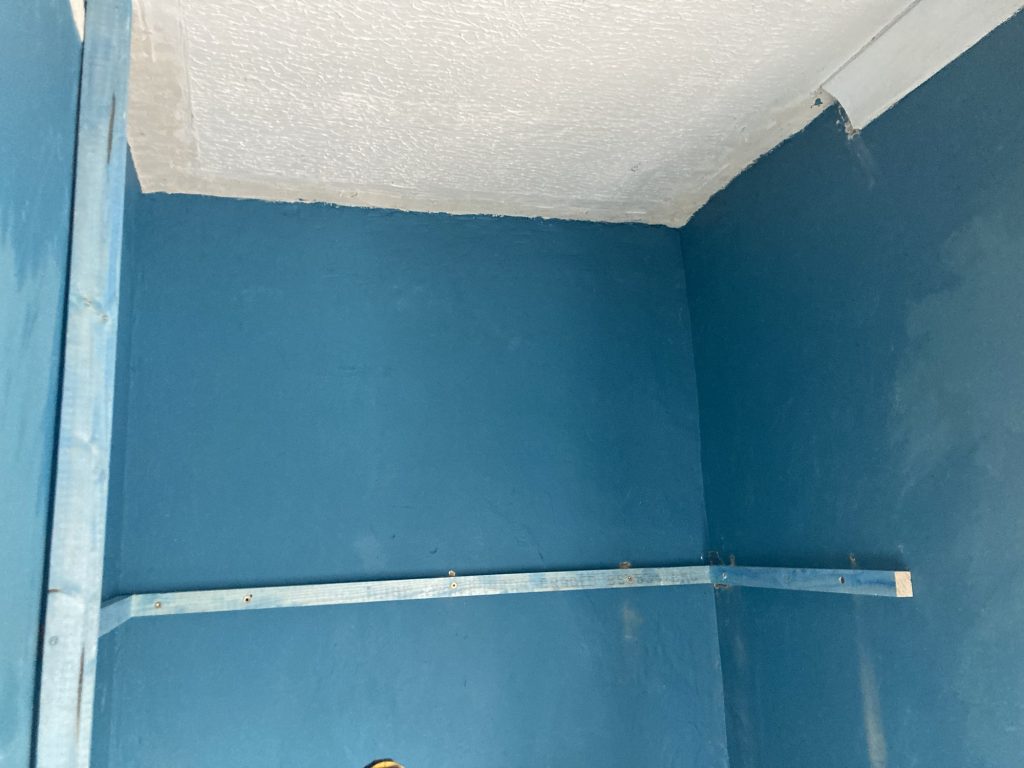
And lastly… after dinner I did a little bit more: I fixed a bar from the back wall across the floor, to secure the middle vertical, which divides the fridge area from where clothes can be hung.
There will also be another ply panel, this time vertically aligned, dividing these areas as well. As I need both left and right planes on which to fix whatever will support any clothes rails or poles.
I also put a second and wider beam across the lower front of the shelf. This hides the Joni between supporting structure and plywood, adds a little lip to the shelf – to stop stuff rolling or falling out – strengthens the overall structure, and brings that horizontal flush with all the front verticals.
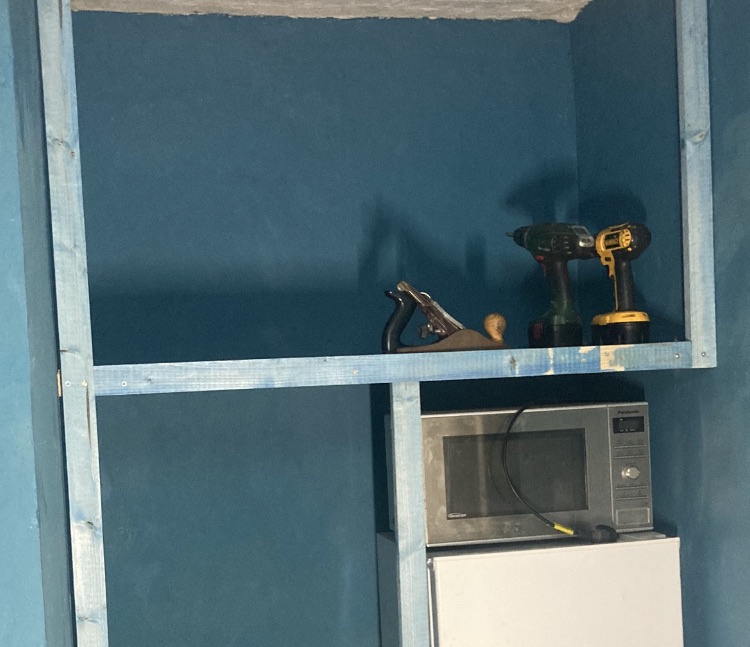
I had to do it with two pieces, as I didn’t have any leftovers that’d bridge that particular span in one go. But once planed, sanded, and with filler and paint added, I reckon it’ll look fine.
One little conundrum: how am I going to deal with that little void, due to the concave bowing of the wall, at left? I have several ideas. But I’ll save that till towards the end of this project.
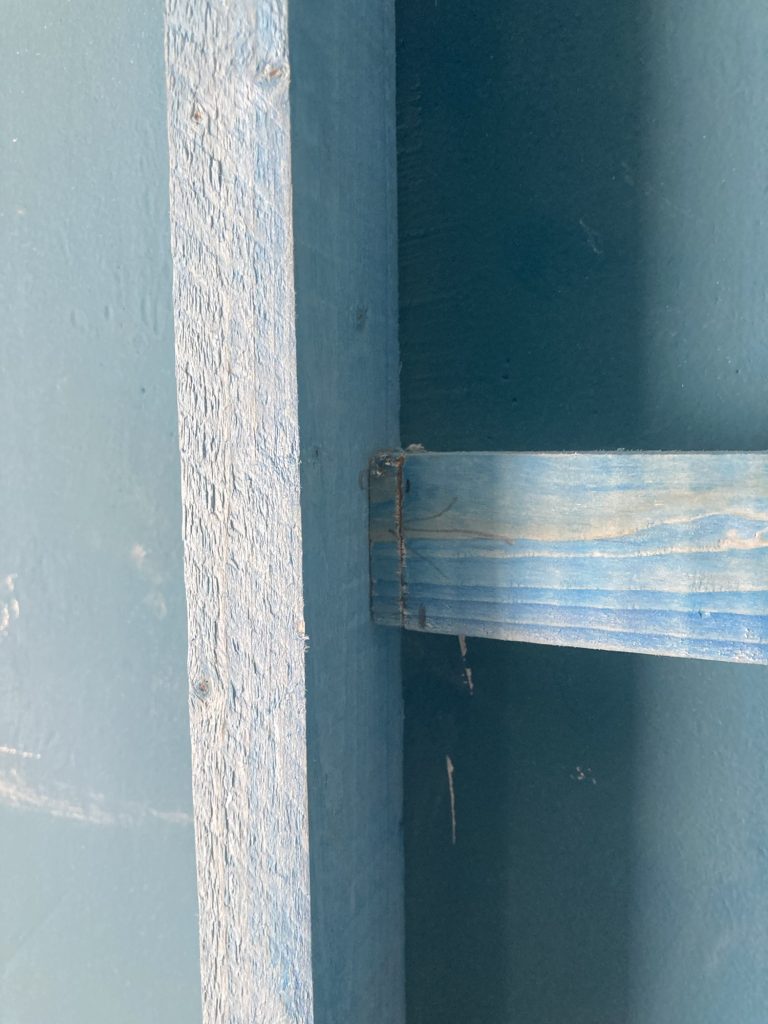
Another issue, that kind of sorted itself out, was the right hand side vertical. Rather than doing it floor to ceiling, as I had on the left, I just did it from the shelf to the ceiling. This obviates the difficulties posed by the position of the power sockets.
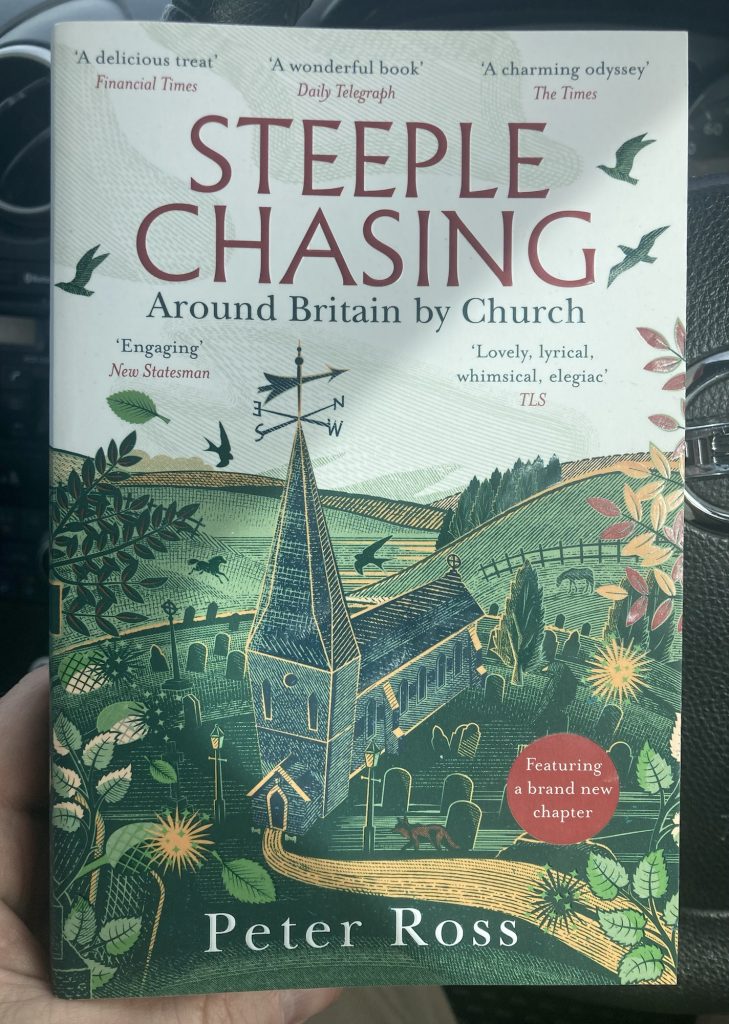
I’m only on page five of Peter Ross’ Steeple Chasing, and I already love it.
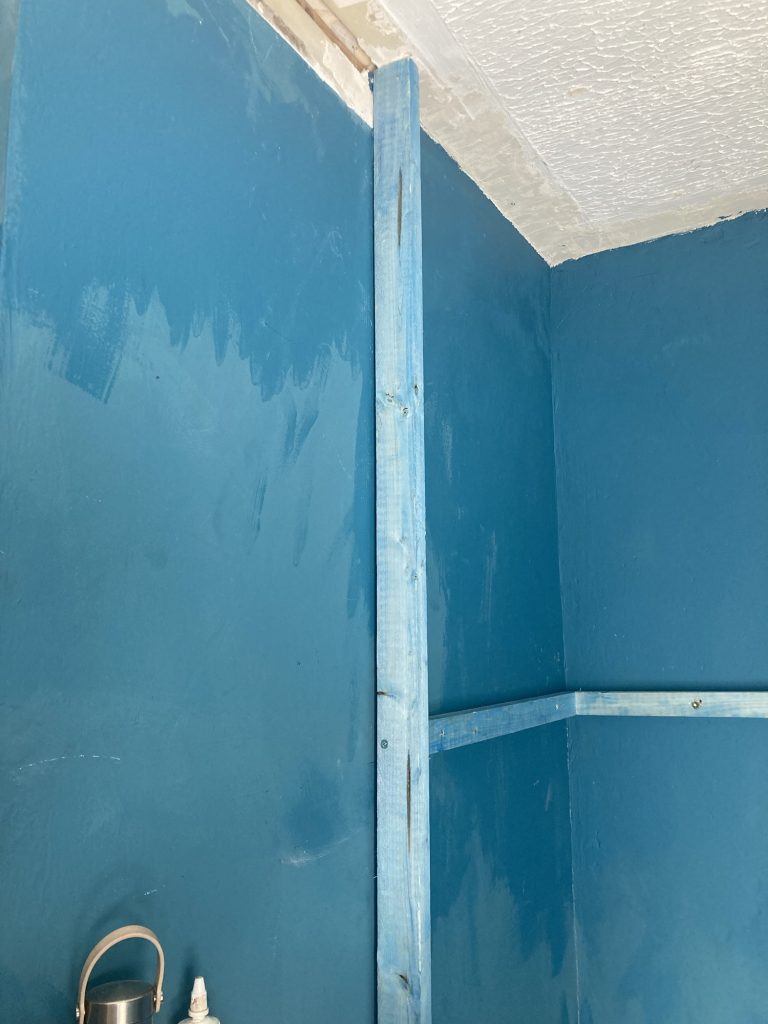
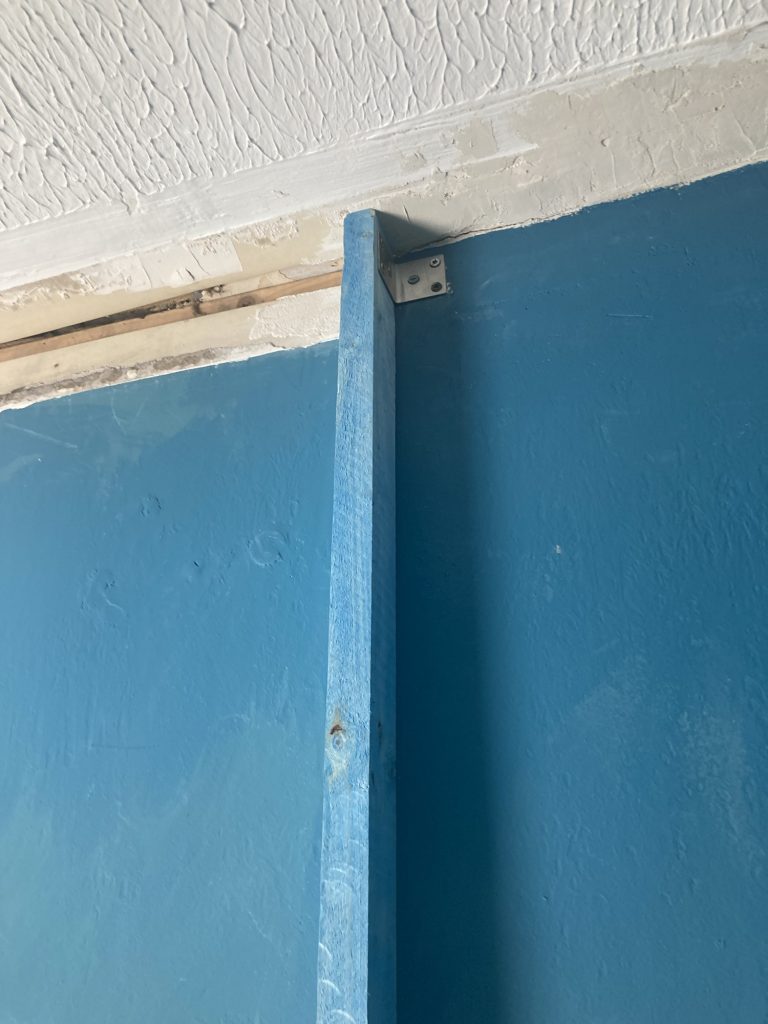
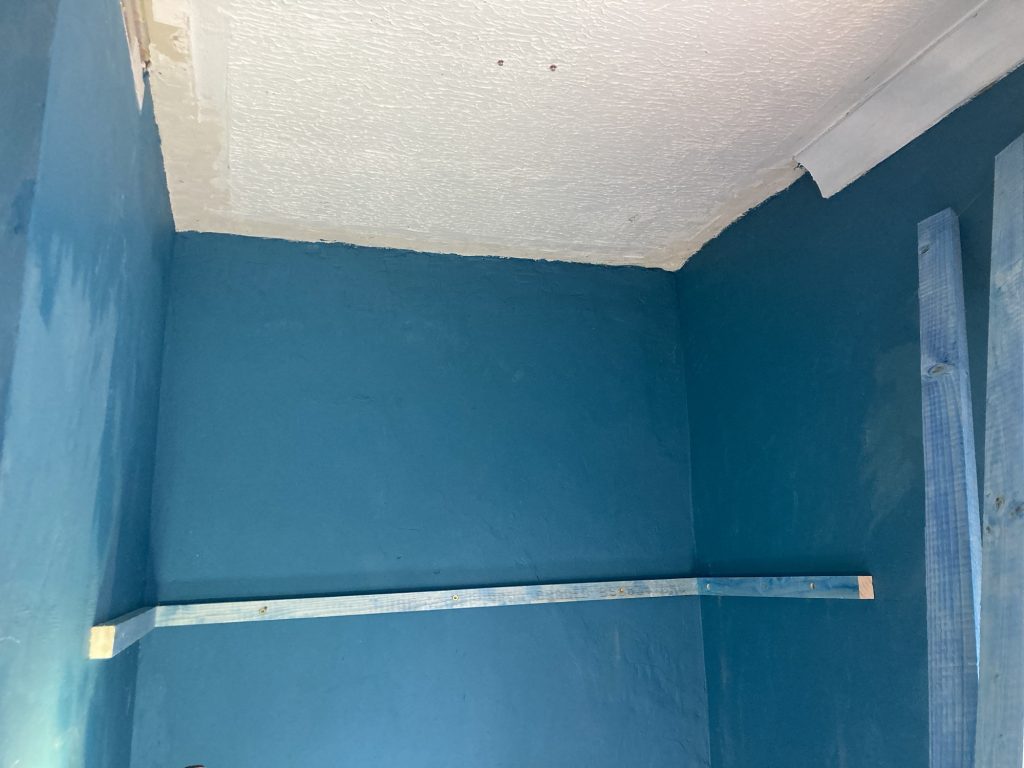
The wall at left, a plasterboard thing put up when the stairs were moved (the stairs originally bisected the property at a 90° angle, midway between front and back, oriented the same as what’s now the upstairs hallway) is a bit concave. It bows outwards. Which can be see above.
I’ll probably just run a bead of caulk or sealant or whatever, down the entire length. We shall see. the upright is pleasingly vertical, according to the spirit level.
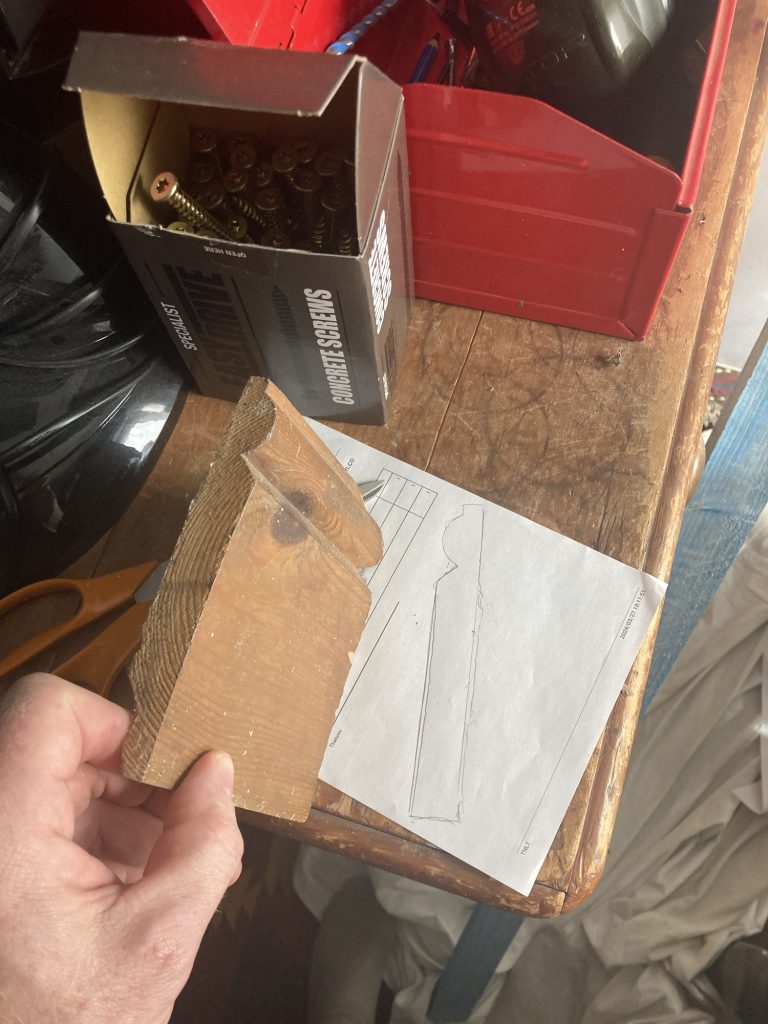
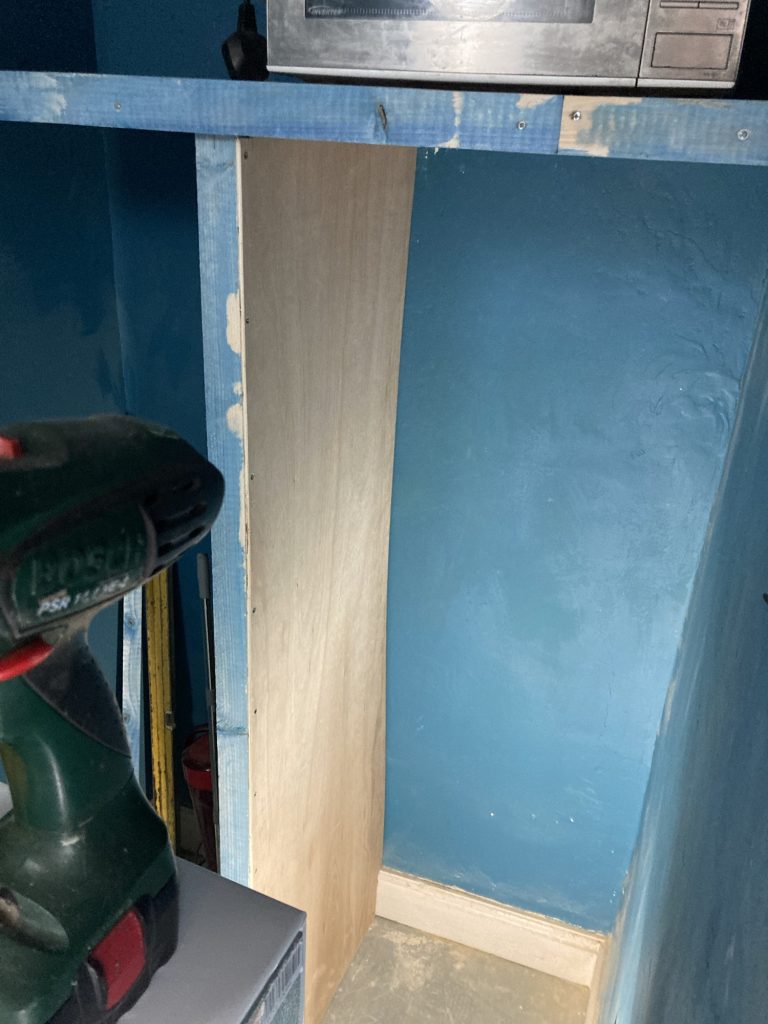
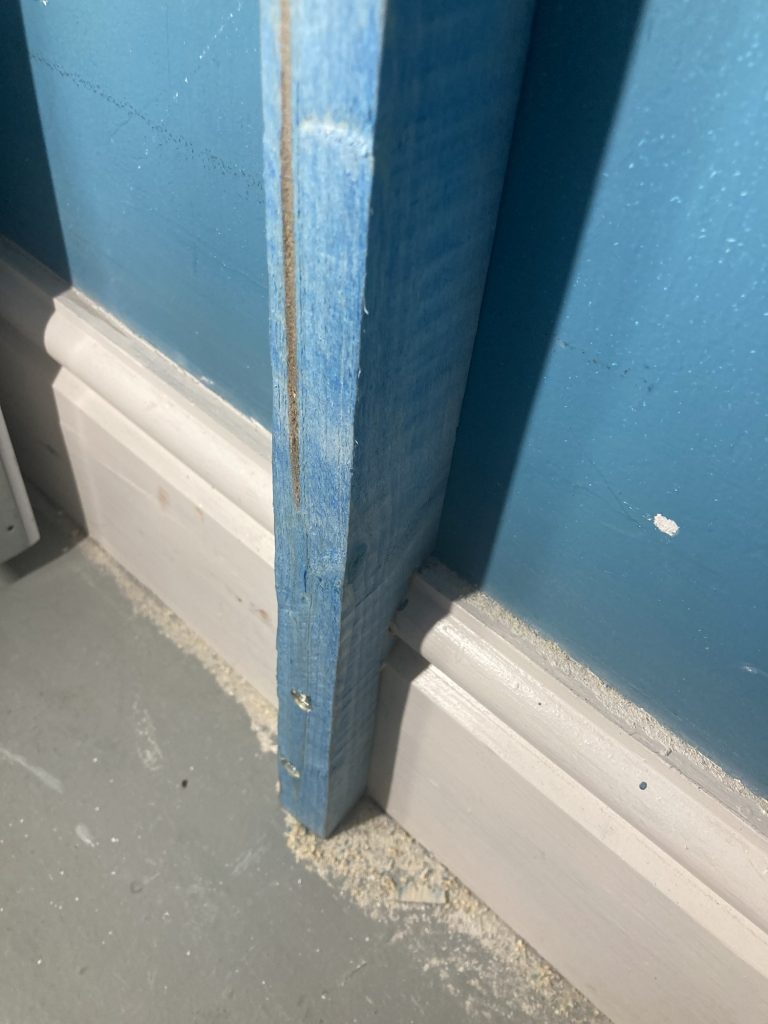
But let’s go back a bit… before this vertical piece went up, I had to cut out the recessed areas so it would fit snugly up against the skirting board.
This was rather awkward work to do, in the cramped confines of the room itself. But patience, persistence, and having decent tools, got me there.
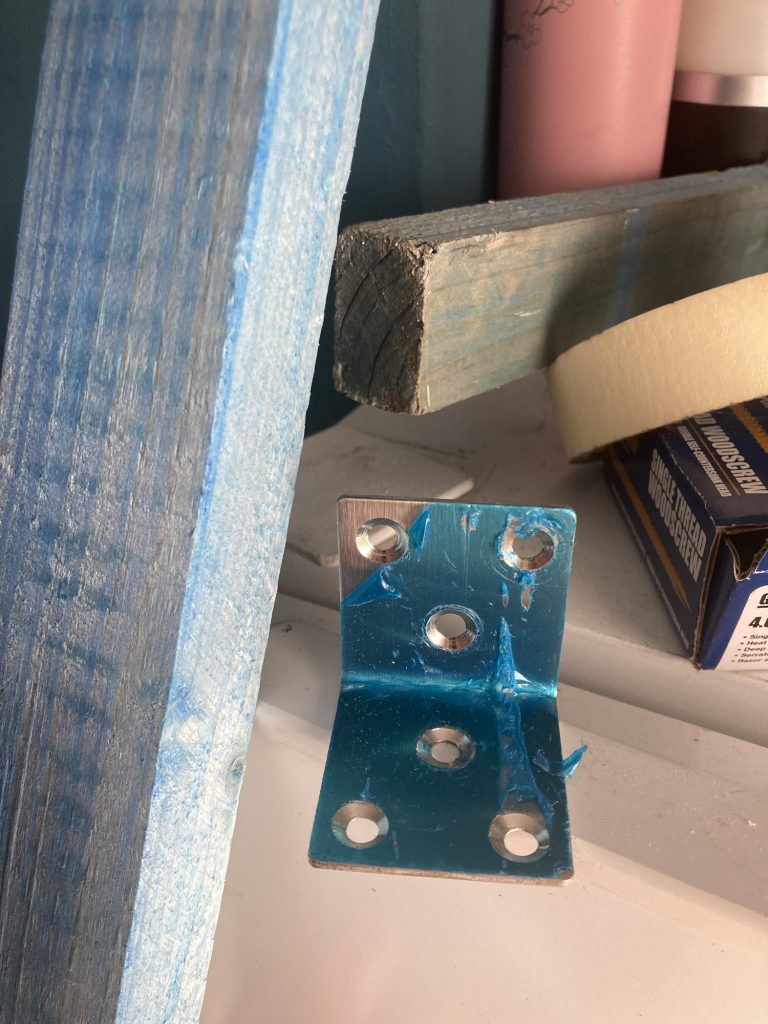
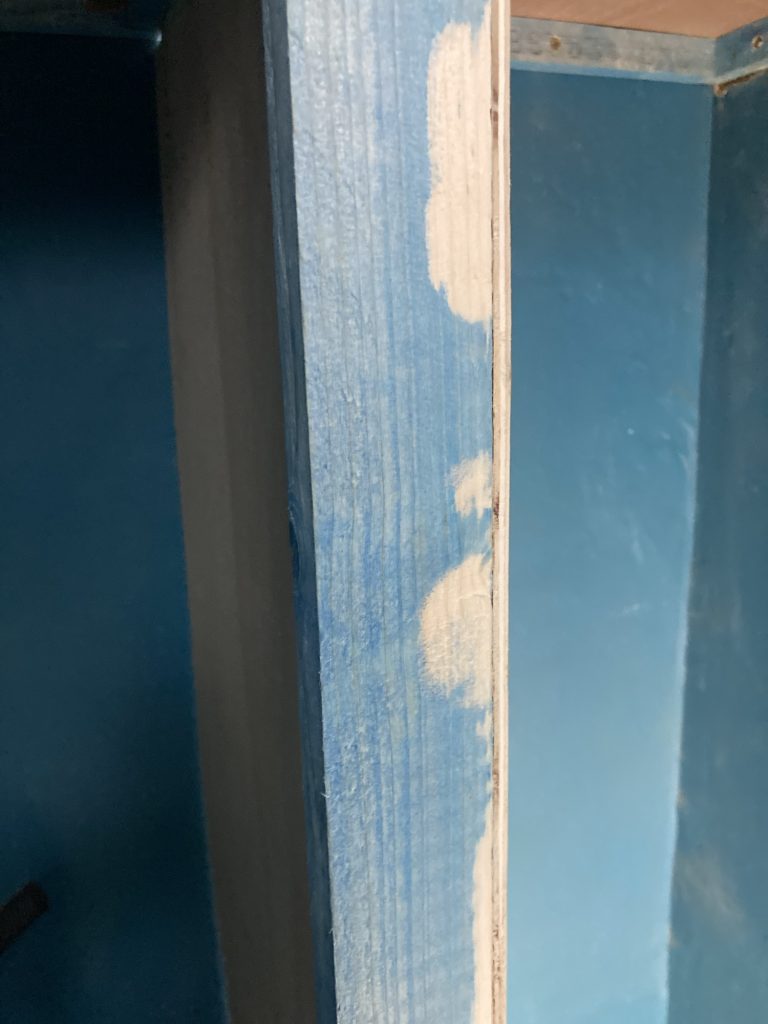
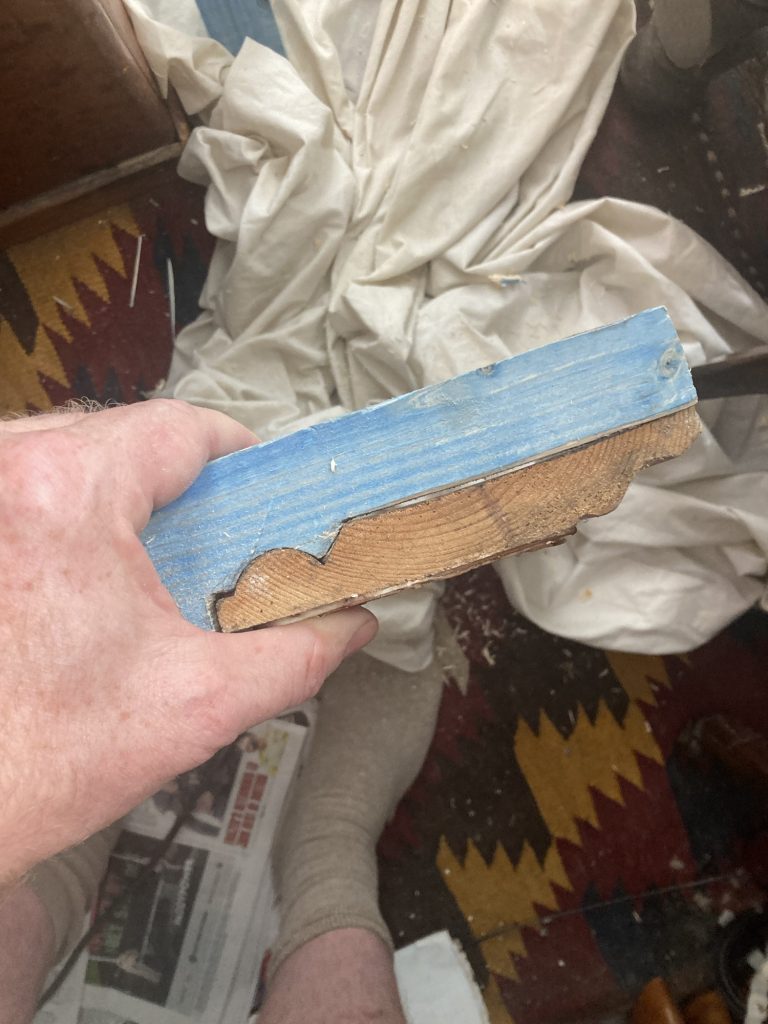
I love that the blue theme of the room is echoed, quite coincidentally, by the blue timber I’m using, and even the blue film on these fixtures.
The film comes off, and then I’m using one or two of these here and there, to hold the timber in place. There’s not room for one at the bottom. And this top one will be more or less out of sight, ultimately.
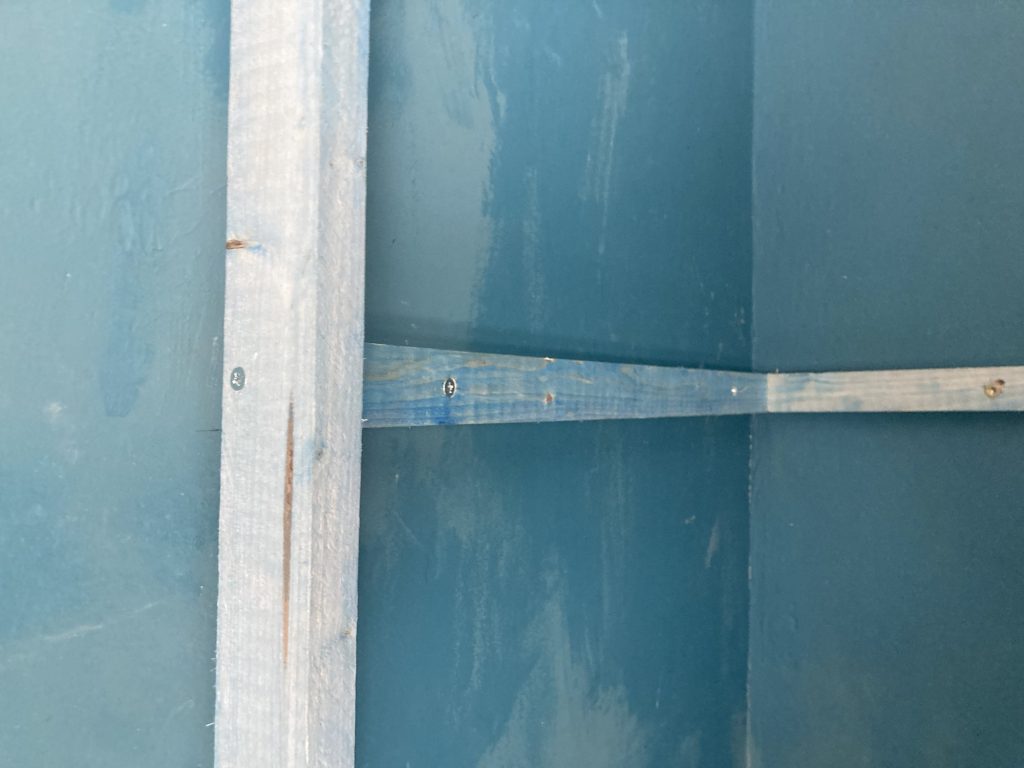
I think the middle horizontal must be set back a bit. Probably the rear wall also bows outwards a bit, inside this part of the room. All the horizontal measurements are 60cm. But I had to put a little extra bit in here (just visible, if you look carefully).
There’s a bit of twist in this timber. But not so much as to greatly trouble me. And fixing it in place has to some degree ameliorated that.
I’m stopping for a wee rest, and a little light lunch. And then it’ll be all systems go; full steam ahead!

* From the ‘Partridge Over Britain’ segment of Knowing Me Knowing You.
Now I’m working on a bit more of the structure.
Uh-oh… a bit of a clash.
Hmmm!? Rather like the plastering I had to do, after removing coving. This is not something I’d wanted to deal with. Still, it’ll learn me some new skills.
I’m glad I did this. It’s going to be better, neater, stronger and more satisfying job, by doing it right!
And that allowed me to put this front member (below) across the gap. I tested this latest addition for level, and it’s poifeck!

I’m doubly pleased I bothered to correct my earlier mistake. And the new tools/technique, with concrete screws, etc, have made it all much easier.
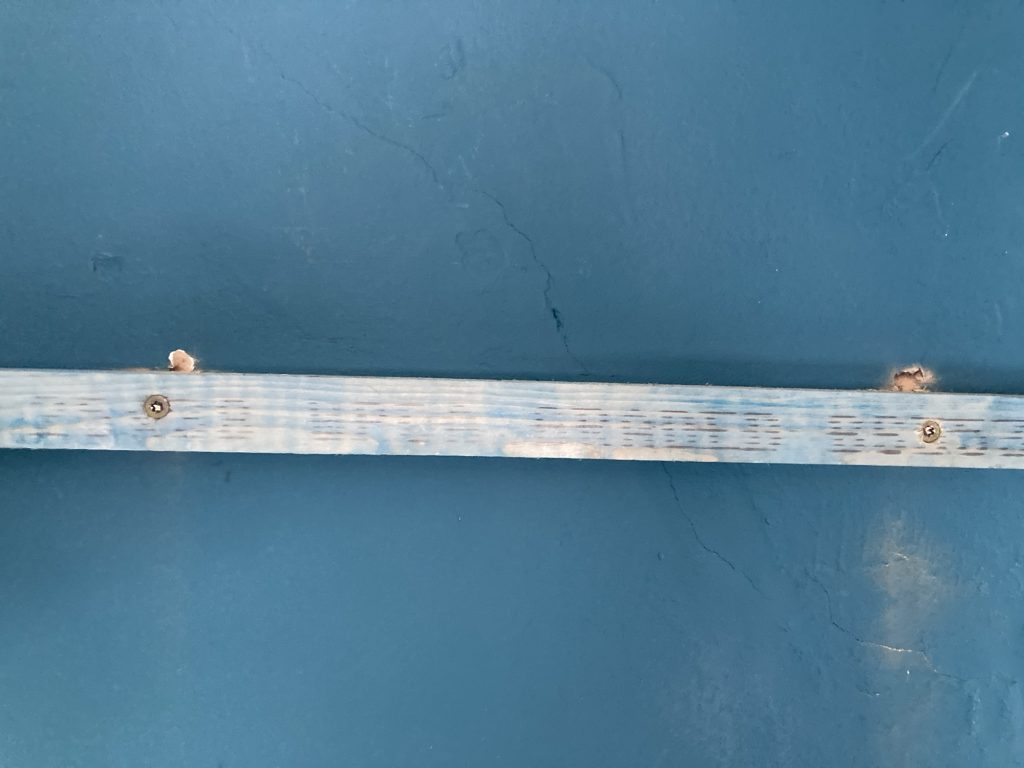
This from horizontal is screwed in at the left, but it yet at right. That’ll happen when the front vertical goes in. And that’ll happen after I’ve moved the power sockets.
Having another brief break, and then it’ll be time to take up the electrical challenge… (gulps)
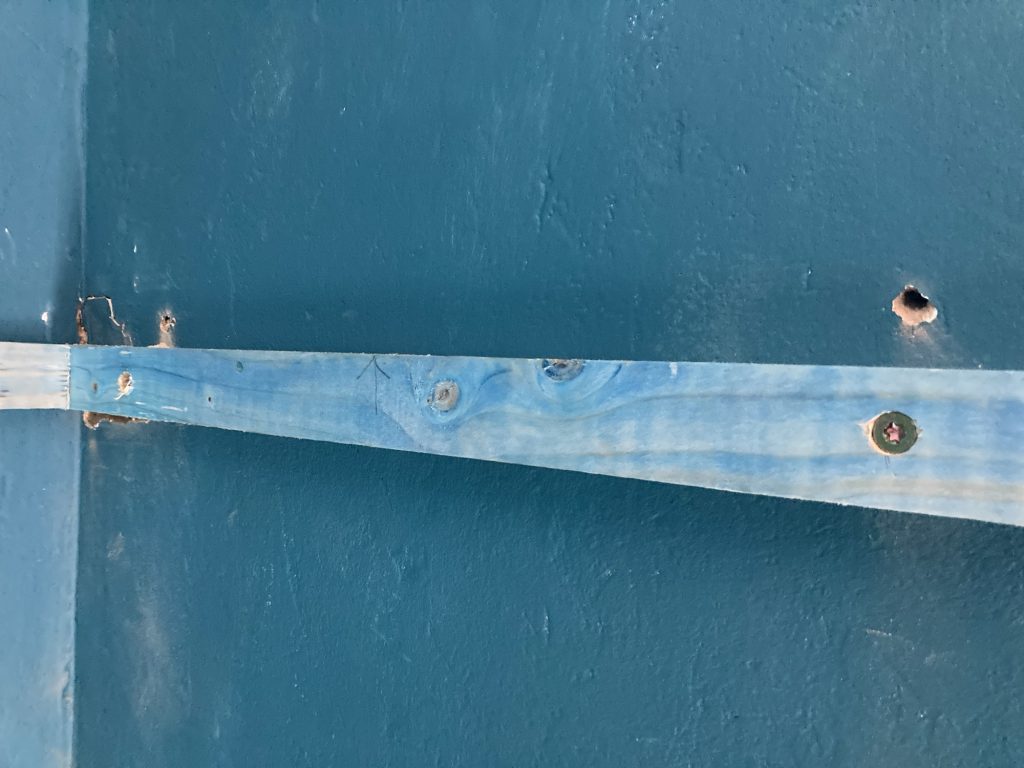
As usual, I watched YouTubers making this sh*t look easy. And as usual, when I tried my hand at it, it was really hard! The hole ended up way too big, and none too neat.
I wound up using the plaster to help get the back-box level, and roughly in the right place, depth wise. I’ll let this fully harden, for at least 24 hours, before using a concrete screw or two to secure the box. Mind, I reckon the plaster alone will hold it pretty well.
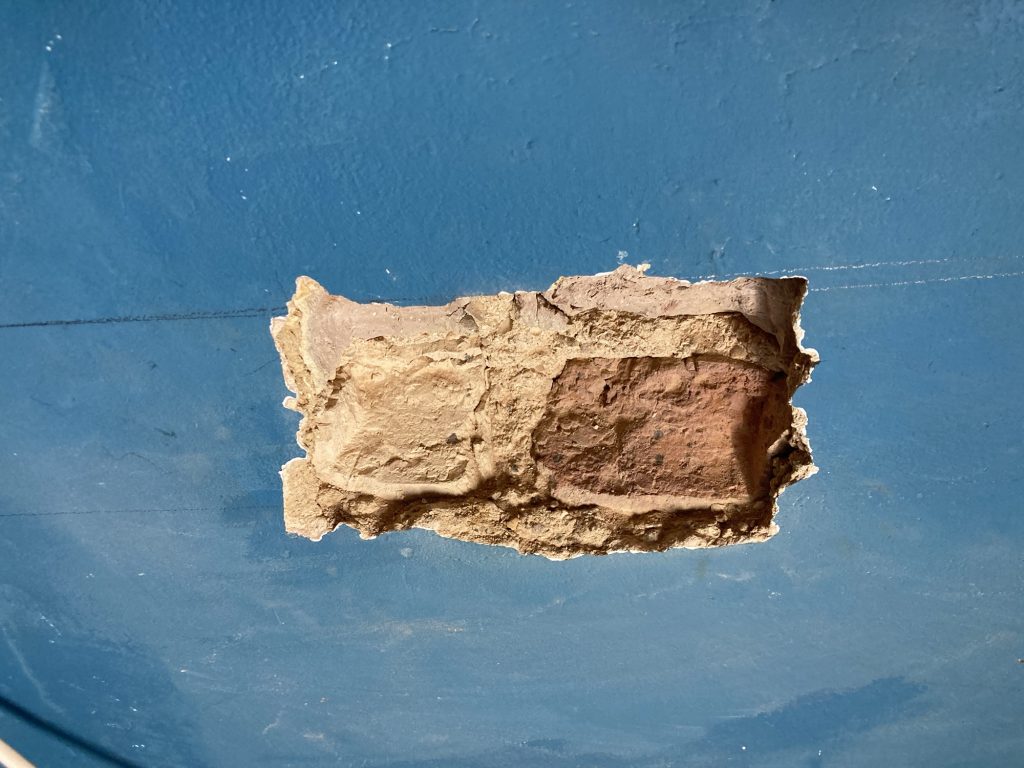
I had to pop out and collect Teresa from Ely. She’s had to get a bus, due to the train strike. When we got home, the back-box looked as you see it below. I’ll let it dry, screw it to the wall, sa d and paint the surround, and pop the from on (unwired, for now).
Why unwired? Well, I haven’t done the chasing yet, from the other sockets. And my plans may have changed again, anyway. This is kind of Jazz DIY, with me improvising and making it all up as I go along. Perhaps not the best way? But currently my way!
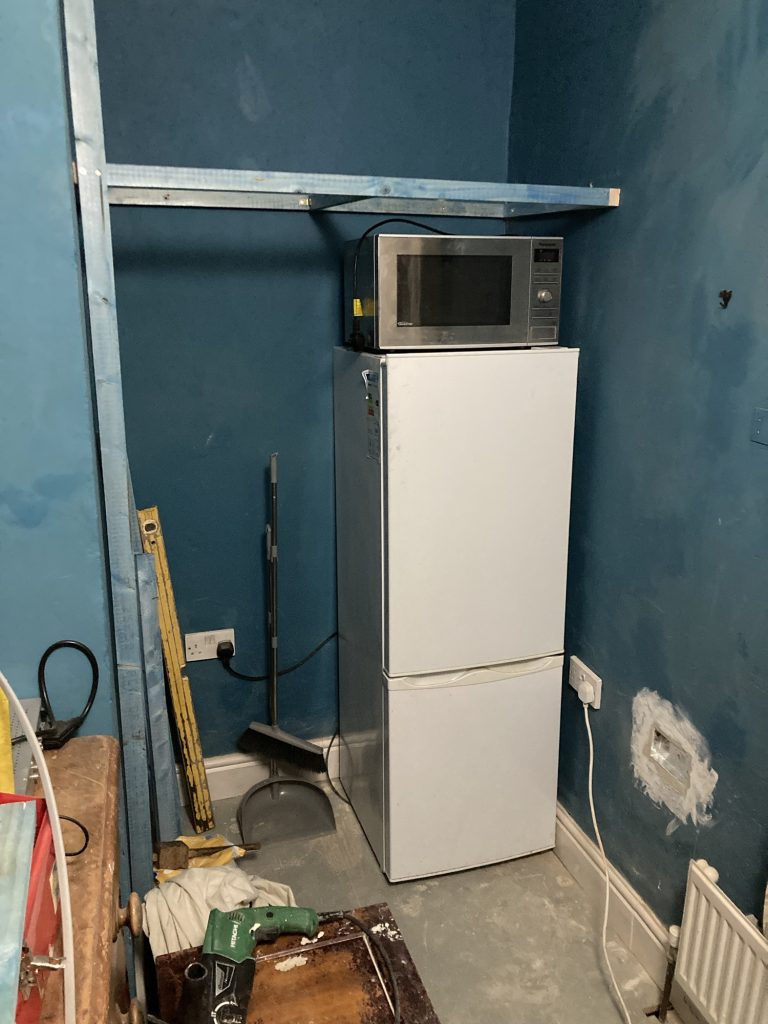
So I might be leaving the pair of sockets by the fridge where and as they are. That would make the new sockets as redundant visual fluff, for the time being. The reason being that with the fridge back in place (see pic several below) there might be discs for the vertical beam anyway.
The next step was a reinforcing bar, across the middle of the basic rectangular frame. This’ll stop the sheet-work shelf from sagging. There’ll also be a pillar support, left of the fridge.
I decided on two L-brackets and glue at rear: the concrete screw, drilled into the wall smack-dab in the middle, precluded repeating what I’d wanted to do, and did do, at the front.
And that was, a stepped north. I’ve a feeling there’s a correct woodworking term for this kind of joint. But I can’t recall it! making these cuts was ok. Although ideally I should’ve done this before putting the beam in place.
Getting it to the state pictured above took ages, inc. some chisel sharpening. And required a lot of patience. But, taking it as a meditation, slowly and calmly, I got there in the end. And I’m chuffed with the result.
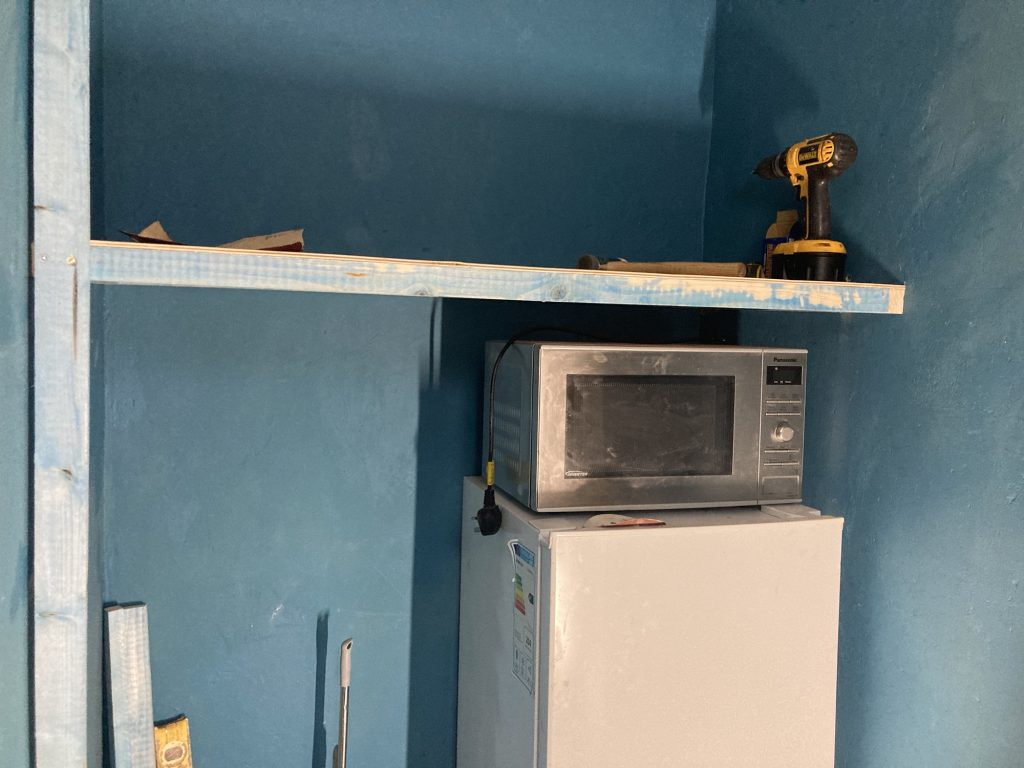
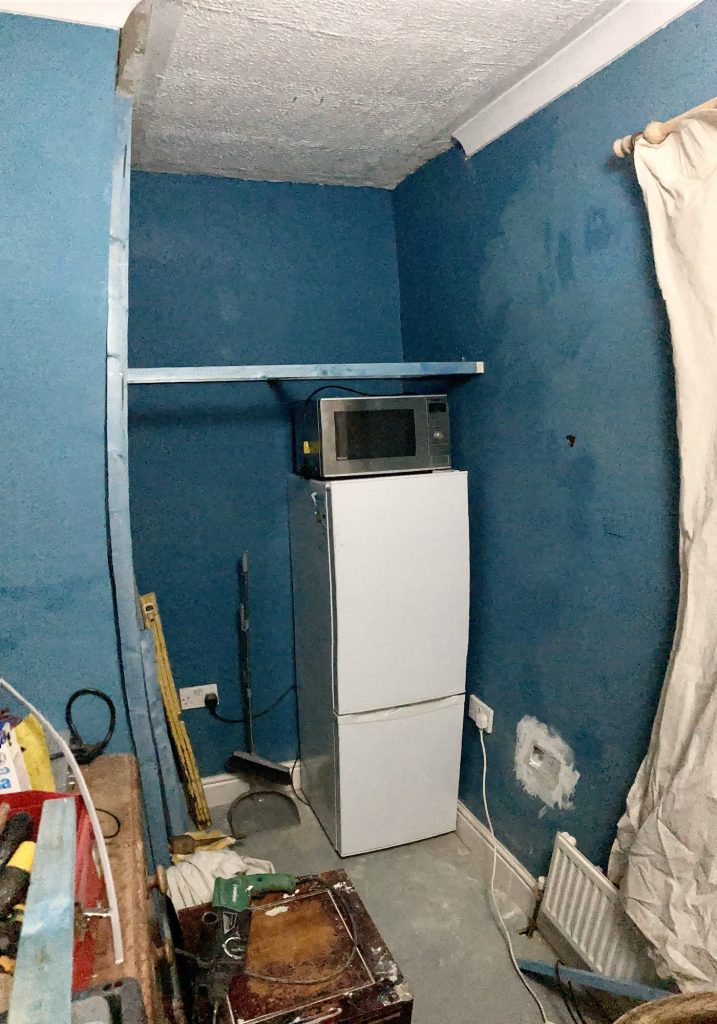
Having got this far by about 9.30pm (I’d normally be in bed, these days, long before this!), I decided it was time to tidy up a bit. By which I mean general sweepage, putting tools away, and returning the fridge and microwave to their allotted places.
I took the day off delivery work to focus solely on this. And I think that was the right move. I feel I’ve broken the back of it now.
I need to measure up, and then buy a flat sheet (prob light/thin ply?), to go over the framework. That’ll be an upper storage shelf area. I might add a second shelf at some point?
Then I need to put a partition wall alongside the fridge. And, across the gap, contrive some kind of clothes rail/hanging business. Prob a couple of poles, sitting in semicircular troughs.
This morning I dropped Teresa off in town, for work. We’d stopped over at dad’s for the night, on account of more train strikes. It actually makes for a rather lovely little one night family getaway.
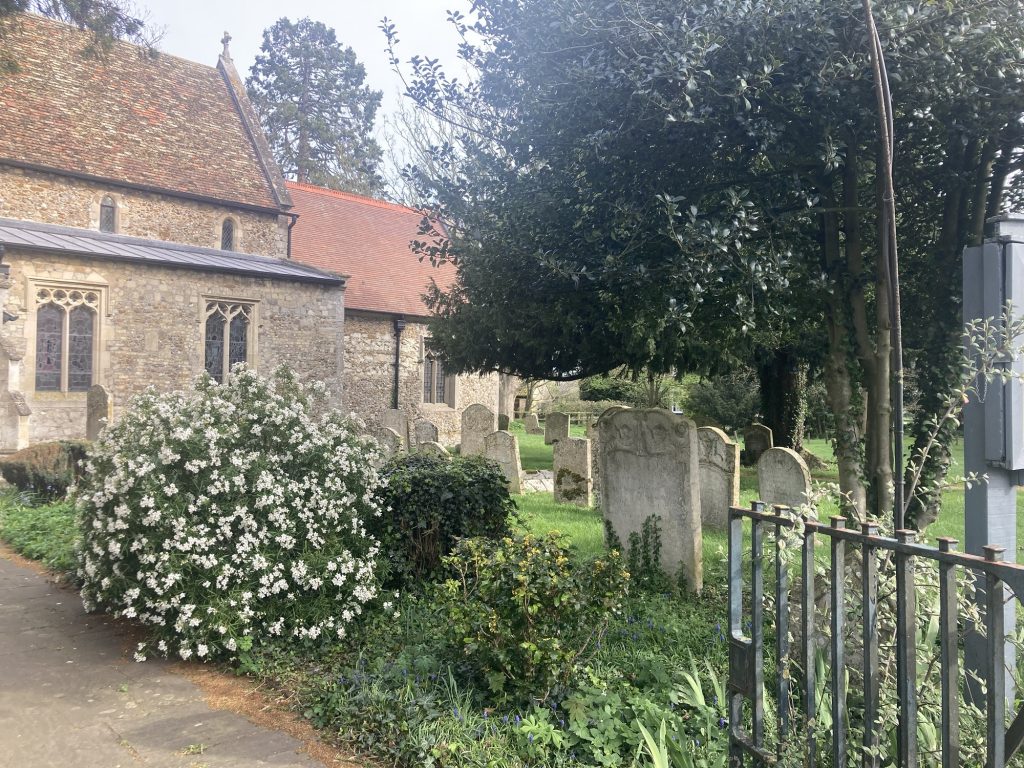
En route home, I stopped to admire St John The Evangelist, in Waterbeach. But alas, ‘twas closed. So I just took a few outside snaps.

After that, I popped into Topping, in Ely, and poichased this:
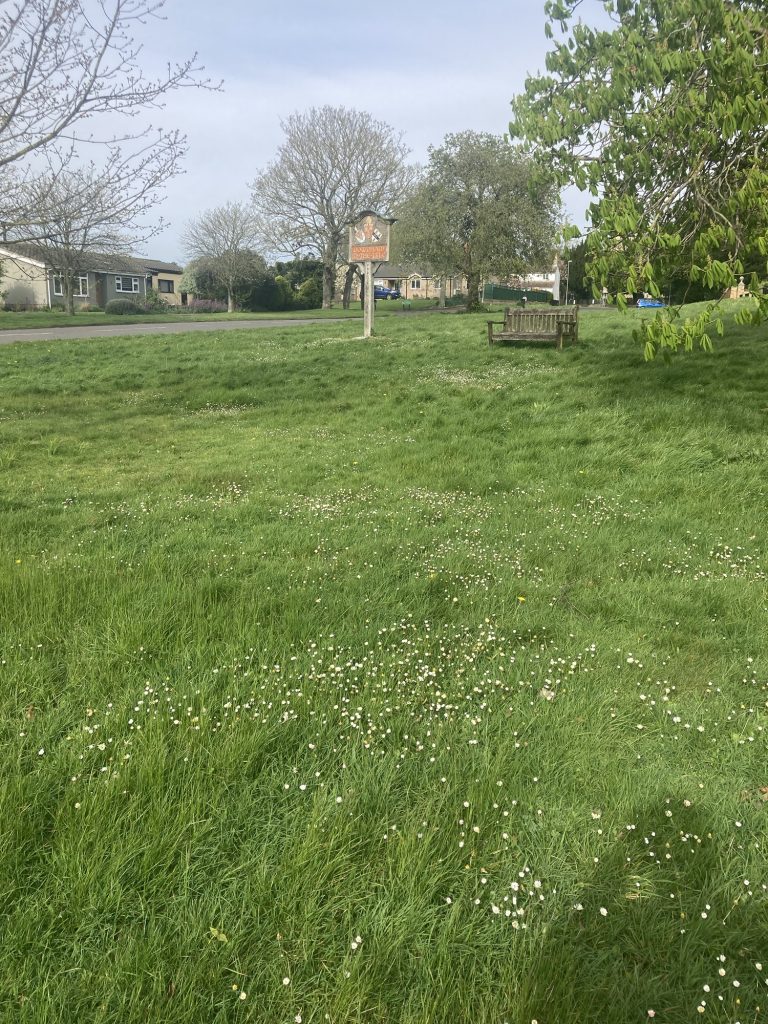
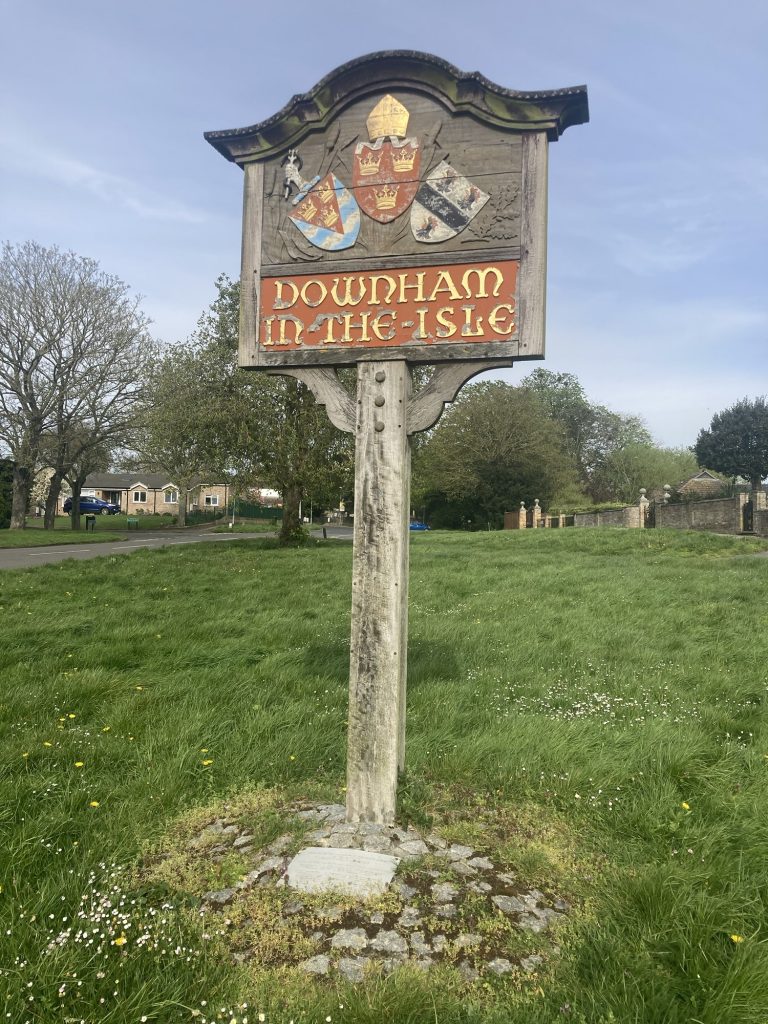
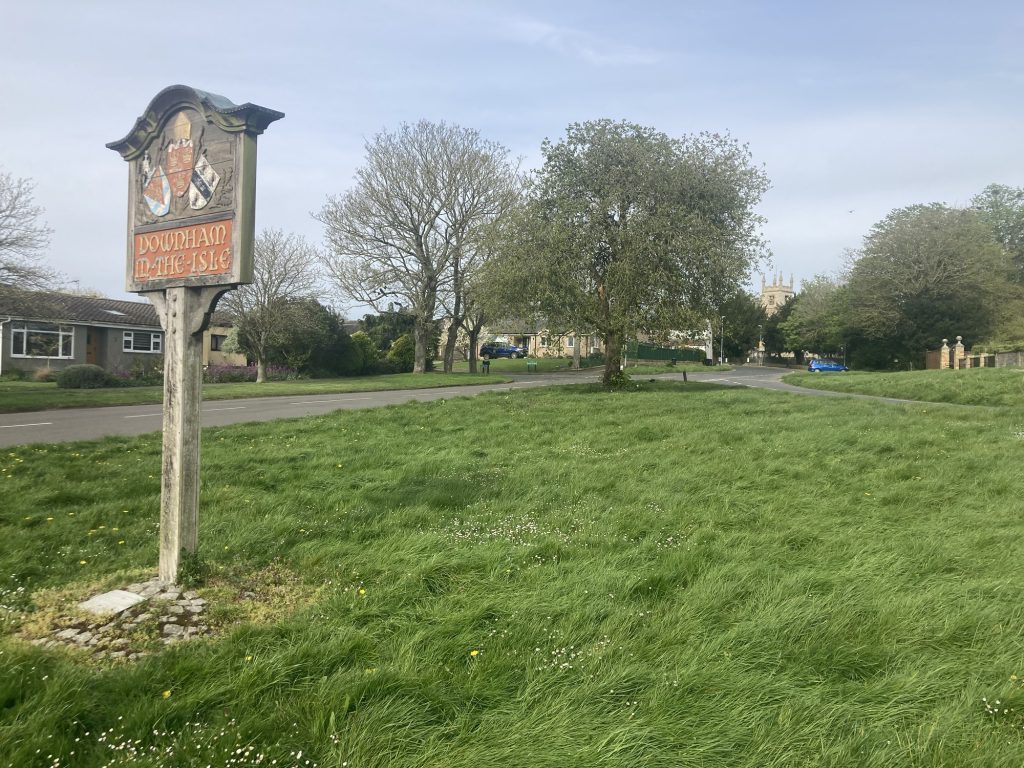
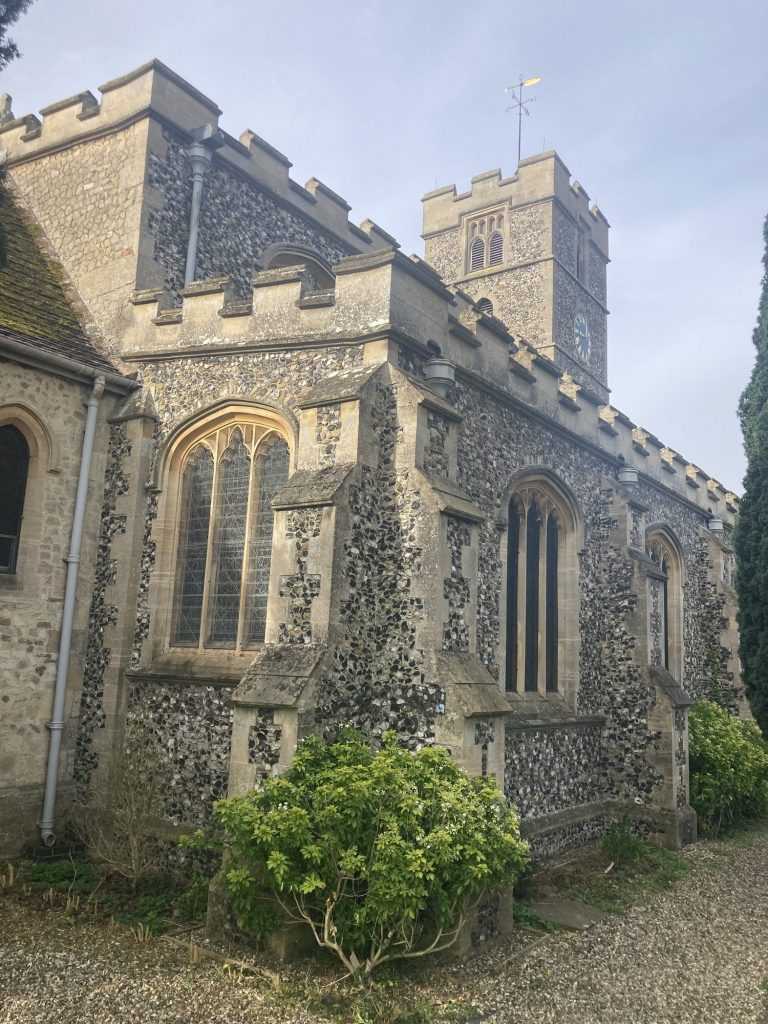
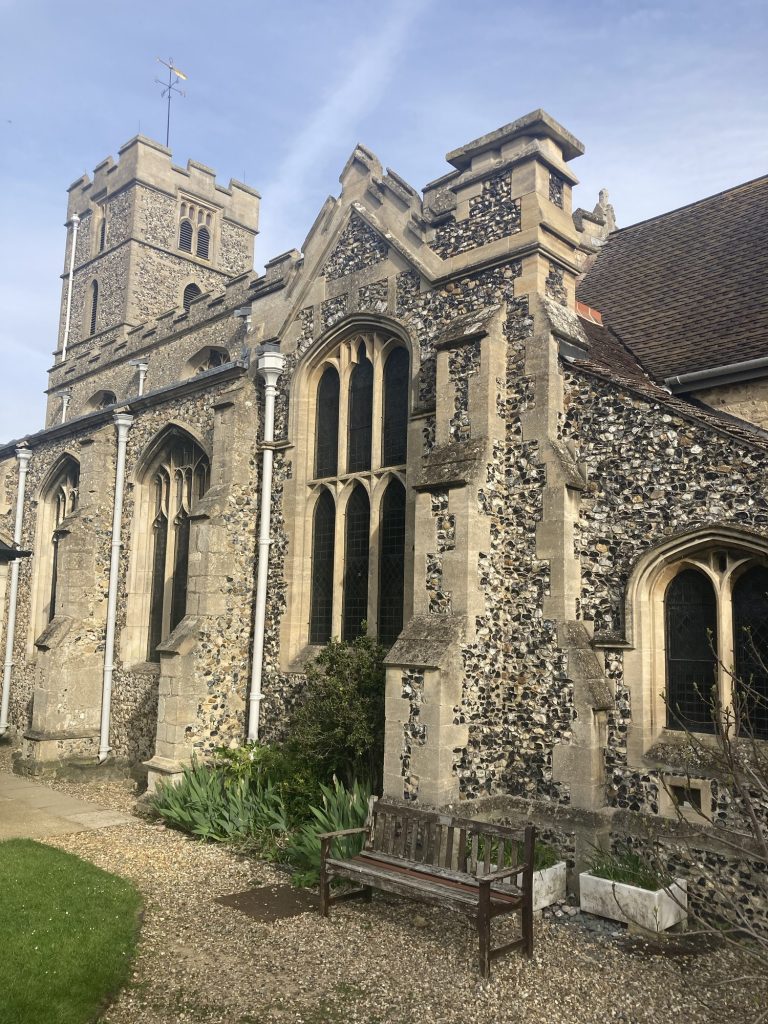
And then further down the road, driving through Little Downham, I stopped to photograph the village green, and the village sign. And lo, I didst spy St Leonard’s, in the background.
Once again, the church was locked. So this is another one to be revisited. I rang the vicarMe landline and mobile, and left messages, asking about keys/access. Answer came there none. Another time. Meanwhile, a few pics…
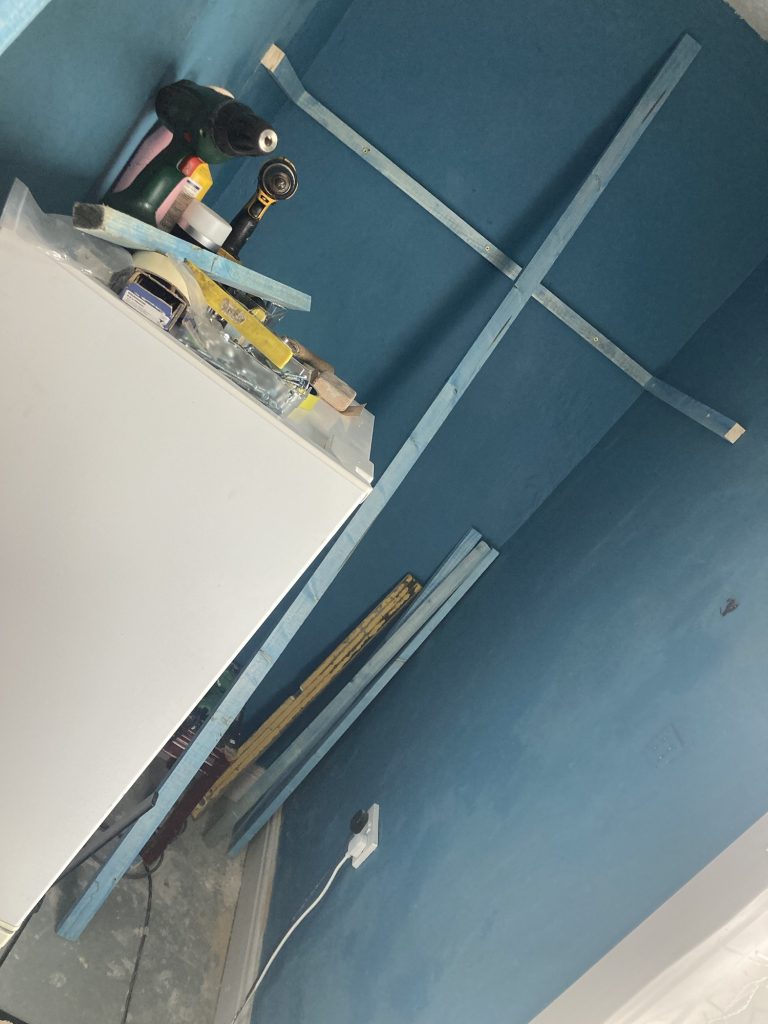
The mess I’ve made/am making… oh dear!
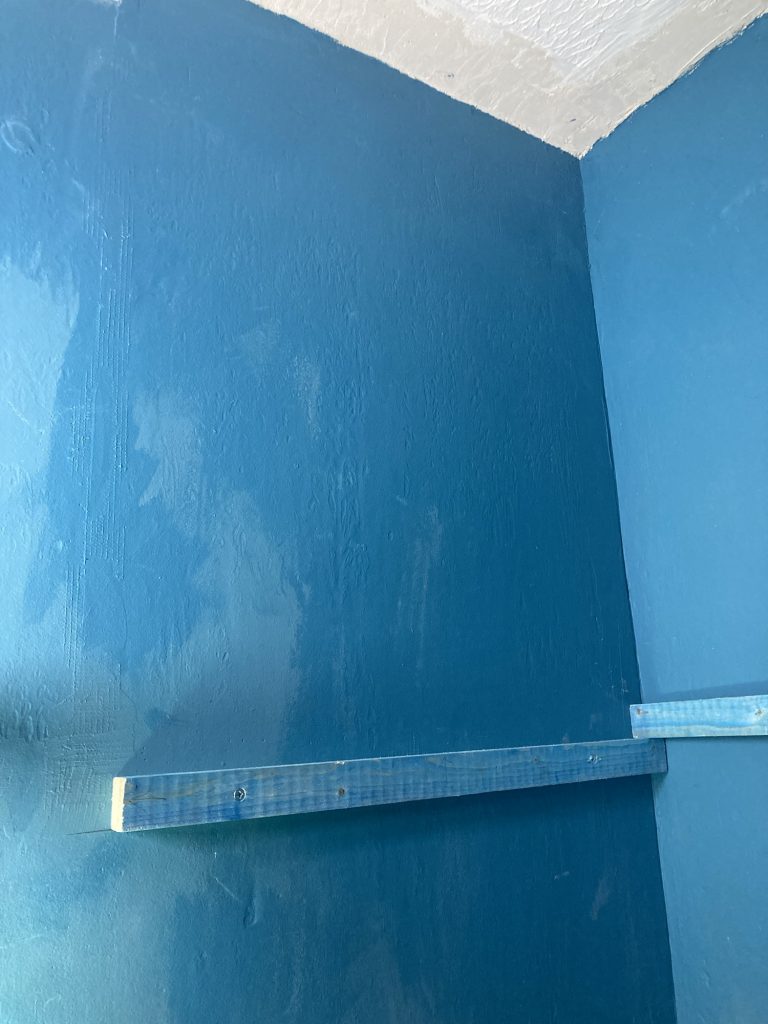
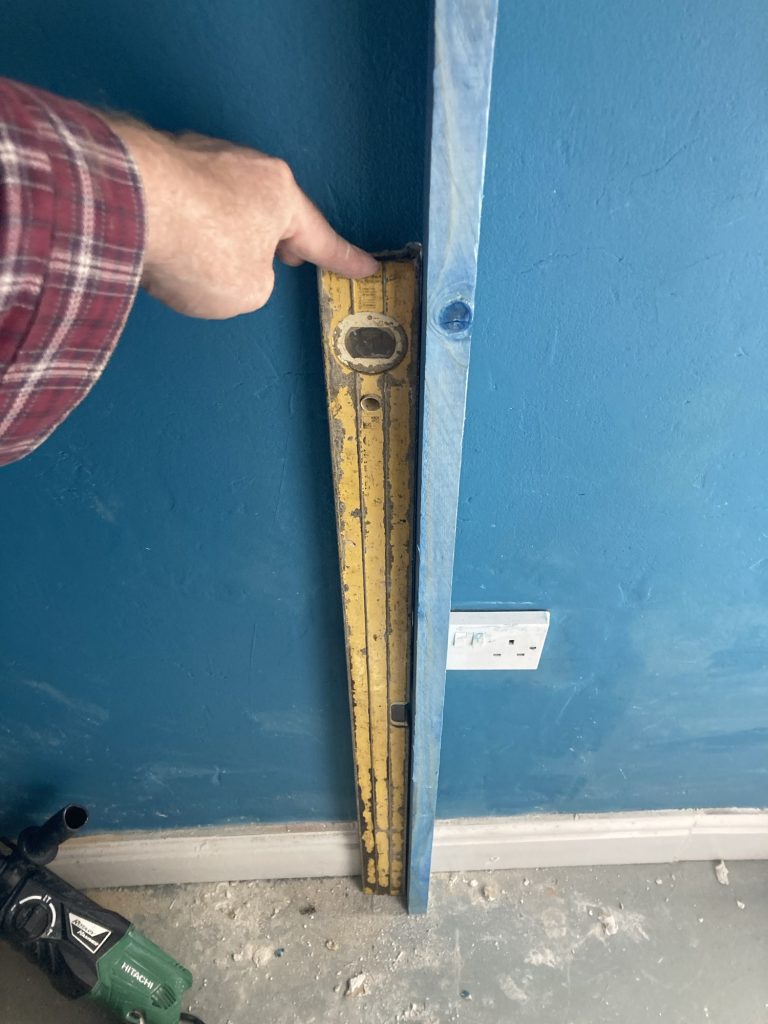
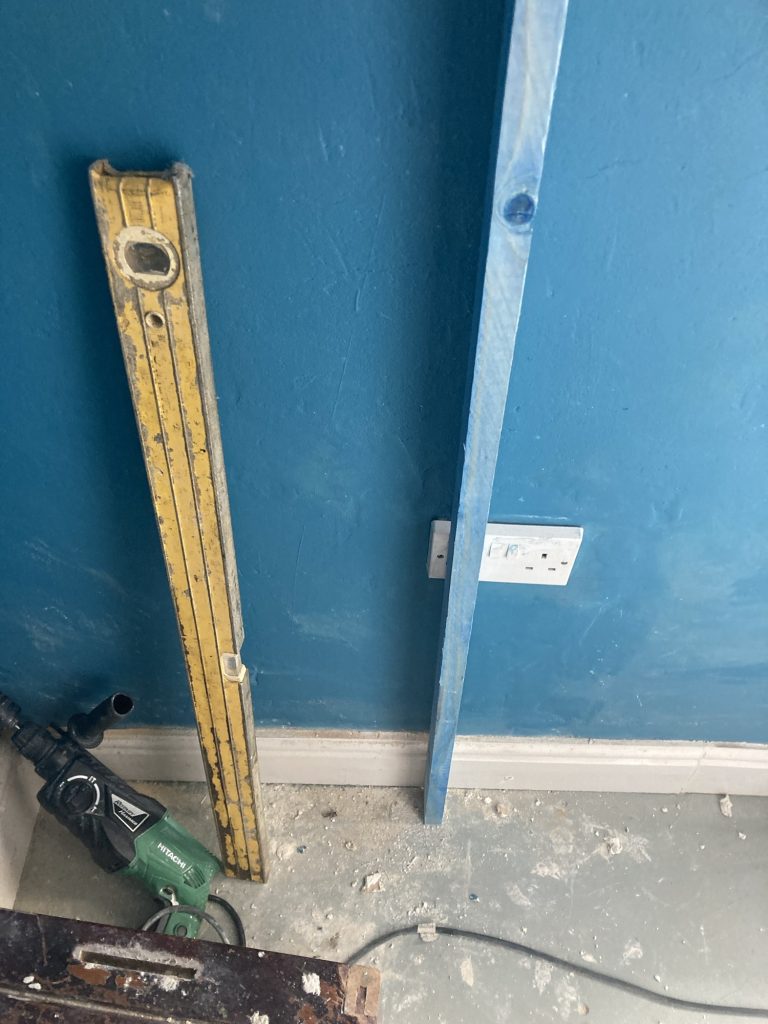
In the above pic the first bit of wood has gone up. This is attached to a plasterboard partition wall. Expanding rawl plugs, standard screws. Pretty easy/straightforward.
The other bit of wood – at right – is just sitting on top of the first bit. And isn’t fixed in place. Piece one is pretty good, plumb wise. I marked up from there, across the back wall, to get piece two, opposite, at the same level.
But, goddam it, despite careful measuring, neither piece two (right) nor three (middle) are plumb level. But then these were attached directly into plaster and solid brick, using concrete screws. That’s a whole new thing, for me.
The drilling and screwing seemed to go perfectly. But then when I checked for horizontal plumb, they’re both out. Gaaah!!! Do I take them down and try again?
Strangely, the measurement from ceiling to wood, in both corners, is 76cm. But to the naked eye, it looks wider on the left than the right. Hmm!? When it comes to learning by mistakes, I make so many mistakes, I ought to be learning shitloads…
I ran out of time. We had to skedaddle, over to dad’s. There’s a train strike tomorrow. And Teresa arranged that we’d stop over with Claire, Simon and Sam, for the night. So’s I could drive her to work Monday morning.
I’d just started measuring and cutting the vertical members for the framing. These have to be individually tailored to the irregularities of the room, height-wise. Plus they need the profile of the skirting board cut into them, so they abut seamlessly.
Do I work, delivering, tomorrow? Or focus solely on finishing this job? I think the latter has to take precedence. As Antonio is due to move in in just one week! Maybe I can do a bit of both? But then I have to collect Teresa as well… Hmmm!?
Alice performing in Poland, with her son Ravi (sax), Reggie Workman (bass), and Roy Haynes (drums). First time I’ve seen Alice and co. ‘in person’!
Turns out she has a YouTube channel. I’m definitely going to be exploring this in more depth. The older stuff looks the most interesting and attractive to me. Currently watching this:
… loving the music. And also digging some of the graphics. I’d love to know more about this. Was it made like this originally? Back in the day? Or has it been created more recently?
The cosmic/psychedelic graphics are sometimes exquisite, and sometimes a bit not! But overall I’m more taken with that all than not. And they suit the music.
Makes me want to try and achieve something similar. For use with my own music.
The music is a live recording from a Carnegie Hall performance, and is exquisite.
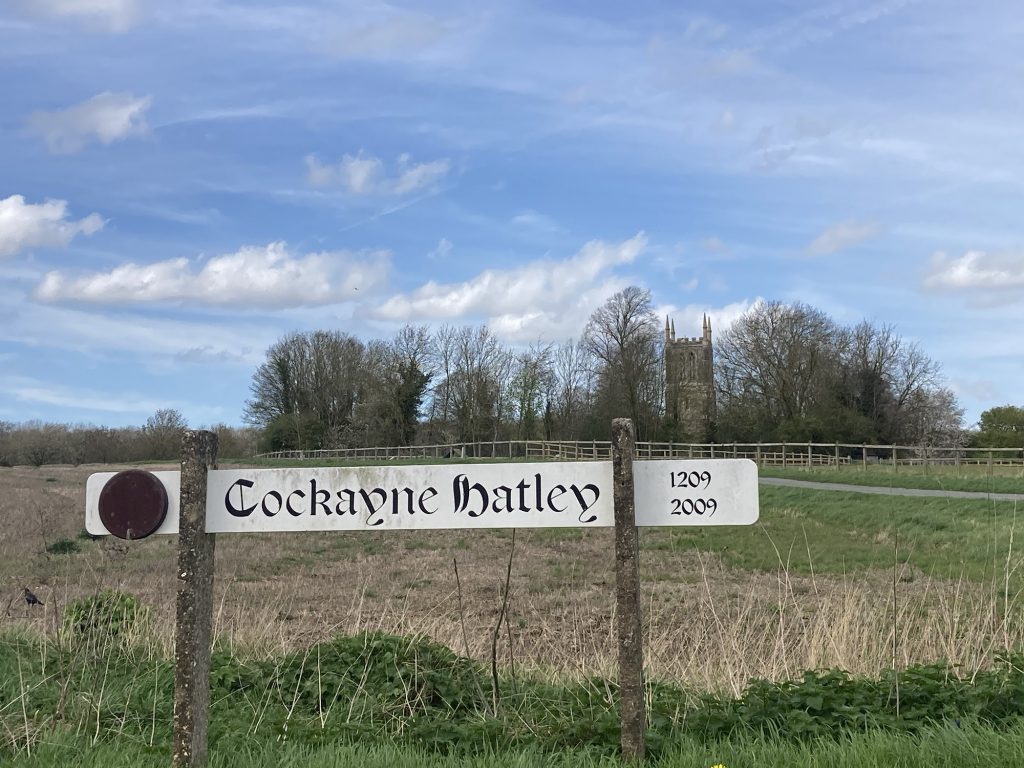
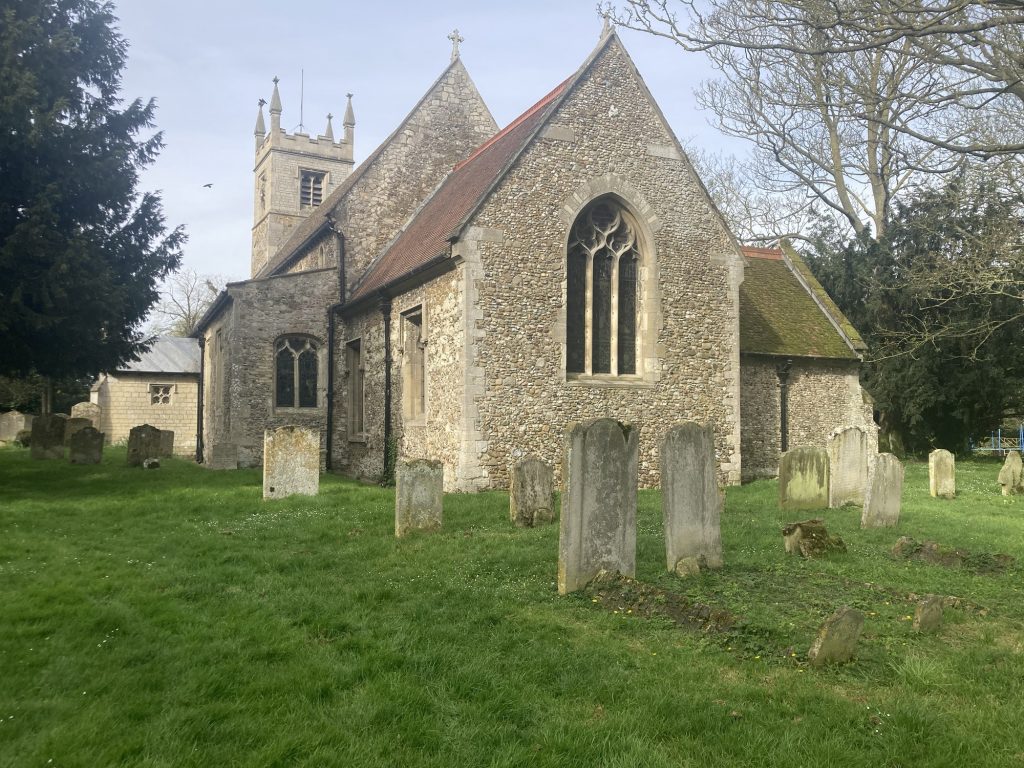
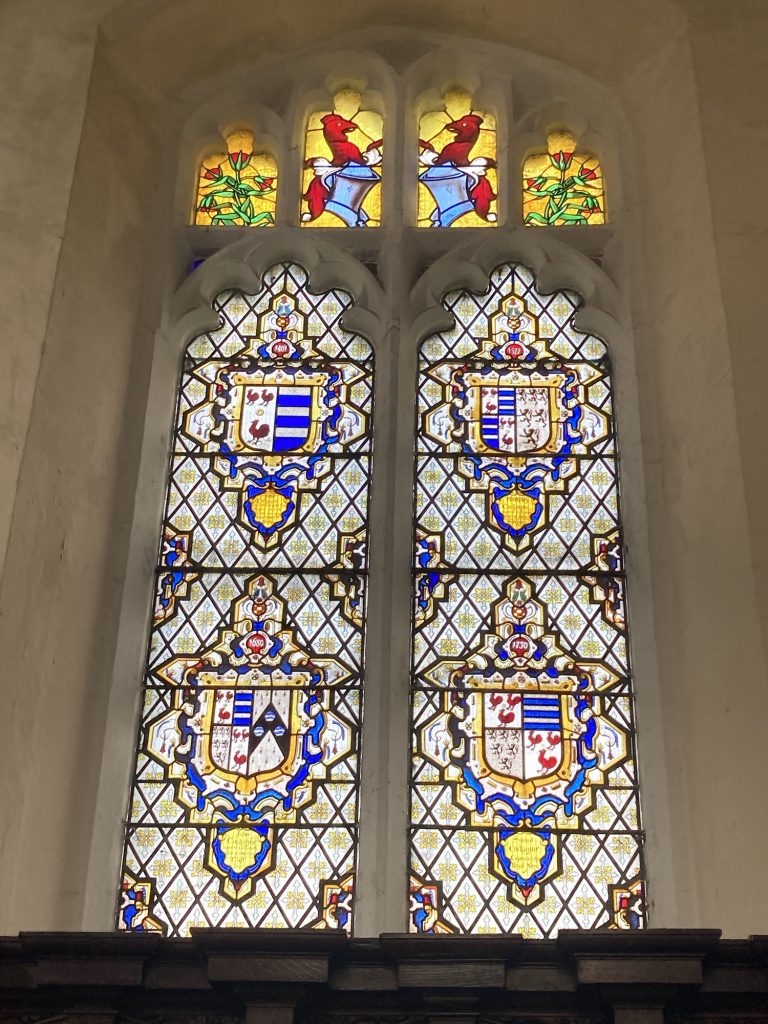
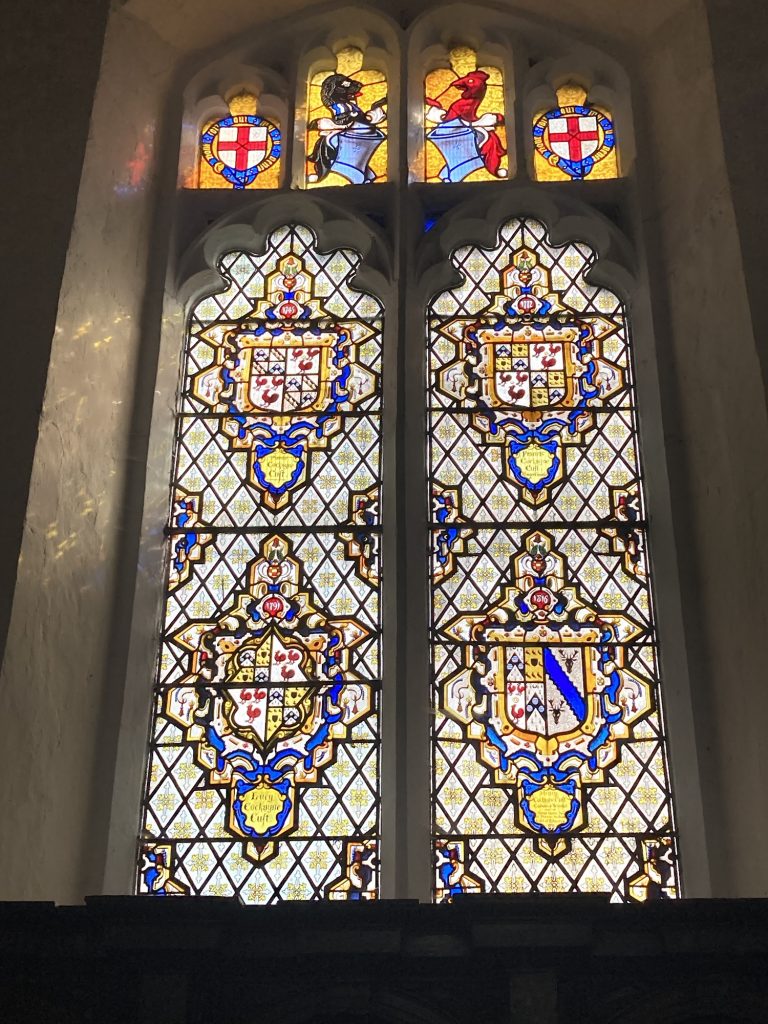
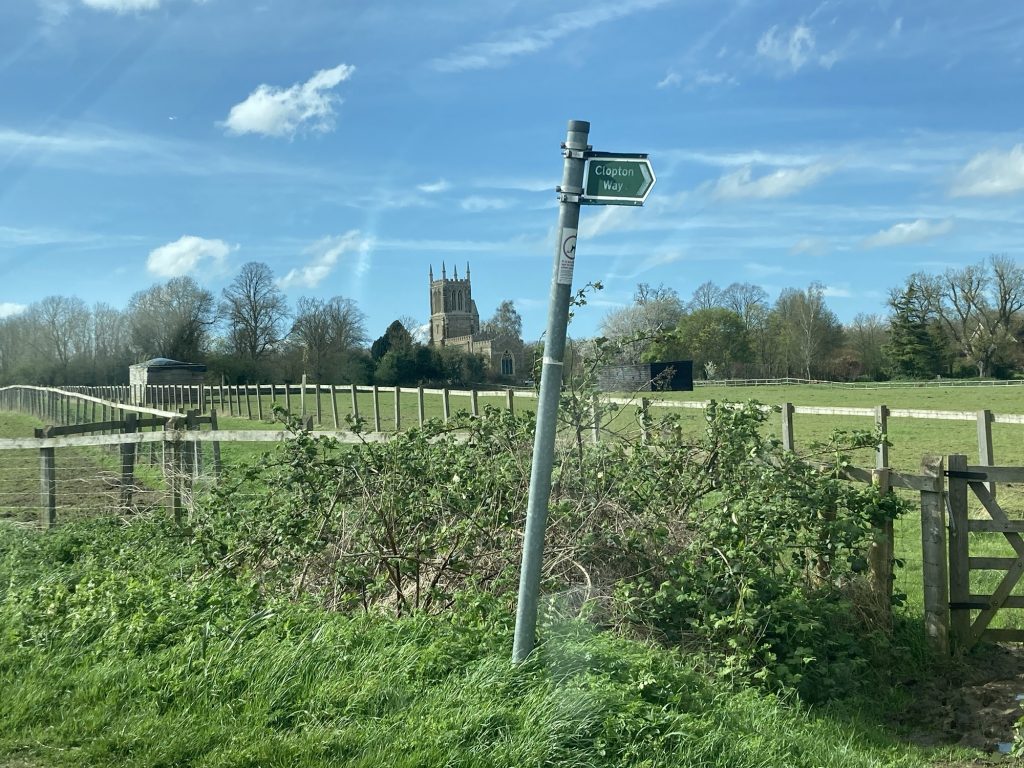
The final drop of my first shift, delivering for Amazon today, was in the picturesque hamlet of Cockayne Hatley.
According to the Wikipedia entry on it ‘The Cockayne part of the name comes from the surname of the Cokayne family, who took possession of the land in 1417.’
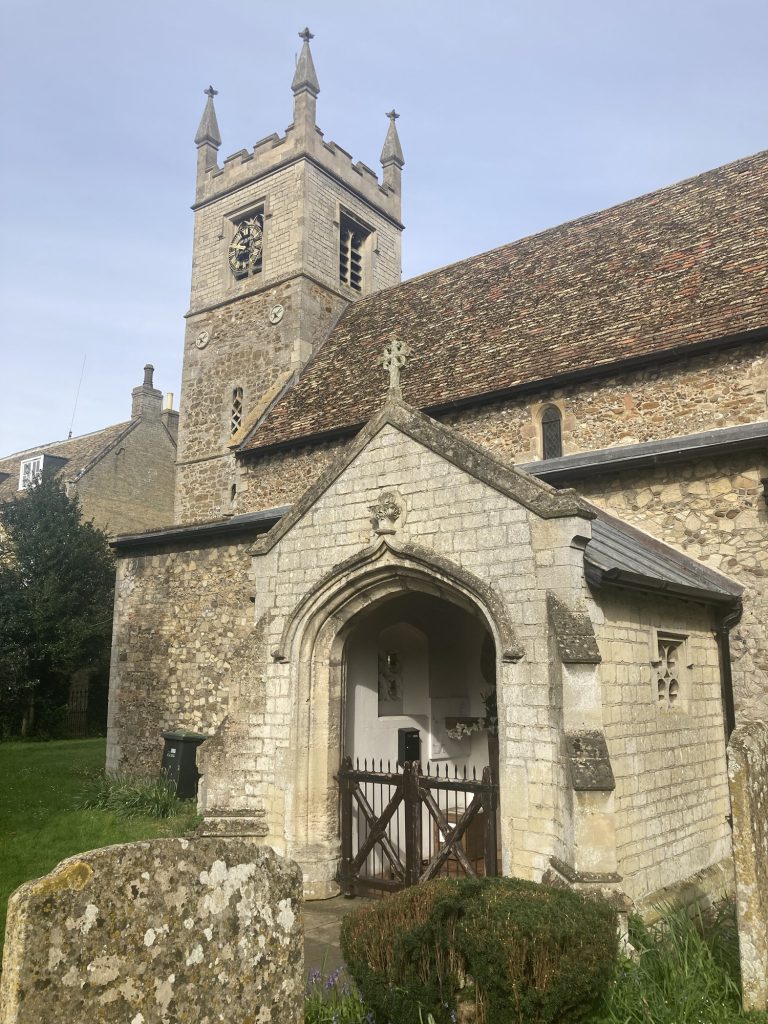
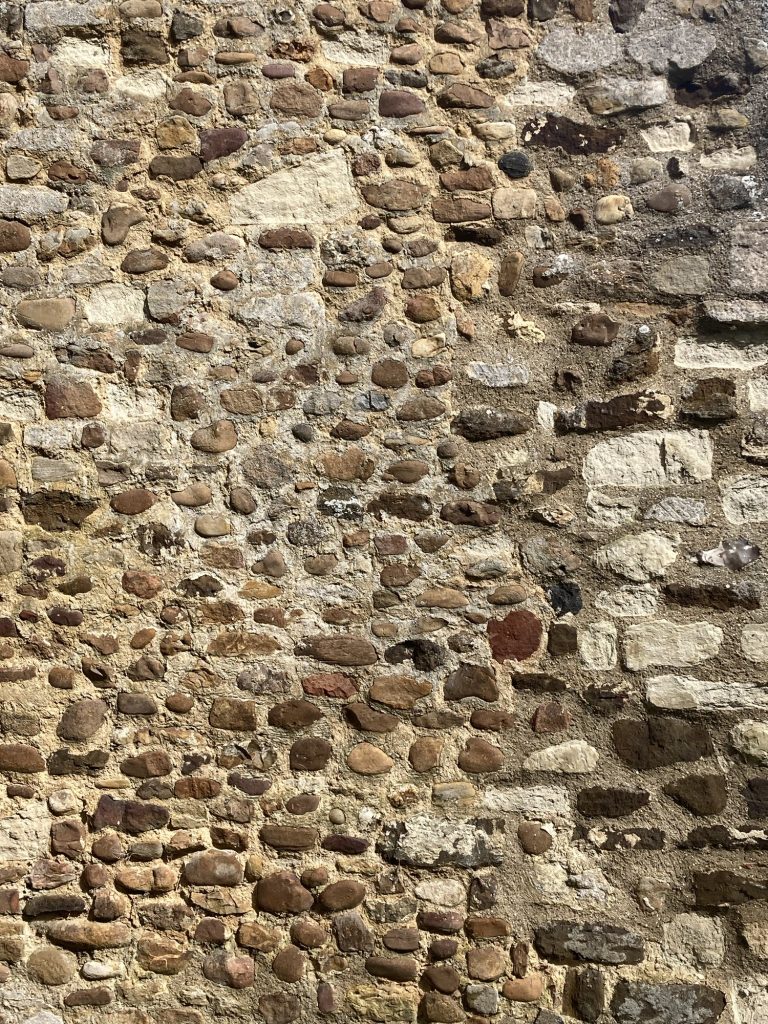
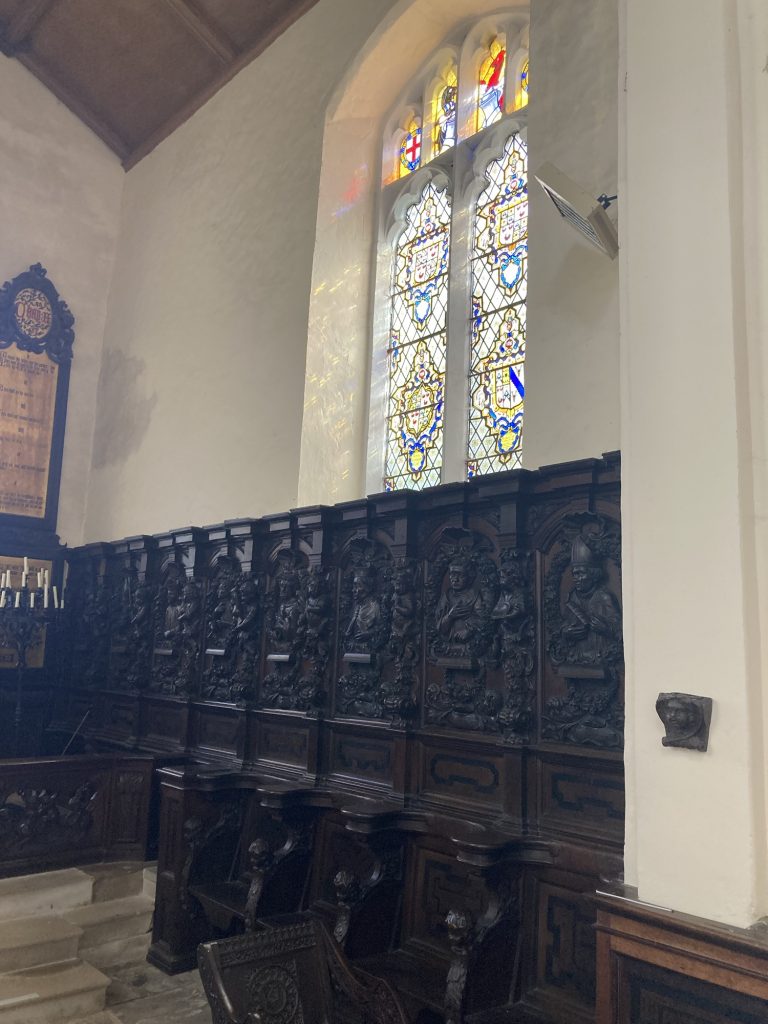
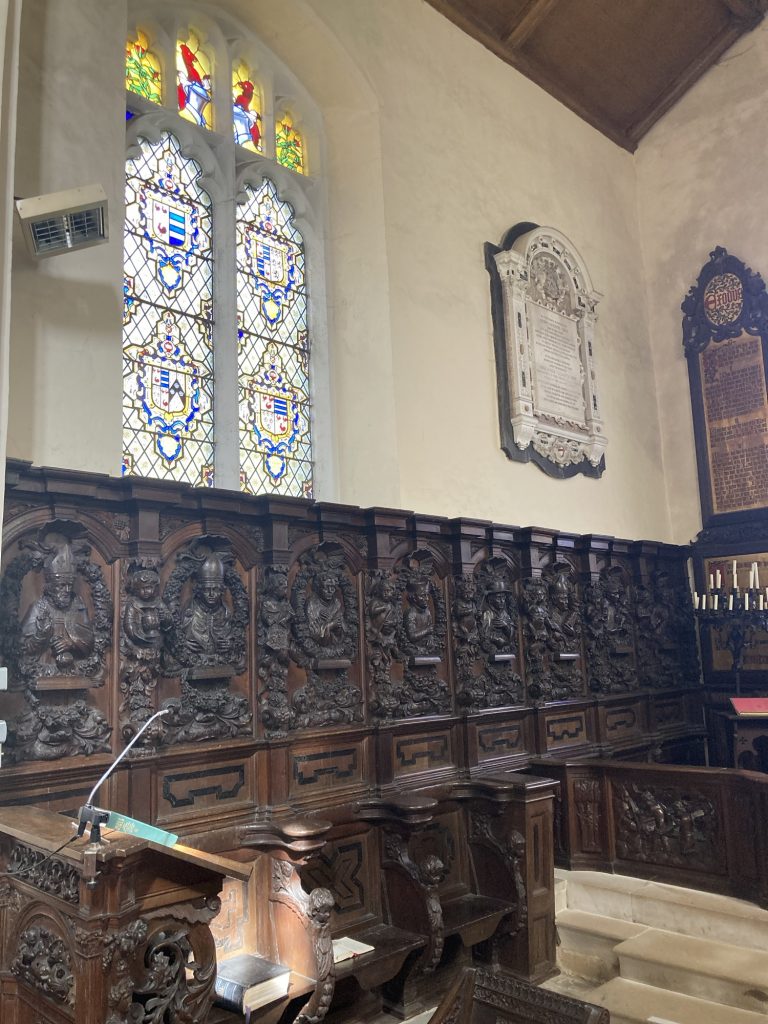
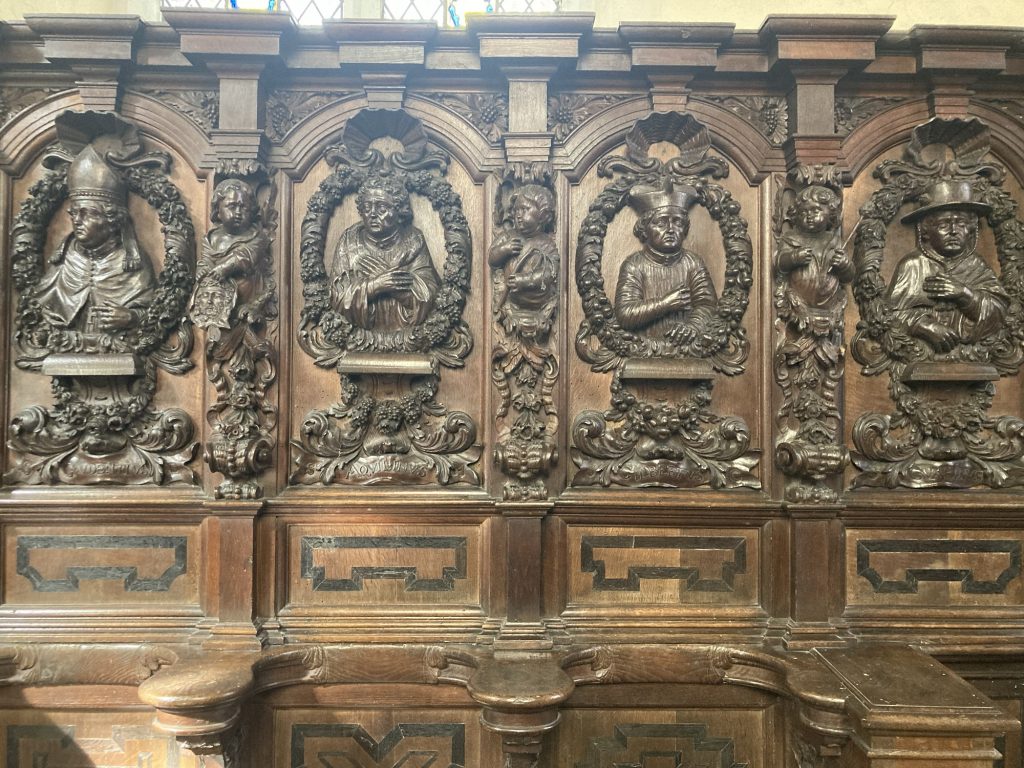
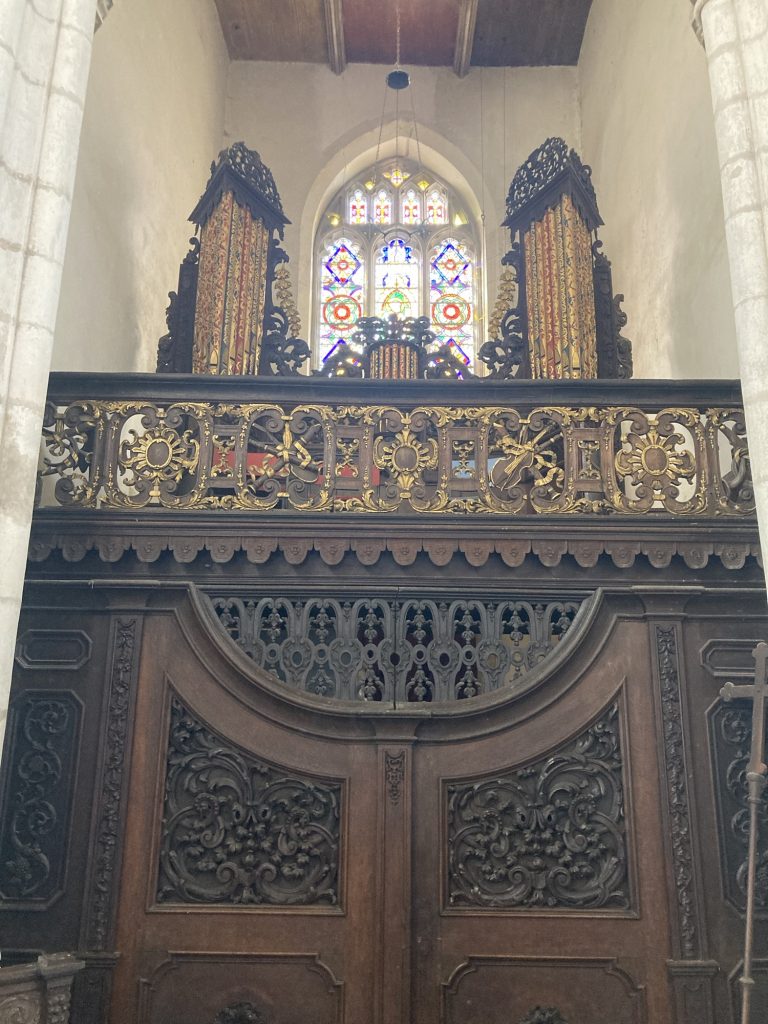
After my last delivery, I had a look at the church, which is pretty stunning. Here are a few photos:


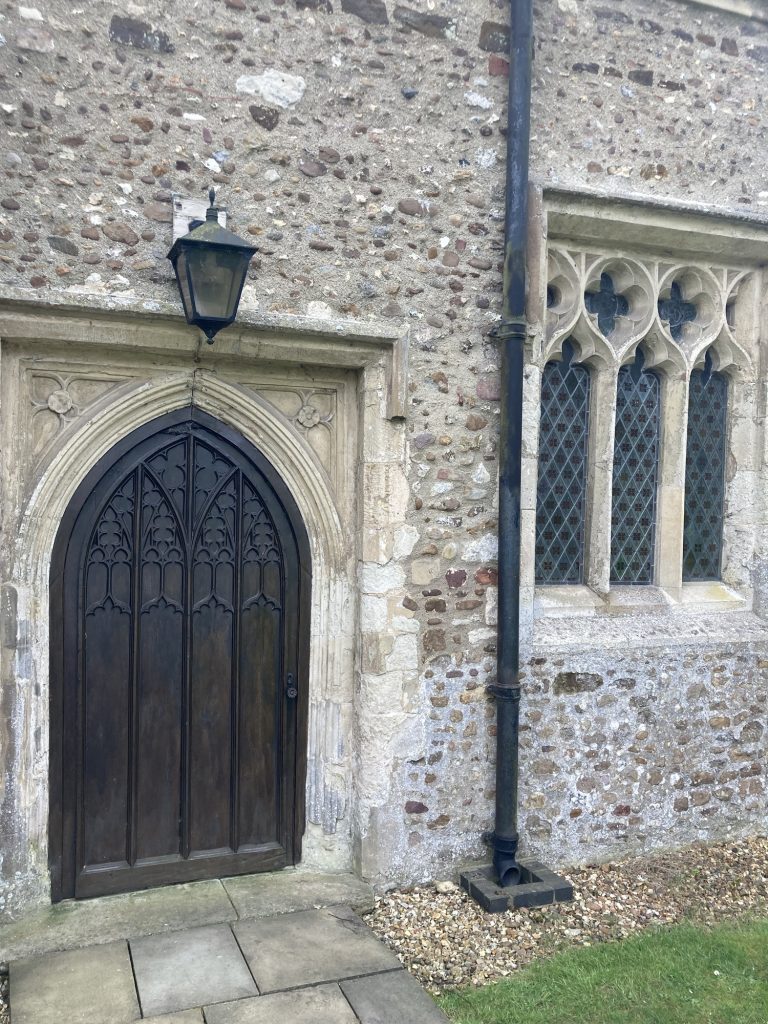
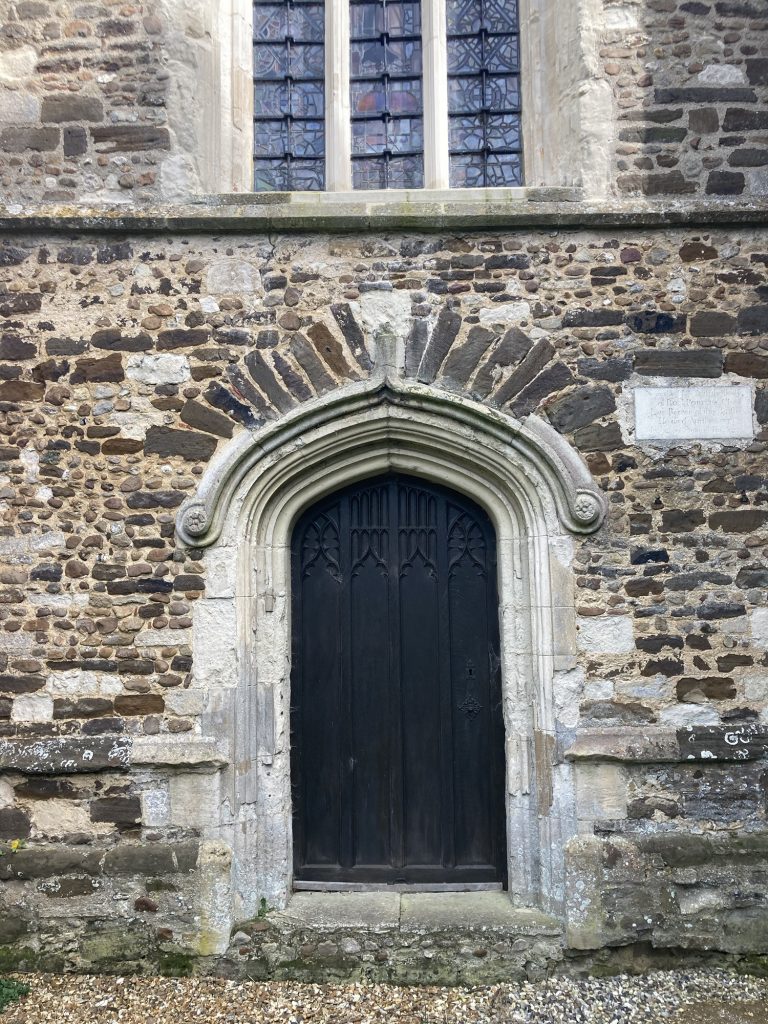
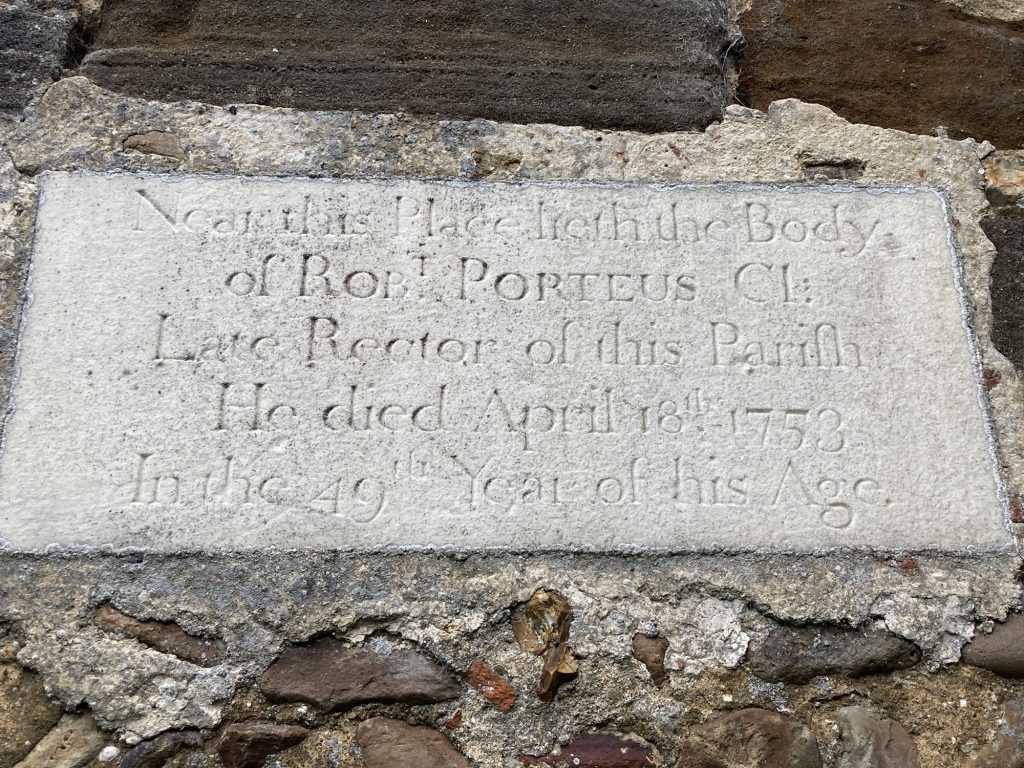

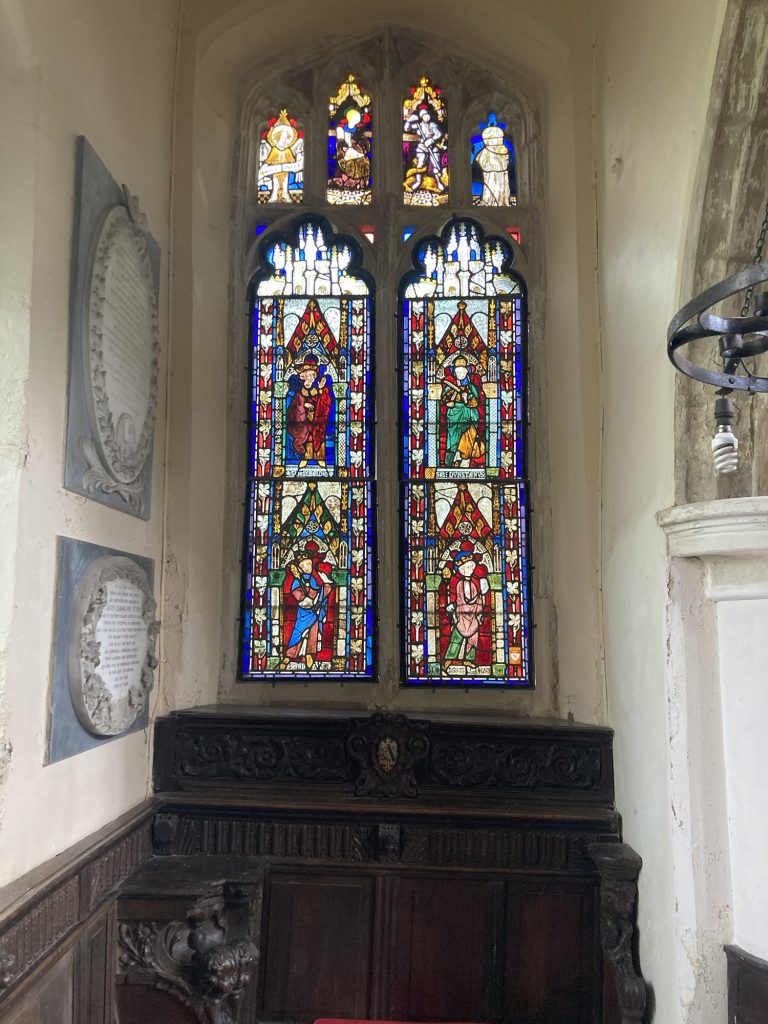
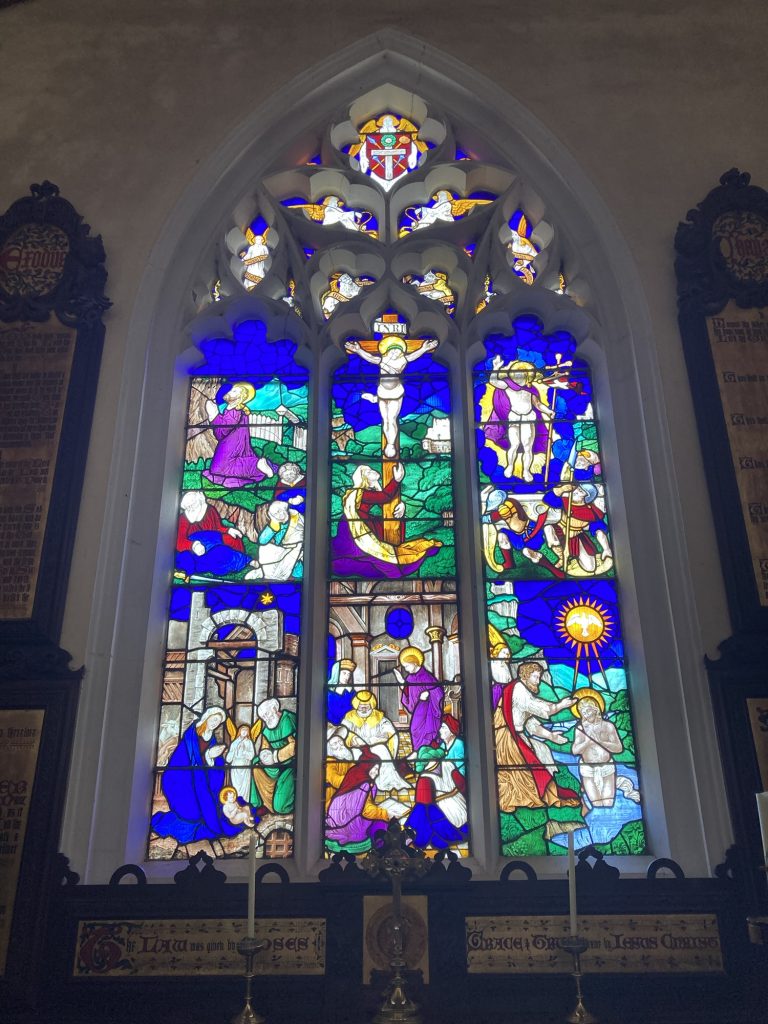
The stained glass is often a favourite aspect of many a church, for me. But here it’s a rather mixed bag. My favourite lights are the heraldic ones.
* being:
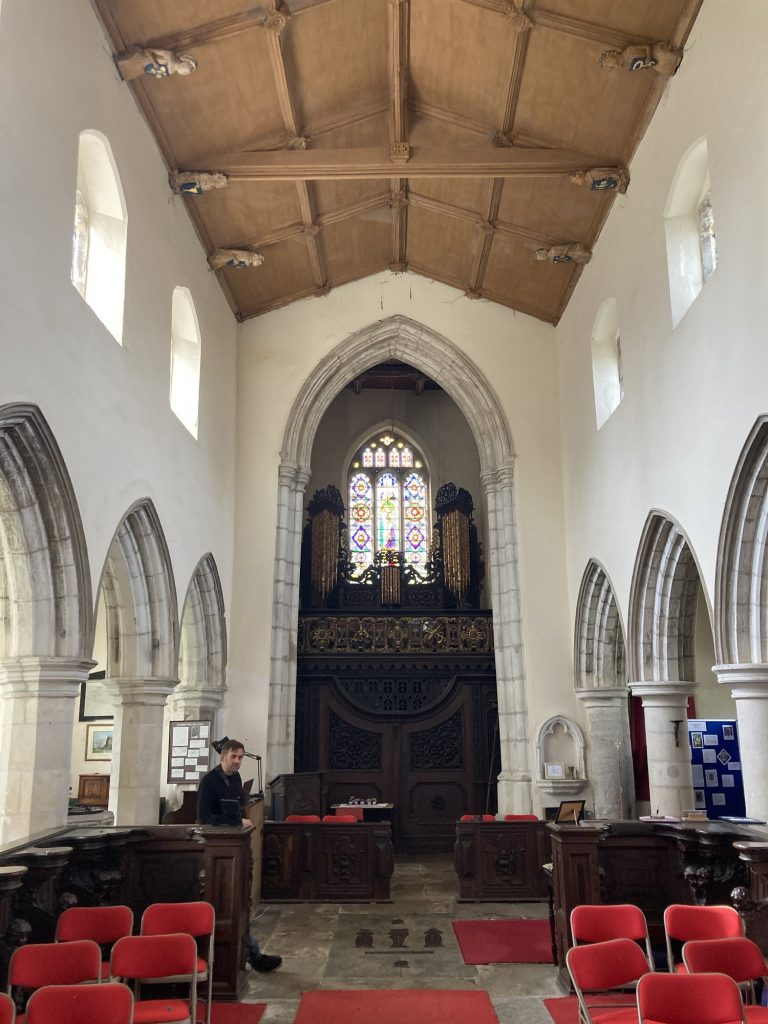
A chap named Christian Forshaw was playing saxophone in the church (that’s him, above), when I ‘rocked up’, as some folk say these days. I had a bit of a chat with him.
Turns out he not only practices there, but also puts on concerts for the church, as well. I think we’ll go and check one of them out…
I’ll also have to return to St John’s another time, partly so as to not interrupt any musical practicing, and partly in order to give this gem of a church a proper look over.
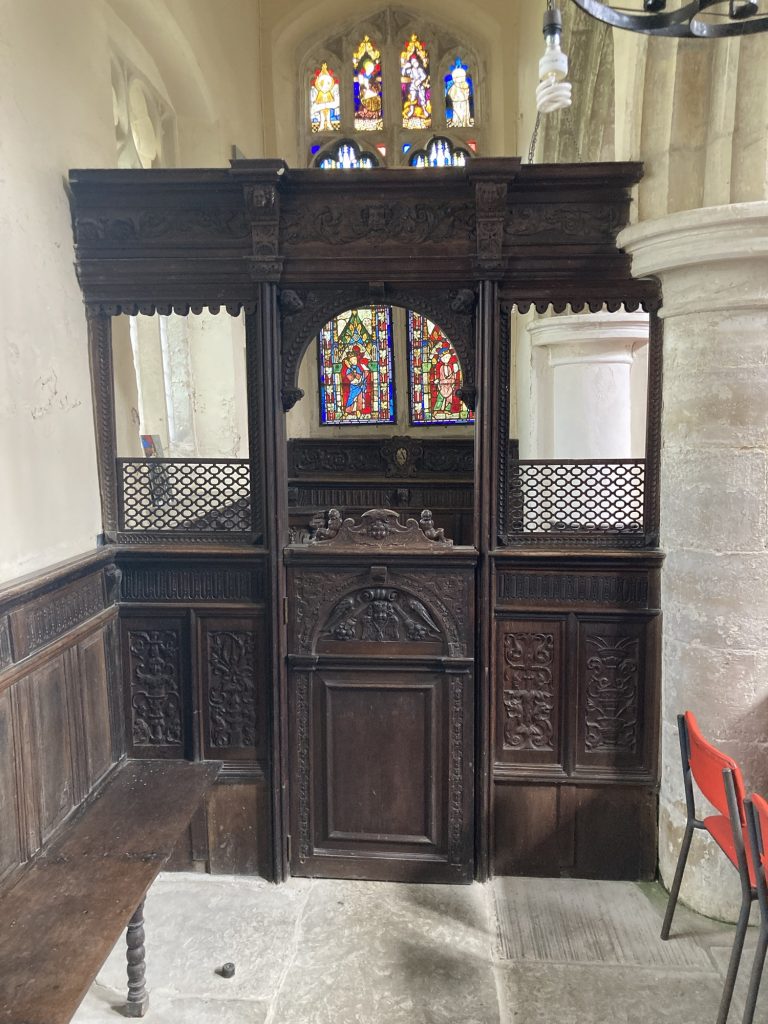
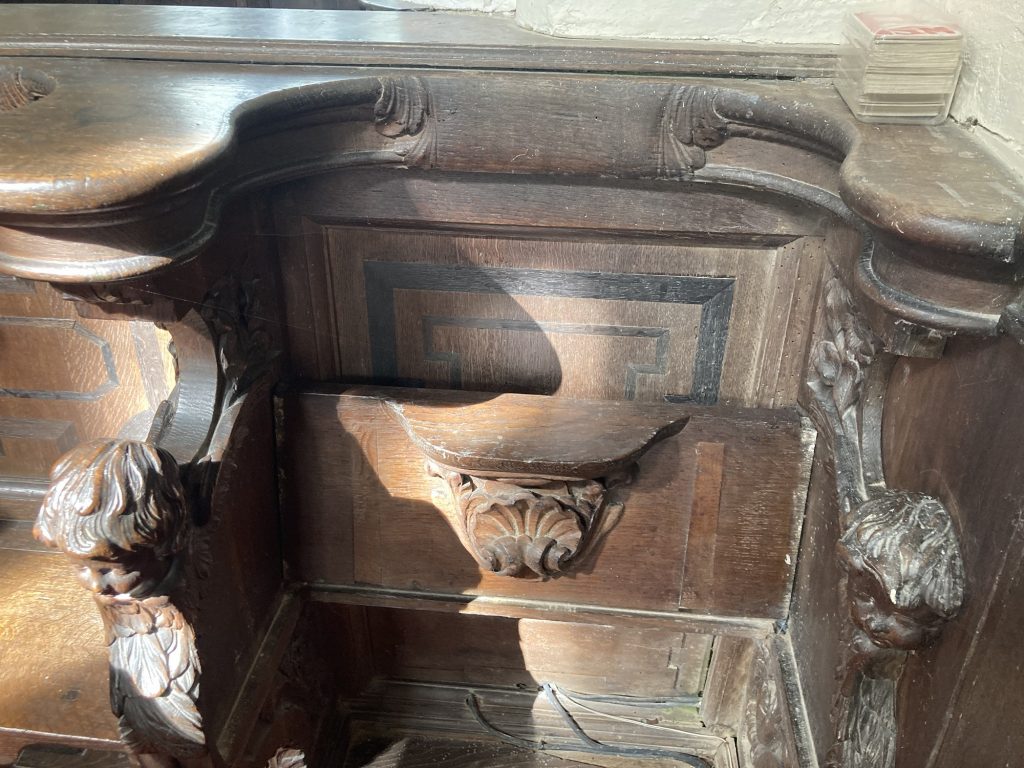
In the case of this church it might be the carved woodwork that steals the show?
And it’s off again, back out into the world…

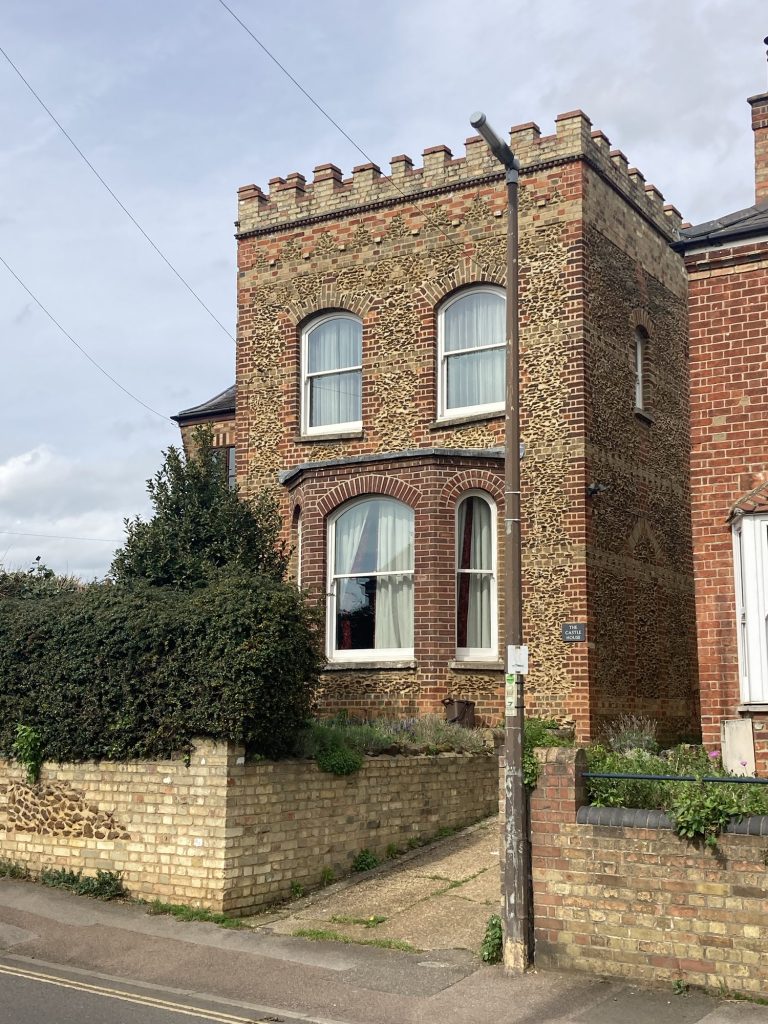
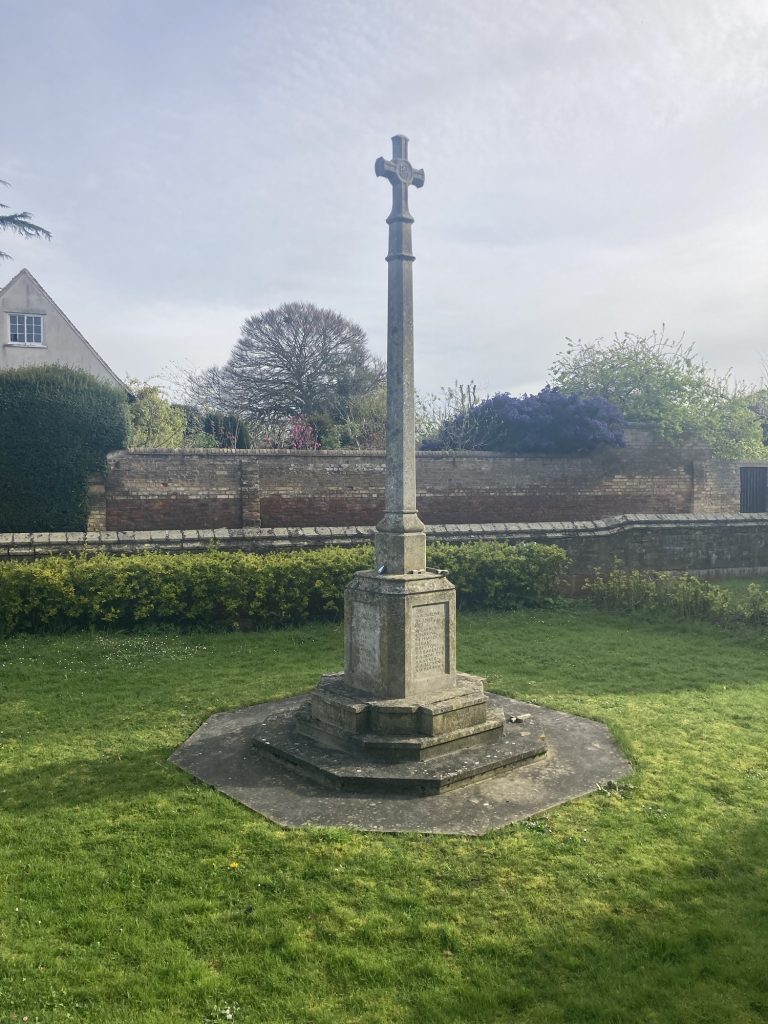
And as I headed homewards, before heading out again, for delivery shift #2, I passed the above, which is in (or just outside of) Potton. Another one for the ‘to do’ list!
Also saw this:
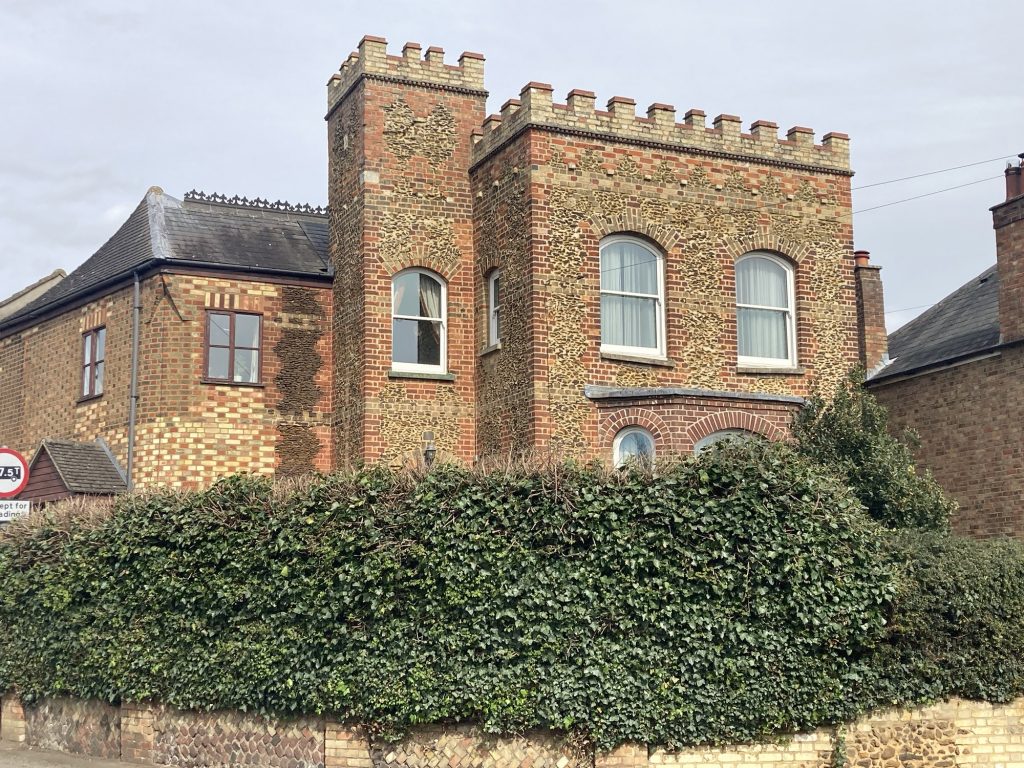
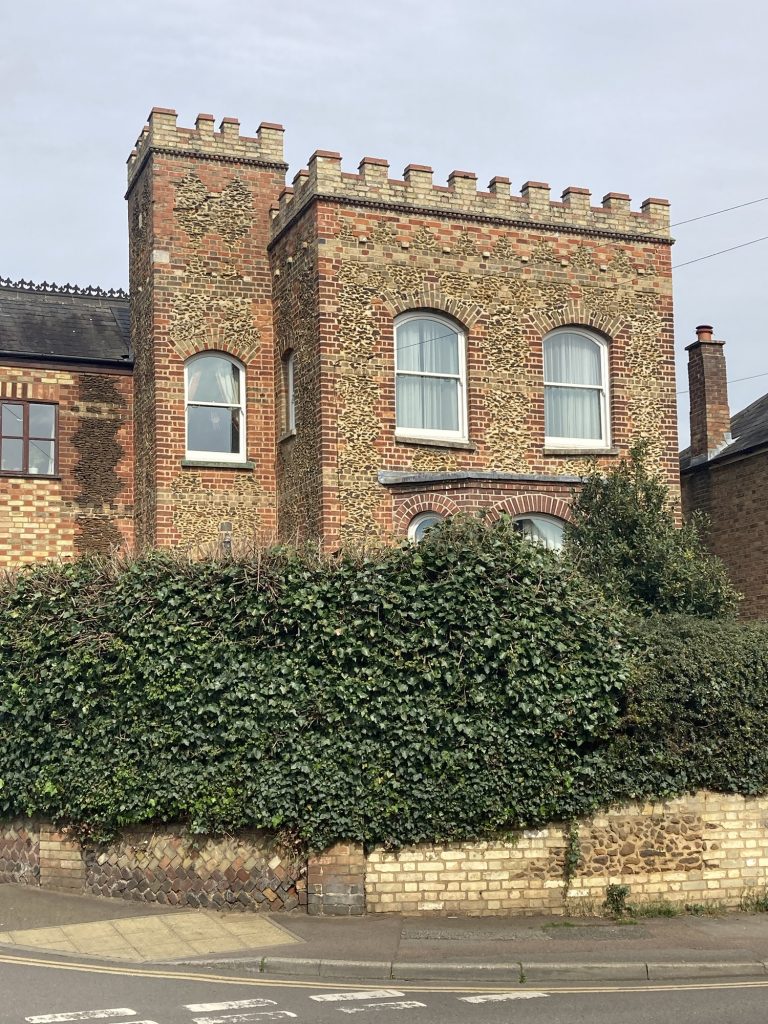
Perhaps rather unsurprisingly, it’s called ‘The Castle House’.