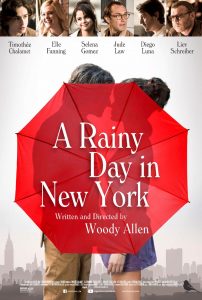
I watched A Rainy Day In New York on Amazon Prime, this evening. And I have to say I loved it. But then I’m something of a Woody freak. I have almost all of his movies on DVD. For me his purple patch began in the mid ’70s, and ran all the way through to the middle, possible even late ’80s.
In the decades since that time his films have been rather more patchy. Nevertheless, there have still been a good number that are superb. Even a pedestrian Woody Allen movie stands head and shoulders above most of the dreck served up by the modern film industry.
Timothée Chalamet as Gatsby Welles, in the titular rain.
I didn’t know this as I watched the film, but Amazon, who had a deal with Allen at the time he made this film, refused to release or promote it, leading to Alan suing them over the whole sorry mess. This is part of the fallout from the ongoing Alan versus Farrow farago. Incidentally, something going by that very name, Alan vs Farrow, is due out soon, on HBO.
Up until 2017, Woody had produced a film pretty much every year for a long, long time. With an output that prolific, it’s perhaps not surprising that numerous movies he’s made tread very similar paths. And this belongs in that camp. So, it’s relatively formulaic. But with a formula as winning as Woody has, that ain’t necessarily a bad thing.
Have you seen it? What did you think? And what, if any, is your, or are your, favourite Woody Allen movie/s? Teresa’s favourite, no contest, is Midnight in Paris. I, on the other hand, have far too many to narrow it down to just one. And given the breadth of his overall output, favourites change with moods.
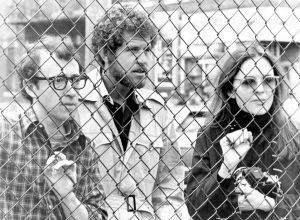
A holy trinity, to me: Allen, Roberts, Keaton, in their glorious prime.
The ones I go to most include Play It Again, Sam (a Woody Allen masterpiece not actually directed by the man himself!), the sublimely nostalgic Radio Days, A Midsummer Night’s Sex Comedy, an Allen-esque take on a Bergman film (Smiles of a Summer Night), the deliciously weird and technically marvellous Zelig, Broadway Danny Rose, Manhattan, Shadows and Fog (expressionism, and paranoia were never so beautiful or so funny), Bullets Over Broadway, and even the later Curse of the Jade Scorpion.
Rainy Day in New York isn’t really close to any of the latter that I mention, quality wise. It’s a pot-boiler, frankly, Allen style. And I can’t even really be bothered to say much about it, in terms of plot, setting, or actors. Picasso was a prolific artist, whose every touch is imbued with a kind of deft magic. For me Allen is a close if very different kind of cinematic equivalent.
So, if like me, you love Woody, you’ll probably enjoy this movie. Not his greatest, not by a long chalk. But solid Allen-esque fare, hearty, delicious and highly enjoyable.
Phew… What a film! Not for the faint-hearted. To say I really enjoyed this film doesn’t feel quite right. The story it depicts is, for the most part, appallingly awful.
And yet I did enjoy Come And See, as well as finding it a whole range of things: sometimes beautiful (the Belorussian landscapes are often almost magically so), sometimes funny, sometimes disturbing, traumatic even. There are moments of innocence, and even romance. Sometimes it veers towards the surreal. But the main theme is, as most who have heard of this film will doubtless know, the barbarism of war.
The story of the central character, Florya, played by Aleksei Kravchenko, demands a stupendous performance. He’s a funny looking kid, and does quite a lot of gurning. But with more than adequate reason. Sometimes. although admittedly not always, I like a film that really hits me hard, and really stays with. Come And See did both. It’s definitely got a very bloody axe to grind. But it never feels heavy-handed.
All things considered, and despite the surreal moments, it felt very real. Horribly and unflinchingly real. I’m someone who – it’s hard to know how to put it – kind of loves war, inasmuch as I agree with Thomas Hardy that it makes for ‘rattling good’ reading/watching, whilst peace-time history could be considered, perhaps, as rather dull in comparison. This film, however, serves as a tonic reminder of how ugly, twisted and senseless human conflict can actually be.
The main narrative arc of the film, telling the Florya’s story, is fantastic in itself. But the way it ends adds an incredibly powerful coda, which I won’t give away here. My response to it all is as much visceral and emotional as considered or thoughtful; I just think it’s absolutely brilliant. Both very beautiful and very ugly. And entirely superb.
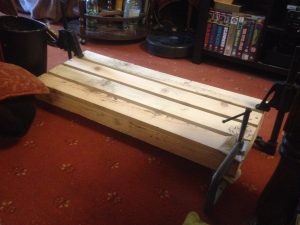
The pedal board, as she is at the time of posting.
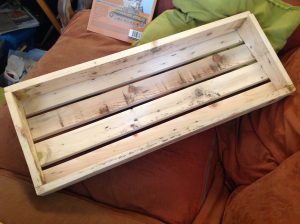
Well, here’s a post on my first ever electric guitar effects pedal board, which I’ve built over the last week or so.
There’s some irony, perhaps, in the fact that after years and years of playing guitar, often as much and sometimes more than drums, my primary instrument, I’m hardly playing at all right now. I built this in the fond and fervent hope I will resume at some future point.
I did get back into playing a bit when I bought the Ditto Looper. And this pedal board project is part of an attempt to make sure that when I do want to pick up an axe, the sounds I want will be readily available to me.
The Build
I used some scrap wood I got off Freecycle, type and origin unknown. I planed and sanded the very rough and heavily treated lumber down, to get it ship-shape. Far from perfect – rustic, I’d say – it was nevertheless a great improvement, and it revealed the wood to be, most likely, standard modern pine.
Glued ‘n’ screwed.
Filled in the screw-holes.
I actually went with the length, which on the pedal board has become width, the wood already was, and simply cut two lengths in twain, on the Triton table-saw, giving me the top four slats. The sides came from the same stock, but a differently dimensioned piece; this had to give two pedals worth of depth, and have sufficient height to give the board a slight rake or pitch, for a comfortable foot operation angle.
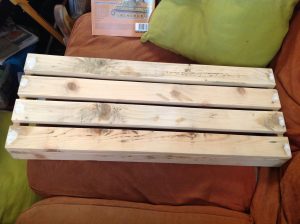
The front face is whole, whilst the back face is both raised off the floor, and has a gap ‘twixt it and the slat directly above it. Like the gaps between the slats, these two voids allow for the passage of leads. In this instance, chiefly for the power supply. The latter is a vexed subject I’ll need to return to and improve, as currently (boom-boom!) I only have a cheap-ish daisy-chain wall-wart.
The underside.
Having prepped the wood and dimensioned it, I assembled the base elements using hand cut dove-tails. Laid out by eye, and cut with my Japanese pull-saw, these were to my usual poor ill-fitting standard. But with home-made sawdust and glue filler packing out any irregularities, they did the job. The slats were fixed, belt and braces style, with both glue and screws.
I used my Stanley Handyman smoothing plane to get the faces of the slats nearest the base of the board flat and true, which was very satisfying. And then, having thought about a natural wood finish, decided against it in favour of paint, on account of how rough the lumber is. So I filled in the countersink holes and bigger blemishes with wood filler.
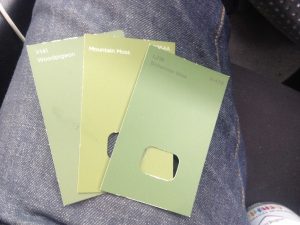
Valspar colour swatches.
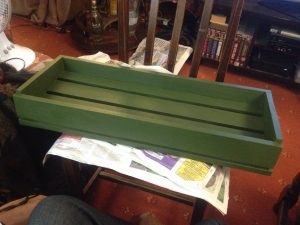
On our way home from a day out with the Mrs I bought a few Valspar sample pots from B&Q, all green. I opted for Bohemian Bliss, a name and a colour I love! This is in fact much darker than the sample swatches in my photo suggest. Four coats of this, and then four coats of gloss varnish, with a little sanding. A nice old-fashioned look for me.
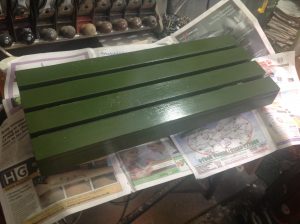
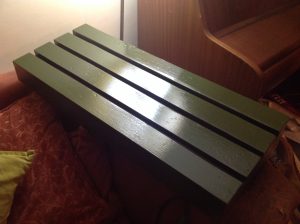
Four coats of Boho-Bliss!
Building up layers of gloss varnish.
Four coats, for a nice rich finish.
Then it came time to put the Velcro on. With that on, soft-side/loops on the board, hooks on’t pedals, some of the pedals themselves needed a little attention. I had to remove a number of rubber feet, clean up with isopropyl alcohol, and make a base-plate for my wah-pedal. What a lot of work! I’ll have to plug a guitar and an amp in, and get playing!
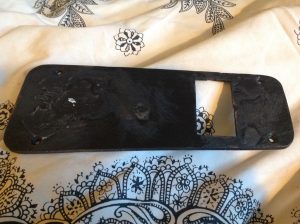
Making a base-plate for my Cry-Baby Wah.
The only suitable piece of wood required much filling/sanding!
Okay, so having made and painted the base-plate for the wah (necessitated by the removal of the rubber feet and the need to stop the screw-heads and battery cover from preventing Velcro adhesion), I tried connecting all the pedals. I discovered that laid out as I have them – bottom row running right to left, from the Wah, top row running left to right from LPB1 right to the Ditto – the patch cables I have aren’t going to allow me to finish. I need a bunch of longer ones.
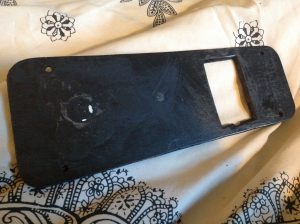
The wah base-plate in situ, after much filling sanding and painting.
I could change the pedal layout. And I may well do so once I start playing with it. But I’d rather buy in some more longer cables – I’ll go with the flat profile type, I like ’em! – for now. I’ve also discovered that my top slat-gaps are just big enough for all the adaptor heads, so long as they point directly downward. So far I’m working round this by positioning the pedals pretty precisely. This low tolerance may cause issues… we shall see!?
Rear view: gaps at bottom and top of rear panel too narrow?
The top gap at the back, however, is way too narrow for the cable ends to pass through. So I’ll need to either notch it in places, or widen the whole thing. Or I could ‘hard’ wire some leads in situ? In fact I have a number of ideas on how to solve this. Wiring the pedals also makes me want to install some stuff under the board to hold the wire-spaghetti neatly in place, and prevent it snagging on stuff.
All told, I’m pretty chuffed. I wound up making this board bigger than I’d thought I might. I drew two cardboard mock-ups, a larger (or rather wider) one, and a smaller one (probably medium, in truth). In the end this one is actually a tad larger than the bigger of my two draft designs. So there’s room for my pedal collection to change and grow.
Nearly ready to be ‘used in anger’, as they say.
The footnote to this project, with which, I must confess, I’m very pleased, is the power-supply. I’d like to upgrade to a proper solution; fully isolated, with every pedal getting its proper allocation of power, and probably with a built in female kettle-lead type plug outlet, for the whole board. But that’s for the future…
We live in a house in what sometimes feels like Artex capital of the world. Loads of the houses we looked at in March (plus places friends or acquaintances live or have lived), when we bought our current home, are more than liberally coated with this dreadful stuff. In our home it was on almost all flat surfaces, and in numerous places in a really thick heavily textured impasto. I’m only surprised and relieved they didn’t Artex the floors as well!
Fortunately the guy we bought our house off had already done the walls in the downstairs lounge/diner and kitchen. That left us with the bathroom (downstairs, off the kitchen!), almost every single room/surface upstairs, plus all the ceilings, including the sloped under-stairs area, downstairs.
I read about X-Tex online, having googled ‘how remove artex’. What I found I ncluded some glowing reviews of the product, such as some that appear on Amazon’s UK website. So I opted to try it. In the end I used it on the walls in the bathroom, upstairs-landing, and second bedroom, abandoning a partial attempt at the master bedroom ceiling after a messy neck-crick-inducing hour of hell. But it was so messy, expensive, and such incrediblyhard work, that work stalled at that point. So we still have quite a bit of hideous Artex to deal with.
Three years have elapsed since I first used it;I’m posting this in 2020, having originally used X-Tex back in 2016-2017. Just recently I’ve considered buying more, and trying again. We would dearly love to be rid of what remains, the very worst of which is in the stair-well area (literally inches thick!). But recalling the horrors of working with it, and then finding it ‘currently unavailable’ when I searched online (Amazon, for example) has saved me from that fate.
In theory it’s a good product. And perhaps on very thin layers of Artex it’s viable? This said, the thinnest Artex-coated area I worked on with X-Tex, our downstairs toilet/bathroom, was still very hard work. And the results were very far from perfect. But I think that was partly because that was the last area I did, and by that point I was exhausted, and heartily sick of both Artex and X-Tex.
Why then would I even momentarily consider trying again? Well, for the same reason I originally went this route, economics; expensive as X-Tex is (or was?) it’s still cheaper than getting a plasterer in. If one opts to plaster over the godawful abomination that is Artex, and I’m thinking here of the areas in our home where Artex was very thickly applied, you’re actually looking at losing appreciable space! That’s why removal of the Satanic substance seemed appealing; gain a little room, don’t lose it!
The Artex under our stairs was on plasterboard sheets, fixed to the underside of the staircase. Having reached the end of my tether with both Artex an X-Tex, I ended up opting to simply tear it all down. Our stairs have remained in an open/gutted state ever since, as I continue to ponder how best to proceed. Anyway, having ranted long enough… in conclusion: this X-Tex stuff does kind of work, inasmuch as it does soften Artex. But in our experience the product was A) too expensive, and B) given the thick impasto Artexing perpetrated on our home, incredibly hard work, and horribly messy.
So, better than one (or no stars). But I couldn’t honestly recommend it. Unless, perhaps, you’re a DIY-sado-masochist? I suppose I’ll have to learn to skim plaster myself?
For the most part I prefer to post on stuff I love, and keep things positive. That said, I’ll not shy away from posting critical stuff, if I feel like it. Teresa just watched The Fountain on Amazon Prime, meaning I was more or less forced to watch it. Anyhoo… so, here goes…
The Fountain
Eugh… just dreadful.
Hugh Jackman and Rachel Weisz embody the vacuity and self-centredness of modern western humanity. And Aranofsky weaves a web of portentousness around them based on aesthetics, emotion and pseudo-mysticism, all of which has the intellectual integrity of a micron thin wafer of, well… nothingness.
Like so much contemporary culture, this aspires and doubtless believes itself to be deep, but winds up being all about surfaces. The two central characters – let’s just call them Izzy and Tom, to keep the overblown pseudo-complexity at bay – are petulantly flighty, and I don’t believe in either of them, for even a nanosecond.
There’s really only one character, Jackman’s. Everyone else is just an adjunct to his egotism. And all the settings are triumphs of form over anything and everything else. 96 minutes of overblown set-dressing!*
The only levels on which this film might conceivably work are, one, aesthetically – on the surface level (and to me it’s all surface) – and two, poetically or metaphorically. It fails on the first as I don’t like the aesthetics, as impressively produced as they may be. As for the second? For me, ideas such as are obviously signposted here – life and death, love and loss, etc – need to be couched in terms I can relate to, or that engage me. And in these respects this film fails totally and utterly, personally speaking.
I loathe the narcissistically self-involved ‘characters’, Tom in particular; I’m not a fan of pseudo-religious cod-mysticism. I don’t even like the much vaunted music, which attempts to give the onscreen action a gravitas it never attains. Weisz is really just a cipher, whilst Jackman’s Tom is a bizarre Richard Madeley lookalike himbo, whose solipsistic ‘love’ is nowt more than a pretext for throwing tantrums.
Just as I was pleased to see the ‘characters’ in Ridley Scott’s similarly awful Prometheus knocked off, it was a relief when Tommy, having indulged in yogic flight, walking on water (groan), and finally gorged on the white sap of the father tree – truly symbolism to gag on – got composted.
Awful drivel, perfectly suited to our shallow self-regarding times.
*If this film were to be nominated for any awards, it ought to be ‘interior design’. Mind you, I wouldn’t hire Aranofsky or any of his hirelings to decorate our home.
Count Arthur Strong, on his superb BBC R4 Show (never liked the TV version), talked about the ancient Chinese art of ‘Flung Shoe’. Or, more specifically, ‘bad flung shoe’.
I’m always put in mind of this when I see drum kits set up in a room facing the wall. Been there and done that myself, naturally. But I’m convinced that it’s not a good thing.
I include a few pics randomly found via Google. Some up against just one wall, some in a corner, and one crammed in to a blind alley of three walls (big kit/small room, poss unavoidable?).
Just as I find living in the country and under open skies with access to or views onto a garden liberating, inspiring and so on, I find staring at walls cloying.
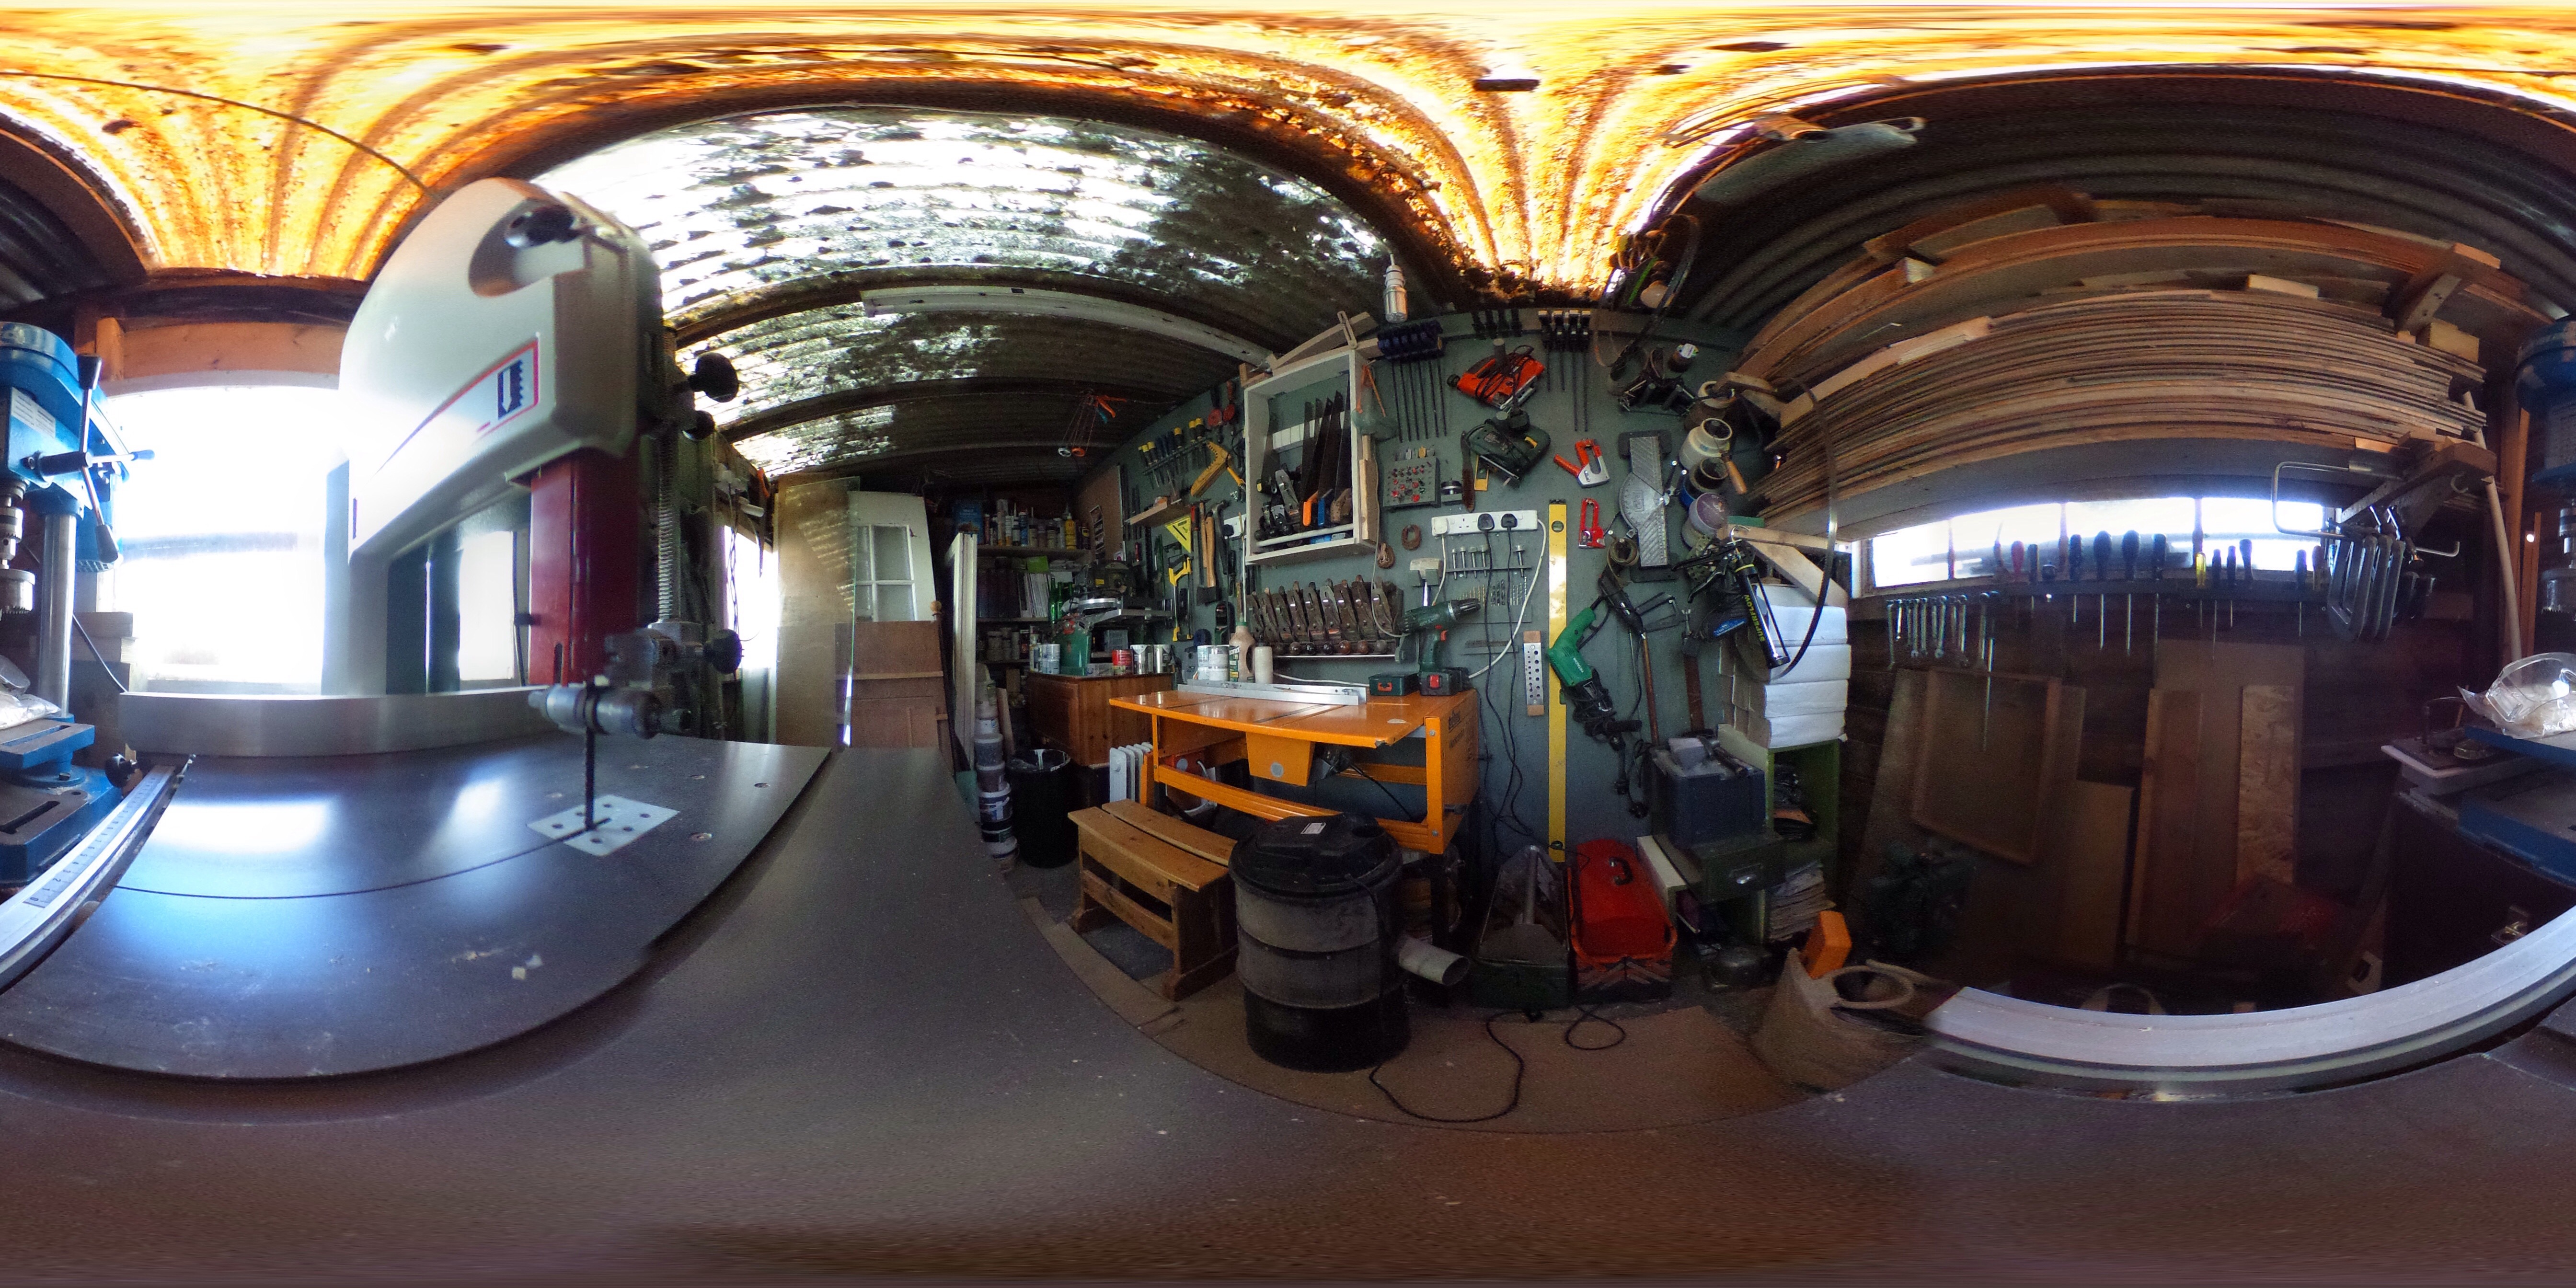
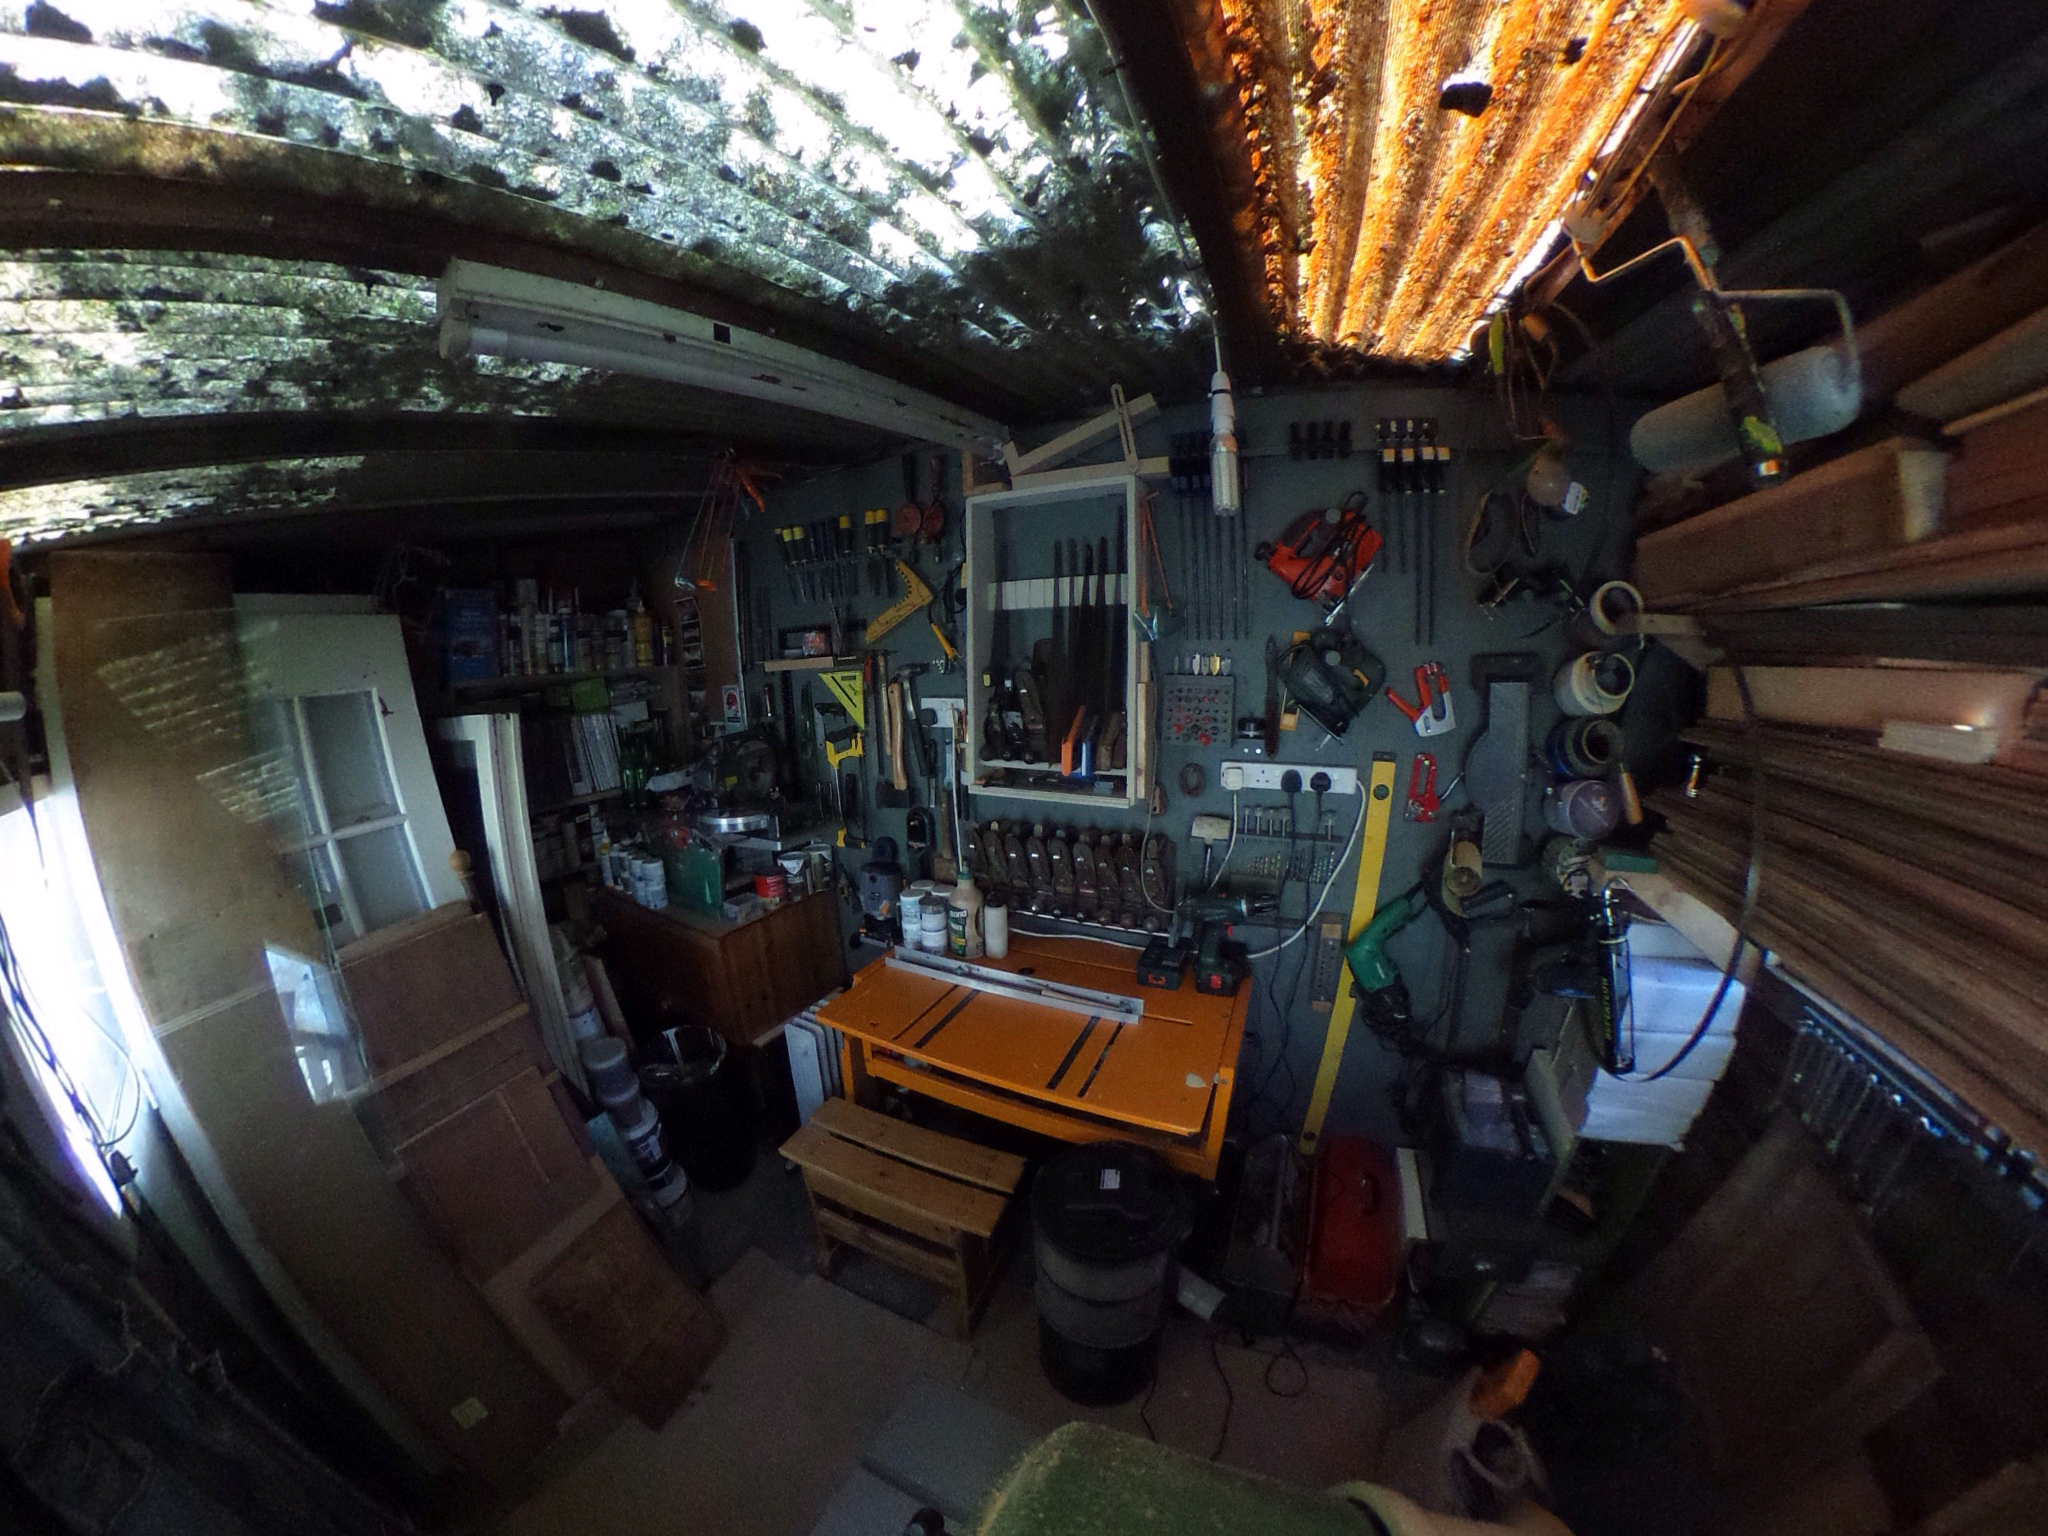
As the world around us grinds to a halt, amidst Covid-19 craziness, I’m enjoying spendibg time on the man-cave/shed that is ‘Ye Olde Workshoppe’.
The fairly recent acquisition of a Triton Mk3 workbench – with built in circular table saw and the doings for mounting a router – has entailed some serious rearranging.
I destroyed an old chest/cupboard that I inherited from the previous owner, which up until fairly recently had been home to a lot of power tools and assorted bric-a-brac. It was horrid, lacked a back (and consequently became a dust/debris trap), and old and knackered.
I’ve still got all the timber from dismantling it. I intend to use the Triton table-saw to cut it all up for kindling. The contents are now either up on the tool wall, which I’ve been reworking, temporarily of no fixed abode, or migrated to another smaller chest of drawers.
Viewed from the bandsaw.
We’ve accumulated several doors: one purportedly to replace our current front door, another for the greenhouse, and two or three others intended for outbuildings. The largest of these I’ve now moved out of the workshop, to free up space. The others have been moved over to where our still as yet unused kiln is secreted.
I’ve moved the bandsaw over to where the doors were previously. And the Triton is now kind of between where the bandsaw was, and the vacated spot where the dismantled chest was. I’ve relocated the (also as yet unused!) Kity planer/thicknesser to a position atop two storage chests, on the left of the room, by the bookshelves (the latter containing more paints and other sundries than books). This has freed up the aforementioned smaller chest, which I’ve moved over to the area under the main window, that looks down the garden.
I might put the drill-press on this unit. I did think about having the planer/thicknesser there, but as I recently located a load of tool storage racks along the bottom of the window, and they’d be inaccessible behind the pretty chunky Kity unit, I decided not to. The view from the window is, for the most part, blocked by the timber storage racks I put up, and all the timber I’ve accumulated.
There’s still an awful lot of stuff without a proper home. But it’s a lot better than it was, and even a little more spacious. even though it’s now late March, I’ve found the concrete floor is like a huge slab of ice. Working in the shed for extended periods has been numbing/swelling my feet. So I put down some cardboard, as an insulating carpet type layer, and brought in a couple of heaters.
Viewed from the ‘kiln’ end.
I also painted some areas of the back/tool-wall, which hadn’t been painted before (having been hidden behind stuff), the internal side of the door, and my DIY window frames. The roof needs replacing altogether. And I’ve a mind to clad the internal framework, and paint the resulting inner walls in a white, or off-white. If I fill the cavities with insulating materials, and replace some rotten/broken boards, along with a new roof, it might even be possible to keep it warm!
Rearranging the larger ‘static’ power-tools and some of the furniture, and losing the ugly old chest, also lead to rearranging and further developing tool storage on the tool-wall and elsewhere. I always seem to rather enjoy working on this particular aspect of the workshop. The idea is, however, that I’ll soon stop with the rearranging, etc, and actually start using the workshop for more creative things!
I’ve been taking a few pics as I go along with the funky 360° camera I have. I’ll post some here in due course, hopefully. But I need to work out how to embed them as scrollable 360° images. Otherwise it’ll just be screenshots of them flattened out…
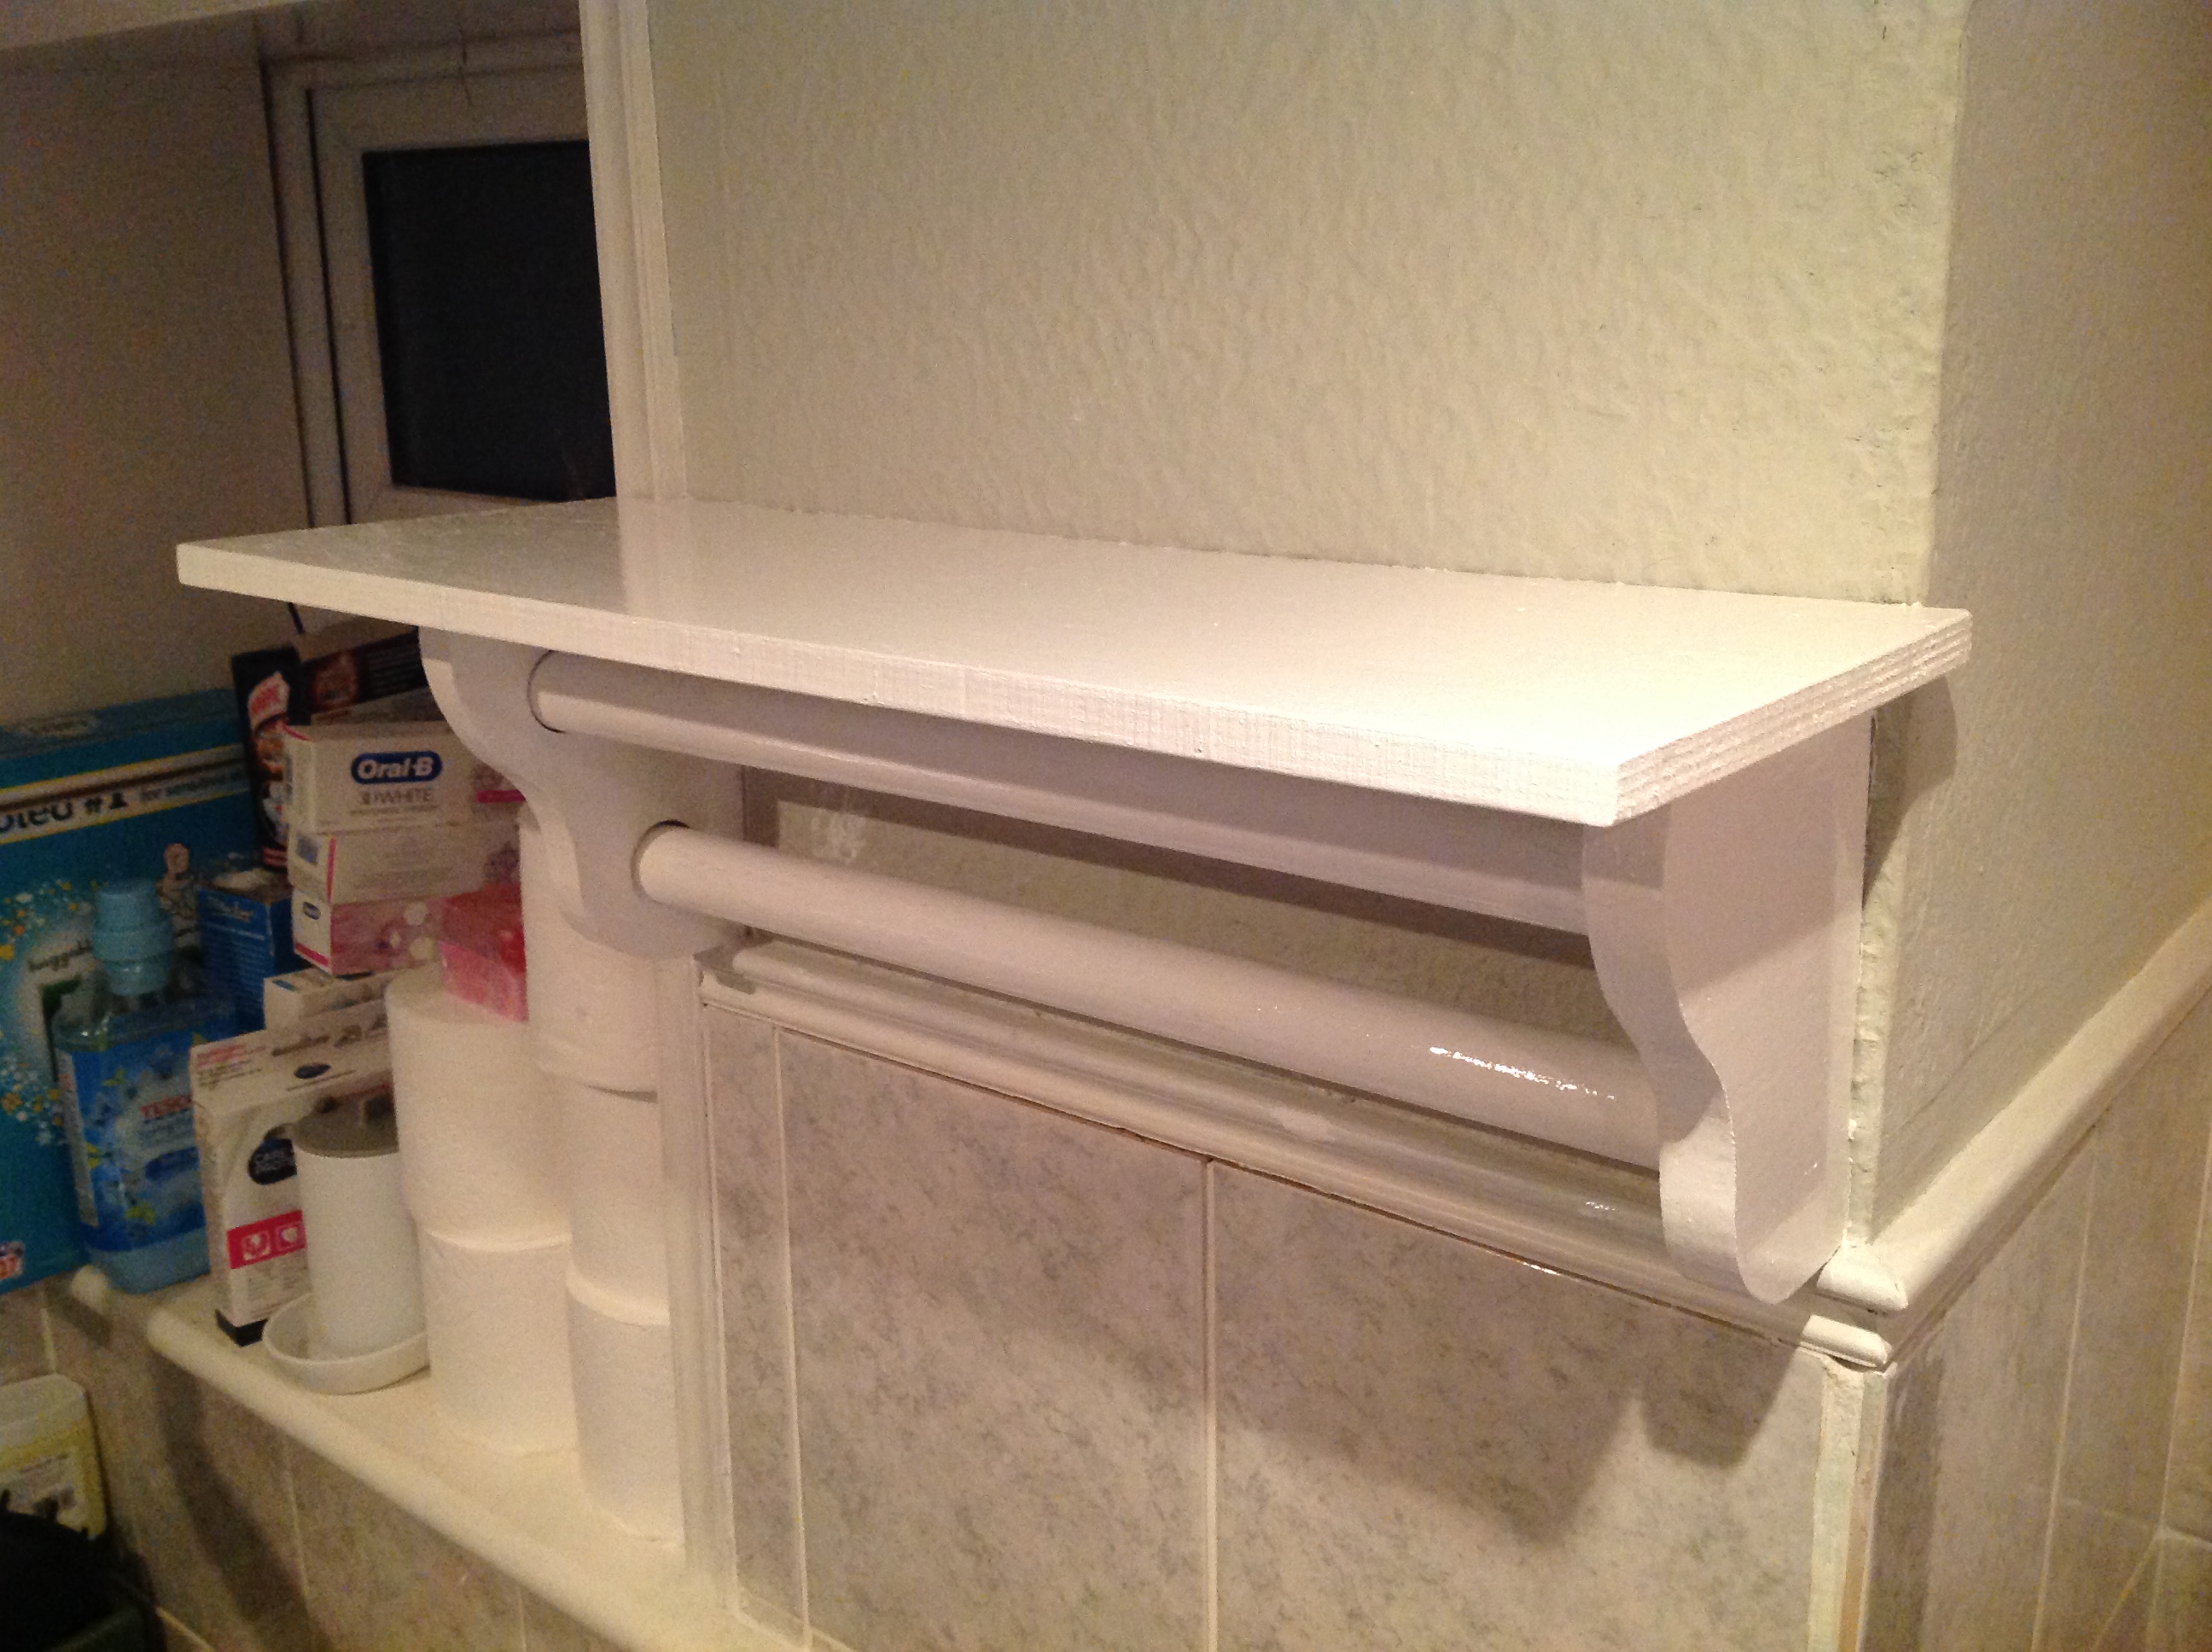
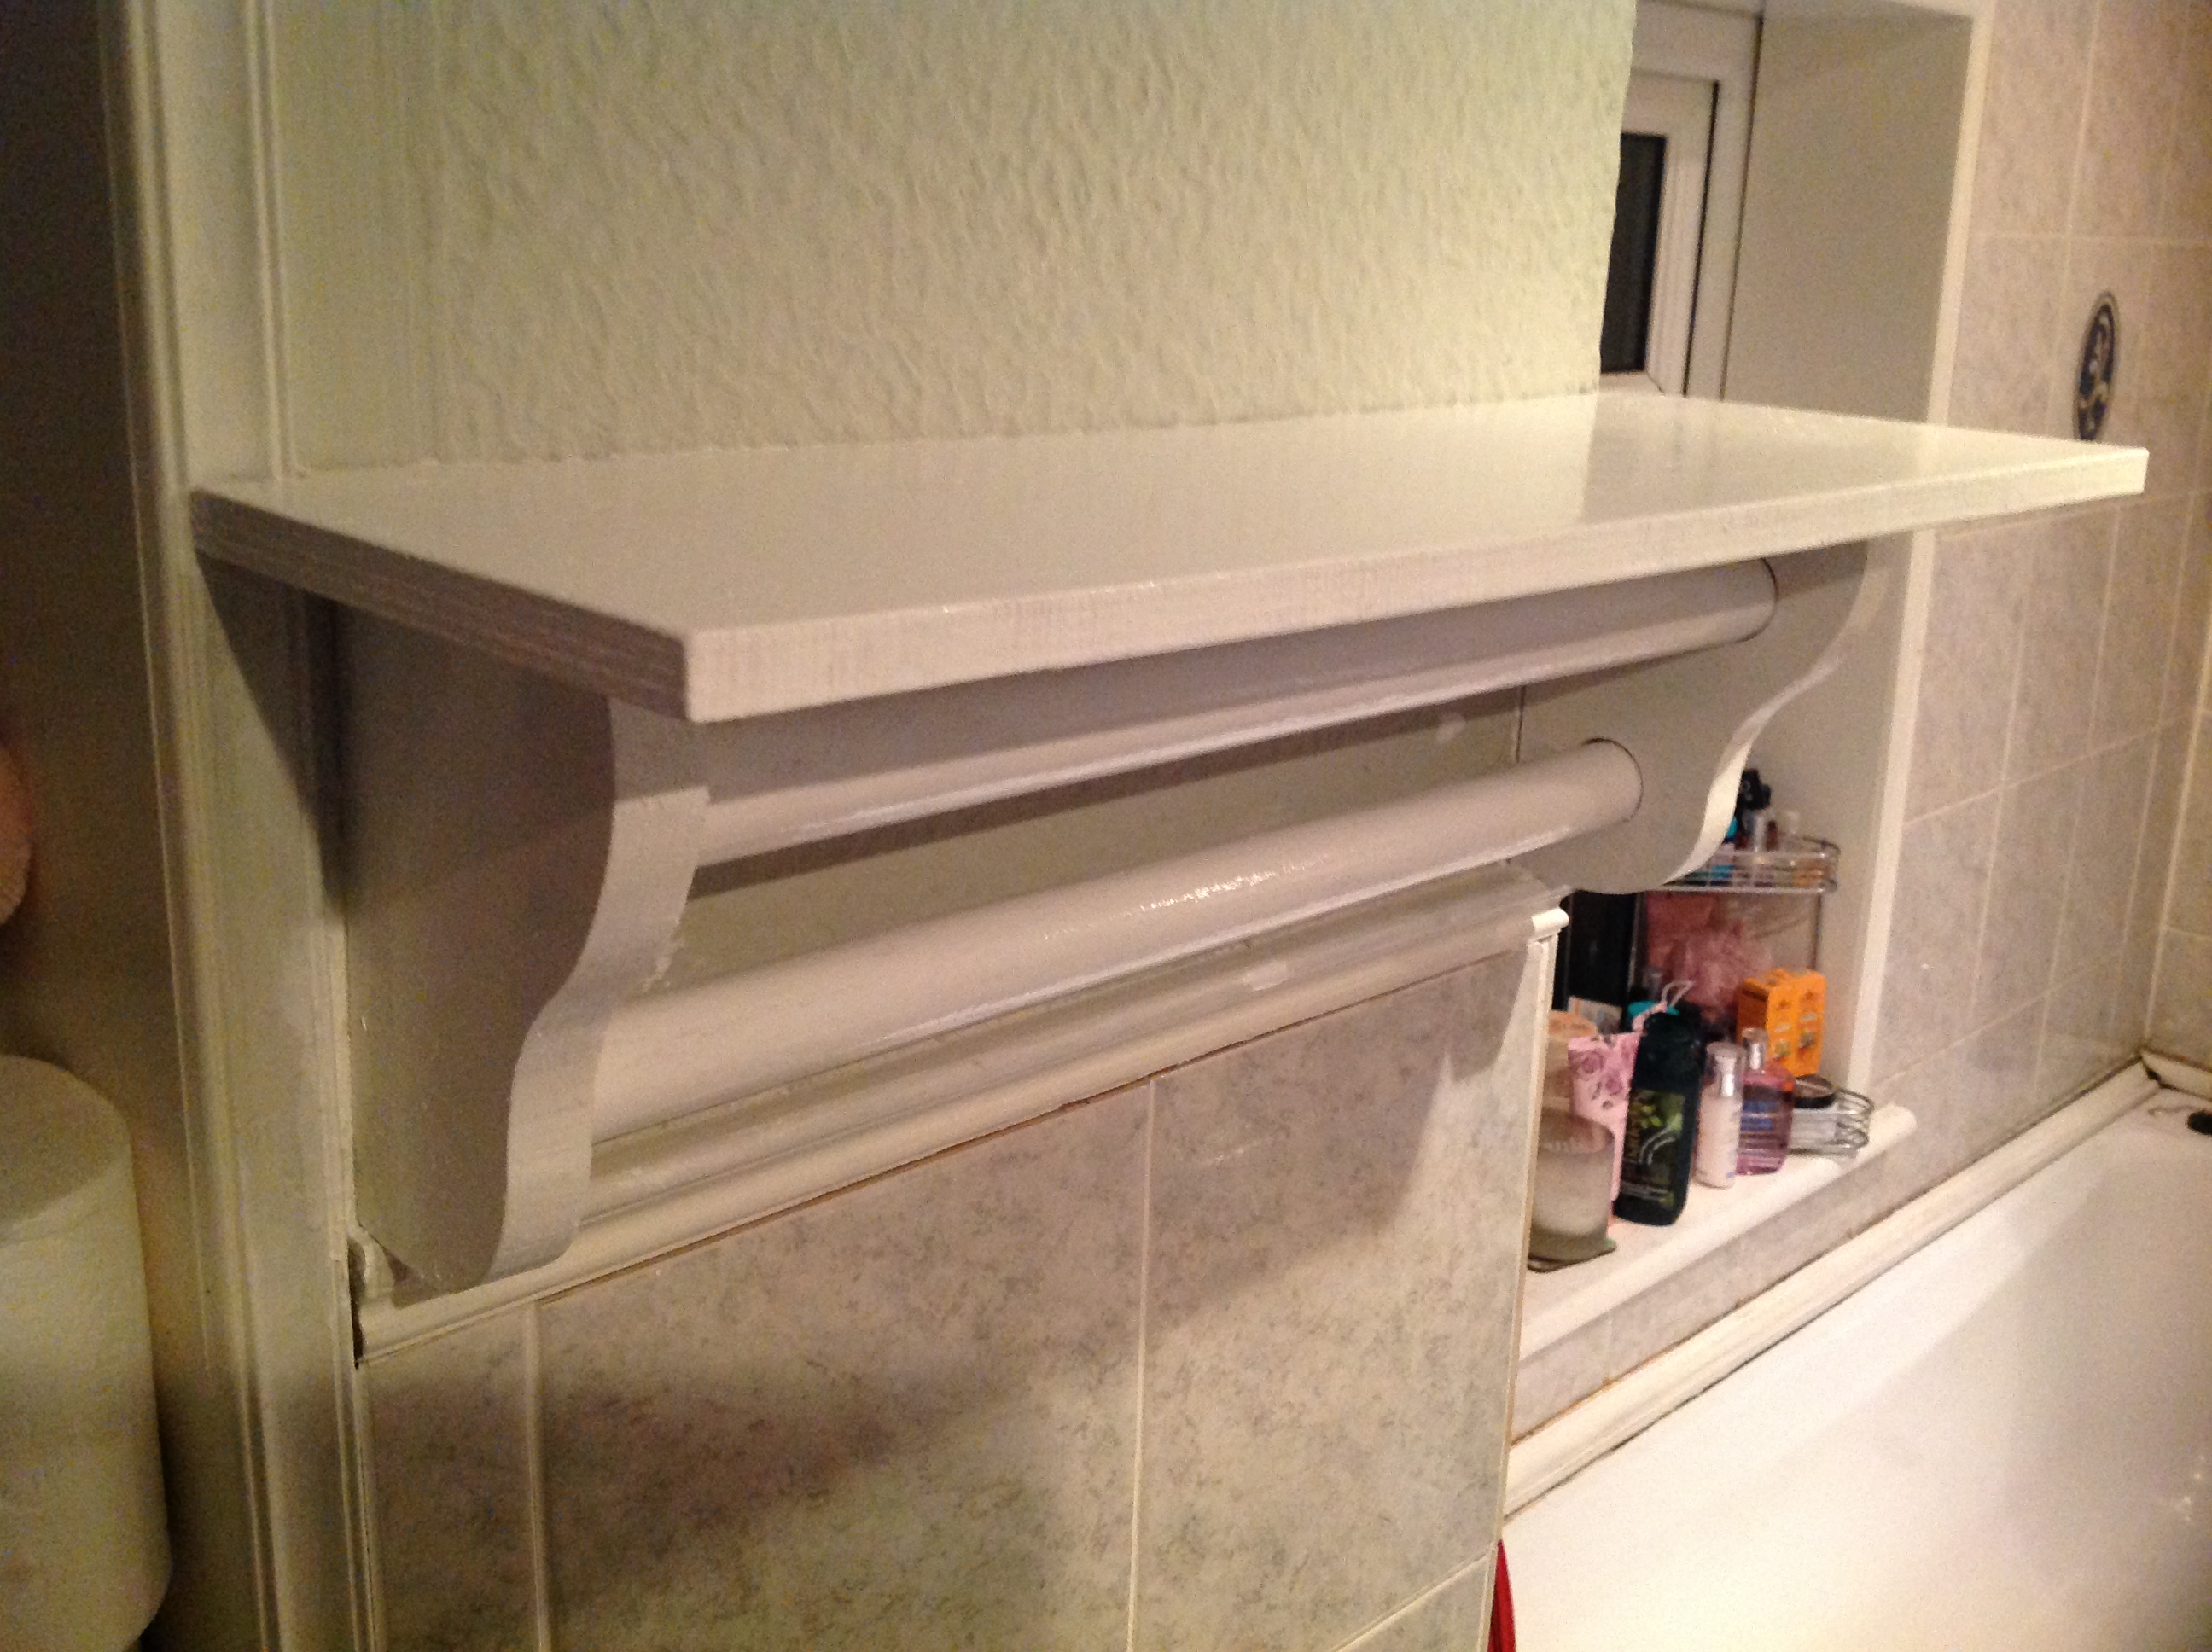
Teresa asked me to make a towel rail or shelf, for the bathroom. So I knocked this together. I’m definitely getting better and quicker at stuff like this. Plus my newly reorganised workshop is way more ergonomic and productive.
New bathroom shelf…
Ar the time of posting the second coat of paint is still drying. I may go over the upper shelf edging, as bandsaw striations are still visible. I may even route a little ogee type edge… hmm!?
… with towel rails.
Even though I masked around the shelves, I need to go back and touch up some of the surrounding areas. But, all told, I’m very happy with this. And I knocked it out double quick, which was satisfying.
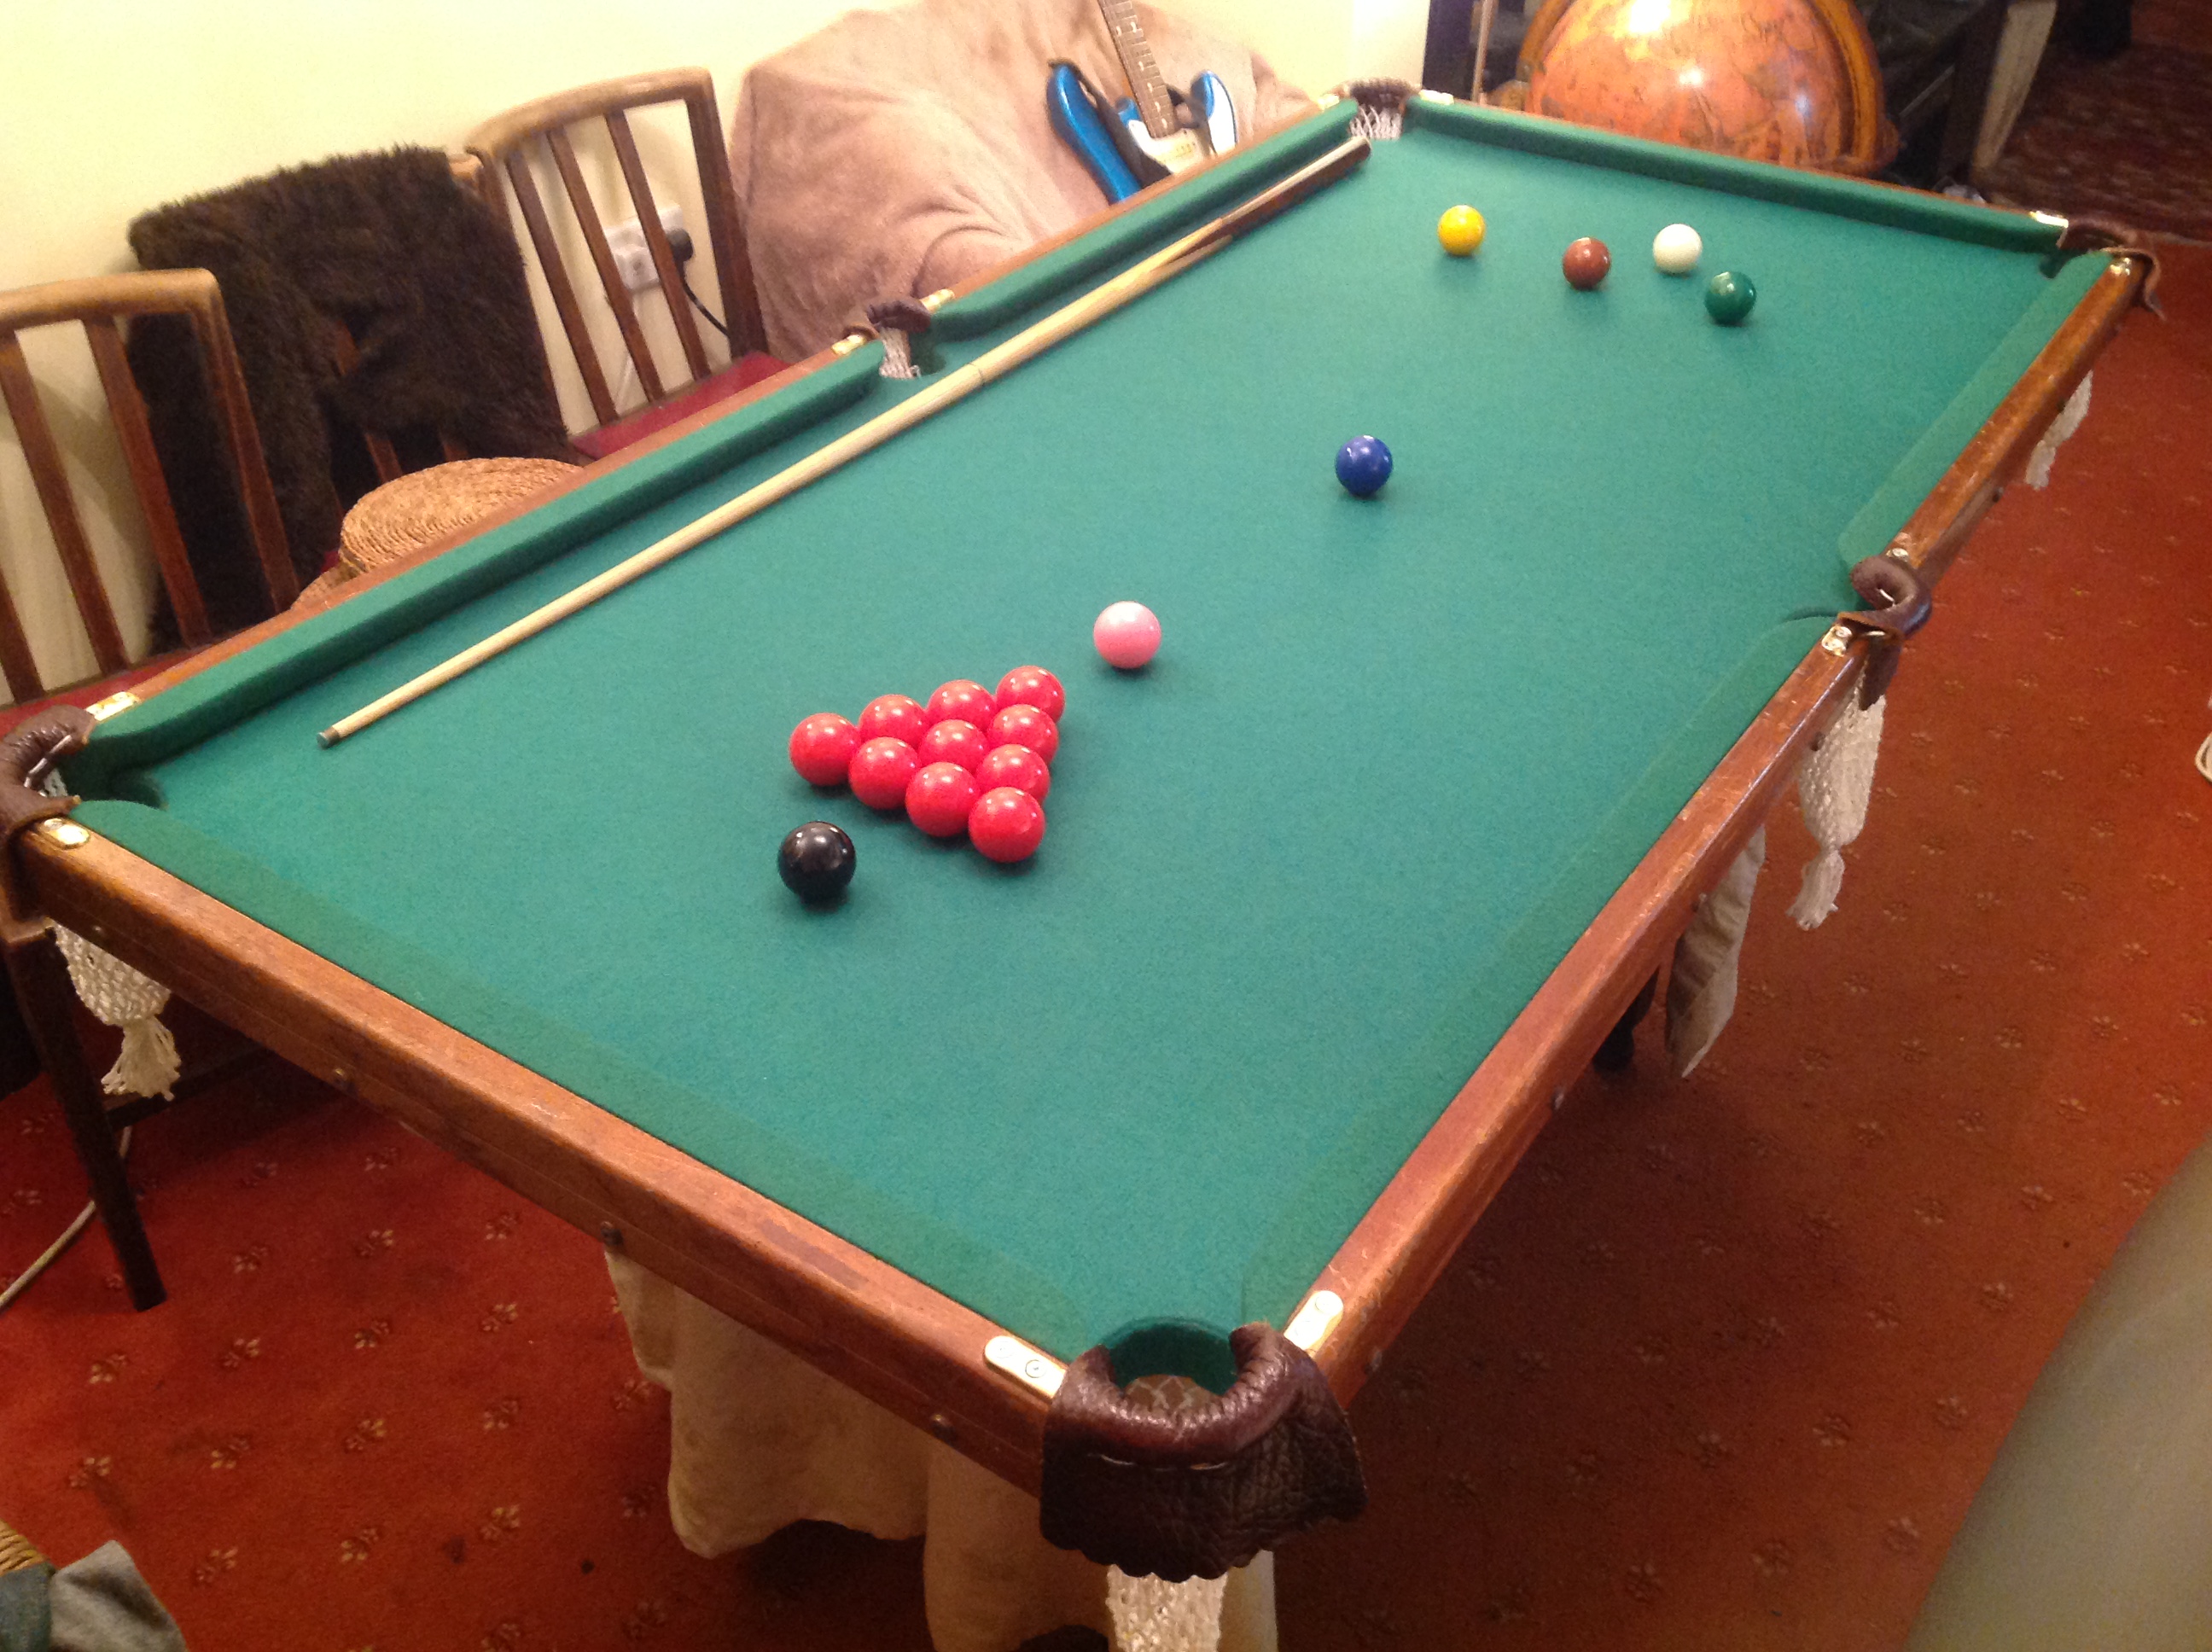
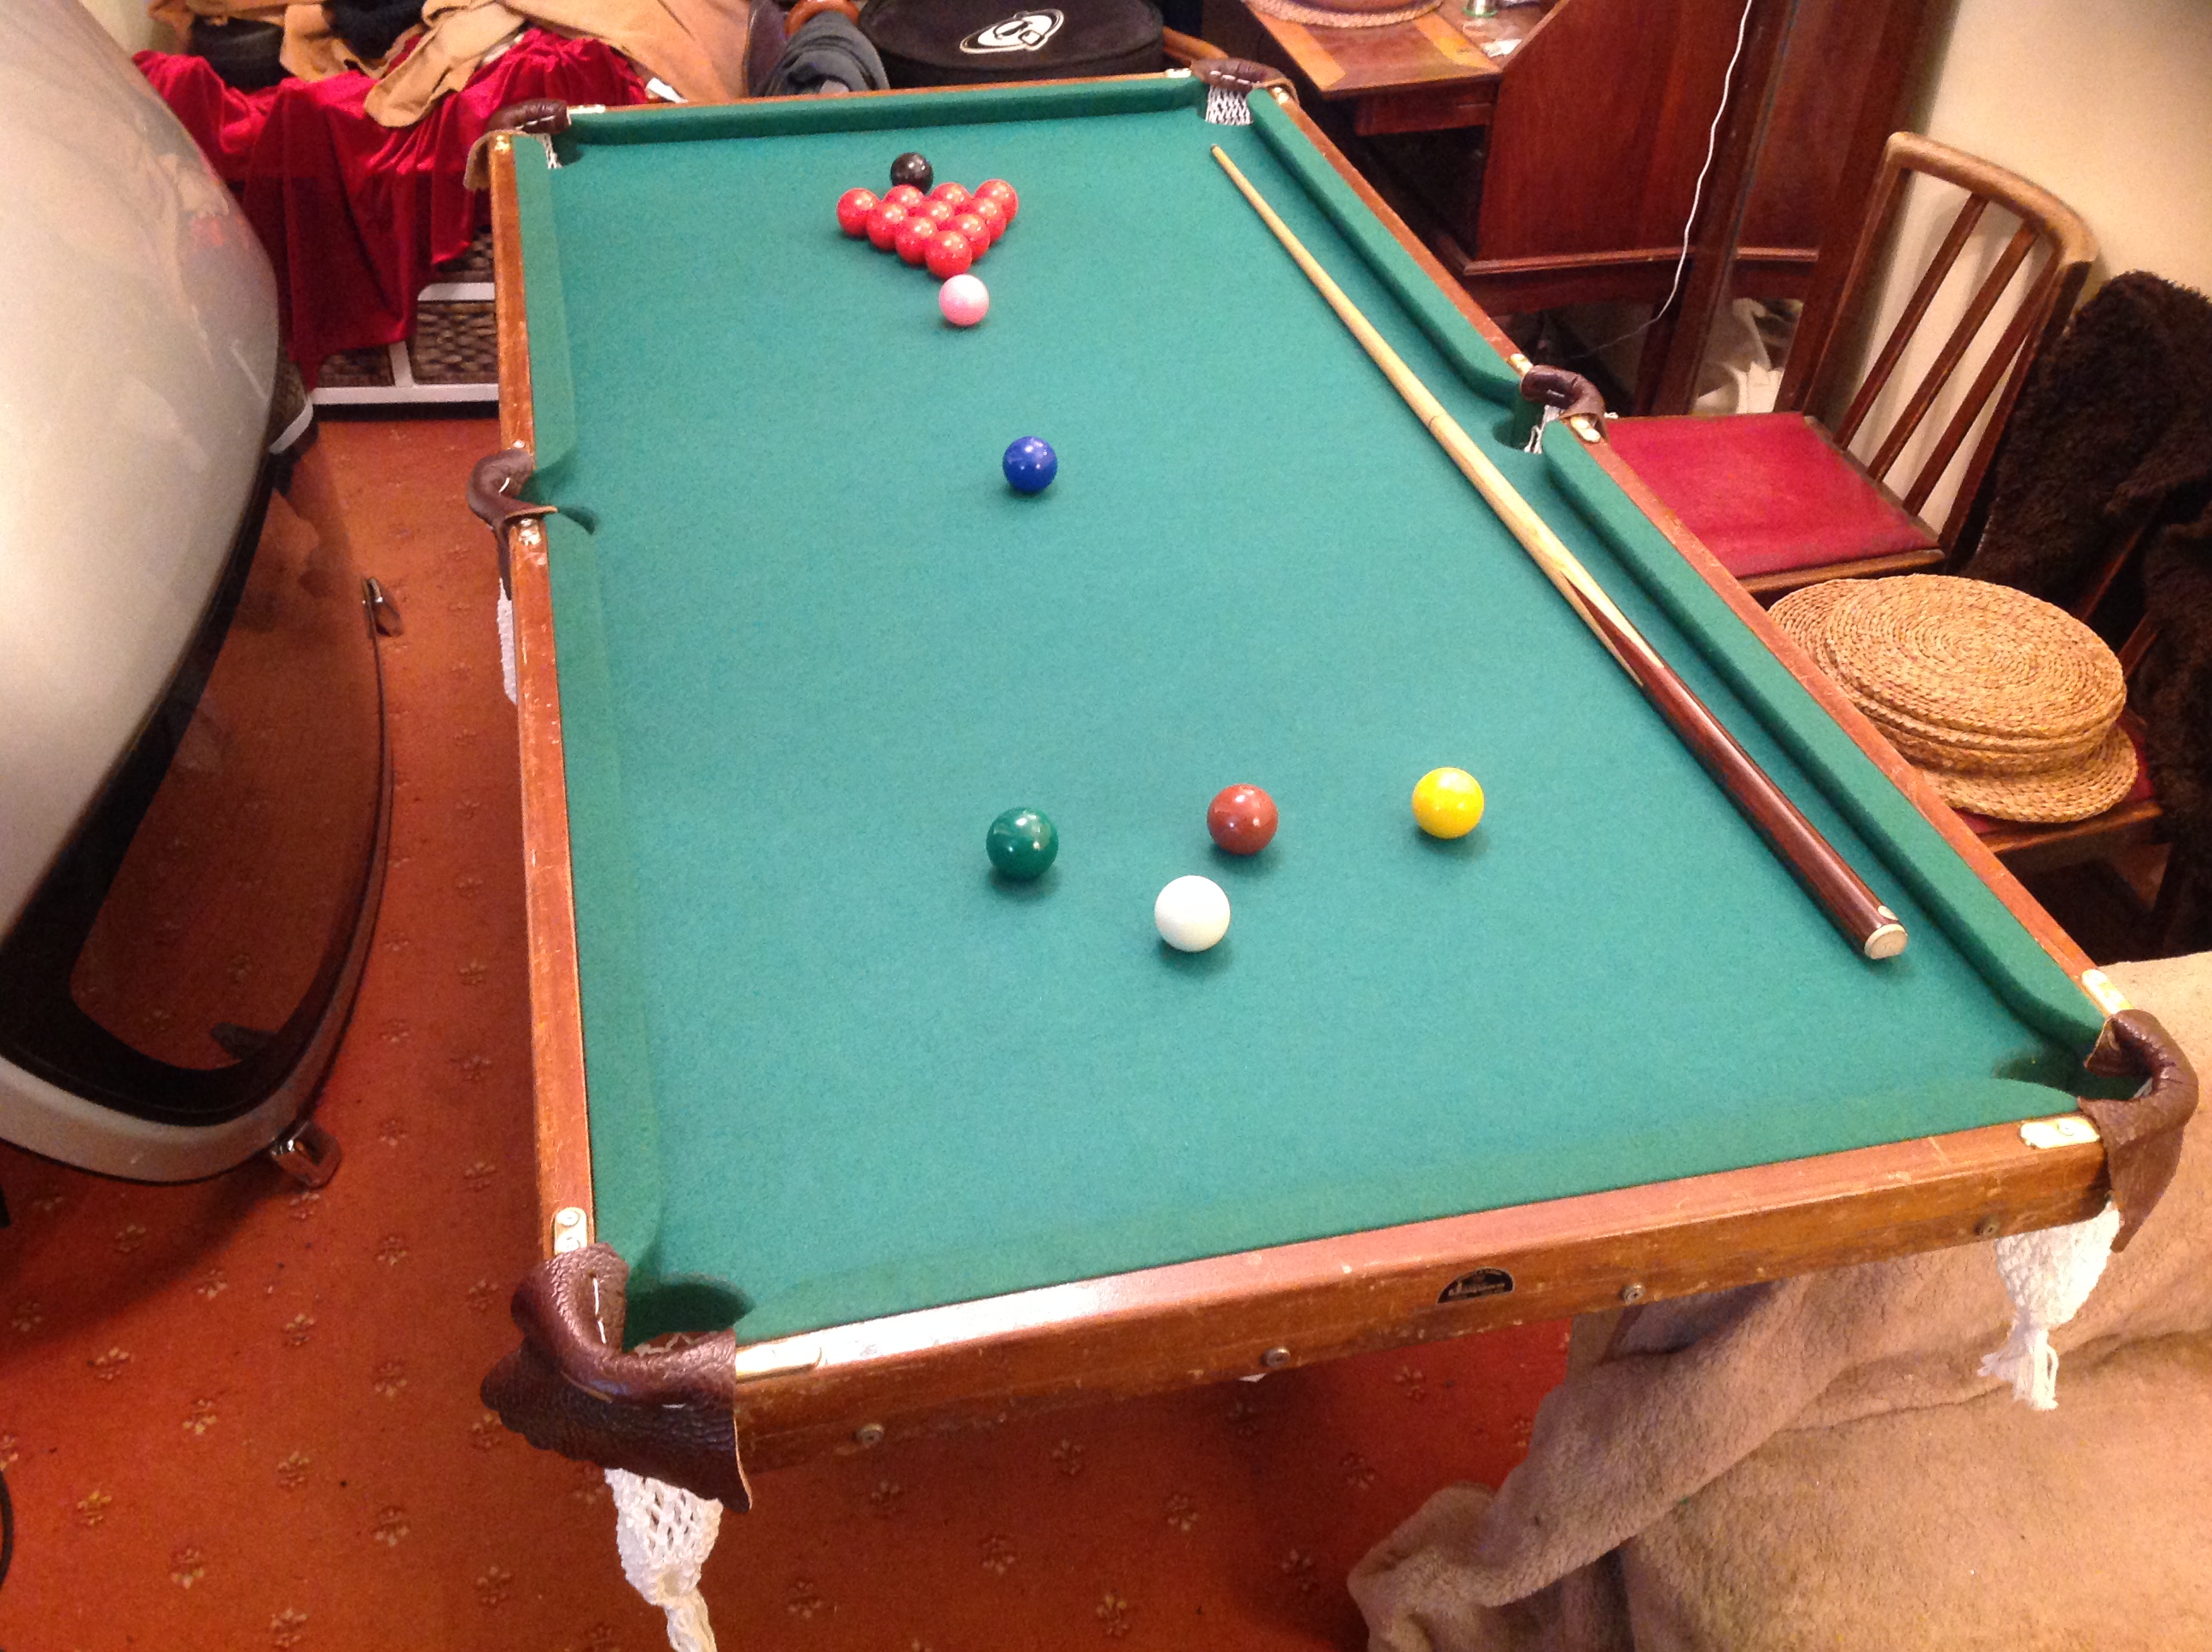
Well, in true Sebulous-stylee, I say finished, but… Well, I still need to mark the baulk-line, D and colour spots. And I haven’t done the base/legs. Although I may not do the latter at all. I may just leave as is, and place it on other supports when playing. As indeed I already have done.
And from another angle.
The biggest issue is space, in our tiny and very narrow home, which is also chock-full of stuff, such as the recently acquired upright piano, dining table and chairs, an armchair, the hard-top for my MX5, and my modelling area (a table, sideboard, and a lorra, lorra model-making bits’n’pieces).
In the long run I hope this will be in an outbuilding games-room. But for now it’s in the lounge, or rather dining room. It was a fun project. And for something around £50-75 in expenditure, plus my time restoring it, we have a fun little snooker/pool table.
‘It’s not a philosophy, it’s not a religion; it’s just lessons learned from cancer.’*
*Espinosa on his ideas in general, and his concept of ‘Yellows’ in particular, p.173.
Espinosa survived childhood cancer, spending a lot of time between the ages of 14-24 in hospital, losing a lung, a leg, and more – including many fellow patients, or ‘eggheads’, as he calls them (from the baldness caused by chemo’) – to the disease. This book is one of the things to come out of his experience.
Surviving cancer is a great/amazing and, thankfully, ever more common thing. And not to be sniffed at. However, as a generator of self-help literature it has, in my limited experience, a chequered past. I was once gifted a book by Louise Hay, who survived cervical cancer, which shared the positivity aspect that is the chief strength of this book, but then went seriously bonkers in ‘diagnosing’ the supposed causes of disease.
The actual and more boldly abstract cover style of the edition I have.*
Fortunately Espinosa seems more rationally tethered to reality than Hay. Although that said, whilst I like many aspects of it, I don’t buy fully into either his core ‘yellow’ idea, or even less so his (to me) arbitrary choice of 23 ‘yellows’ in your life. His concept of a ‘yellow’ is essentially someone more than a friend but less than (or different to) a lover. If you’re keen to understand his ideas, read the book. I’m not going to synopsise them any further here.
Chapters are on the whole plentiful but very short, which, together with the informal writing style, make this is an easy if rather whimsical read. It’s certainly more poetic and thoughtful than scientific or intellectual. Like me, the author likes lists. But, and again like me, despite his penchant for lists the overall feel of the book is somewhat loose and random feeling. One little unexpected nugget; I like that there’s a very positive and somewhat surprising chapter on ‘wanking’!
For those affected by cancer, whether personally or indirectly (and in many ways most of us are), this may well be worth a read. Beyond that rather particular aspect, the primary and more general thing I take from this book is that it’s best to reframe potentially negative events in as positive a light as one can. A stunningly obvious ‘lesson’, in all honesty. But nevertheless one a great many of us find hard to put into practice.
Three stars seems mean, and four stars generous, for so slight and whimsical a book. So I’ll give it three and a half.