BOOK REViEW: Stick Control, G L Stone

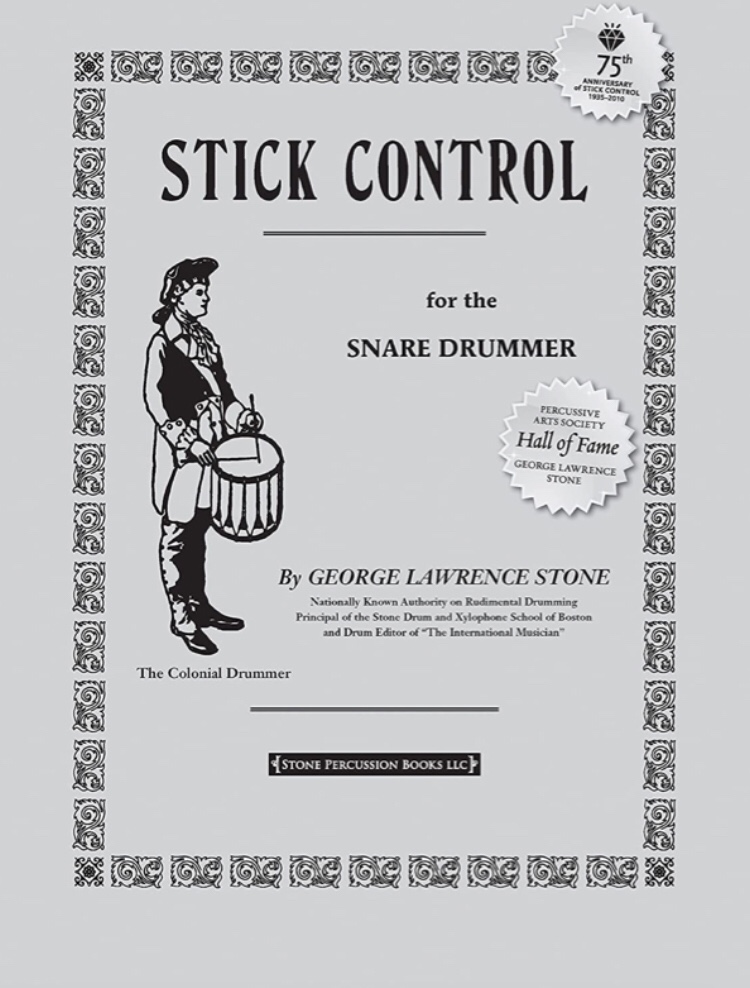
The first part of today’s post is essentially a version of my old Goodreads and Amazon UK review of Stick Control, only I can update that and expand upon it here.

And because this is my own blog, I can also give more nuanced star ratings. In this instance I give Stick Control the rare and coveted six-stars, which, on my normal 0-5 ratings system, means off the chart brilliant.

The author, looking very, er… well… um…

Anyway, for starters, here’s the augmented Amazon review:

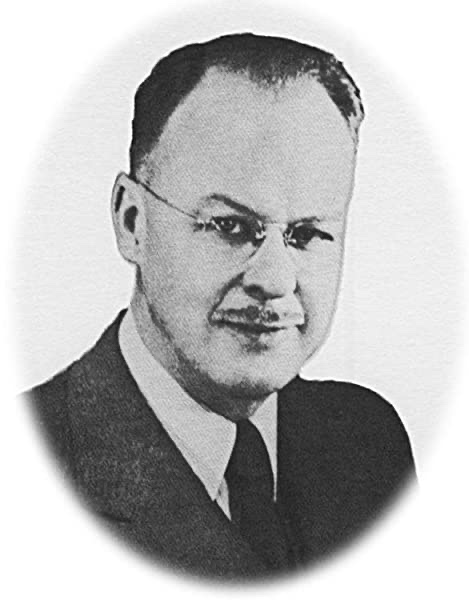
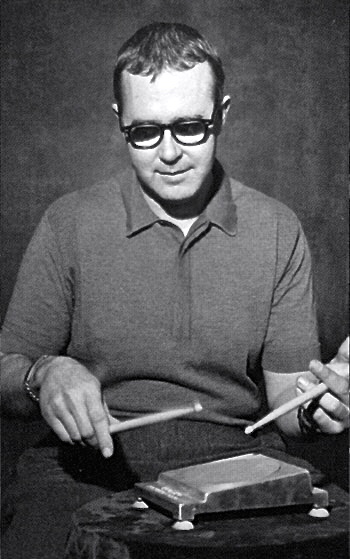
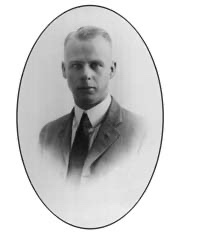
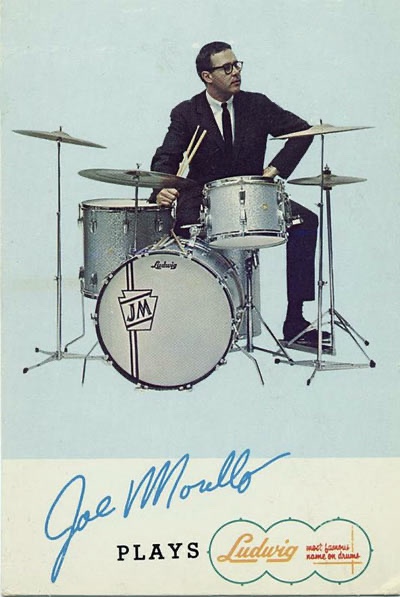
Jazz legend Joe Morello studied with George Lawrence Stone. That alone is recommendation enough! Morello was Stone’s star pupil. And thanks to Morello’s precocious work on Stick Control, we also have Stone’s follow-up, the snappily titled Accents and Rebounds.

I’ve been dipping into this for over two decades now. Although, to my everlasting shame, I’ve not completed it yet.* I use it in my drum teaching all the time. And I tell all my students it’s THE foundation book, ie essential.

A great tool for developing better reading, and – of course – stick control. Starting with such simple building block as singles, doubles, and groupings of three or four, per hand, the numbered exercises take you though a huge variety of combinations, leading with both right and left.

Joe Morello at the practice pad.

Stone says play everything 20 times. And play with a metronome at various different speeds. This is terrific conditioning practice on a pad, and fun to transfer to the snare. Of course one can then take it to the kit, and orchestrate it there in endless ways. All of this makes this book a lifetime investment. In a way, you can never truly ‘finish’ Stick Control!

Used regularly, and with the appropriate doses of discipline, this book can impart strength, stamina, speed, control of dynamics, and much much more. Definitely one of the most essential non-gear (ie not the instrument itself!) bits of kit in the drummer’s training arsenal.

* UPDATE: Since first posting this review, I am, now (summer of ‘22) making a concerted effort – not for the first time, mind you – to complete a continuous run through of the entire book. At the time of updating this, I’m about one third through the whole volume, getting heavily into the flam section!

A much younger G L Stone (from PASIC).

Some further thoughts…

So, that’s my Goodreads and Amazon UK review take on Stone’s classic work. In the latest update to that review I allude to what I’m calling elsewhere my Stick Control Summer Challenge. That’s going pretty well. One week into my summer hols, and I’m already just over a third of the way through the book.

This seems like a good time and place to add a few further thoughts on taking a deeper dive into this aged but illustrious tome.

For starters, having gotten further into the book than formerly – I did occasionally dip into later sections, but I’d only ever systematically done the first five or six pages previously!) – I’m encountering stuff I’ve not tried before. Some of it easy, some very challenging (for me at any rate!).

But there are also more fundamental issues, such as stick motion, and the exact ways to interpret certain notation. This is where a teacher from the Stone-Morello lineage would be very handy. I intend to explore this online, as I’m sure YouTube will provide some answers.

Morello looking very cool as an ambassador for Ludwig.

I won’t get into massive detail here, as this is an area for more exact exploration later/elsewhere. But taking just one aspect of the core subject, ie ‘stick control’, I’ve been practicing the material in this book sat at a practice pad, and using strokes that range from fairly full to ghost or grace note level.

And sometimes I’m leaning more towards French or German grip, but mostly I’m using American grip, somewhere in the middle. Stick height, grip, rebound, all these aspects start to come into focus more as you dive deeper into the book.

Another thing I’m finding myself fascinated by is, again, like much of what comes from studying this work, nuanced and multifaceted, and that’s how these exercises can become like meditative grooves. If one is playing 20 reps of a two bar exercise and then up to 24 or so different sticking variations of essentially the same (or very similar) rhythms, it gets quite hypnotic!

And one starts to hear the music or the groove in even these quite potentially dry exercises. And it’s fascinating how regularly locking in to a metronome pulse for 20-30 minute chunks throughout the day starts to build better time.

And if you set the metronome volume just right, there’ll be moments where you think it’s stoped, so you stop… only to hear the metronome still going. At those moments you’re achieving nigh on perfect time, as you’re covering the metronome so exactly you’re effectively masking it!

A classic shot of Morello in action!*

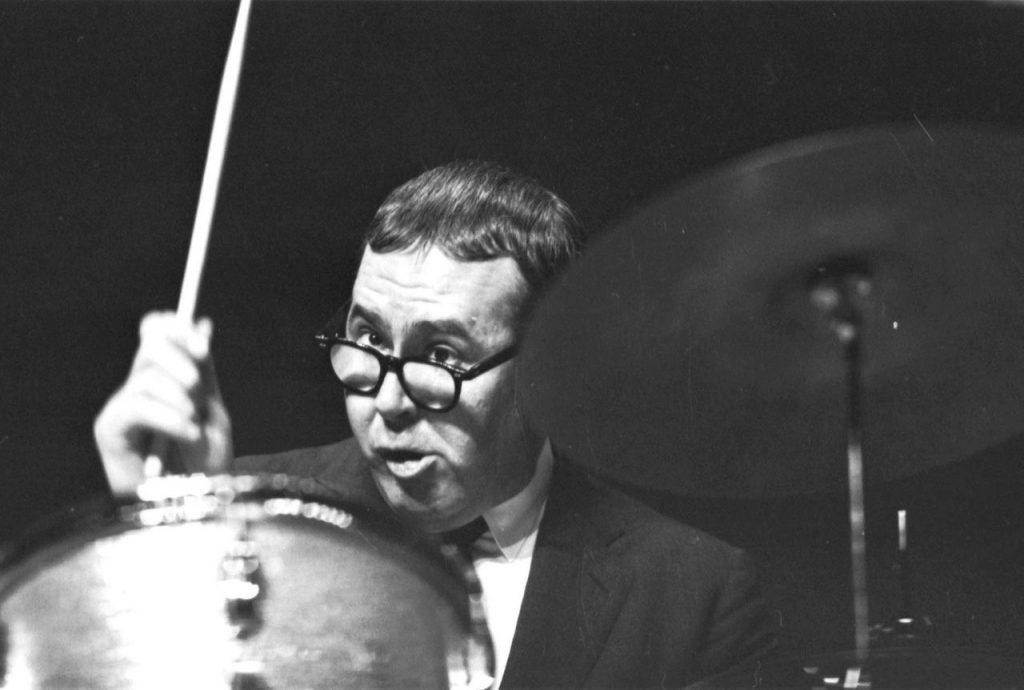
* The Guardian, rather cruelly, perhaps, used this shot of Joe for his obituary!

That opens the door on an aspect of this kind of study that I’m definitely falling in love with; the routine of regular practice is, it seems, like we’re told physical exercise is, or should be, both pleasurable and perhaps even somewhat addictive.

Now to lean into the ‘nuance’ aspect a little. I’m finding that the exact position of my hands and fingers on the sticks is coming more sharply into focus: if I find the right spot – esp’ noticeable the higher/harder and louder the strokes are – I can locate a zone where I can minimise the ‘shock waves’ that sometimes reverberate along the stick.

This must be the ‘fulcrum’, I guess? And it’s slightly higher up the sticks than I usually hold them. At least on the Vic Firth 2Bs I’m currently favouring for pad work. this actually coincides with another train of thought I’ve been having about modifying (or better yet making my own) sticks. But I’ll save that for another post.

Anyway, the ‘practice what you preach’ aspect of studying Stick Control over this summer is proving to be both pleasurable and beneficial. And the associated YouTube surfing has lad me to discover yet another meister-drummer, so I’m adding some of his stuff to my practice work-outs, such as this doozy:

HOME/DiY: ‘Clent Wiston’ is Dirty Hairy, in Sleepers in March

Diggin’ in th’ doit, like a doity dawg!

Further work on the railway sleepers, raising them up out of the dirt on gravel. Which I should’ve done from the off. Making a rod to beat myself with there, eh!?

Wearing a mask due to the dust raised whilst doing the work. It’s hard heavy work. Back bent as I dig or rake the soil out of the way. Then raising the sleepers, then putting three bags of gravel down, and raking that lot that flat.

I actually quite the aesthetics of the speckled dirt on my skin, with the hair over it all! Am I weird!? In real life – at least as I perceive it – qin the sunshine and dappled shade, my skin is more bronzed and hair more golden than in these photos.

Anyway, all six sleepers are now an inch or two higher than before, with gravel underneath each of them. They’re still level (enough for my satisfaction, and hopefully enough for keeping the shed square?) in both directions.

Four sleepers done…

The whole lot seemed to move a couple of inches eastwards, towards the house. Actually that’s alright. As the final sleeper was a bit further apart than all the others. So having them shuffling along a bit has wound up with them all better spaced.

One annoying thing is that I’ve referenced a the sleepers off a splash-board on the neighbours (very dilapidated) fence. If this is misaligned, as it probably is, then all my sleepers are as well. I was actually aware of this from the start. But couldn’t be arsed trying to remedy it.

All six raised on gravel.

Just went and got more Facebook/Gumtree free gravel! Yesterday I went to Bourne (Lincs), twice, and got twenty bags. From a nice Latvian chap. And today I got two big plastic tubs full, plus one bag, from Upwell area, a little closer to home.

I decided to scoop aside the earth along the sides of the sleepers and infill more gravel, so they’re not just sat on gravel, but in gravel. Hoping this’ll better protect them form moisture, to some extent. Will it? I really don’t know!

Gravel along the sleeper edges. House end view.
And viewed from the far end.

Anyway, that’s enough work on that lot for today! Yesterday and today have been, for me at least, pretty hardcore, in terms of exhausting energy sapping hard physical labour. So, to end, one last ‘go ahead, make my day,’ Dirty Hairy moment…

A visible glove line!

HOME/DiY: Sleepers For Shed Base

Ta-dah!

Got the sleepers roughly in place. They need tweaking to get them properly spaced and levelled out. They’re close though. Cross-wise they’re all pretty good, but along the length of the shed there’s a slight decline, as you get further from the house.

Workman’s hands!

It was pretty quick n easy, doing the sleepers, in the end. Somewhat surprisingly so. Teresa helped me shift the first one. But after that I was on my own. Just ‘drag n’ drop’, like Photoshop!

The foreman checks over my work. Seems to approve.

It was very sweet when Chester saw what I’d done. He evidently enjoyed clambering over them all, and even snuggled up to one for a little spell. I’m glad I have the guv’nor’s blessing!

CARS: MX5 Nipple Reduction Surgery

I used plasticine to profile the inside of my ‘nipple’.

A few days back I posted about how annoying this particular little job was becoming: first I get two new parts, but the one that prompted the work – the ‘nipple’ for the really poorly fitting/closing latch – breaks almost immediately. Back to square one!

Another view; hopefully the different shapes are slightly clearer here?

So I order a new part. But it’s different, and doesn’t actually fit. It’s a more ‘pointy’ shape. At least this clarifies for me the type of latch and nipples (oo-er!) I had installed before, i.e. the more rounded type.

These differences in shape mean that the screw hole in the nipple doesn’t align with the threaded hole in the latch, necessitating either a different part, or making changes to one of the parts, so they do align.

The holes don’t align!

According to some sources it’s only the pointy type that are easily and widely available now. I don’t know if there’s any truth in that or not, as I definitely can get the other sort elsewhere. And, indeed, I already have done (on my first attempt).

The ‘male’ latch part filed down a bit.

Anyway, as I’m broke, rather than buy a third one (or pair), I decided instead to file the metal on the latch to conform to the ‘nipple’, instead. That took a bit of work, but I think it achieved the desired goal.

Viewed from t’other side.
After some filing, the two holes align nicely.

This job turned out to be a right pain in the rump. Firstly, with parts breaking or not fitting. Then, when I’d filed the latch to fit the nipple, I discovered that the entire soft-top frame seems somewhat out of alignment. I had to wrestle with it a fair bit to make everything align better.

Reassembled and back in place.

Is this the price I’m paying for loading my little MX5 with all kinds of stupid burdens over the years? I’ve had all sorts, from fence-panels, timber, doors, to trees, chests of drawers, fridges, and lord knows what else, on the back of Maisie. Often sitting atop the folded away roof. Have I bent it all out of whack?

After struggling with this latter issue for a while, and fiddling with the latch adjustments, so that both are quite tight, but neither are fully tightened, I’ve finally managed not just to close the top, but to eradicate the very large (and formerly plainly visible) gap, on the driver’s side.

Sooo much better! Green algae points to next job.*

I can’t find any before pics (although I’m certain I took some!?), alas. But above and below are some after shots. Trust me, it looks waaay better!

I’m hoping it’s improved the ride as well, as before the sound of wind coming through said gap was really, really, REALLY, REALLY annoying! It was sooo loud – it literally roared – that music or conversation were pretty much out at over 55/60mph.

Passenger side, looking as it did both before and after.

I’ll be taking her out for a spin later to see how all this nipple play has affected things!

… A bit later the same day… Well, I took her out, with Teresa, for a brief spin. And, my oh my, what a difference! No roaring airflow, nor can I even feel any draught. And – although we’re currently in a heatwave – this’ll mean no more ingress of rain. Wahoo!

* Next? Either adding some of the silicone pipes I got from BOFIracing a whiles back , or using the Auto Glym products I have to clean and re-waterproof the soft-top. Hmmm!??

HOME/DiY: New Shed Build (#4!) – Sleepers Arrived

Six ‘B Grade’ sleepers arrived this morning.

There was a very faint knock on our door at about 9am this morning. I’m amazed I heard it. As I was busy drilling holes in an upstairs wall, to mount a little shelf for a DVD player, ‘neath our bedroom TV.

DVD shelf brackets up; hardboard shelf is temp’!

On going downstairs I spied a young lad with a lorry, with a crane on’t back, and six rather knackered old looking sleepers on it. It is a shame they’re B grade, in all honesty, as they have ruddy great cracks in them, splintered areas and missing chunks.

Unloading the sleepers.

But we were given them, in exchange for my help with some manual labour. So really we’re lucky to have them at all! Thanks, Ken, for helping us out.

Nearly there.

Two other jobs this morning: the above mentioned little DVD-player shelf in our bedroom, and (re)fixing – I already repaired it once – another knackered old drawer from a set of freebie (Freecycle this time, and ages ago now) chest o’mc-drawers.

The drawer in its broken state.

This set of drawers was full of my clothes till yesterday, as were two others. Leaving Teresa with just one set of drawers, and yet more clothes than me! So now we’ll have two chests each, and I’ll have mended us a drawer each in one of them as well.

The drawer fixed, the glue ‘going off’.

The heat today is ridiculous. I did some of the drawer fixing work out in the back garden. And now I’m back indoors, buck naked and sweating profusely (I think at heart I’m a naturist!). I’m going to hop in the shower and freshen up, and have a brief rest.

Another view. Note missing bits of fancy trim!*

Or should I delay the shower until after moving the sleepers? The latter would require enlisting a strong burly neighbour. I wonder… is Sean in at no. 72?

* Yet another DIY project for yet another day!

DAYS iN: Home & Garden

Hollyhock avenue.

Yesterday and today I’ve been out in the garden, filling in a hole I dug a whiles back. I had hare-brained plans to dig an underground drum bunker music studio. Actually I still do. But I was eventually persuaded that, for now, such schemes weren’t really on.

More Hollyhocks.

I took these photos whilst working in the garden. What an absolutely gorgeous day it’s been! Our long thin garden is looking lovely. To my eyes at any rate. It’s cluttered and messy, just like ever single room in our home! And that’s actually something I’m determined to start dealing with better.

Look at the roses. Lovely!

I haven’t bothered to document the re-filling of the concrete slab ‘ole. Tho’ I may take some pics tomorrow. As there’s (literally) tons more earth to shift. Pretty flowers and grasses seem more uplifting!

Our ‘cottage garden’ long grasses are out of control.

Fortunately the large tree at the end of the garden meant I was mostly in the shade when doing the earth-moving. We wound up inviting some new-ish neighbours over to have a look around our garden, which was very nice. But it did stop me from doing as much spade work as I’d hoped.

‘Strategic neglect’ creates meadow!

Yesterday I picked up two spades and two forks, all nice old fashioned stuff, from a local Facebook seller, for £5 each. I thought these would be useful for this job, and just to have generally.

Returning to the theme of clutter. I’m determined that 2022 will be the year I turn that side of our home life around. In every area: every room, every outbuilding, the garden. The whole damn lot!

‘Egbert the Egret’, by his ‘nest’.

And to finish, a pic of a bird sculpture. We got two of these, one for us, and one for my mum. It’s not the sort of thing I’d normally go for. But Teresa wanted it, and I’m mellowing and allowing her to change me, in many ways. For the better, I hope!?

CARS: MX5, The Saga Continues…

More supplies from BOFIracing.

Since fixing the cam-belt the car’s been running pretty well. But it’s felt a bit syrupy, or even porridge-y recently. It’s hard to get across exactly how one knows or feels this. Things just feel a bit sluggish. There’s also quite a bit of engine vibration when one starts and moves off.

I’ve heard this can be either timing related or due to misfires. Hopefully if it’s either it’s the latter, as I’ve gone to great pains to get the timing properly aligned!

VVT spark-plugs, wires and spark-plug socket.

Rather disappointingly the VVT spark plug wire set is just two leads. In a normal engine it’s all four. This is because there are two ‘coil-on’ plugs or packs, which are rather complex, and, apparently, not available commercially. At least not easily, commonly or cheaply. Bummer!

Uh-oh! Oil in the second spark plug chamber.

When I did all the cam-belt work I didn’t take the plugs out. I thought about it. But I was busy enough with everything else. I kind of wish I had now! Why? Because I found that there was oil inside the second from front plug well. It would be interesting to know if this problem predated my work, or was a result of it.

The old plugs. Second from left is the oily one!

I had the cam-cover off several times during the cam-belt and cam-cover gasket changes. According to several YT videos I’ve watched on the ‘oil in your spark-plugs’ topic, the most likely cause is a faulty gasket on the plug’ole.

Now mine is a new gasket. But has the on and off business damaged it? I guess I’ll have to check again after this job is done. But in the meantime, once the old plugs were all out (see above pics), I had the cam-cover off yet again, to really clean it.

This is the oily one.

I took numerous pics of all the spark-plug holes, both before and after, for my own reference. But I’m only putting up one or two of those images, not all eight plus of them!

The cleaning of the cam-cover was the most time consuming part of this day’s work. And it’s only really a cosmetic thing, if I’m honest. I should’ve done this the first time I had this part off. And actually I did, just not so thoroughly.

Cleaning the cam-cover.

This time I spent a couple of hours, repeatedly washing the top, with a little washing up liquid in warm water. Then I scrubbed it, again repeatedly, using Swarfega, getting into all the nooks and crannies as best I can. I used wire brushes, wire wool, and plastic toothbrushes, both large and small, going over it all multiple times.

I then rinsed it all off in warm soapy water, and dried it using lint-free cloths. After that I went over the entire thing several times using wire rotary tools in a hand-drill. Then it all had a dry-clean with the lint-free towels. And to finish off, a thorough rub down with isopropyl alcohol, to clean up.

I had to remove or mask certain bits.

This whole cleaning period took ages! And during doing it my iPhone battery died. So I didn’t get any photos of the masking I did, nor the removal of sundry bolt-on bits, nor even much of the cleaning itself. Thanks Teresa for capturing me at work in my home-made denim apron!

Whilst the cam-cover is certainly much improved, it’s nothing like as clean or shiny as I’d really have liked. There’s still a residual ‘rash’ effect. And the embossed lettering was hell to try and clean out.

This and the above are the ‘after’ pics.

With the cam-cover cleaned, mostly top, but also bottom, and the gasket cleaned and re-installed, I put the four new spark-plugs in (see pic immediate below). It was at this point that one of my major frustrations with this day’s work came to a head.

Throughout the work I struggled to find all sorts of things I needed, from my car keys to the socket set I prefer to use (I have several!). And then – and this was the real cherry on top – part way through the work, I appear to have lost or mislaid a crucial socket-set adapter.

New plugs in.

This means I can’t torque the bolts down to specific settings, but have to guess, and do it all by feel. Not very satisfactory for a newbie grease-monkey like me. The room that leaves for anxiety over cock-ups is grand-canyon-esque!

So I had to ‘button everything up’ in an approximate manner. And at this juncture it’s worth noting that, if one’s learns from mistakes, I ought to be learning plenty! Here are a few I made during this particular session of maintenance:

  • I took all the VVT bolts out before loosening – or make that trying to loosen – the 40NM torqued banjo bolt. This led to the bending of a ‘hard line’ hose. I’ve tried to bend it back, but it’s still misshapen. This makes re-fitting the whole VVT arm harder. Doh!
  • I couldn’t find the ‘loosening’ sequence – tightening yes, loosening no – for the cam-cover bolts, so had to guess (based on reversing the tightening sequence… ‘ish).
  • When I did the sequence I got to the ‘end’, only to realise I’d somehow skipped one bolt, leaving that one tighter throughout, with the danger of deformation or even cracking of the cover. A visual inspection seems to indicate I’ve gotten away with it this time.
  • During cleaning myriad little things occurred: using tissues that leave debris everywhere; getting cleaning stuff meant for top only underneath; snagging the rotary wire brushes on the towel on which the cam-cover was sat, sending it flying (another visual inspection promotes a relieved sense that I probably got away with this).
  • Constantly mislaying stuff, from car-keys to tools. I need to tidy, streamline and get properly and thoroughly organised… in advance!
  • I’m sure there was more… but I forget!

I sincerely hope I do actually learn from this litany of errors! Some of these are already repeat mistakes, shoddy organisation being my most repeated ‘sin’!

All back together. Looks nice!

And at day’s end, when I took the car for a test-drive? After all that work it felt exactly the same. Grrr!!! Has oil gotten into that spark plug chamber again? Do I already need another cam-cover gasket, having had this one on and off repeatedly?

Two other new parts – a thermostat gasket and a little plastic doodad that’s supposed to fix floppy roof latches – both failed more or less immediately. So perhaps the new cam-cover gasket has as well?

At least the engine bay looks a bit nicer! But what good is that if she still runs iffily? Guess I need to check to see if oil’s still getting into the second spark-plug well. But without the torque adapter I’m not keen to be taking stuff apart again right away.

Birthday stuff for mum.

Plus we’re due to go out today to meet my mum for slightly belated birthday tea and cakes at Anglesey Abbey. So no further fiddling about under the hood! I just hope we don’t have a repeat of the original ‘on the road to Anglesey’ debacle, which required an expensive AA tow home!

HOME/DiY: Fixing A Hotpoint Washing Machine

We have one of these; Hotpoint WMXTF 842P

Today I decided I’d try once again to sort out our washing machine. I’ve tried several times before, without succeeding. According to the rather scant Hotpoint support, on YouTube, 90% of issues are due to the filter getting blocked.

I’ve attended to this filter several times. It’s occasionally had a little crap in it. And I really mean a very little. But mostly it’s been pretty clean and empty, i.e. free of any serious obstructions. Never enough to have caused the blockage and drainage issues we’ve faced.

Eugh! The area under the machine was horrid.

The most recent and worst of these was when it stopped draining altogether. Meaning that we had to empty the drum using a measuring jug. A faintly unpleasant smell gradually but inexorably turned to a truly rank odour!

Intuition and common sense suggested that as the filter was pretty clean and totally not blocked, then logically the blockage must, surely, be in the drainage hose?

So I took the hose off – much easier said than done! – and stuck a trombone cleaner down it. Alas, the ‘bone unblocker isn’t as long as the hose, so I had to attack it from both ends.

Tipped her on her side, to access the hose.

After this, I rigged the pipe so it was on a constant downwards gradient, and started running hot water through it. After about five or six flushes, the stinking opaque effluence had turned, if not into wine, at least into clear clean water!

After re-assembling the washer, and clipping the hose back in place, I ran a cleaning cycle with some soda crystals added to the drum. It was then that another recurrent fault reared it’s ugly head: the machine never reaches the end of any programme.

Not sure why, exactly, but whatever program we run, the machine always ‘hangs’ on one minute remaining… forever!

Hoses and a tub, outside, in case of overflow!

To finish any program off, requires turning the entire machine off, and restarting it set to a rinse ‘n’ spin (which in turn won’t actually finish!). Bit of a palaver. And a lot of a pain!

But not having to bail out stinking dirty water is a tremendous improvement! Compared to which having to fudge finishing wash and rinse cycles is but a minor issue.

I’m not a slick blogger or YouTuber, and very rarely if ever document these things thoroughly, let alone well! But the few pics here do give an idea of just how dull a job this is.

The black clip in the centre releases the hose.

That said, and despite the as yet unresolved ‘won’t finish’ fault, improving the situation does come with a certain pay off.

It’d be great if we could fix the ‘one minute remaining’ issue. And we do also need a new front door seal, as well. But, little by little, we’re getting somewhere.

CARS: MX5 Cam-belt & Gasket, cont

Spark-plugs reminder photo.
Working in dazzling sunshine.
Note that banjo bolt (rear of VVT) leaketh not!
Later in’t day, torch now required.
Happy grease monkey; engine starts!

And lo, it came to pass, that ye olde engine was fix-ed! Hence the happy mien, and Churchillian two finger salute above. The image below is just a reminder of an earlier – and at this point gratifyingly absent – OBD fault diagnosis.

Adopts Inspector Clouseau voice ‘Yes, I know that, you fool!’

But at this point I still have a major coolant leak.

CARS: MX5 Cam-belt & Gasket, Day 4

Today I hardly took any photos of the work I did. Most remiss of me! Maybe it was because today was mainly re-assembly? But frankly I really should’ve taken lots of pics!

The above screen capture was taken to help me work out how much oil I needed to refill the engine with. Most of the helpful videos are American – the call their Mazda MX5s Miatas! – and everything needs to be changed from foot pounds and quarts to NM and litres.

I walked into town – not far! – and had a slice of pepperoni pizza from Dreggs. I also checked out some larger wrenches, in Boyes and what used to be Thing-a-me-bobs. I can’t recall what the latter is called now!?

I wound up buying two 300 mm x 36 mm – one foot long with an inch and a half ‘mouth’ (in old money) – Rolson adjustable spanners. At £6.99 they were a wee bit dearer than the Boyes ones; it’s the latter pictured above. But they looked and felt both bigger and better quality.

Actually, whilst they look decent enough, they’re not great. Are any adjustable spanners any good? The adjustment is always fiddly, and very prone to slipping or working loose!

I left off all three of the cam-belt guard plastic bits, as they were pretty mangled to start with. And removing them had further damaged them. I think this metal plate screwed into one of them. There are two metal bits n this line that are not fixed back in place.

Took two shots of this bit, which now seems poss’ redundant. Ended up removing it altogether. in total there are three plastic cambelt guard sections I’ve left off, and two metal brackets, this larger one, and a much smaller one.

A chunk of today – two hours, poss’ more? – was given over to a trip to Halfords. After buying the two spanners and a bit of pizza, I caught a bus to the big roundabout on Wisbech Road, which is pretty close to Halfords.

I bought a new oil filter. I was expecting it to have a ‘crush ring’. But it didn’t. Rather tragically and annoyingly I failed to install it, as I was unable to remove the damned old one!

I wanted to catch a bus home, but didn’t want to walk to Tesco. I would up walking all the way home, with a rucksack full of heavy tool, engine oil, and even a little ‘dolly’ trolley (the latter in lieu of a larger and more expensive inspection trolley).

I stopped at The Hippodrome en-route, for a refreshing lager shandy, and to rest my poor aching feet! I’m not fit any more. The walk home was horrible!

As I said at the top of this post, I totally failed to document the re-build. I replaced the cam-cover, inc adding sealant gasket gloop where indicated.

One of the only bits of documenting I did arose out of the balls up I made of the radiator re-install. For starters I totally wasted a whole bottle of coolant/antifreeze, by failing tore-attach one of the radiators’ lower pipes.

Pouring the whole litre in, it simply drained right out, via the lower and still disconnected tube. It was a mother to re-connect that particular pipe, as the clip on it, and the end of the pipe itself, we’re not in tip too condition.

Then, when refilling the coolant mix into the re-installed radiator, I discovered further leaks due, once again, to missed connections. This was a thinner pipe-work segment, and it only haemorrhaged coolant when the radiator got pretty full.

But even after connecting all the errant lines, and tightening up all tubing and fastenings, there remained a terrifically annoying leak. This turned out to be the thermostat housing, the gasket inside of which had fallen apart.

I tried to bodge it, with gasket sealant. But I put it back together wrong; a whole 180° out of its proper alignment. So when I’d reversed it, or corrected it, the ‘temporary fix’ suggested by a BOFIracing dude, didn’t come out as planned.

So I wound up ordering a new thermostat housing gasket today, plus four new undertray fasteners, all from MX5parts.co.uk I hope they get to me ASAP!.

What was most g-g-gutting and g-g-galling, was getting everything back together only for the engine to not work, still. I have to be honest. This necessitated a bit of a lie down! I was, frankly, utterly crushed.

After about an hour of rest, I decided to go out and look at the car again. A friendly neighbour then took me to Halfords, for my second visit o’ the day – at 7.50pm, ten minutes before they shut! – where I bought some coolant.

Still from my video that WP won’t upload!

Topping up the coolant revealed several leaks. the easiest to repair was a small hose I’d missed. Next I tweaked a few of the clipped hose connectors. But, alas, coolant continued to leak. And a video under the area revealed that the thermostat gasket bodge hadn’t worked.

I tried to add that video to this post. I had to shorten it to even upload it. And then, once added in WP, the post no longer updates… gaaargh!!! So I’ve taken a still image from said vid’. Not great, but better’n nowt!

Bizarrely, the coolant, which was streaming out initially, but only dripping by the time I got my iPhone camera on it, seems to be dripping not from where the two parts meet, but just behind that. Weird!?

Anyway, that’s that for this post. I guess tomorrow I just keep on keepin’ on…