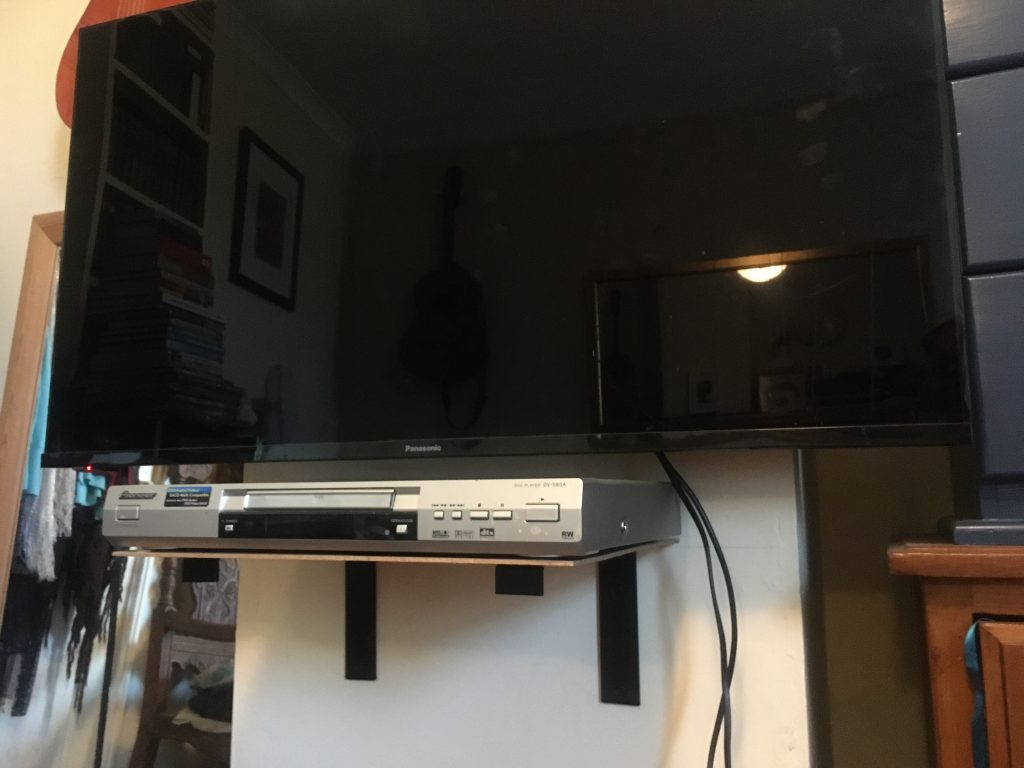
There was a very faint knock on our door at about 9am this morning. I’m amazed I heard it. As I was busy drilling holes in an upstairs wall, to mount a little shelf for a DVD player, ‘neath our bedroom TV.
DVD shelf brackets up; hardboard shelf is temp’!
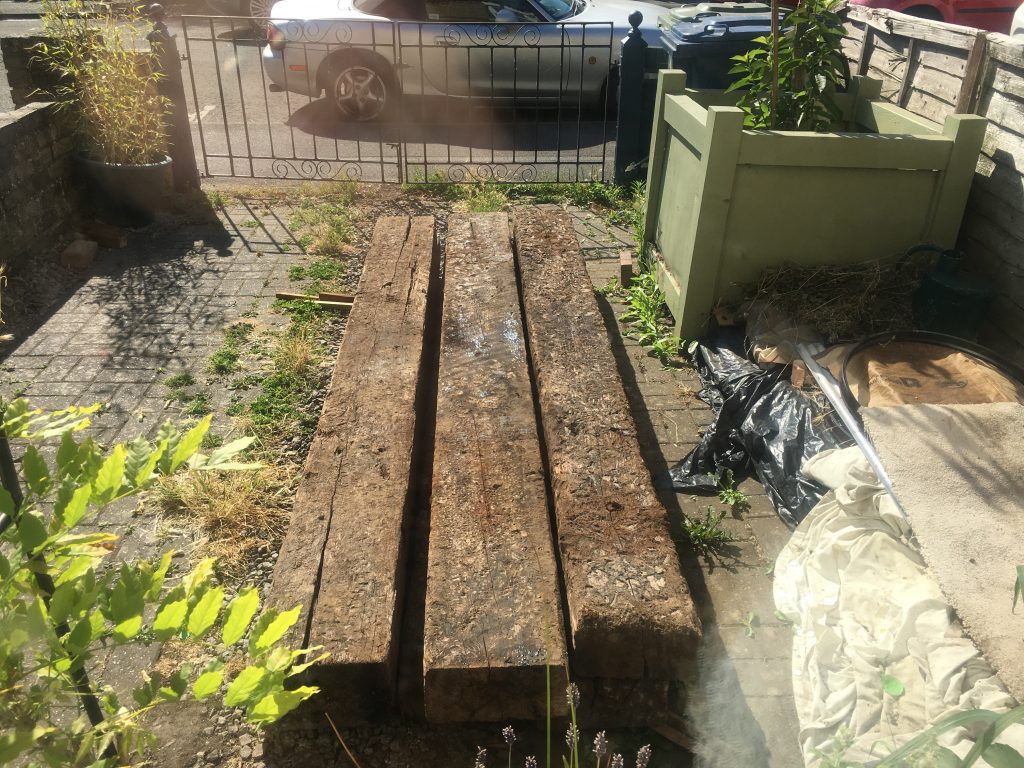
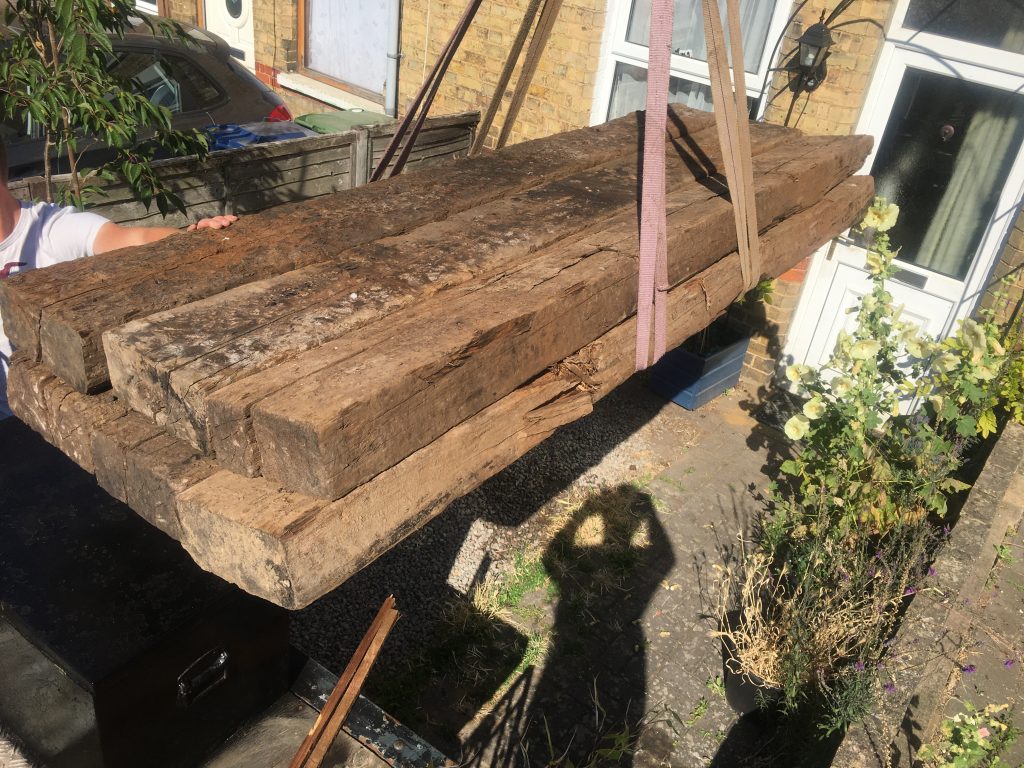
On going downstairs I spied a young lad with a lorry, with a crane on’t back, and six rather knackered old looking sleepers on it. It is a shame they’re B grade, in all honesty, as they have ruddy great cracks in them, splintered areas and missing chunks.
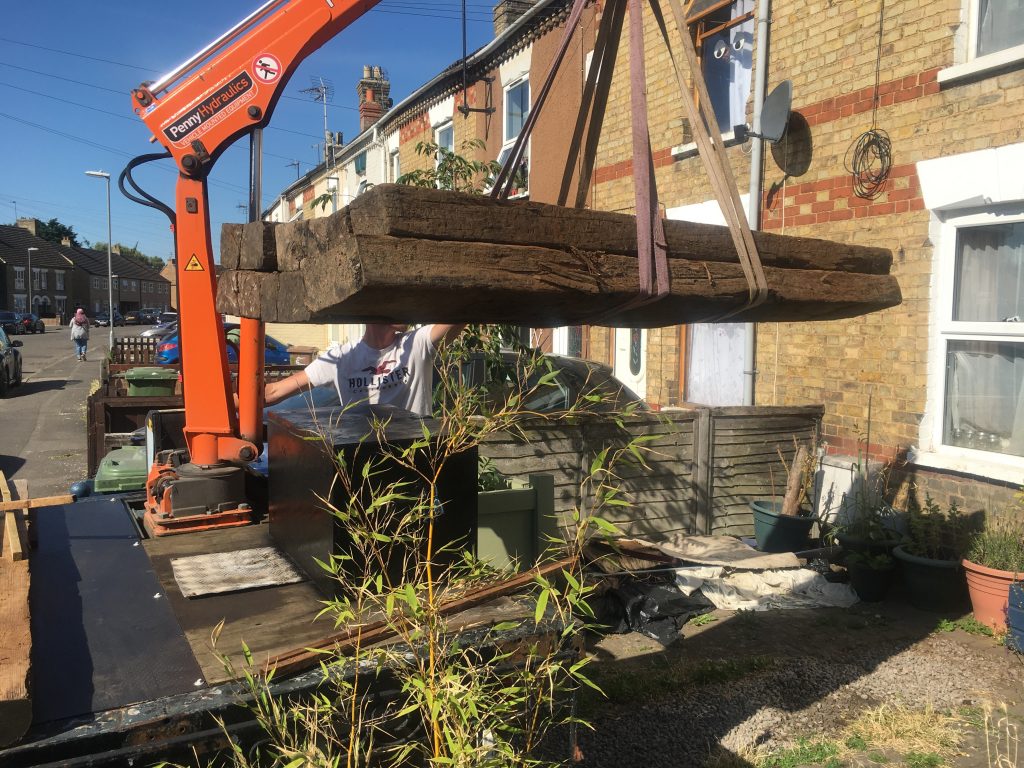
Unloading the sleepers.
But we were given them, in exchange for my help with some manual labour. So really we’re lucky to have them at all! Thanks, Ken, for helping us out.
Nearly there.
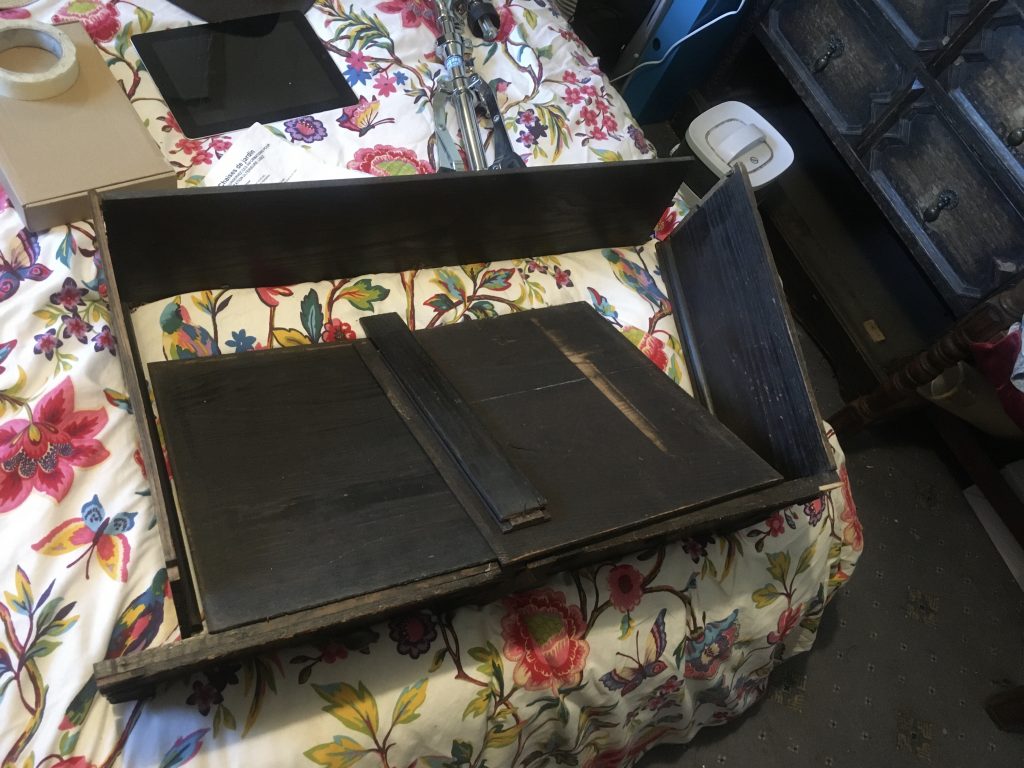
Two other jobs this morning: the above mentioned little DVD-player shelf in our bedroom, and (re)fixing – I already repaired it once – another knackered old drawer from a set of freebie (Freecycle this time, and ages ago now) chest o’mc-drawers.
The drawer in its broken state.
This set of drawers was full of my clothes till yesterday, as were two others. Leaving Teresa with just one set of drawers, and yet more clothes than me! So now we’ll have two chests each, and I’ll have mended us a drawer each in one of them as well.
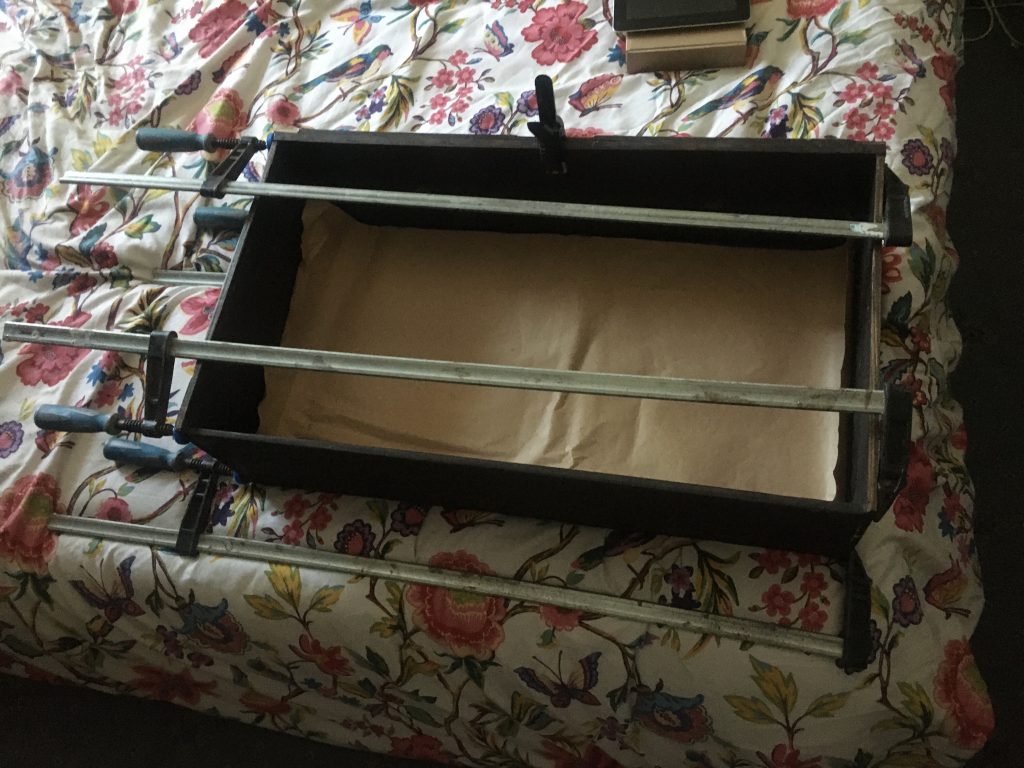
The drawer fixed, the glue ‘going off’.
The heat today is ridiculous. I did some of the drawer fixing work out in the back garden. And now I’m back indoors, buck naked and sweating profusely (I think at heart I’m a naturist!). I’m going to hop in the shower and freshen up, and have a brief rest.
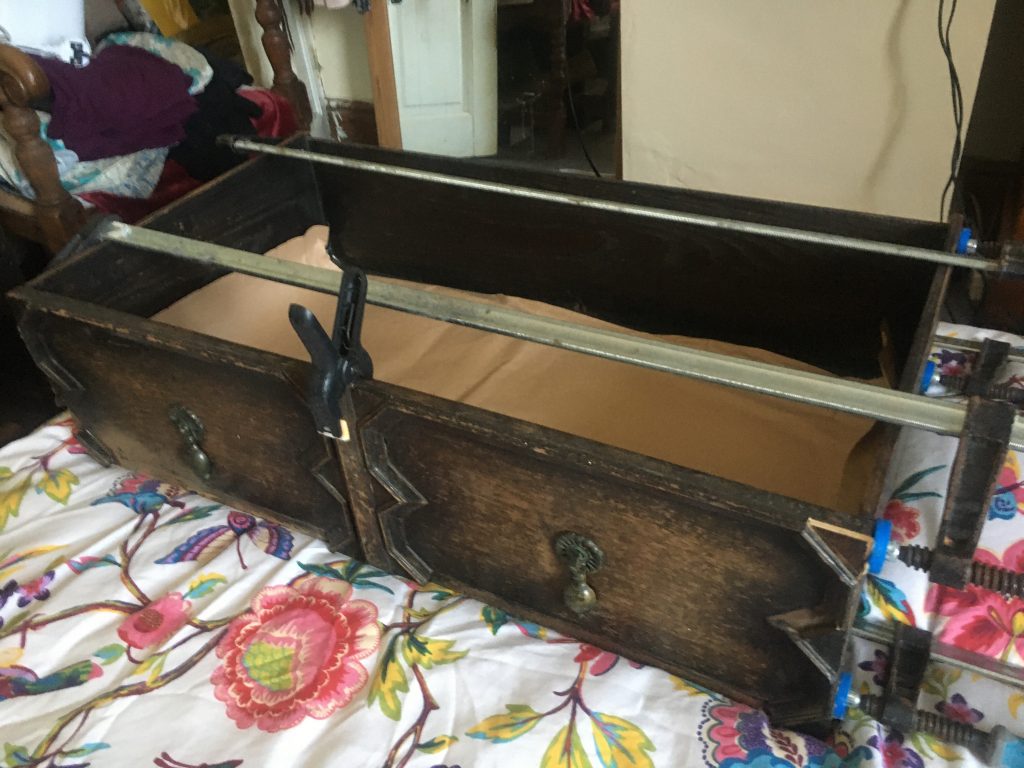
Another view. Note missing bits of fancy trim!*
Or should I delay the shower until after moving the sleepers? The latter would require enlisting a strong burly neighbour. I wonder… is Sean in at no. 72?
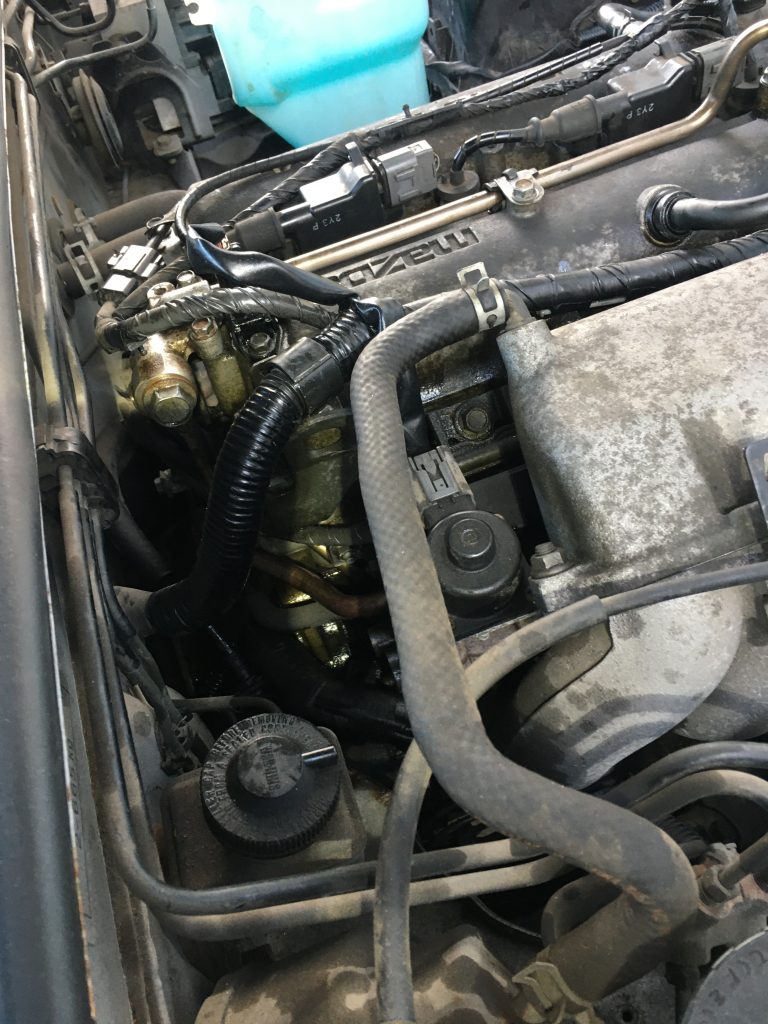
Since fixing the cam-belt the car’s been running pretty well. But it’s felt a bit syrupy, or even porridge-y recently. It’s hard to get across exactly how one knows or feels this. Things just feel a bit sluggish. There’s also quite a bit of engine vibration when one starts and moves off.
I’ve heard this can be either timing related or due to misfires. Hopefully if it’s either it’s the latter, as I’ve gone to great pains to get the timing properly aligned!
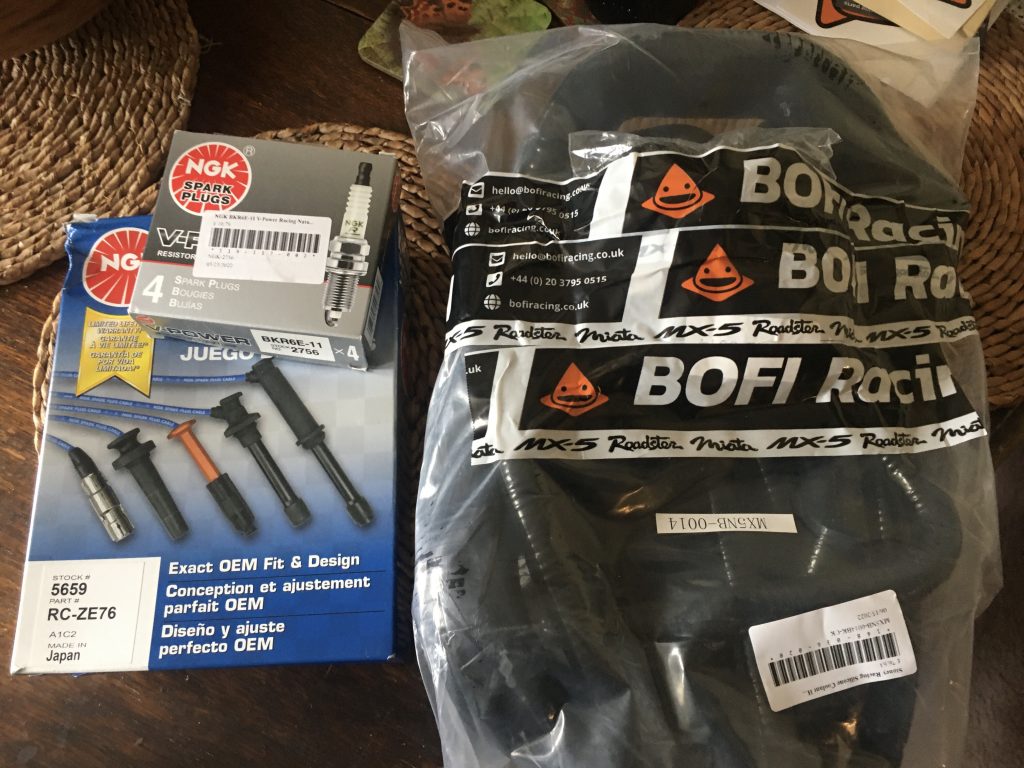
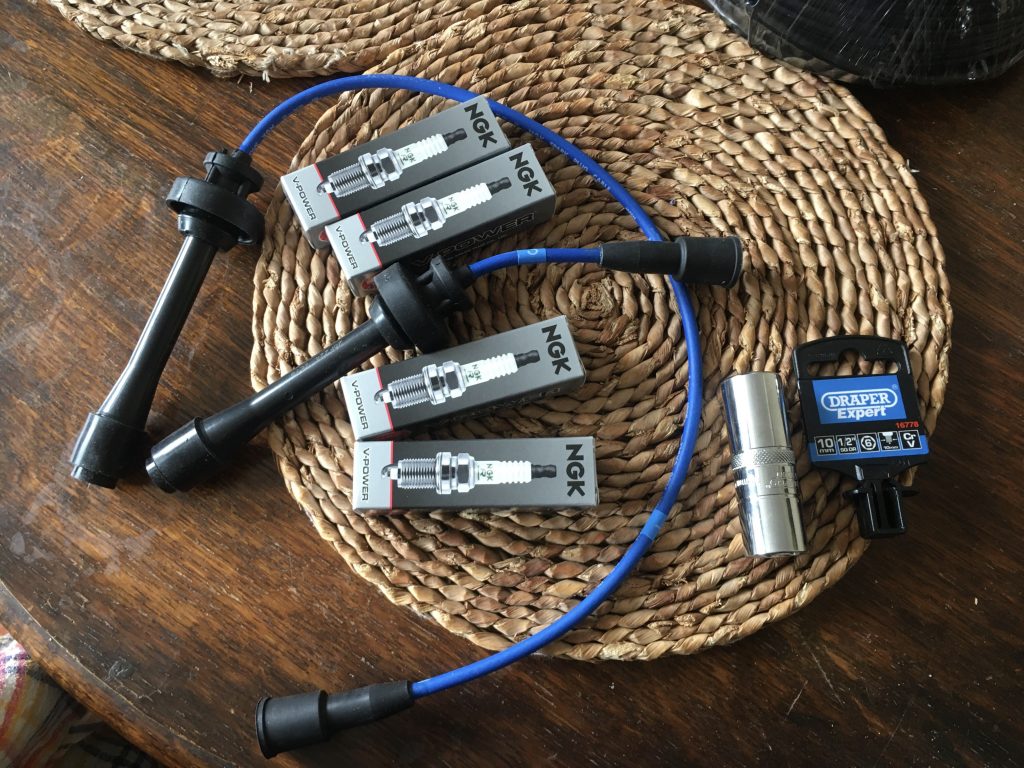
VVT spark-plugs, wires and spark-plug socket.
Rather disappointingly the VVT spark plug wire set is just two leads. In a normal engine it’s all four. This is because there are two ‘coil-on’ plugs or packs, which are rather complex, and, apparently, not available commercially. At least not easily, commonly or cheaply. Bummer!
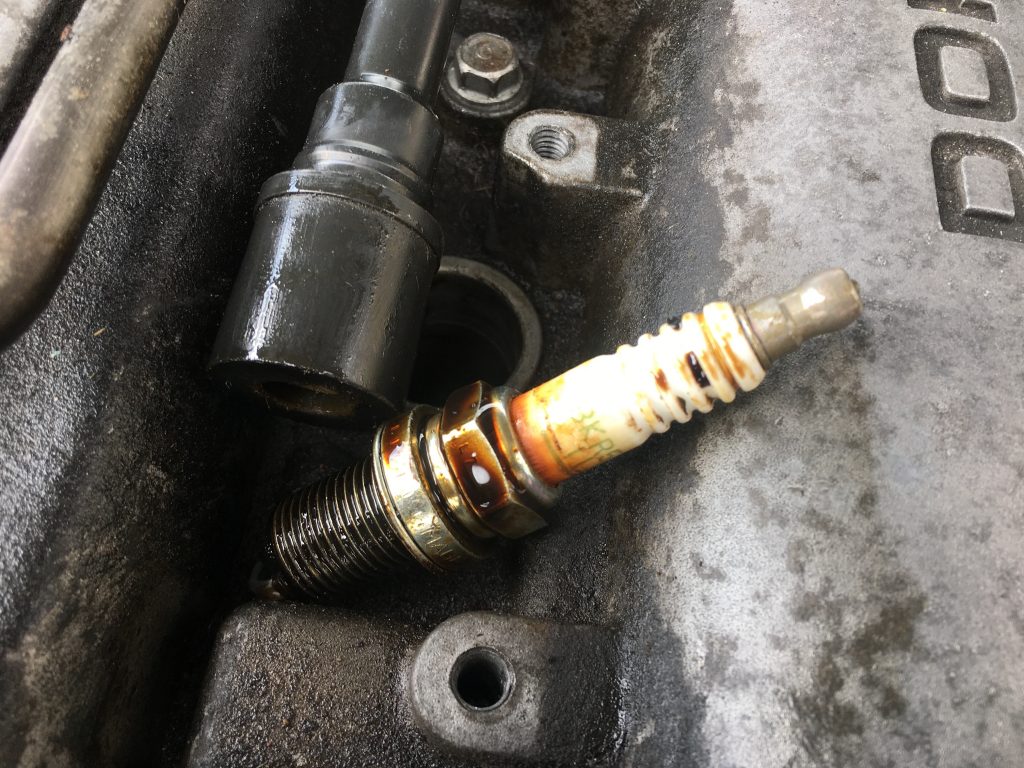
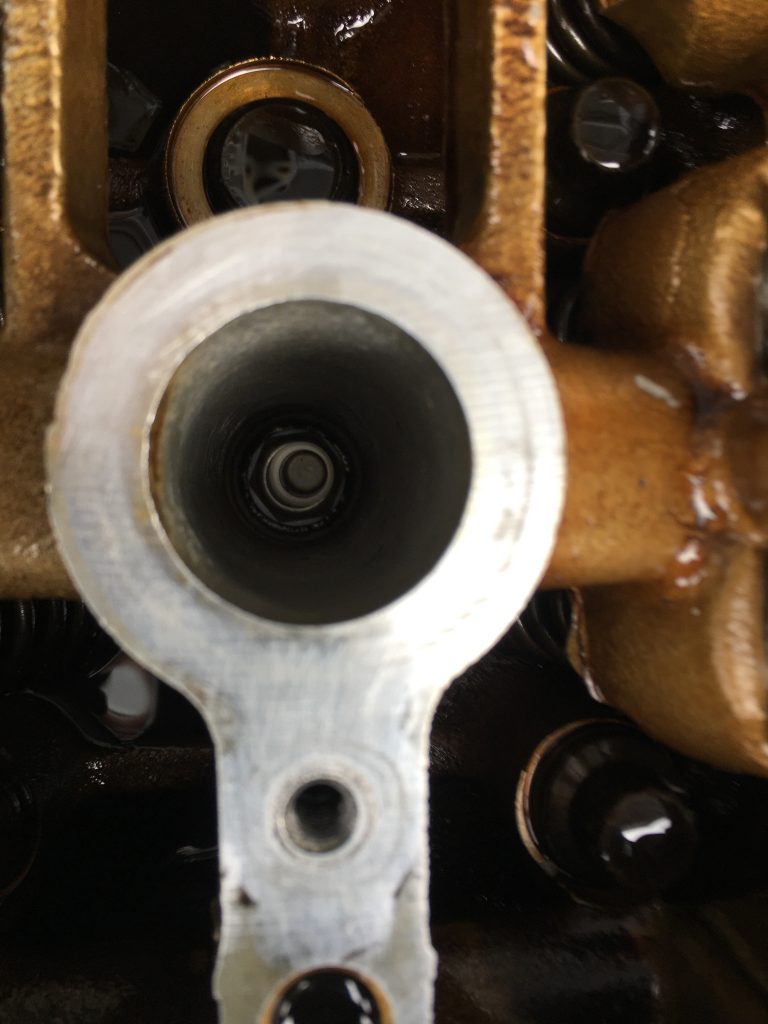
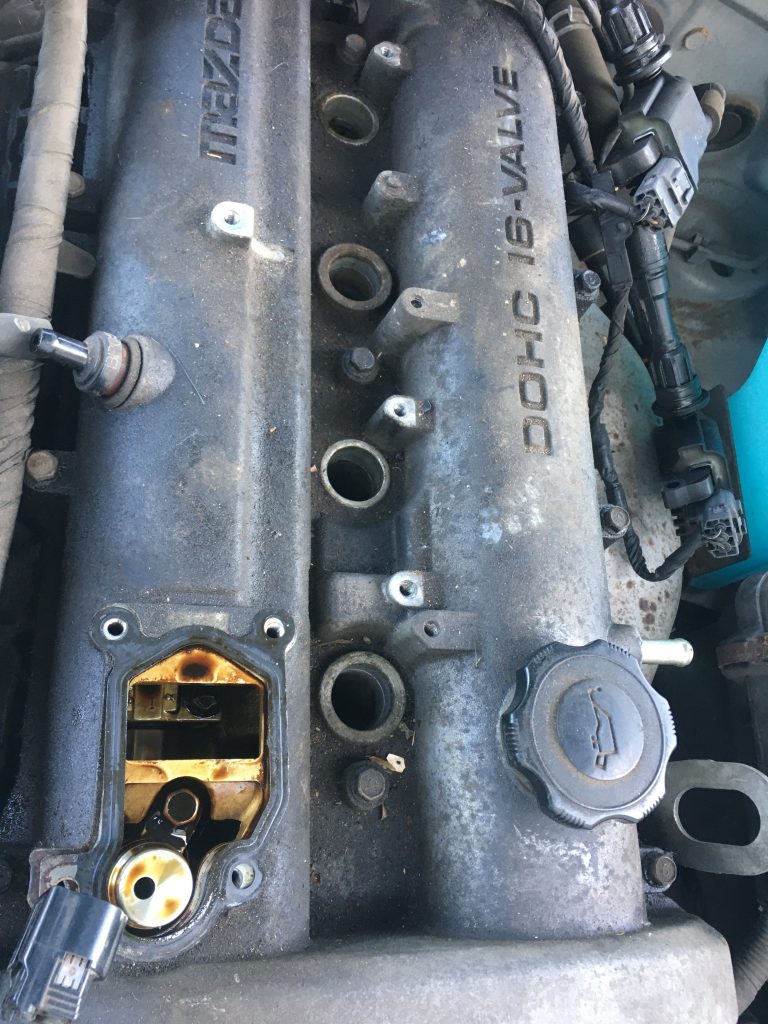
Uh-oh! Oil in the second spark plug chamber.
When I did all the cam-belt work I didn’t take the plugs out. I thought about it. But I was busy enough with everything else. I kind of wish I had now! Why? Because I found that there was oil inside the second from front plug well. It would be interesting to know if this problem predated my work, or was a result of it.
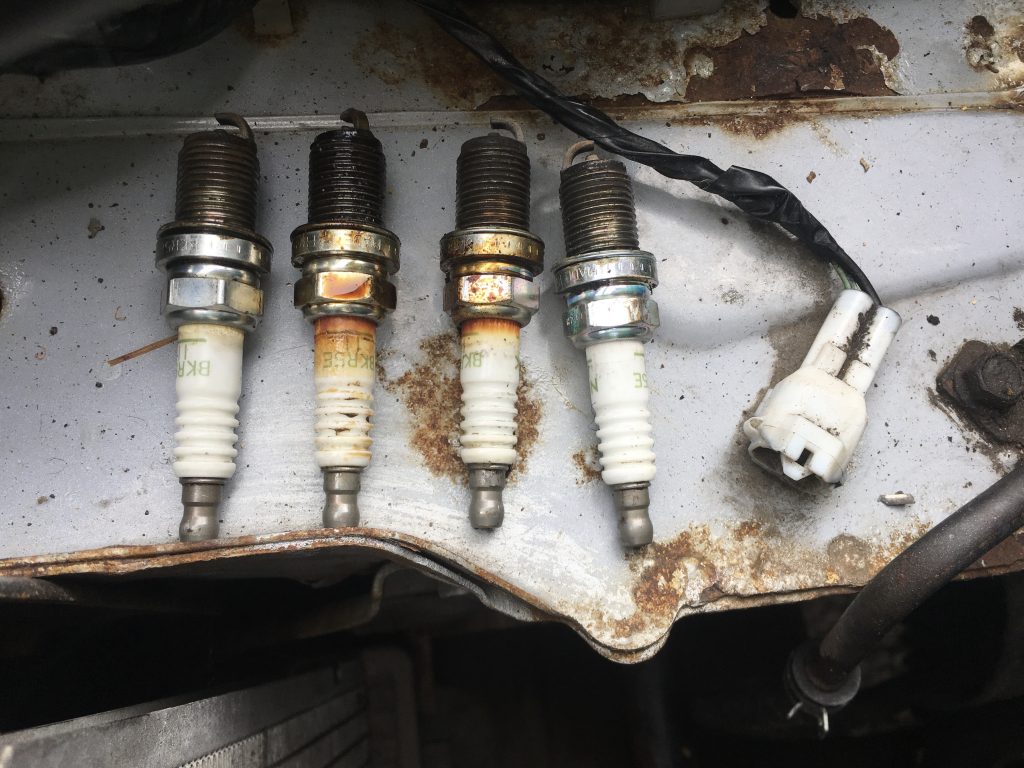
The old plugs. Second from left is the oily one!
I had the cam-cover off several times during the cam-belt and cam-cover gasket changes. According to several YT videos I’ve watched on the ‘oil in your spark-plugs’ topic, the most likely cause is a faulty gasket on the plug’ole.
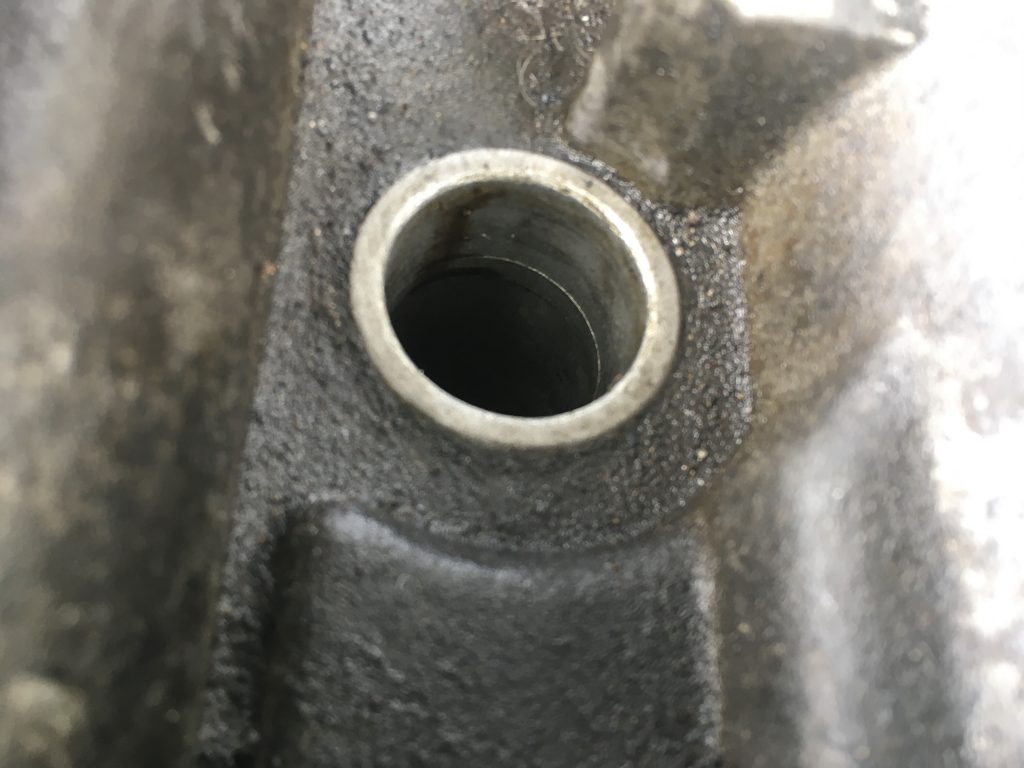
Now mine is a new gasket. But has the on and off business damaged it? I guess I’ll have to check again after this job is done. But in the meantime, once the old plugs were all out (see above pics), I had the cam-cover off yet again, to really clean it.
This is the oily one.
I took numerous pics of all the spark-plug holes, both before and after, for my own reference. But I’m only putting up one or two of those images, not all eight plus of them!
The cleaning of the cam-cover was the most time consuming part of this day’s work. And it’s only really a cosmetic thing, if I’m honest. I should’ve done this the first time I had this part off. And actually I did, just not so thoroughly.
Cleaning the cam-cover.
This time I spent a couple of hours, repeatedly washing the top, with a little washing up liquid in warm water. Then I scrubbed it, again repeatedly, using Swarfega, getting into all the nooks and crannies as best I can. I used wire brushes, wire wool, and plastic toothbrushes, both large and small, going over it all multiple times.
I then rinsed it all off in warm soapy water, and dried it using lint-free cloths. After that I went over the entire thing several times using wire rotary tools in a hand-drill. Then it all had a dry-clean with the lint-free towels. And to finish off, a thorough rub down with isopropyl alcohol, to clean up.
I had to remove or mask certain bits.
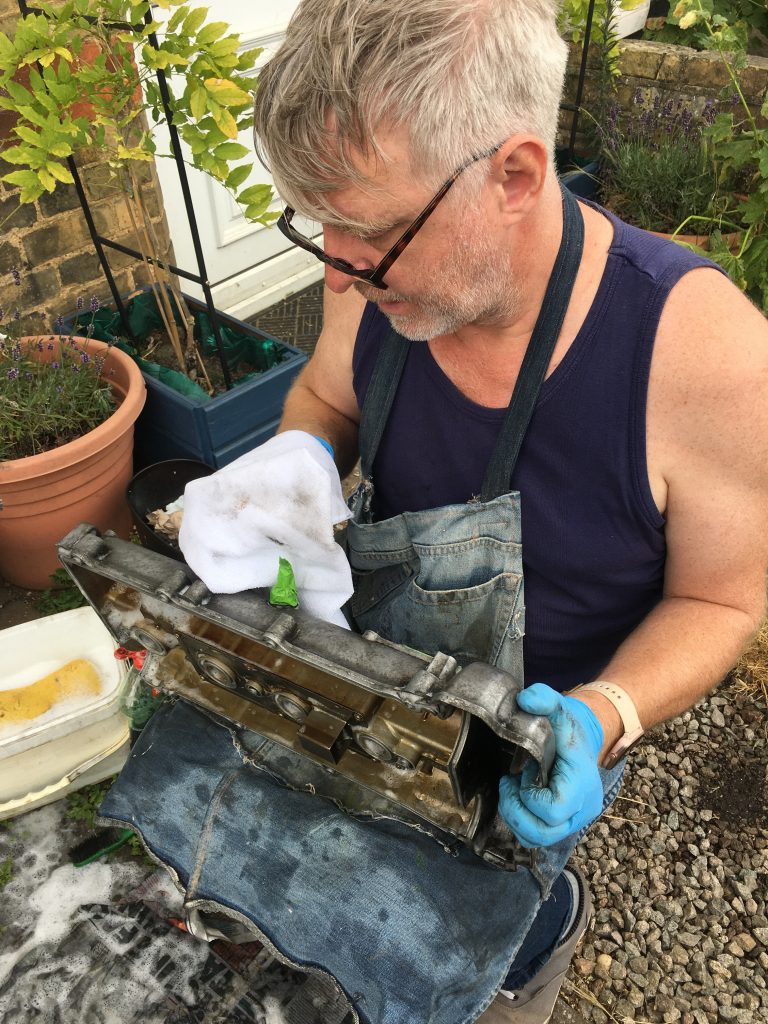
This whole cleaning period took ages! And during doing it my iPhone battery died. So I didn’t get any photos of the masking I did, nor the removal of sundry bolt-on bits, nor even much of the cleaning itself. Thanks Teresa for capturing me at work in my home-made denim apron!
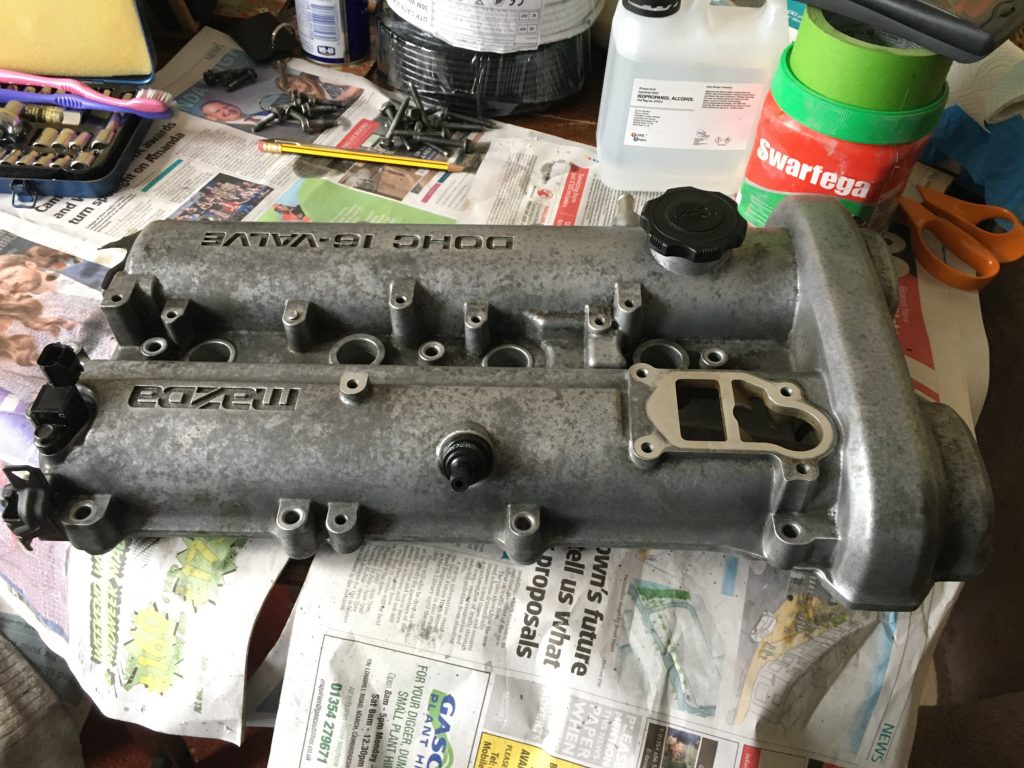
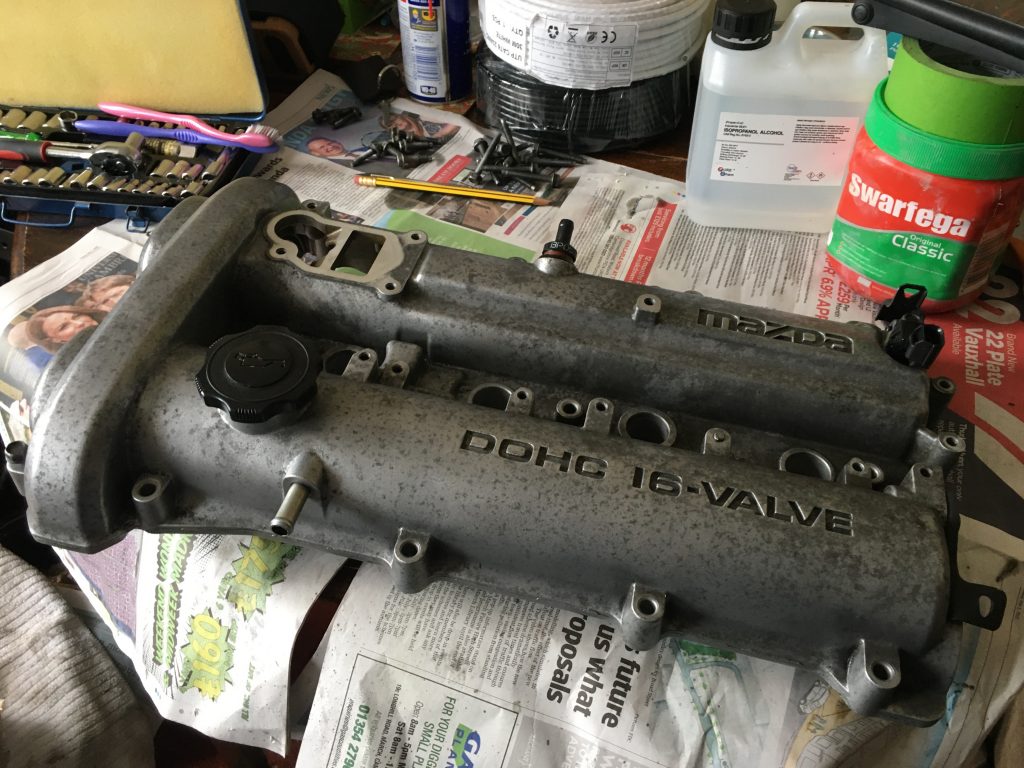
Whilst the cam-cover is certainly much improved, it’s nothing like as clean or shiny as I’d really have liked. There’s still a residual ‘rash’ effect. And the embossed lettering was hell to try and clean out.
This and the above are the ‘after’ pics.
With the cam-cover cleaned, mostly top, but also bottom, and the gasket cleaned and re-installed, I put the four new spark-plugs in (see pic immediate below). It was at this point that one of my major frustrations with this day’s work came to a head.
Throughout the work I struggled to find all sorts of things I needed, from my car keys to the socket set I prefer to use (I have several!). And then – and this was the real cherry on top – part way through the work, I appear to have lost or mislaid a crucial socket-set adapter.
New plugs in.
This means I can’t torque the bolts down to specific settings, but have to guess, and do it all by feel. Not very satisfactory for a newbie grease-monkey like me. The room that leaves for anxiety over cock-ups is grand-canyon-esque!
So I had to ‘button everything up’ in an approximate manner. And at this juncture it’s worth noting that, if one’s learns from mistakes, I ought to be learning plenty! Here are a few I made during this particular session of maintenance:
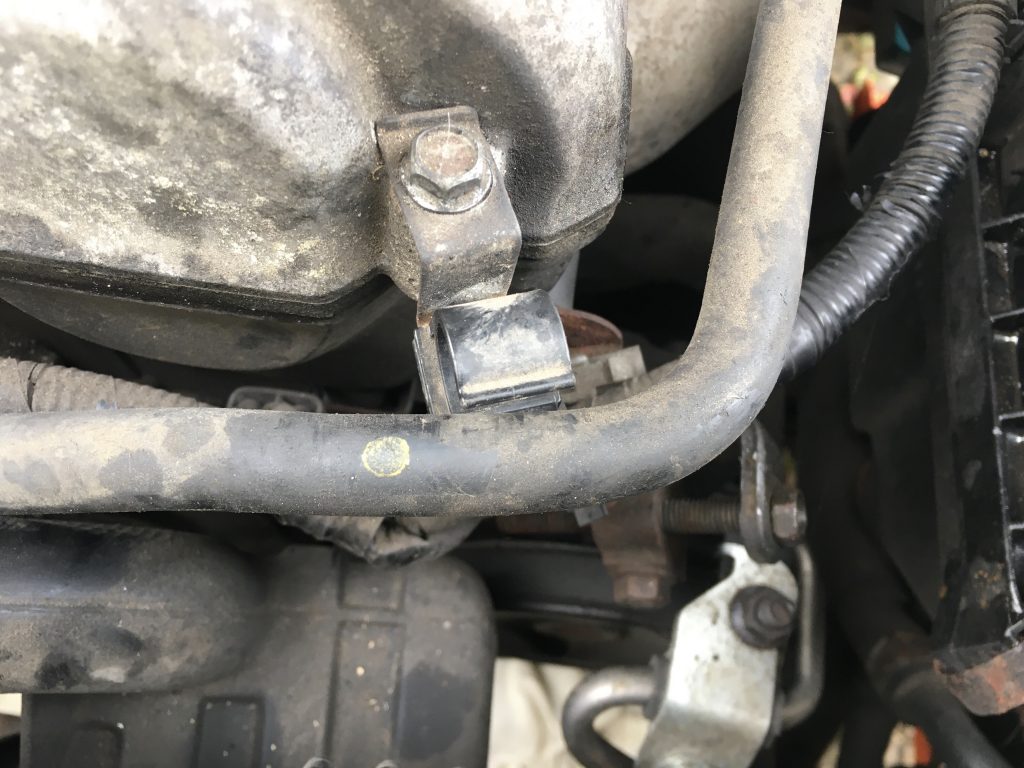
I took all the VVT bolts out before loosening – or make that trying to loosen – the 40NM torqued banjo bolt. This led to the bending of a ‘hard line’ hose. I’ve tried to bend it back, but it’s still misshapen. This makes re-fitting the whole VVT arm harder. Doh!
I couldn’t find the ‘loosening’ sequence – tightening yes, loosening no – for the cam-cover bolts, so had to guess (based on reversing the tightening sequence… ‘ish).
When I did the sequence I got to the ‘end’, only to realise I’d somehow skipped one bolt, leaving that one tighter throughout, with the danger of deformation or even cracking of the cover. A visual inspection seems to indicate I’ve gotten away with it this time.
During cleaning myriad little things occurred: using tissues that leave debris everywhere; getting cleaning stuff meant for top only underneath; snagging the rotary wire brushes on the towel on which the cam-cover was sat, sending it flying (another visual inspection promotes a relieved sense that I probably got away with this).
Constantly mislaying stuff, from car-keys to tools. I need to tidy, streamline and get properly and thoroughly organised… in advance!
I’m sure there was more… but I forget!
I sincerely hope I do actually learn from this litany of errors! Some of these are already repeat mistakes, shoddy organisation being my most repeated ‘sin’!
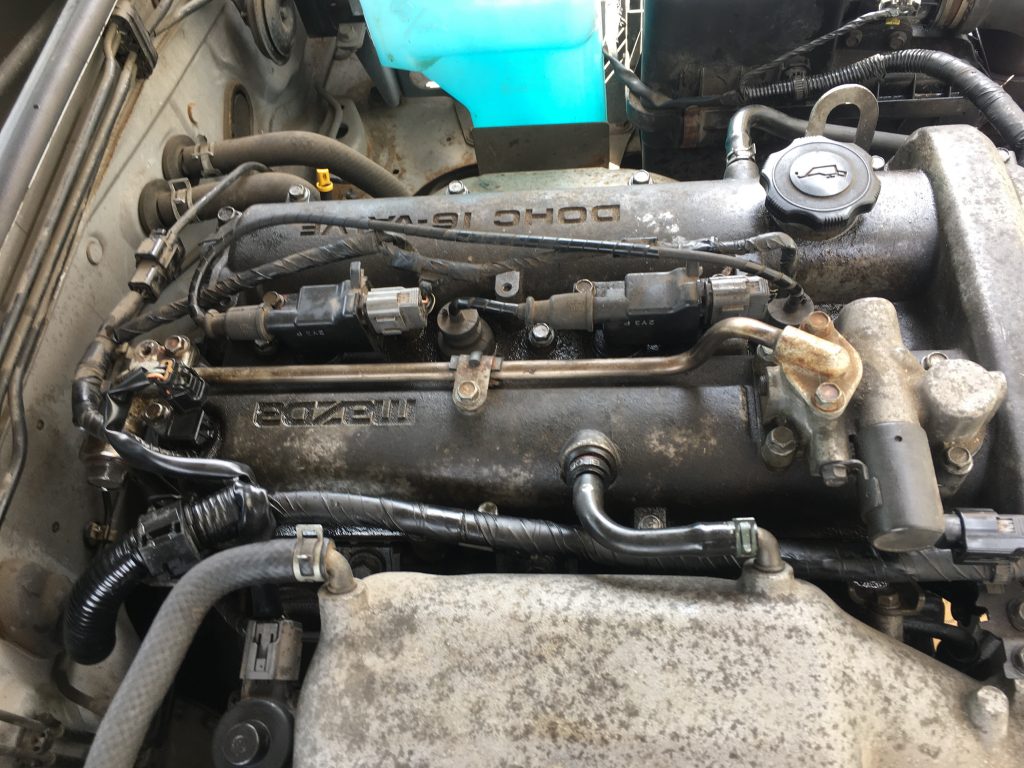
All back together. Looks nice!
And at day’s end, when I took the car for a test-drive? After all that work it felt exactly the same. Grrr!!! Has oil gotten into that spark plug chamber again? Do I already need another cam-cover gasket, having had this one on and off repeatedly?
Two other new parts – a thermostat gasket and a little plastic doodad that’s supposed to fix floppy roof latches – both failed more or less immediately. So perhaps the new cam-cover gasket has as well?
At least the engine bay looks a bit nicer! But what good is that if she still runs iffily? Guess I need to check to see if oil’s still getting into the second spark-plug well. But without the torque adapter I’m not keen to be taking stuff apart again right away.
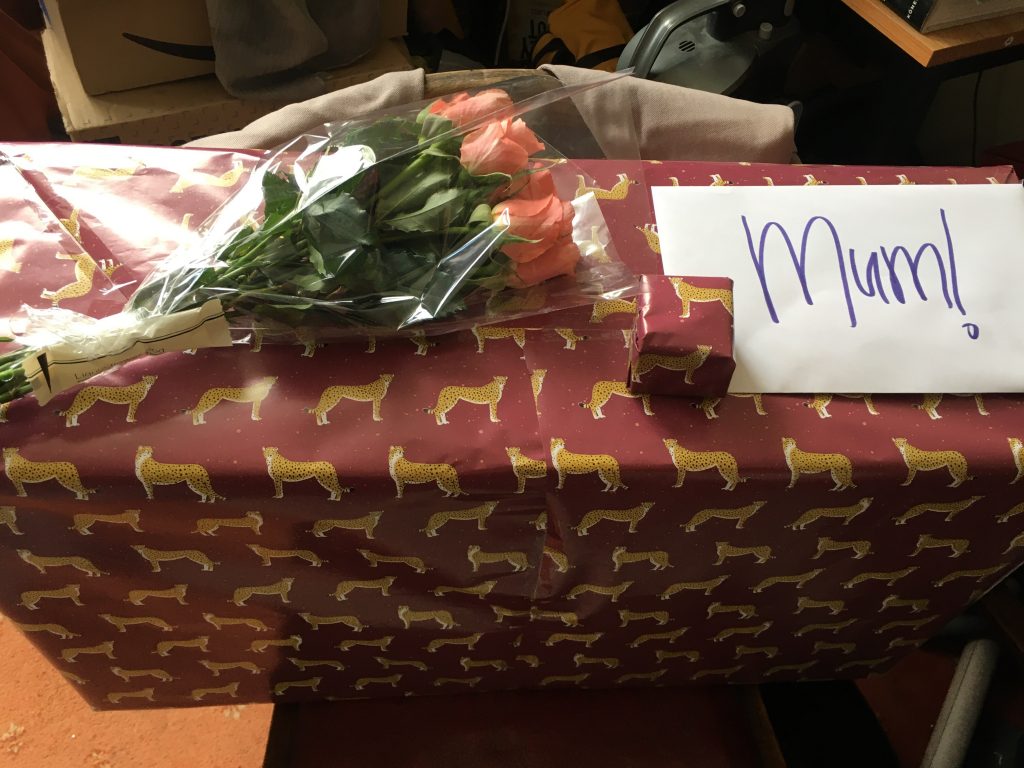
Birthday stuff for mum.
Plus we’re due to go out today to meet my mum for slightly belated birthday tea and cakes at Anglesey Abbey. So no further fiddling about under the hood! I just hope we don’t have a repeat of the original ‘on the road to Anglesey’ debacle, which required an expensive AA tow home!
Spark-plugs reminder photo.Working in dazzling sunshine.Note that banjo bolt (rear of VVT) leaketh not!Later in’t day, torch now required.Happy grease monkey; engine starts!
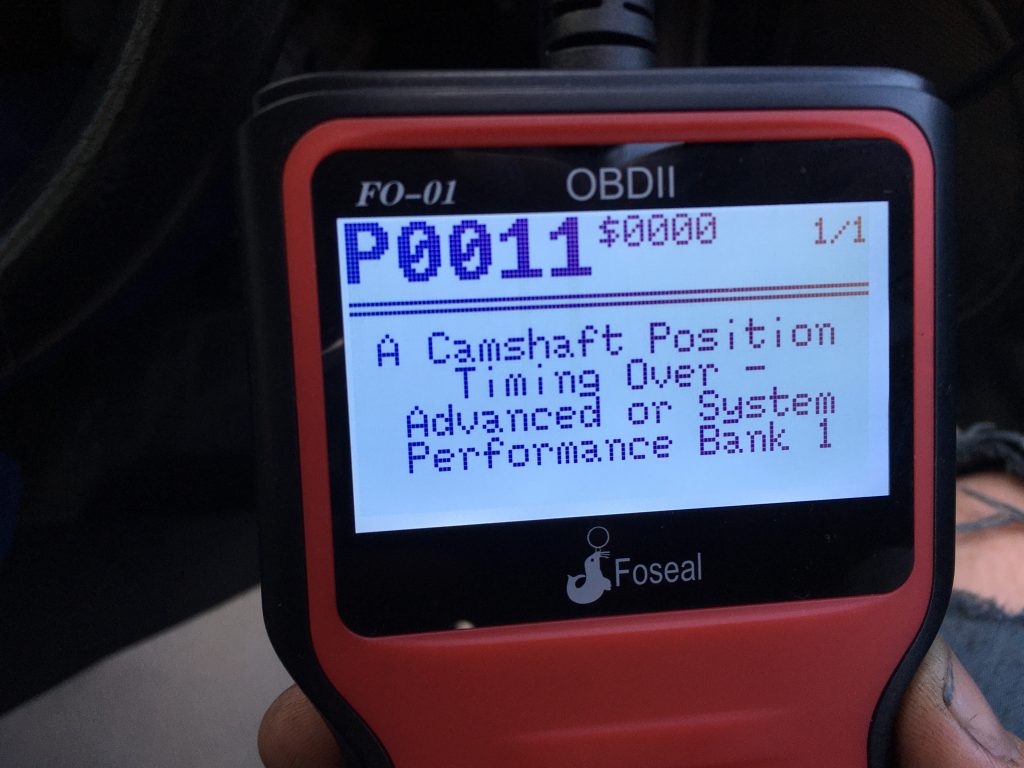
And lo, it came to pass, that ye olde engine was fix-ed! Hence the happy mien, and Churchillian two finger salute above. The image below is just a reminder of an earlier – and at this point gratifyingly absent – OBD fault diagnosis.
Adopts Inspector Clouseau voice ‘Yes, I know that, you fool!’
But at this point I still have a major coolant leak.
Today I hardly took any photos of the work I did. Most remiss of me! Maybe it was because today was mainly re-assembly? But frankly I really should’ve taken lots of pics!
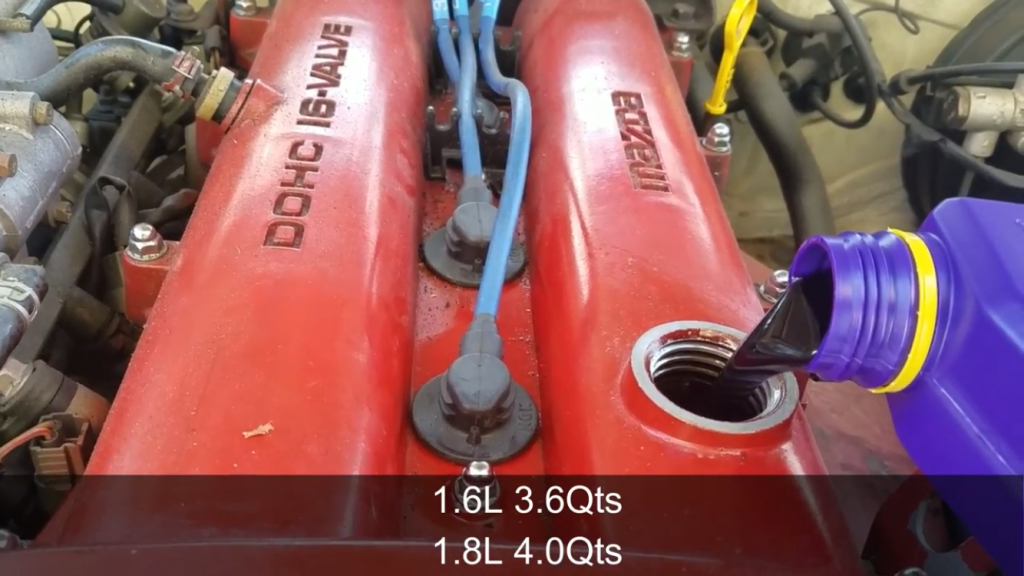
The above screen capture was taken to help me work out how much oil I needed to refill the engine with. Most of the helpful videos are American – the call their Mazda MX5s Miatas! – and everything needs to be changed from foot pounds and quarts to NM and litres.
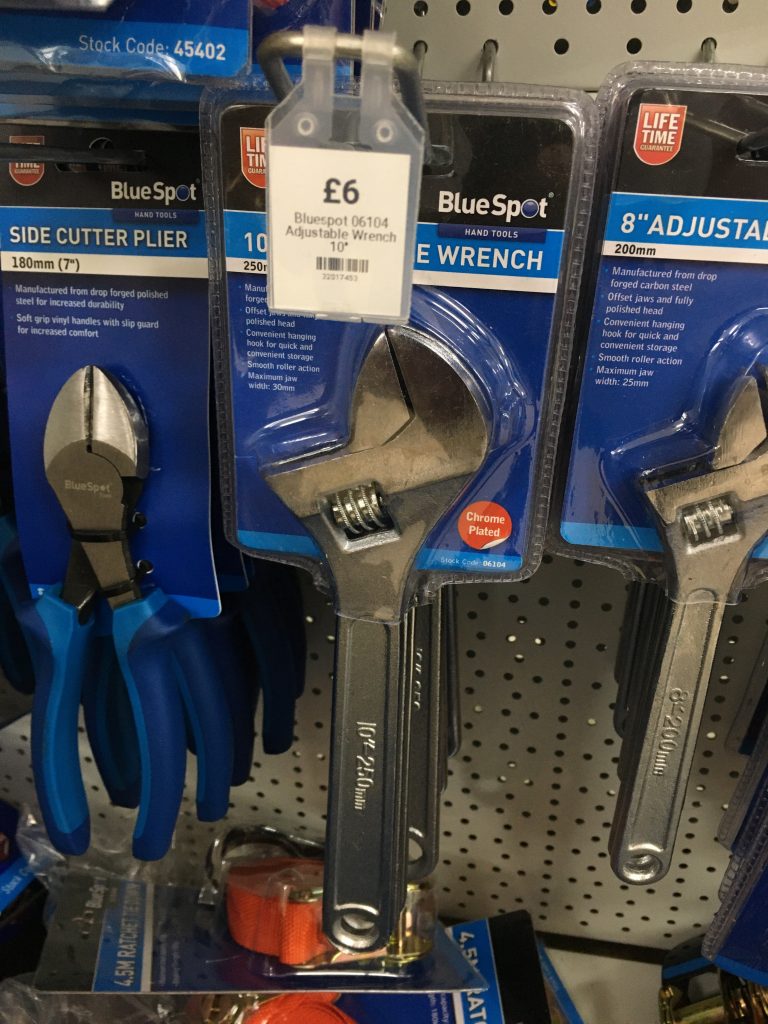
I walked into town – not far! – and had a slice of pepperoni pizza from Dreggs. I also checked out some larger wrenches, in Boyes and what used to be Thing-a-me-bobs. I can’t recall what the latter is called now!?
I wound up buying two 300 mm x 36 mm – one foot long with an inch and a half ‘mouth’ (in old money) – Rolson adjustable spanners. At £6.99 they were a wee bit dearer than the Boyes ones; it’s the latter pictured above. But they looked and felt both bigger and better quality.
Actually, whilst they look decent enough, they’re not great. Are any adjustable spanners any good? The adjustment is always fiddly, and very prone to slipping or working loose!
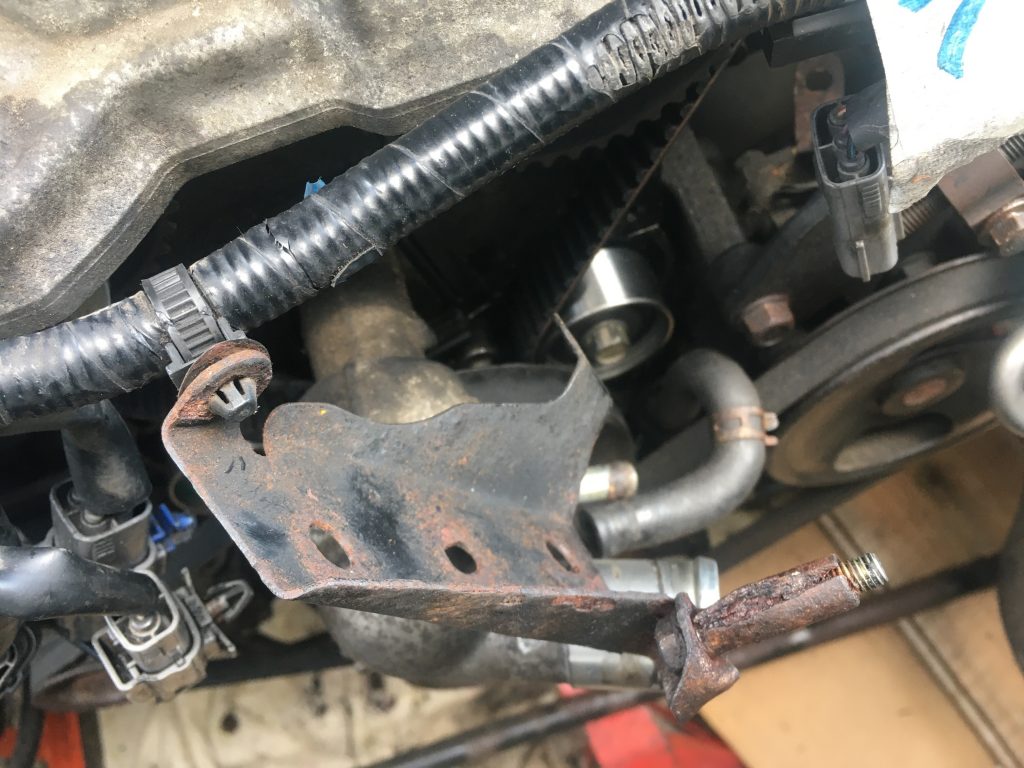
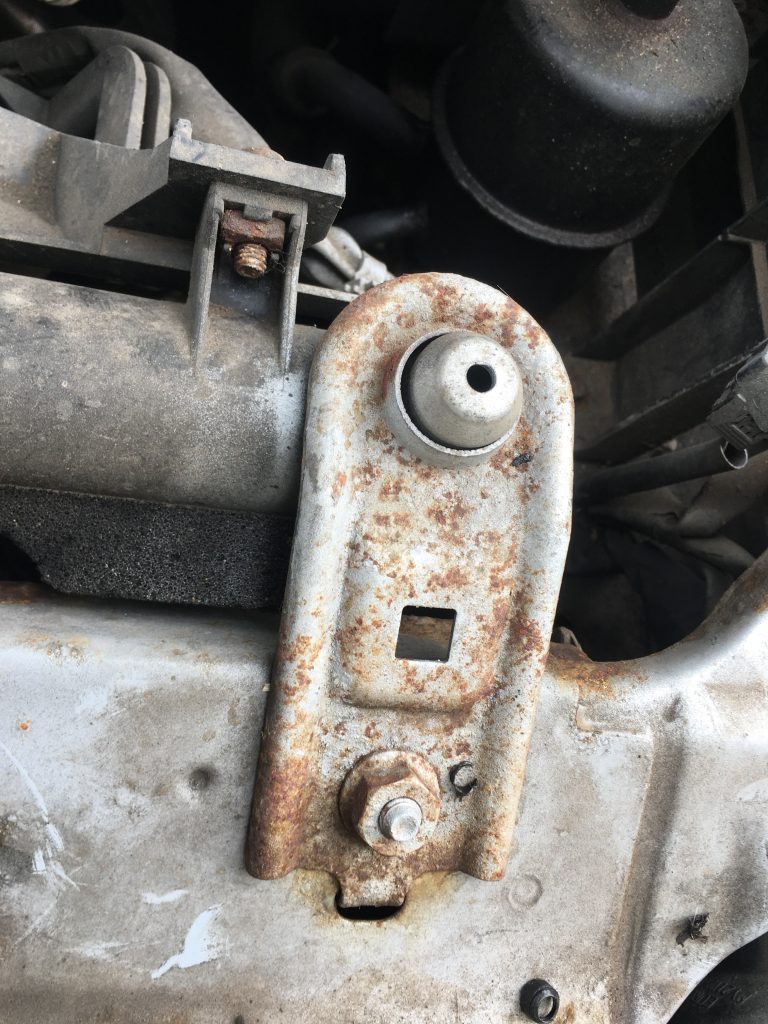
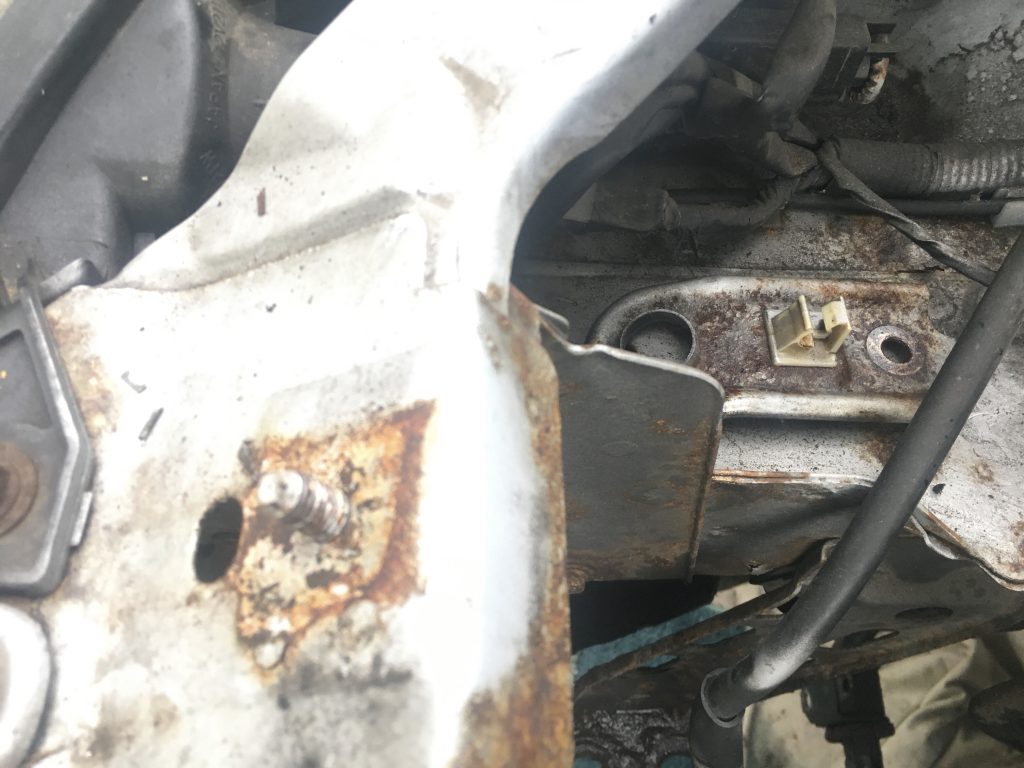
I left off all three of the cam-belt guard plastic bits, as they were pretty mangled to start with. And removing them had further damaged them. I think this metal plate screwed into one of them. There are two metal bits n this line that are not fixed back in place.
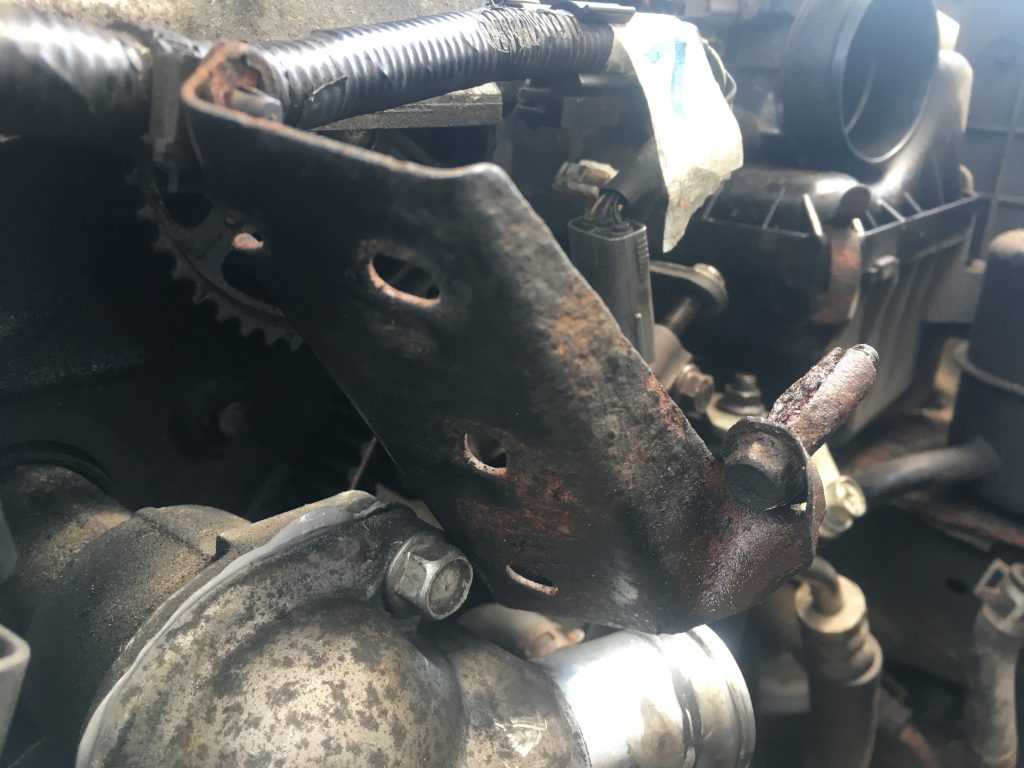
Took two shots of this bit, which now seems poss’ redundant. Ended up removing it altogether. in total there are three plastic cambelt guard sections I’ve left off, and two metal brackets, this larger one, and a much smaller one.
A chunk of today – two hours, poss’ more? – was given over to a trip to Halfords. After buying the two spanners and a bit of pizza, I caught a bus to the big roundabout on Wisbech Road, which is pretty close to Halfords.
I bought a new oil filter. I was expecting it to have a ‘crush ring’. But it didn’t. Rather tragically and annoyingly I failed to install it, as I was unable to remove the damned old one!
I wanted to catch a bus home, but didn’t want to walk to Tesco. I would up walking all the way home, with a rucksack full of heavy tool, engine oil, and even a little ‘dolly’ trolley (the latter in lieu of a larger and more expensive inspection trolley).
I stopped at The Hippodrome en-route, for a refreshing lager shandy, and to rest my poor aching feet! I’m not fit any more. The walk home was horrible!
As I said at the top of this post, I totally failed to document the re-build. I replaced the cam-cover, inc adding sealant gasket gloop where indicated.
One of the only bits of documenting I did arose out of the balls up I made of the radiator re-install. For starters I totally wasted a whole bottle of coolant/antifreeze, by failing tore-attach one of the radiators’ lower pipes.
Pouring the whole litre in, it simply drained right out, via the lower and still disconnected tube. It was a mother to re-connect that particular pipe, as the clip on it, and the end of the pipe itself, we’re not in tip too condition.
Then, when refilling the coolant mix into the re-installed radiator, I discovered further leaks due, once again, to missed connections. This was a thinner pipe-work segment, and it only haemorrhaged coolant when the radiator got pretty full.
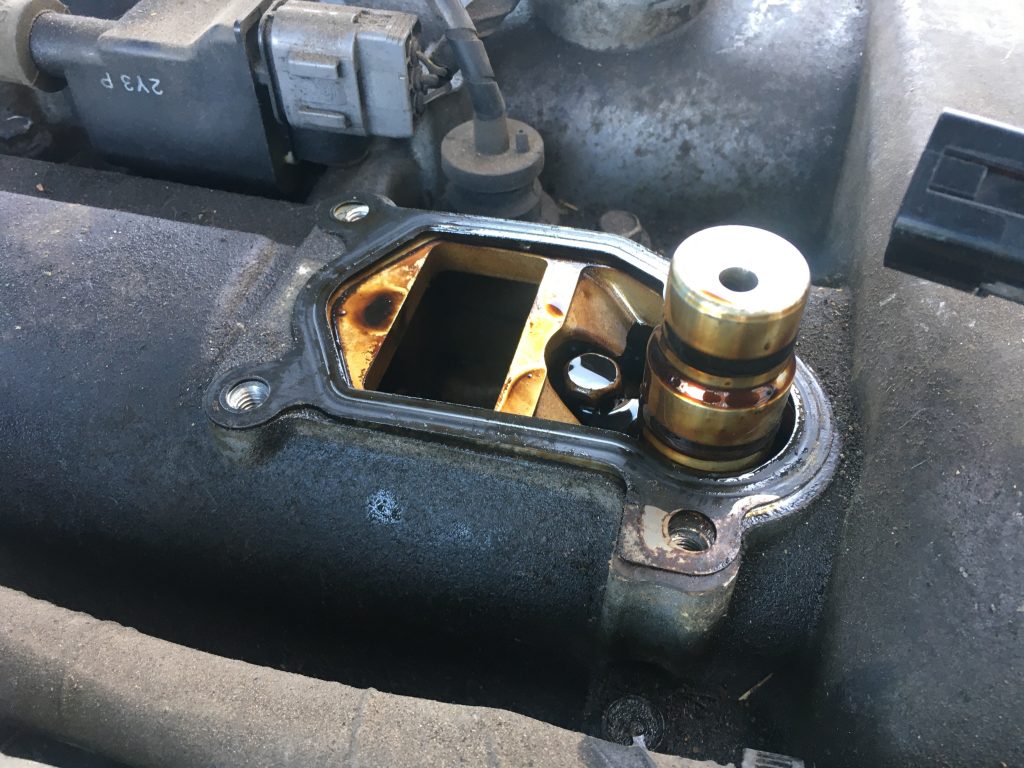
But even after connecting all the errant lines, and tightening up all tubing and fastenings, there remained a terrifically annoying leak. This turned out to be the thermostat housing, the gasket inside of which had fallen apart.
I tried to bodge it, with gasket sealant. But I put it back together wrong; a whole 180° out of its proper alignment. So when I’d reversed it, or corrected it, the ‘temporary fix’ suggested by a BOFIracing dude, didn’t come out as planned.
So I wound up ordering a new thermostat housing gasket today, plus four new undertray fasteners, all from MX5parts.co.uk I hope they get to me ASAP!.
What was most g-g-gutting and g-g-galling, was getting everything back together only for the engine to not work, still. I have to be honest. This necessitated a bit of a lie down! I was, frankly, utterly crushed.
After about an hour of rest, I decided to go out and look at the car again. A friendly neighbour then took me to Halfords, for my second visit o’ the day – at 7.50pm, ten minutes before they shut! – where I bought some coolant.
Still from my video that WP won’t upload!
Topping up the coolant revealed several leaks. the easiest to repair was a small hose I’d missed. Next I tweaked a few of the clipped hose connectors. But, alas, coolant continued to leak. And a video under the area revealed that the thermostat gasket bodge hadn’t worked.
I tried to add that video to this post. I had to shorten it to even upload it. And then, once added in WP, the post no longer updates… gaaargh!!! So I’ve taken a still image from said vid’. Not great, but better’n nowt!
Bizarrely, the coolant, which was streaming out initially, but only dripping by the time I got my iPhone camera on it, seems to be dripping not from where the two parts meet, but just behind that. Weird!?
Anyway, that’s that for this post. I guess tomorrow I just keep on keepin’ on…
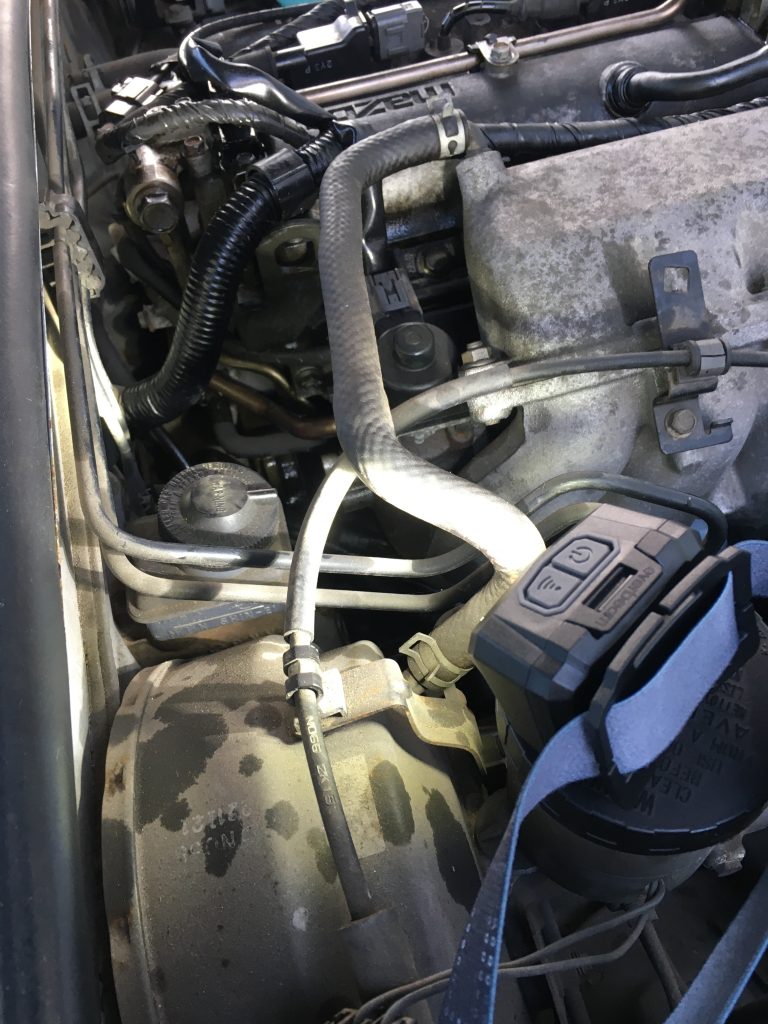
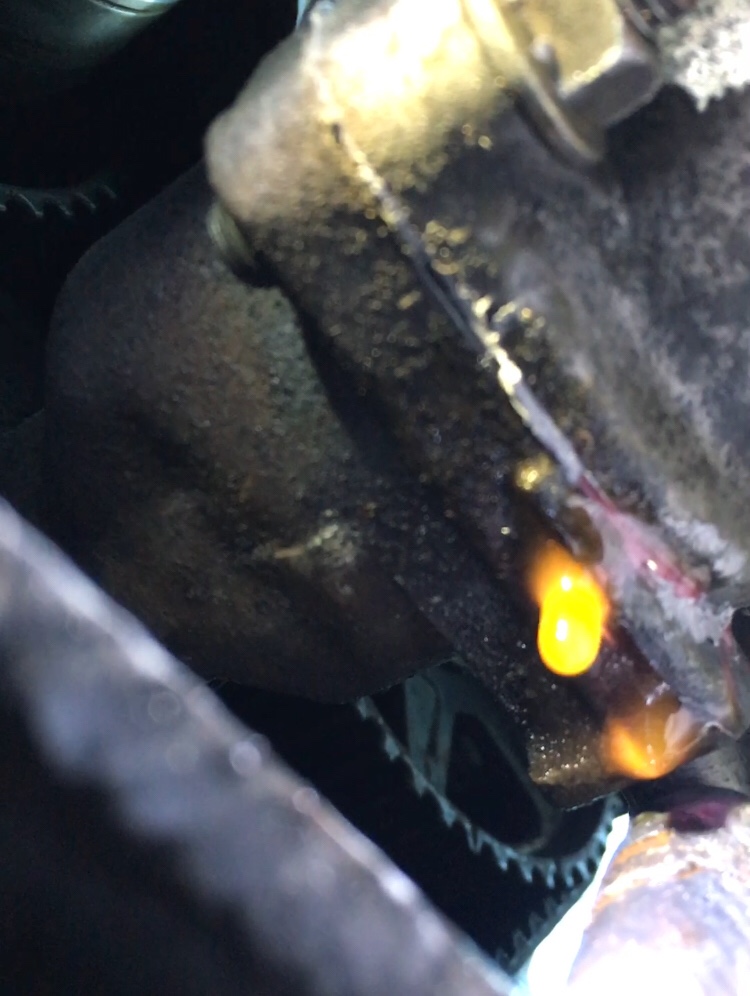
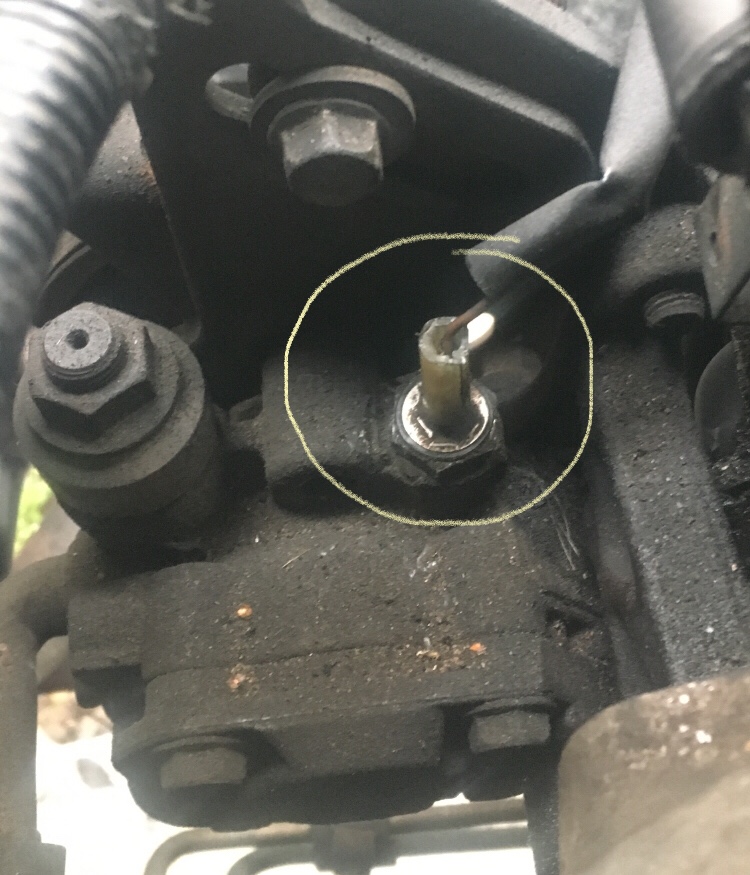
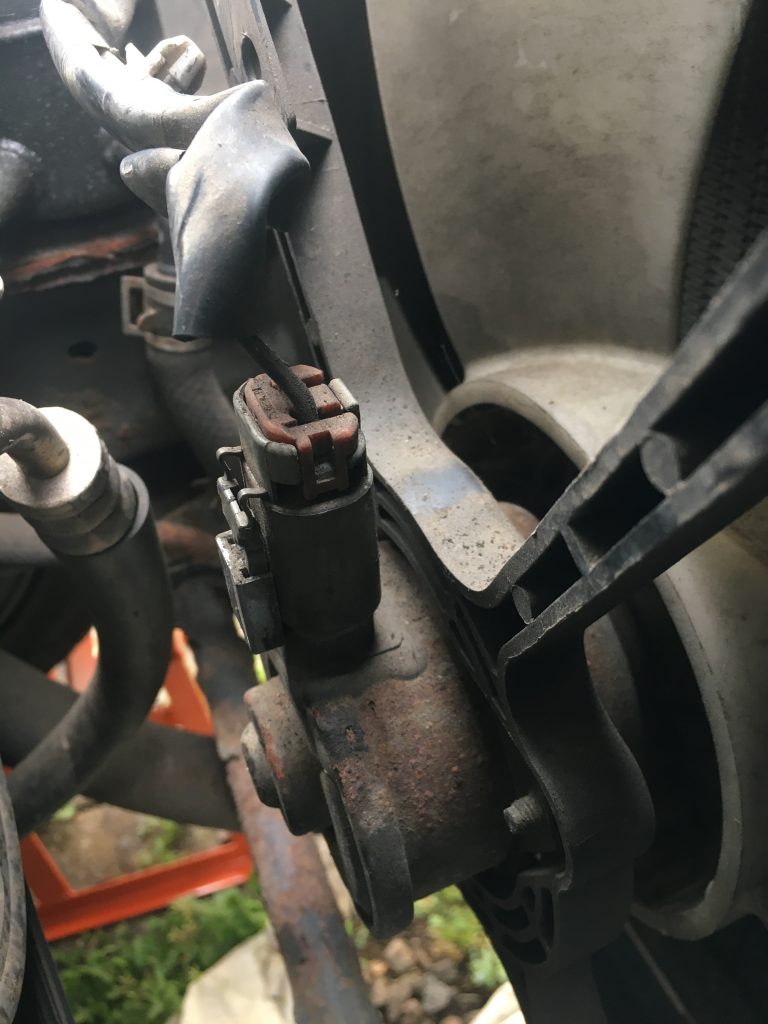
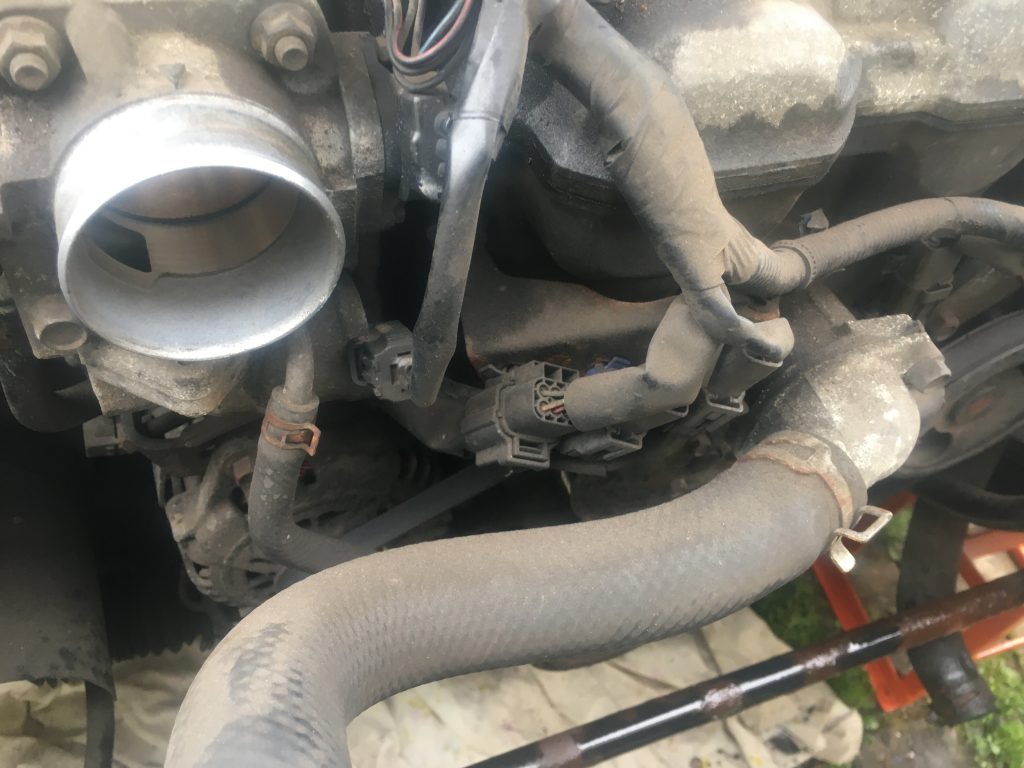
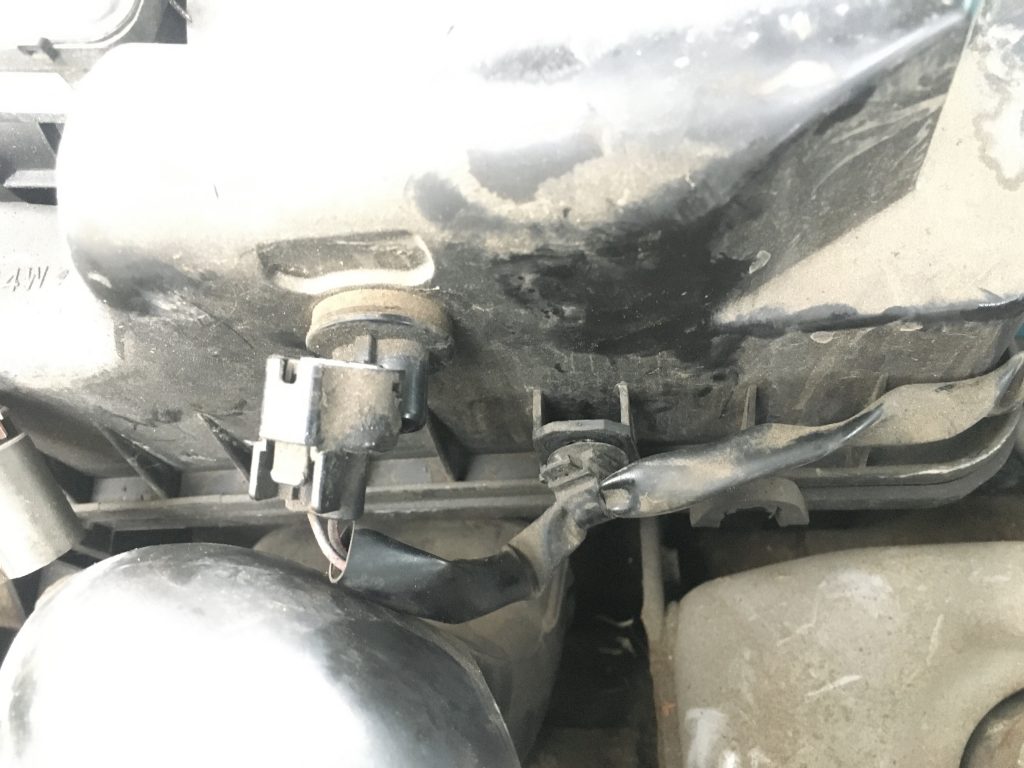
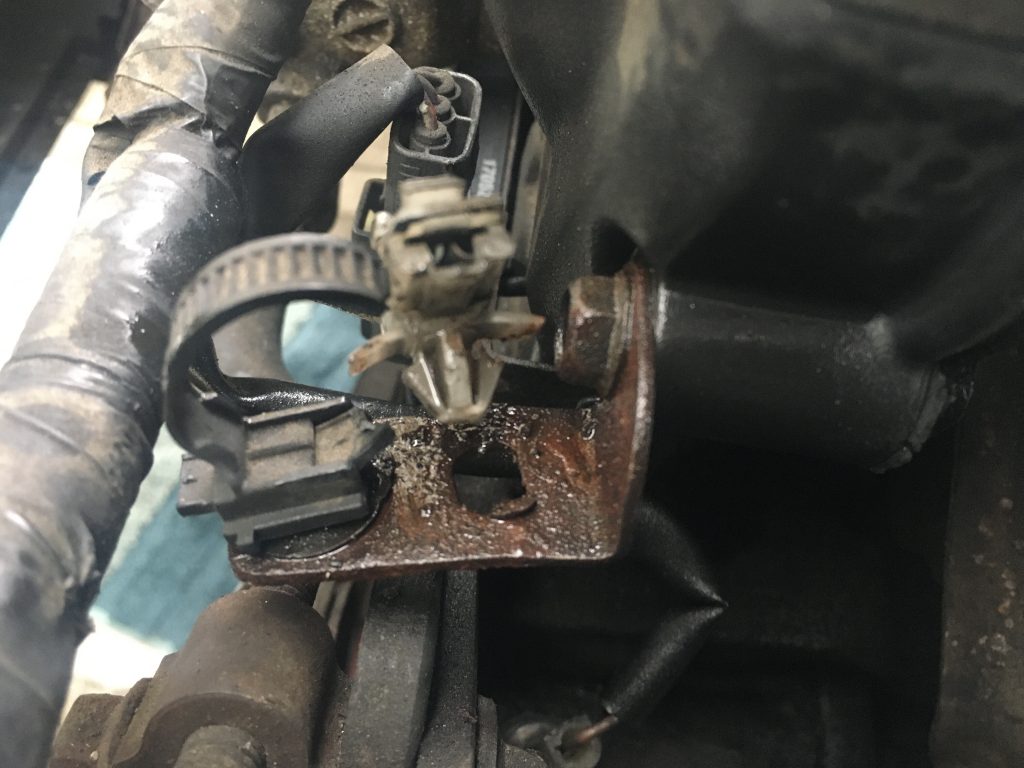
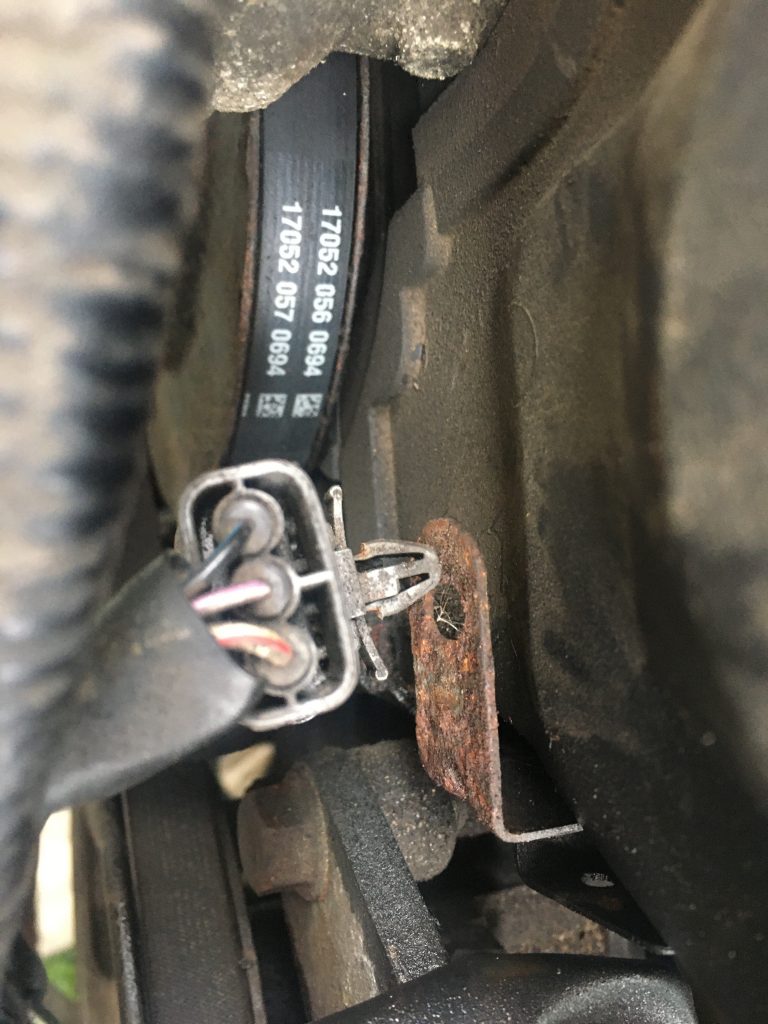
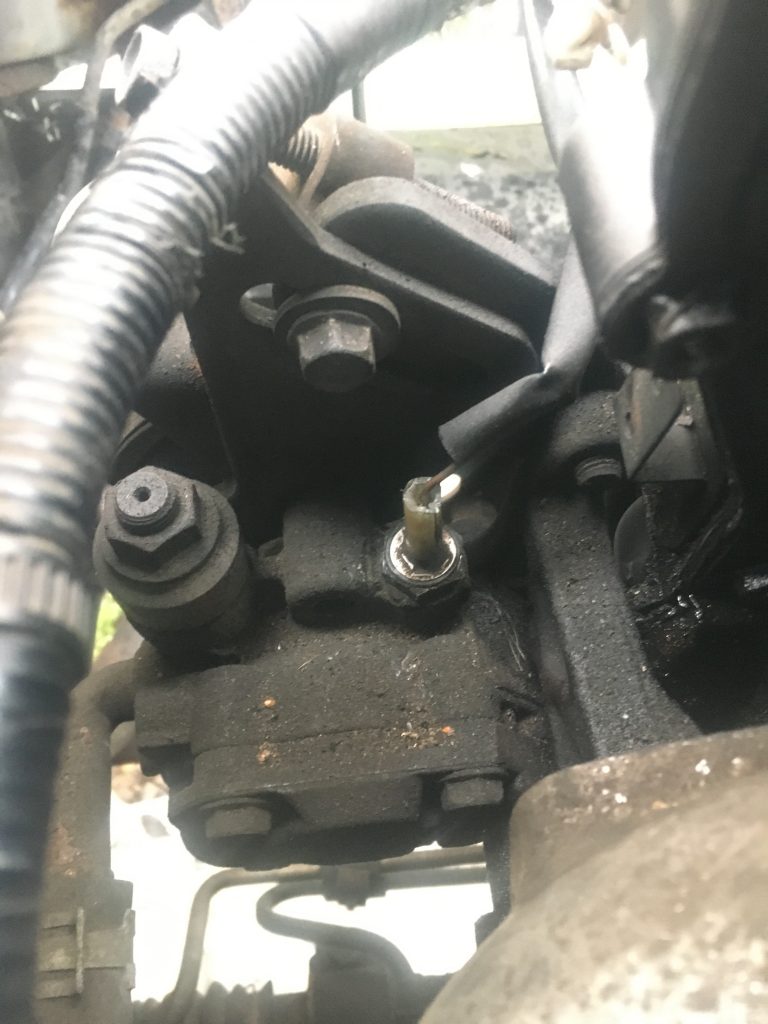
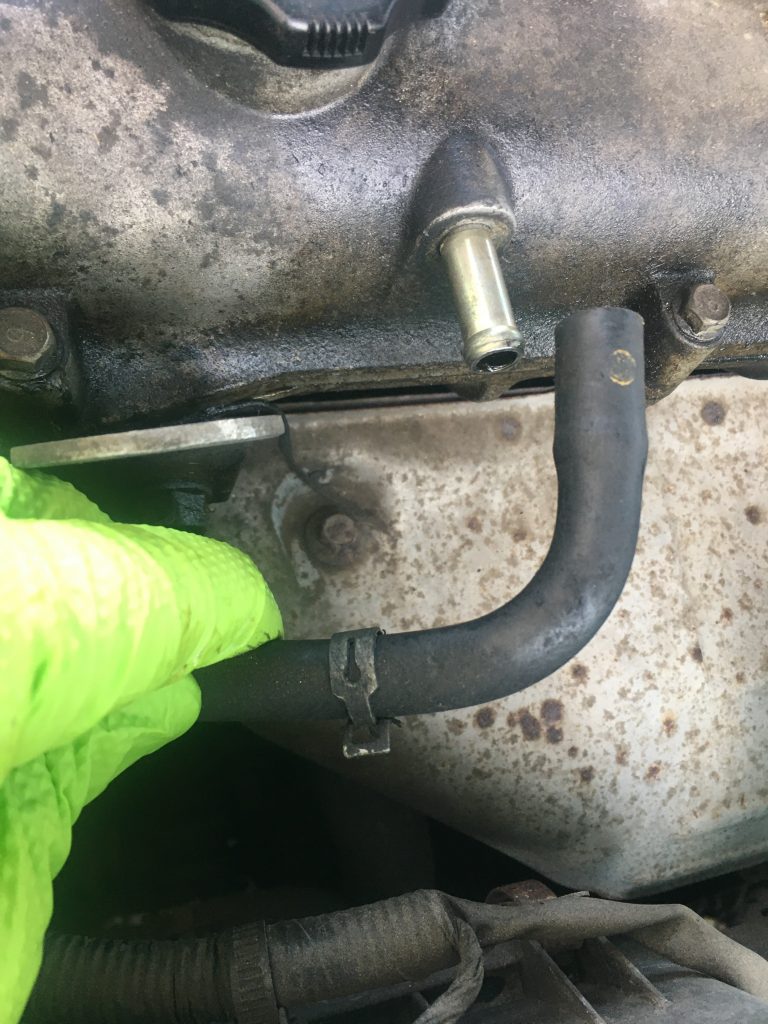
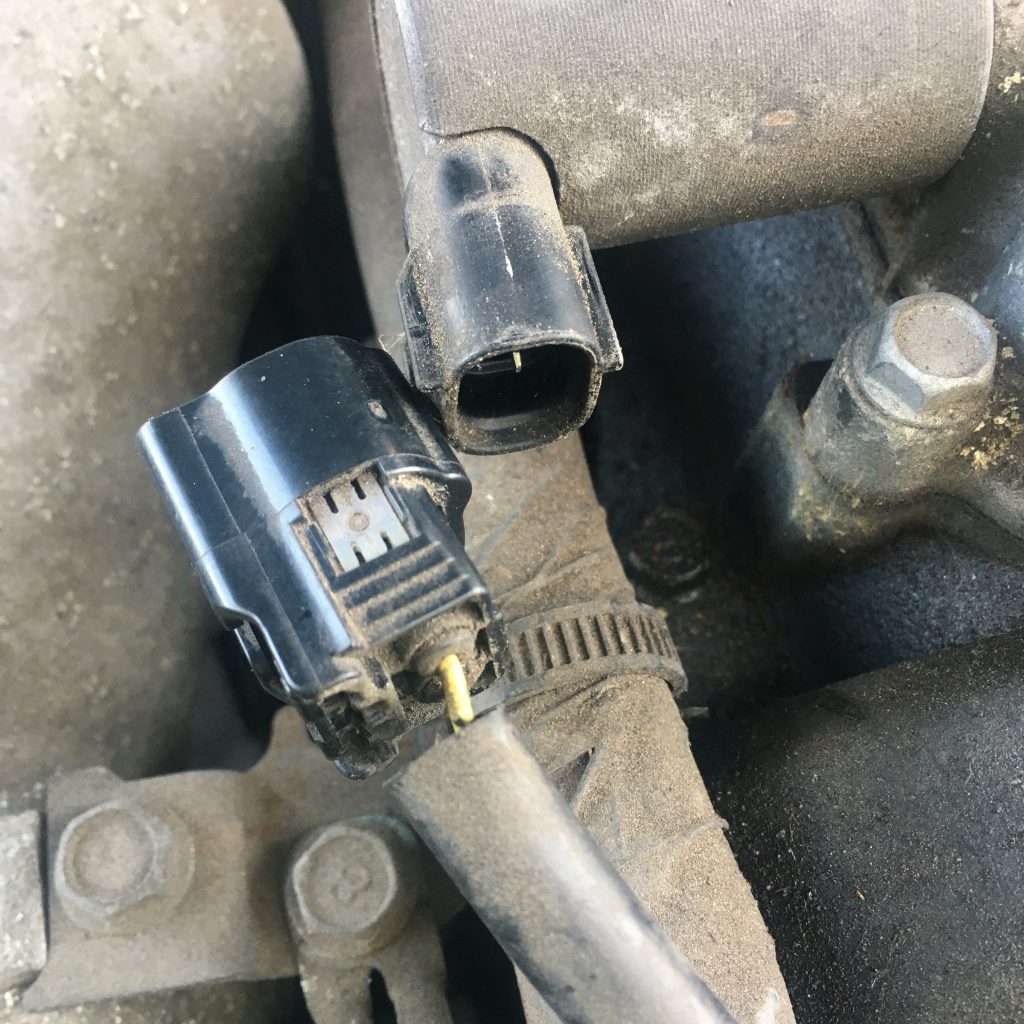
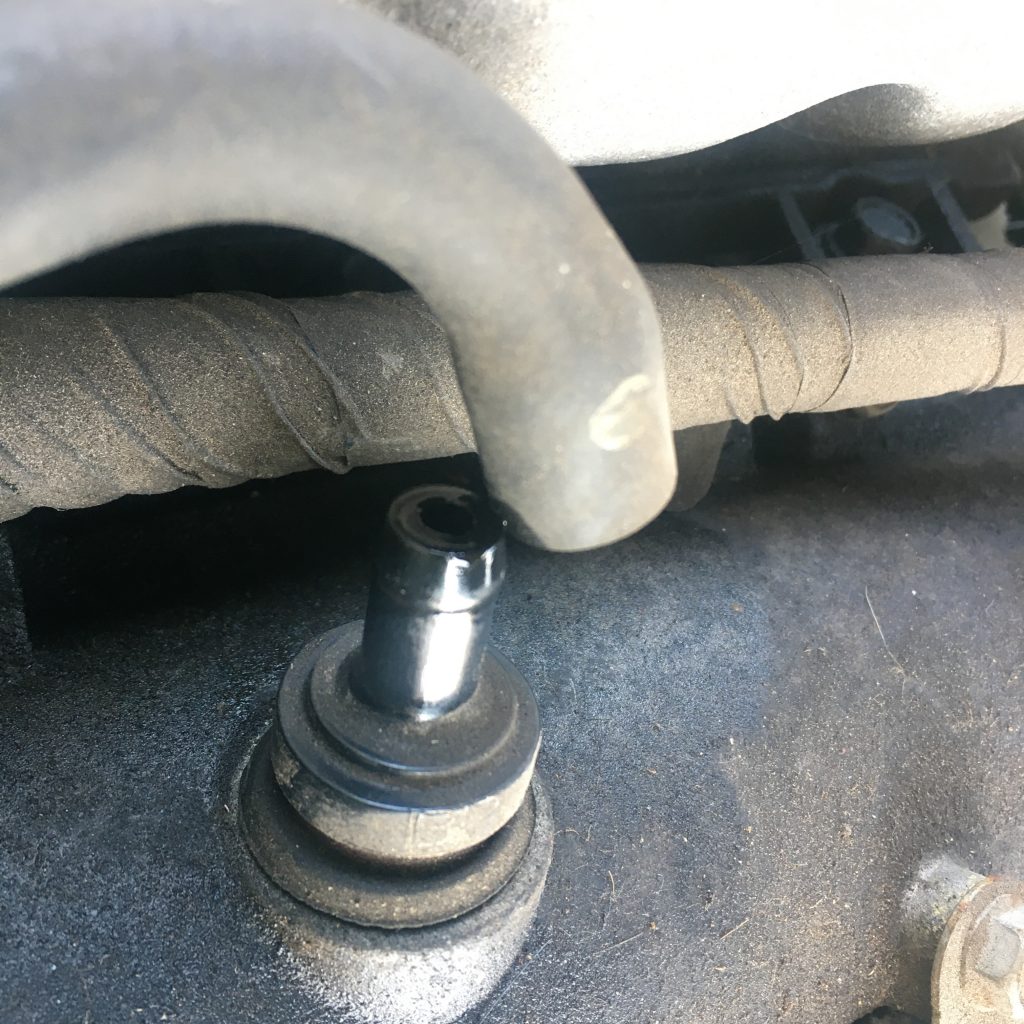
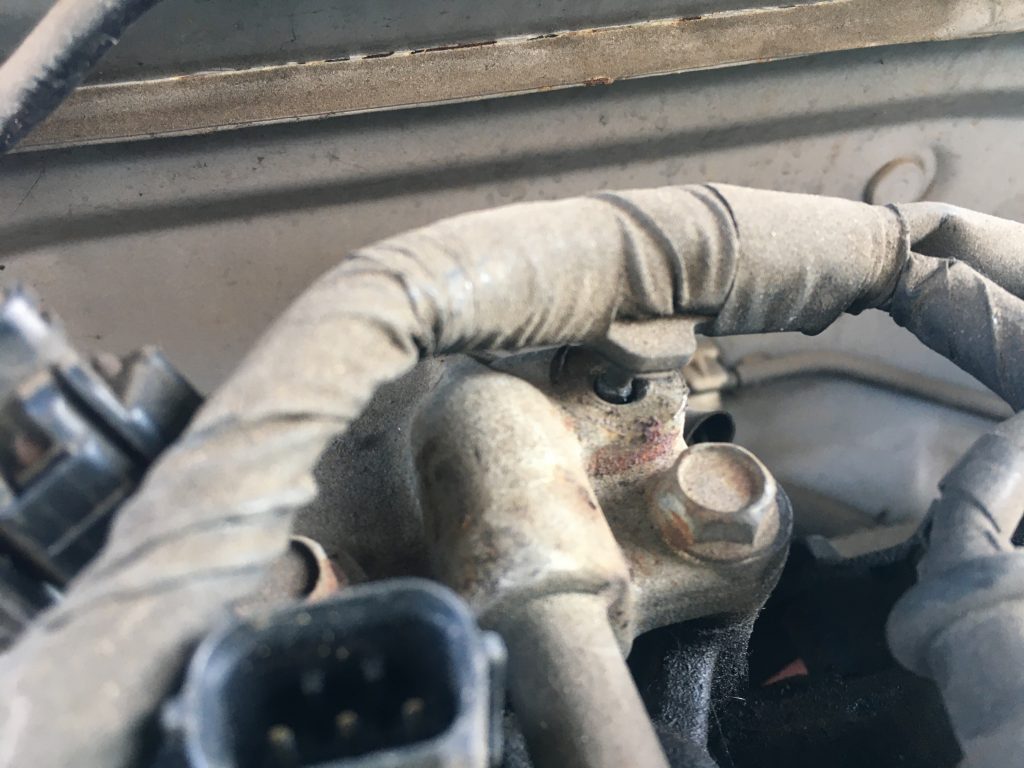
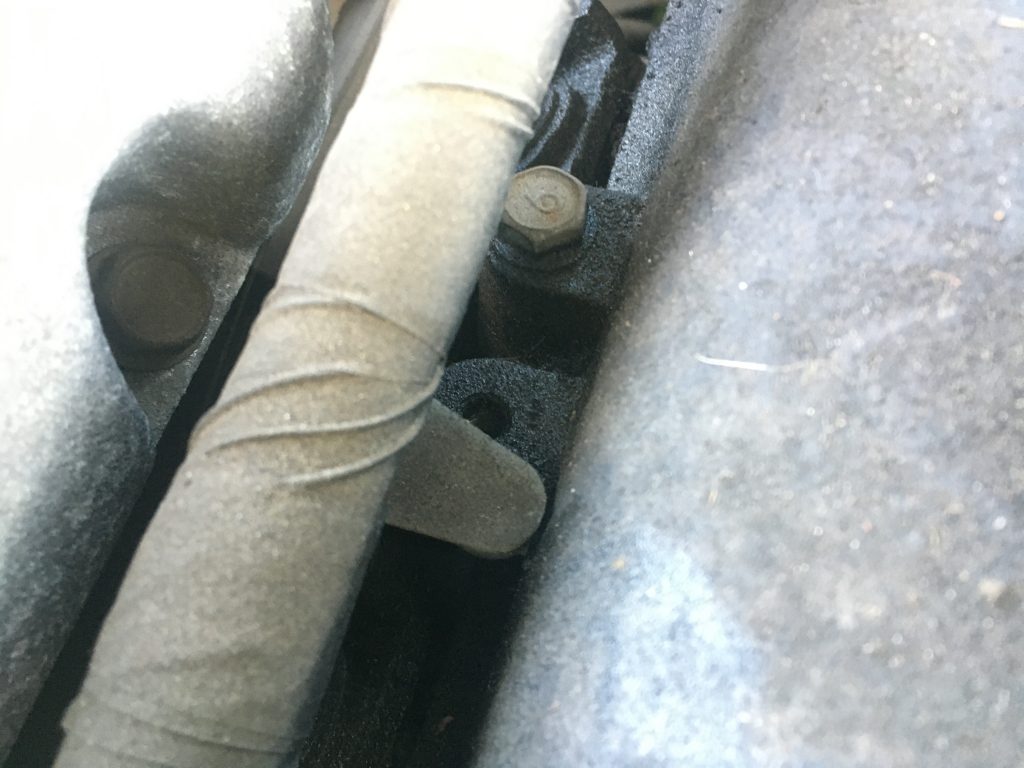
Last night, after emailing Greg Peters at ‘carpassionchannel’ (thanks, bro’!), and much – mostly fruitless – googling and watching of YouTube, I finally found out what the thing circled in the image below is.
Turns out this is a power steering pressure sensor.
Having established what it is, I was able to find a YouTuber removing it, and thereby learn how to do so myself. I did that late last night, sporting a head-band style torch, as it turned dark.
In the YouTuber’s video, as so often, it looked super easy. In real life, for me, it was very, very, very tricky. I used needle-nosed pliers to simultaneously grab the whole thing whilst depressing a tiny little lever, all the while also pulling upwards.
After lots of worrying (about breaking it whilst manhandling it so roughly!) and a fair bit of swearing, the ficker funally came orff…
The pic at the top of this post is how I looked and felt at day’s end. Note the new mechanic’s style overalls! £20 from the local Boyes.
Yesterday it was raining in the morning. And it remained damp, drizzly, and cloudy all day. But the afternoon was workable. Today the sun is out, the sky is blue. It’s beautiful, and so … wahoo!
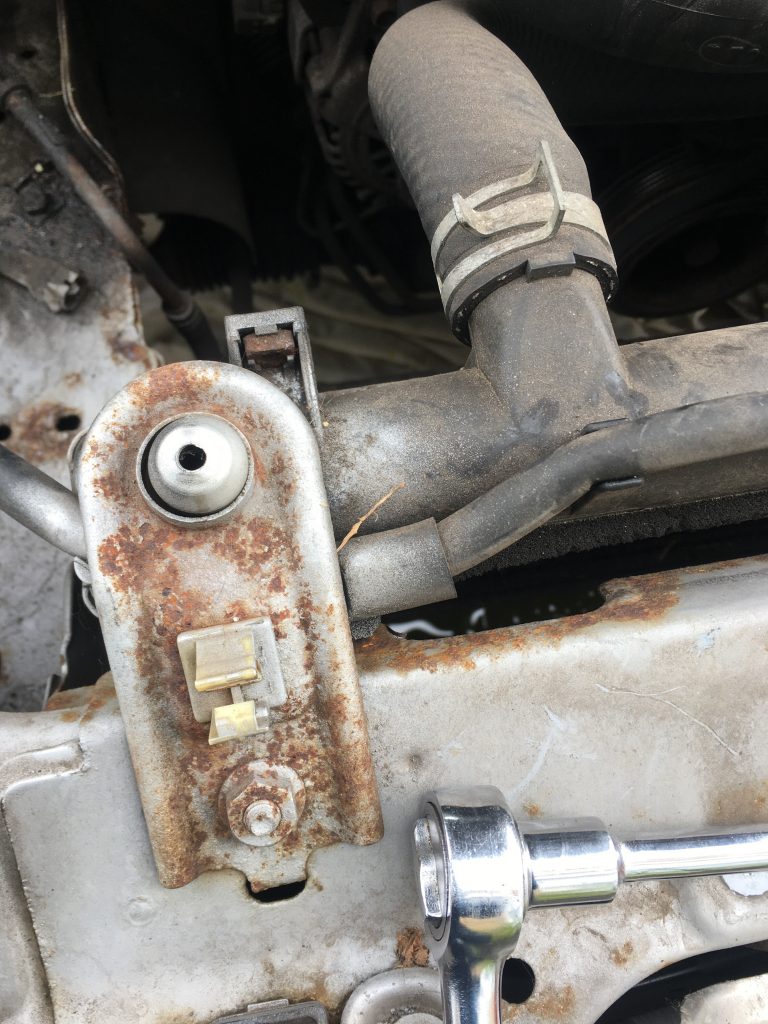
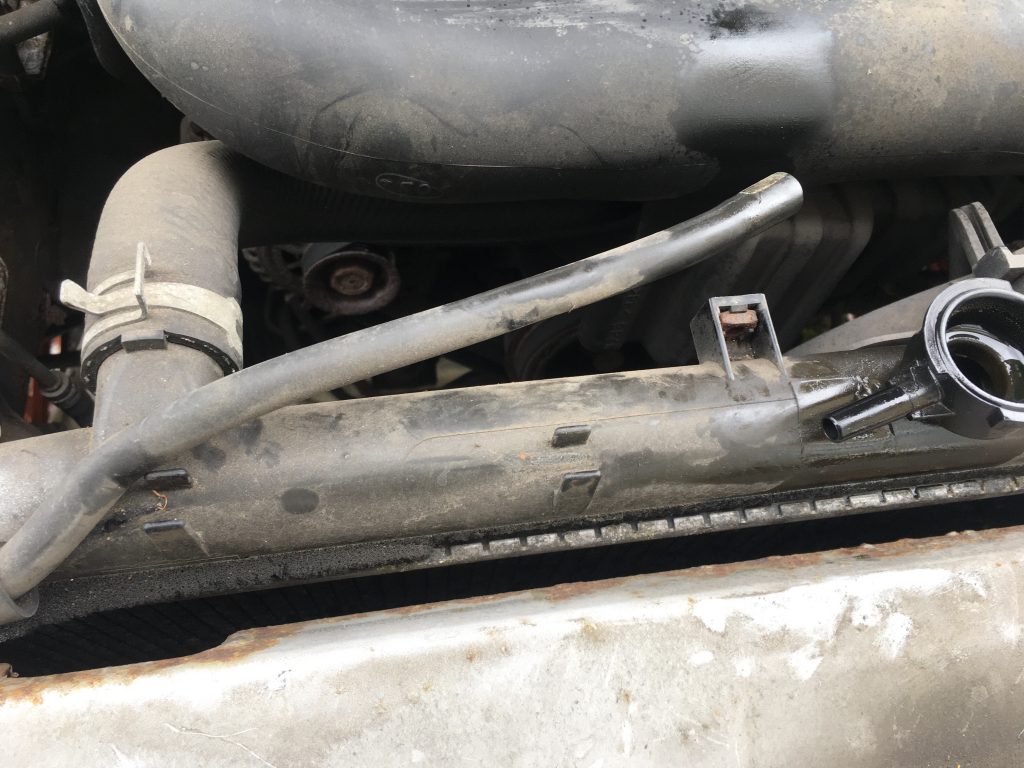
The radiator overflow, disconnected. Main top cap off. Then I drained the coolant, using the plug at the bottom. Did’nae photograph that though.
Disconnecting the main radiator pipe. Turned the radiator clips through 180°.
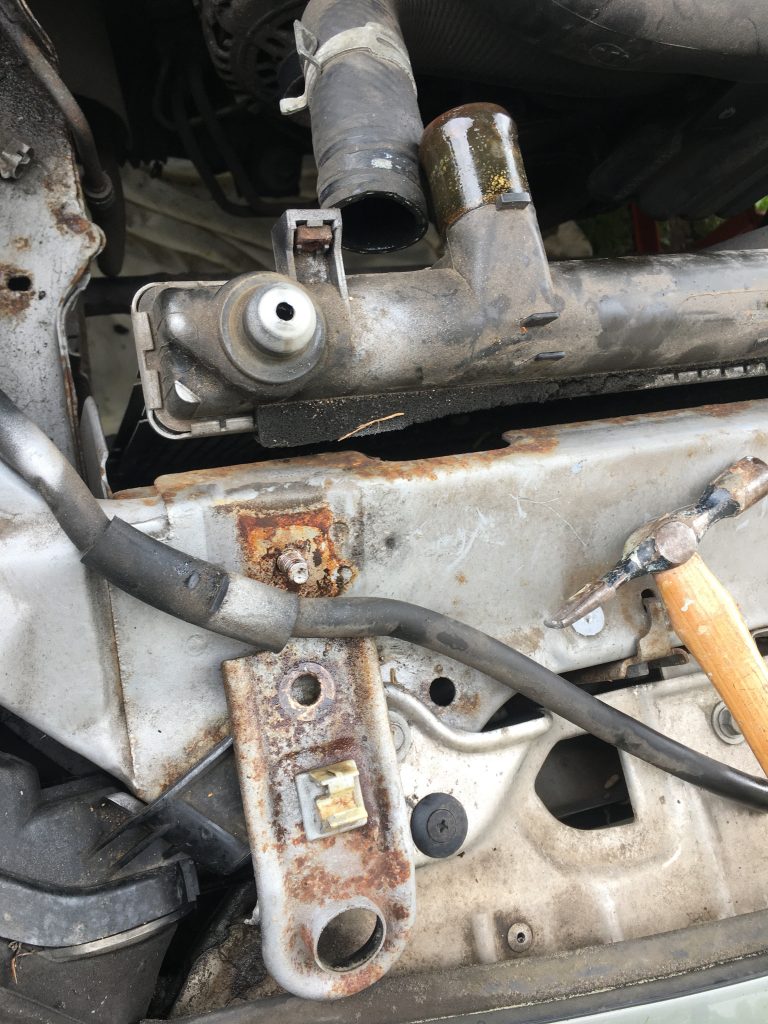
Ditto the right radiator clip.
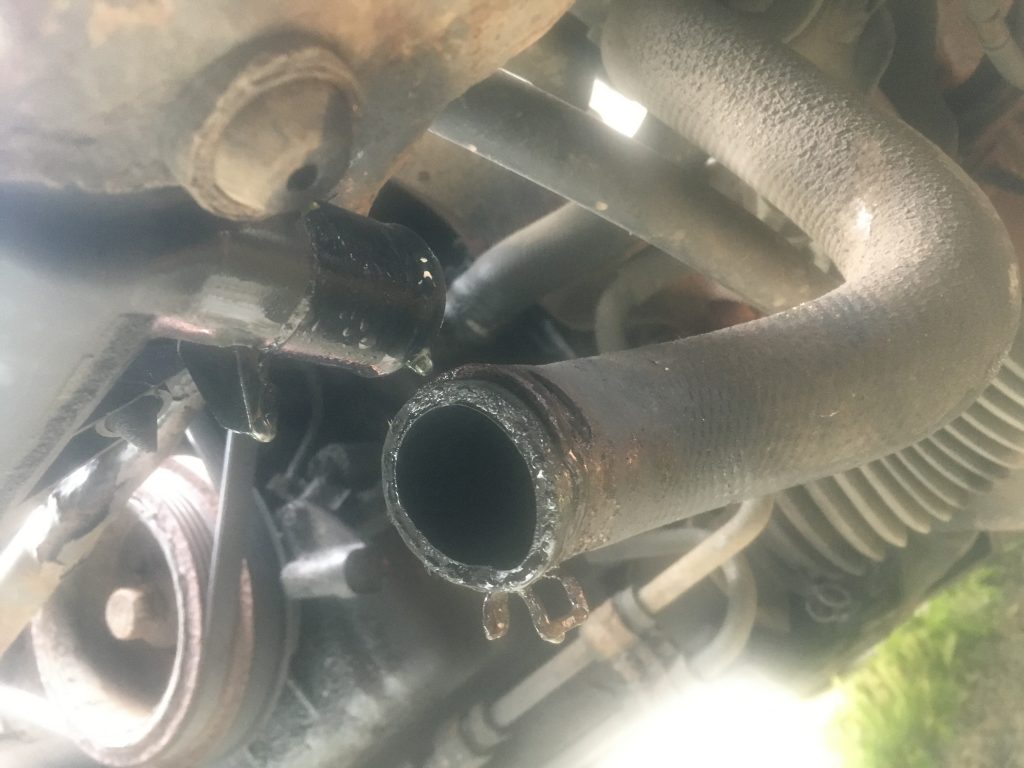
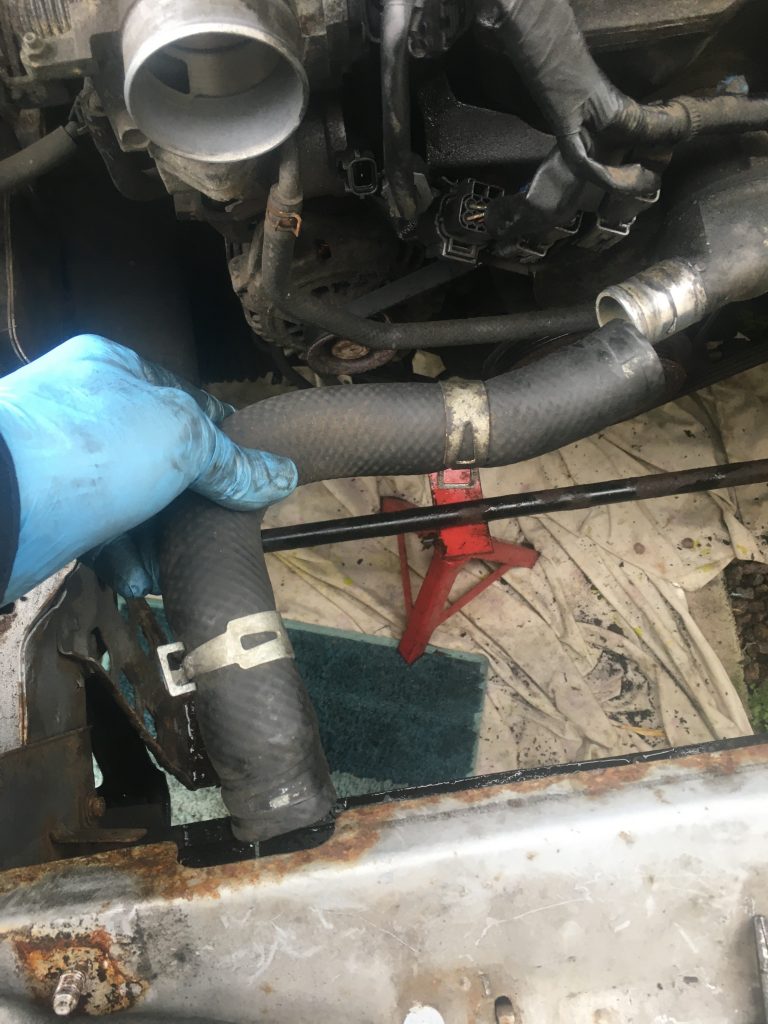
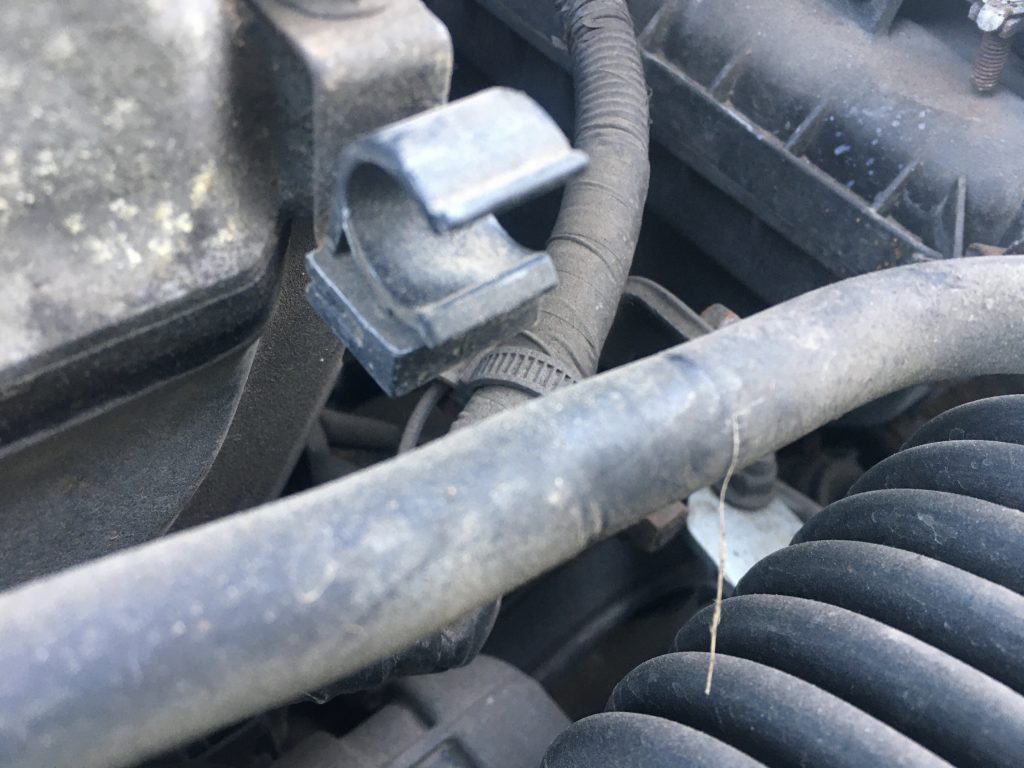
Removing the main hose in the front engine area. What’s this one called/for?
Popped this thinner tube out of a plastic clip.
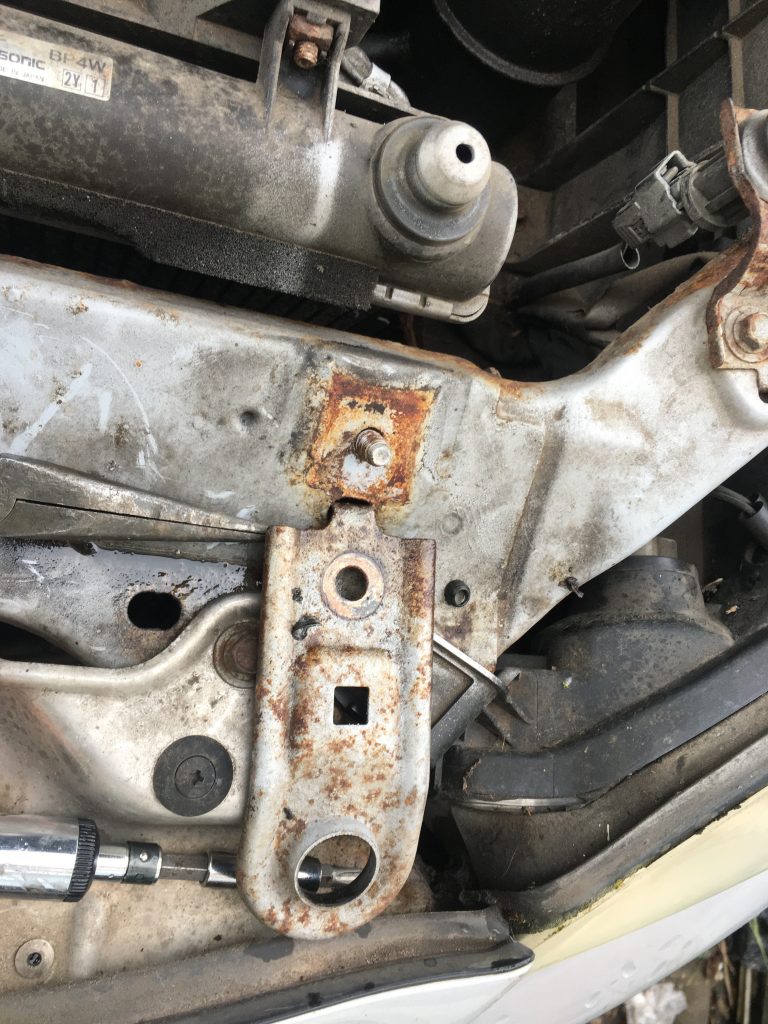
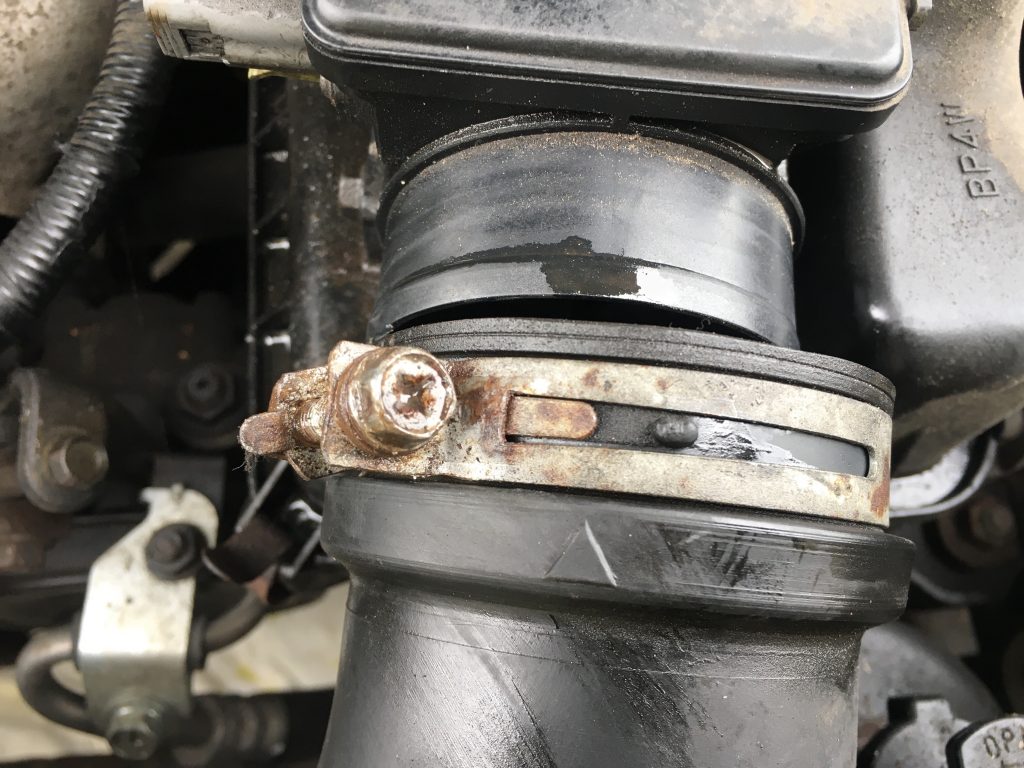
Disconnected the right end of the large tube. Popped it in the passenger seat. This clip was a real mother! I might want to replace it with a different sort, when it comes time to reassemble things.
Popping off another of the simpler smaller tubes.
A lead that runs to the fan clips in place behind said fan. There are one or two plastic doodads that clip into a plate at the front.
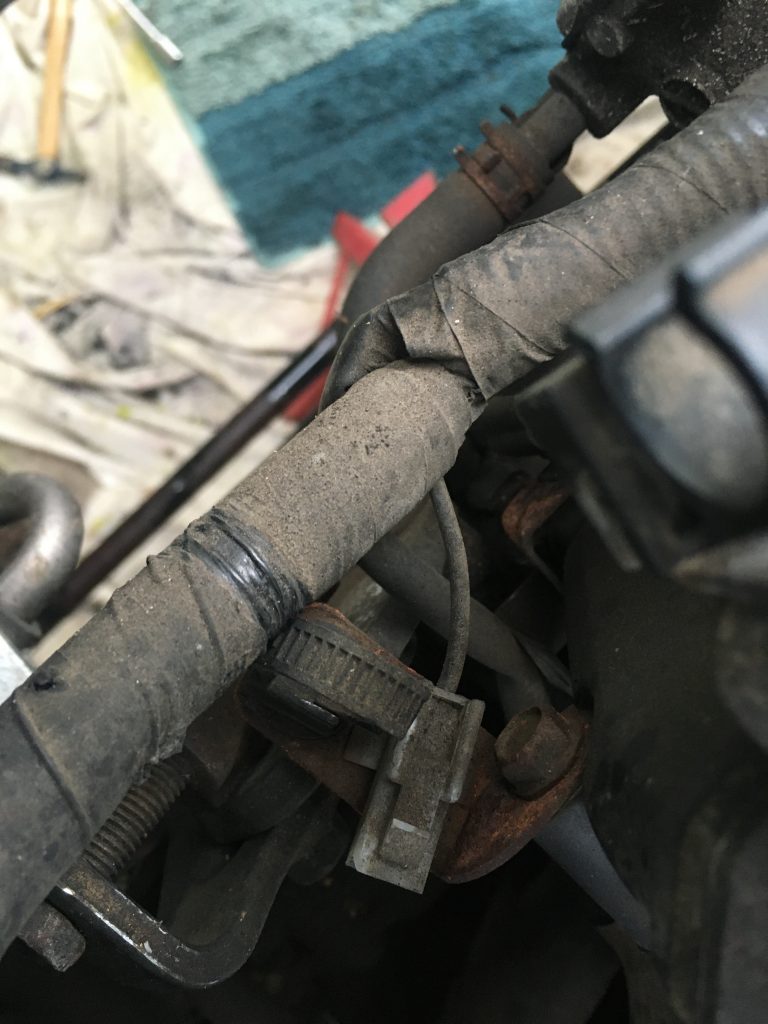
And, lastly, removing a larger pipe from the bottom of the radiator, and draining more coolant! This pipe isn’t in the best condition. And the clip holding it in place is even worse. If the car can be brought back to life, these parts are prime candidates for upgrading.
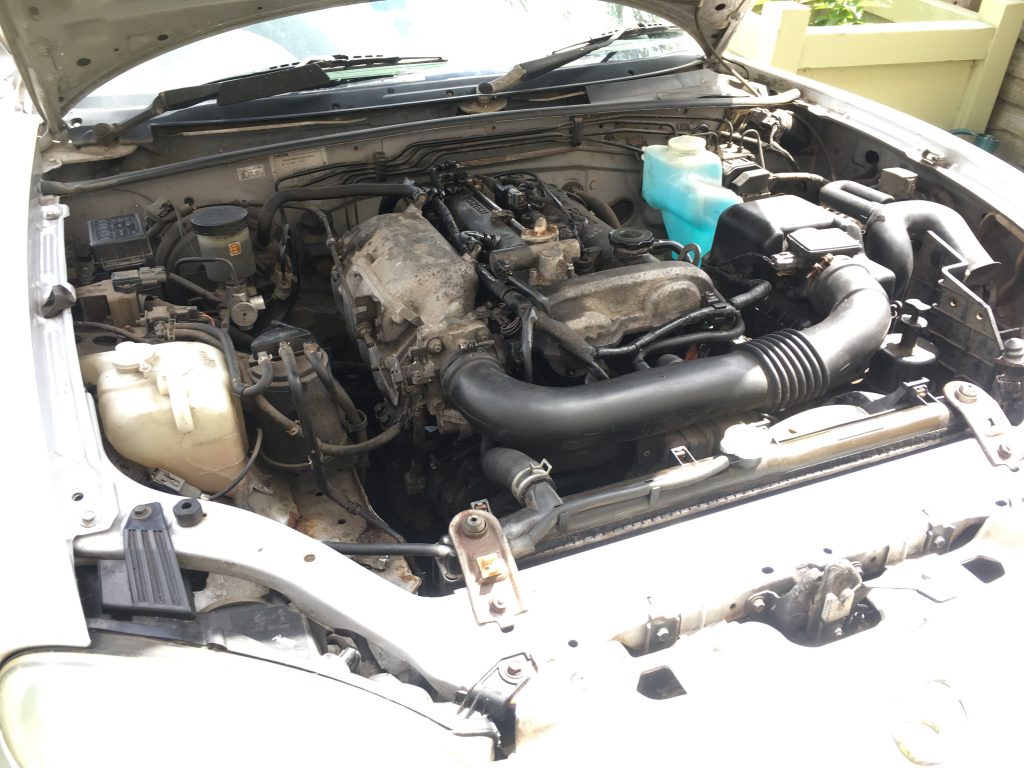
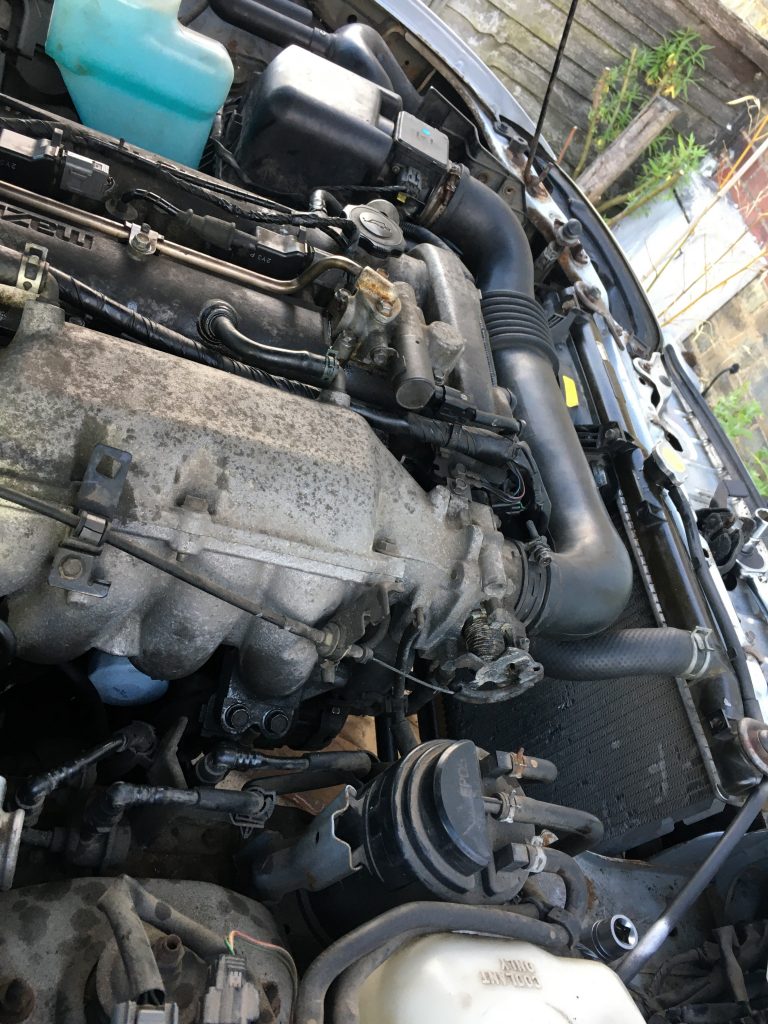
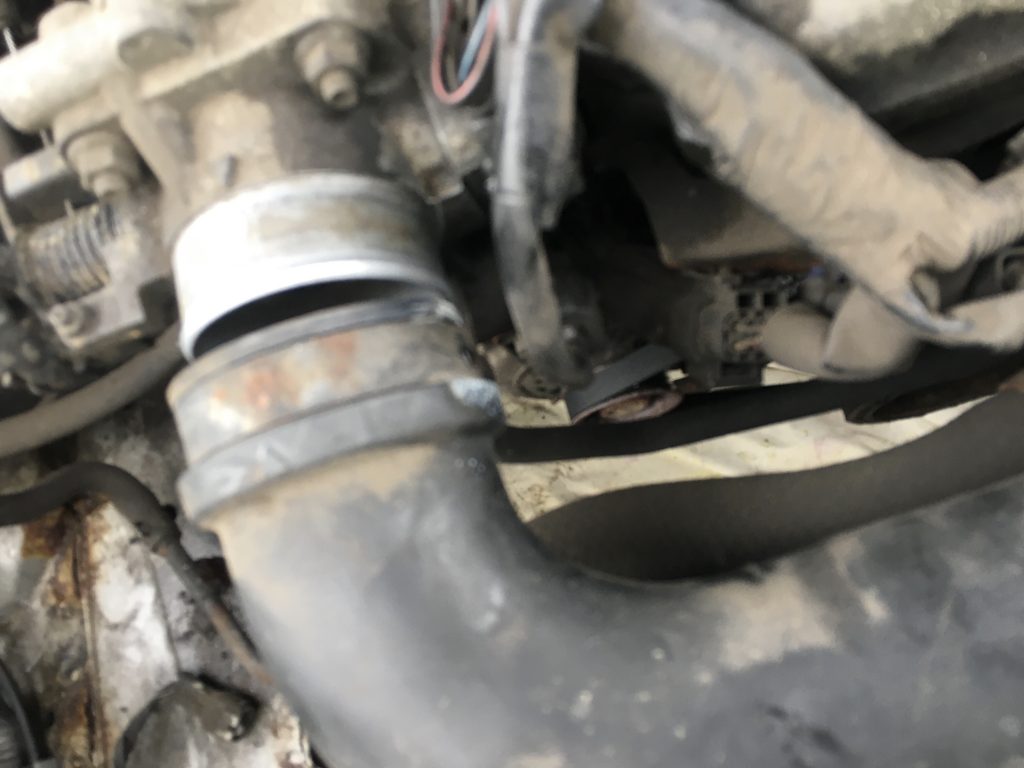
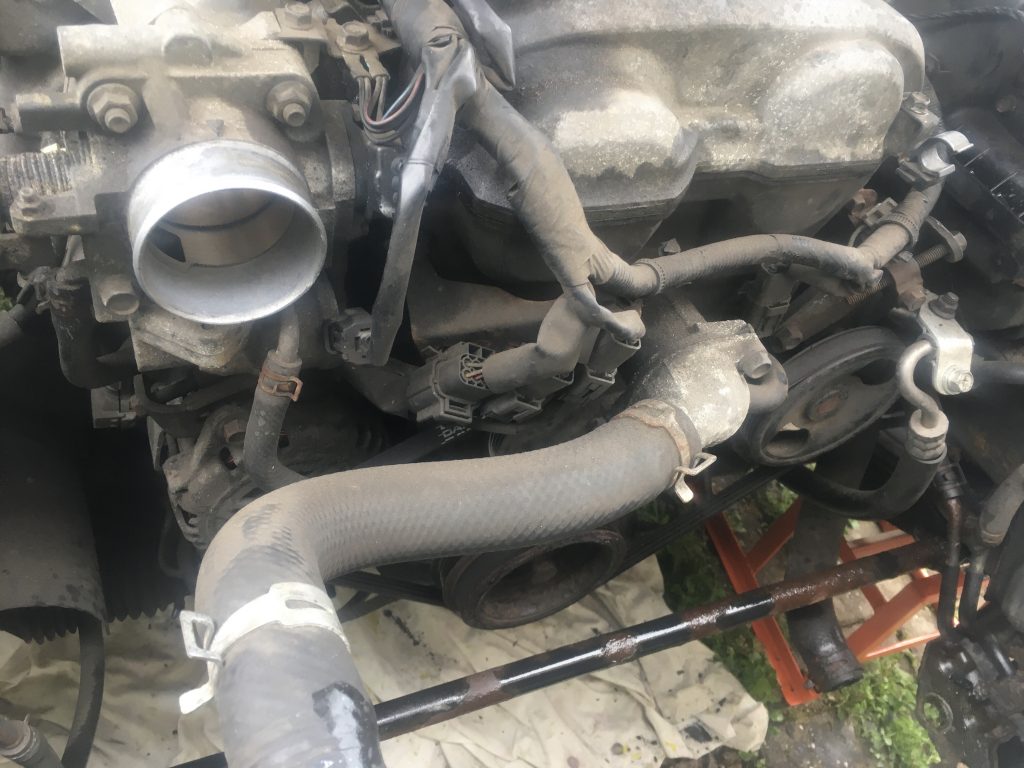
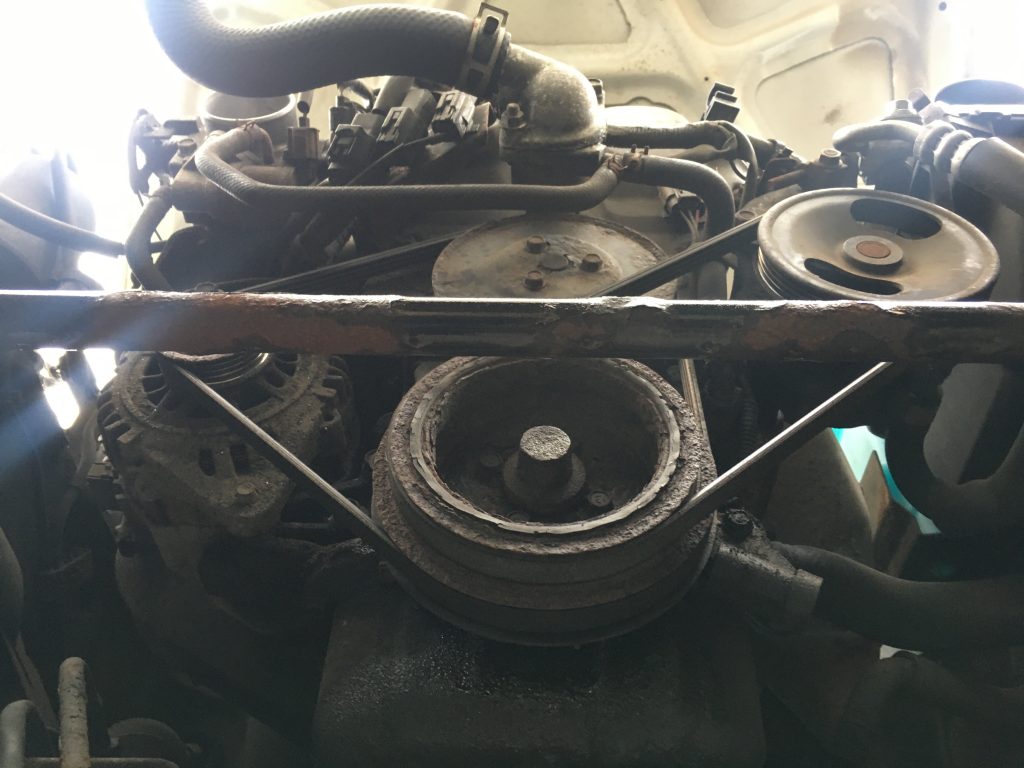
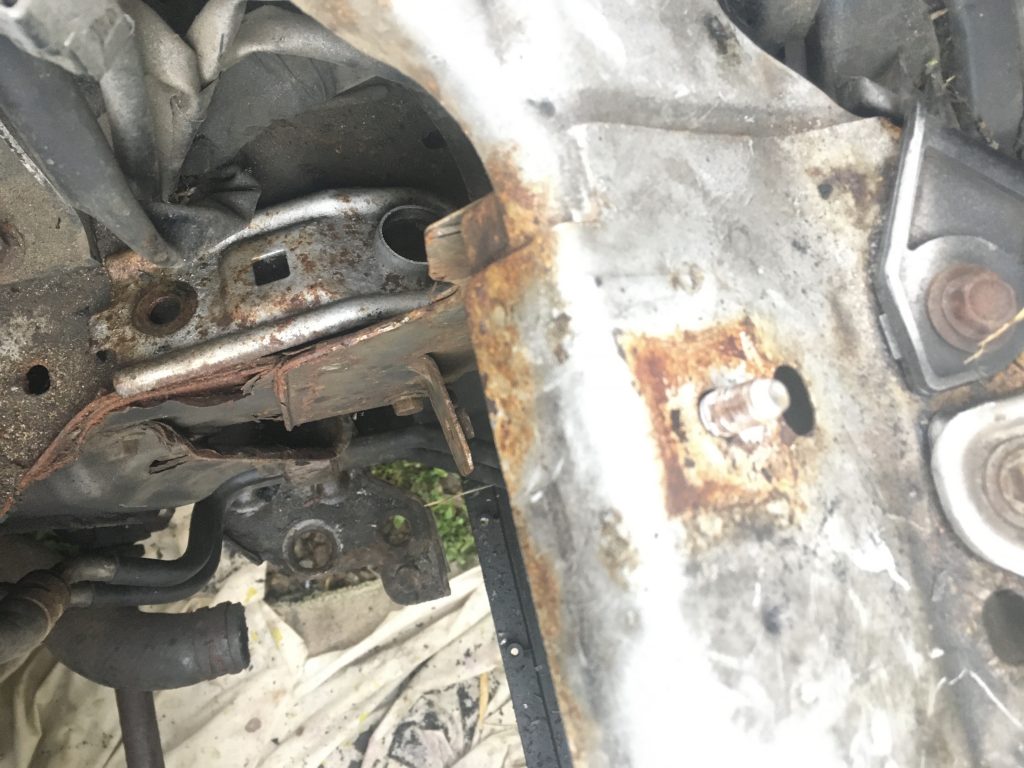
Just a general shot, trying to keep track of engine layout. The bar along the bottom of this shot is called a ‘sway bar’, and keeps the front wheels in proper torsion and alignment. The silvery doodad in the centre is the thermostat housing. Two thin pipes go into this, one to the right, the other directly below.
With the radiator out, and the biggest of the pipes removed, it starts looking a bit more spacious up front. This extra space should be great for working at the the front of the engine. Which I’ll be getting to later, hopefully.
Zooming in a bit. Look at all the electrical leads/cabling (and adaptors/connectors!), and the several sundry pipes. Lots to keep track of!
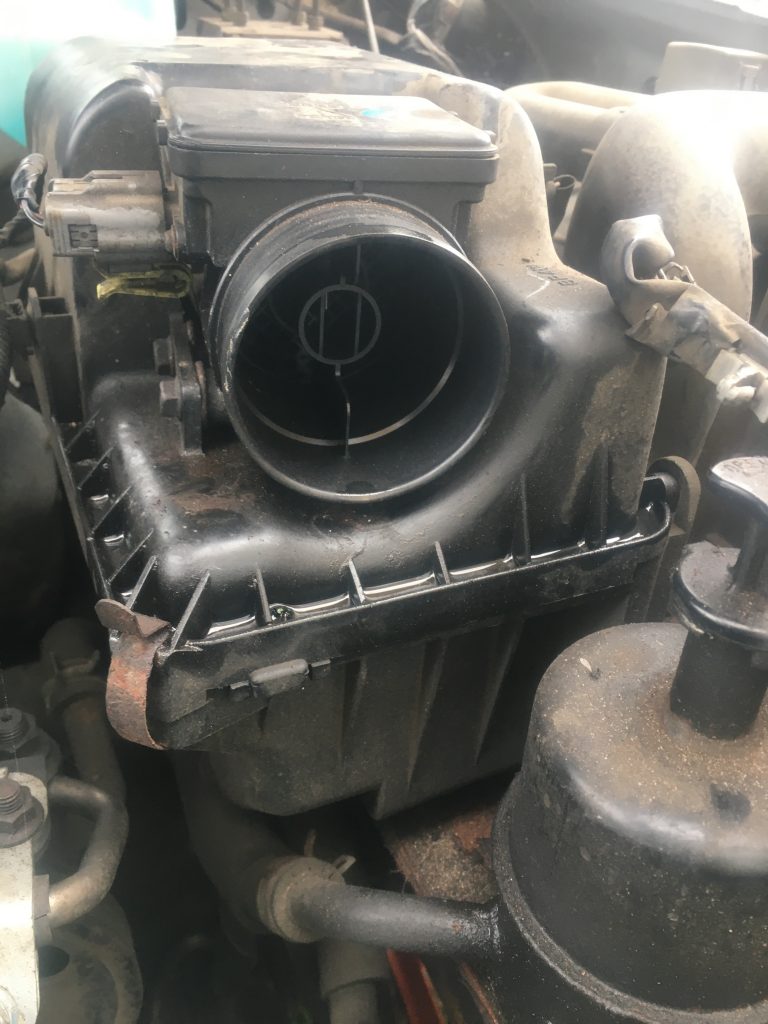
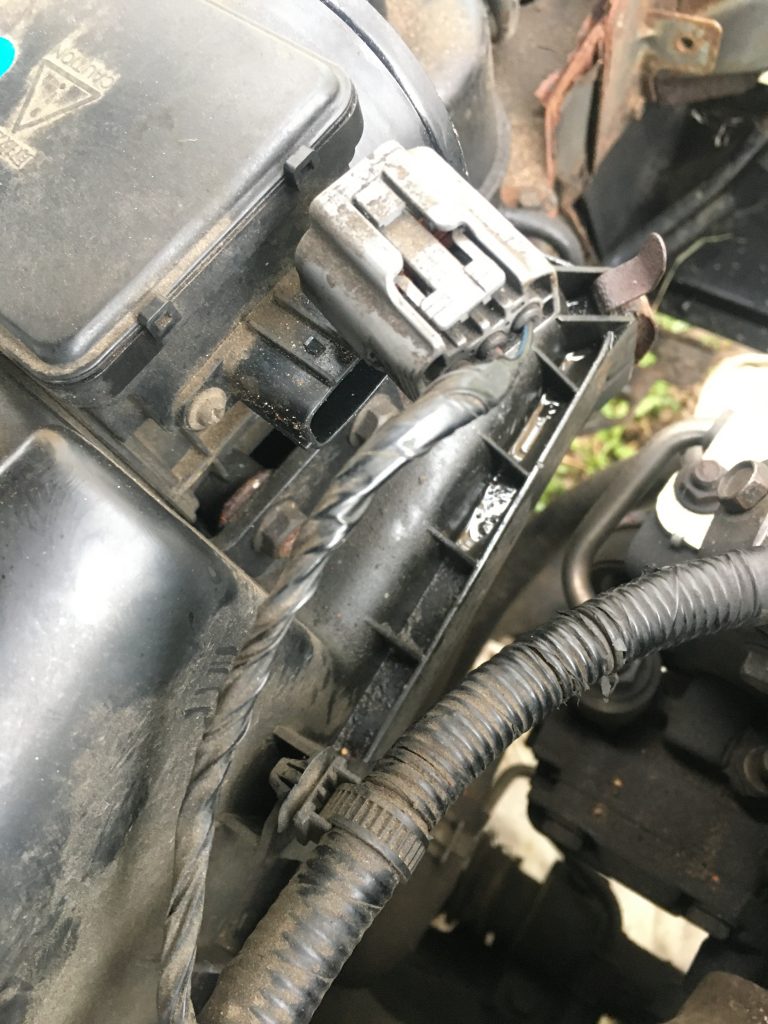
Clips and leads on the air filter.
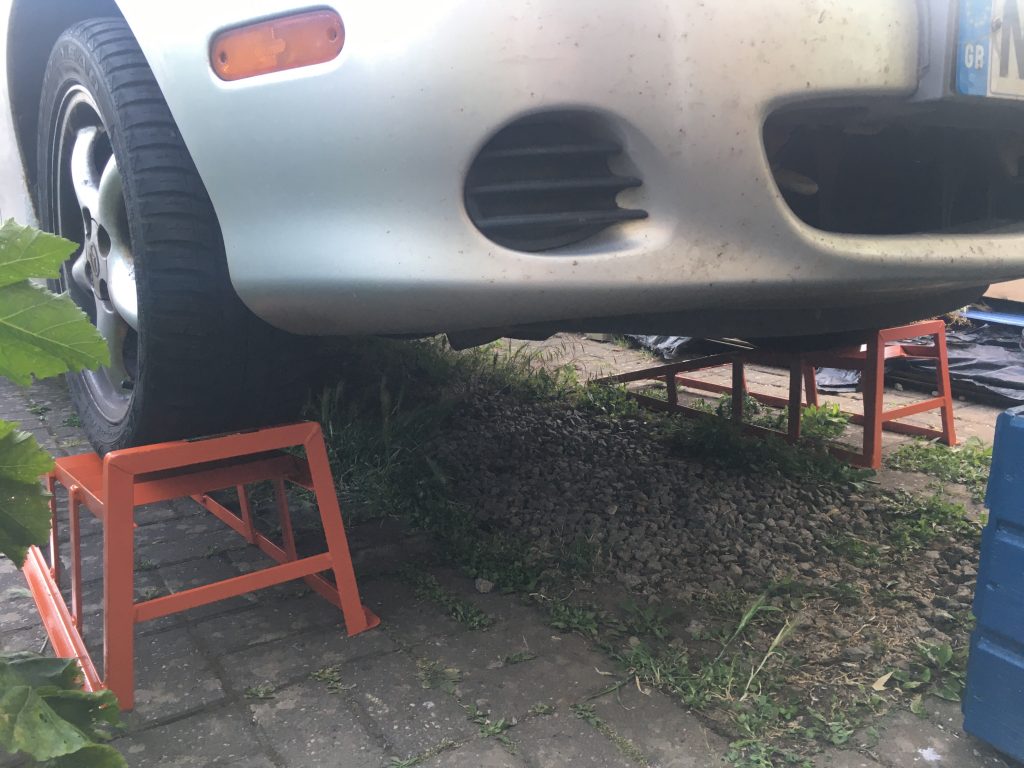
I wanted to capture a general view of the engine as seen from below, under the car. Cool! As can be seen, the sway bar will be in the way of loosening the bottom wheel.
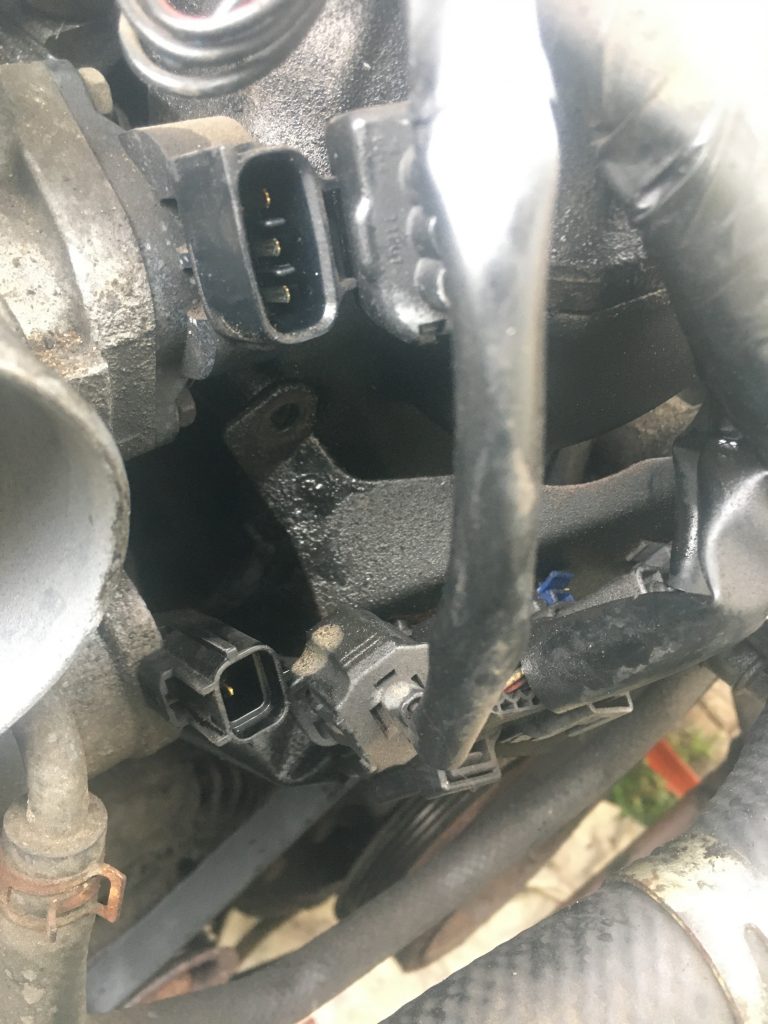
Right side of the air filter. Or is that the left side?
Umm… getting confused. Where is this!? Is this the left or right of the air filter, and adjoining wiring.
A broken clip, and a tricky one. The second being the off white one, to the right of the broken black plastic ring. Can’t recall how I got that one out!?
The same as the above, with the tricky clip out, and the broken one more clearly visible.
Numerous electrical connections had these weird sprung clips. They’re tricky to pop out. I used pliers to squeeze them together, which helped.
Some of the hoses and hose clips were pretty stubborn. BTW, the red jack stand, visible under the ‘sway bar’, supports the latter, which I needed to loosen up, so it wouldn’t be in my way.
Thought it’d be easier to remove the above wiring, as pictured, i.e. still attached to the clip.
More photos of parts of the wiring loom.
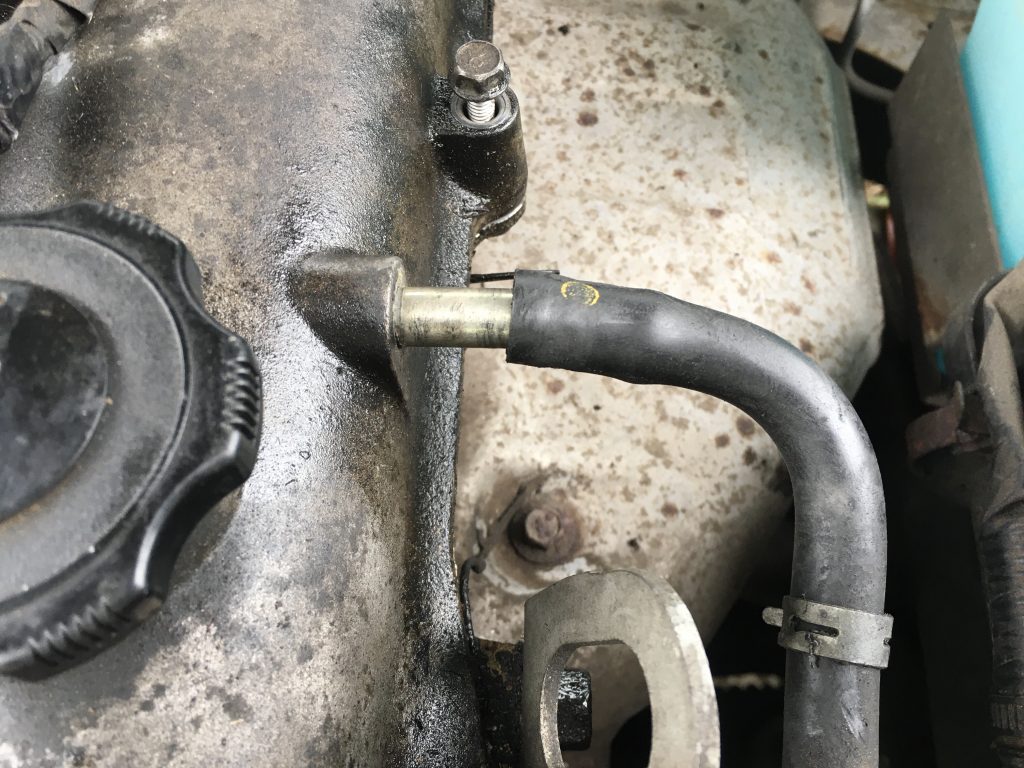
Removing another chunky coolant pipe. Note that there are markings on the pipe which align with little nodules on the metal piping.
Can’t recall why I photographed this nut? Possibly this is the lower and harder to see/access nut, for the plate that’s on the front of the engine cover, which holds many parts of the wiring loom.
This tubular plastic lead junction has caused me some grief. I can’t work out how to disconnect it. And until I do, it’s not possible to finish getting the wiring loom out of the way.
Her you can see I’ve put the radiator clips inside the engine bay. Just so as not lose them!
And the other one!
So that’s it for tonight. A few other things I did, but didn’t photograph, include numbering all the wired connections in pairs.
Tomorrow I’ll drain the oil out of the engine. And disconnect the negative pole of the car battery. Then there’s more disassembling before doing the gasket and cambelt.
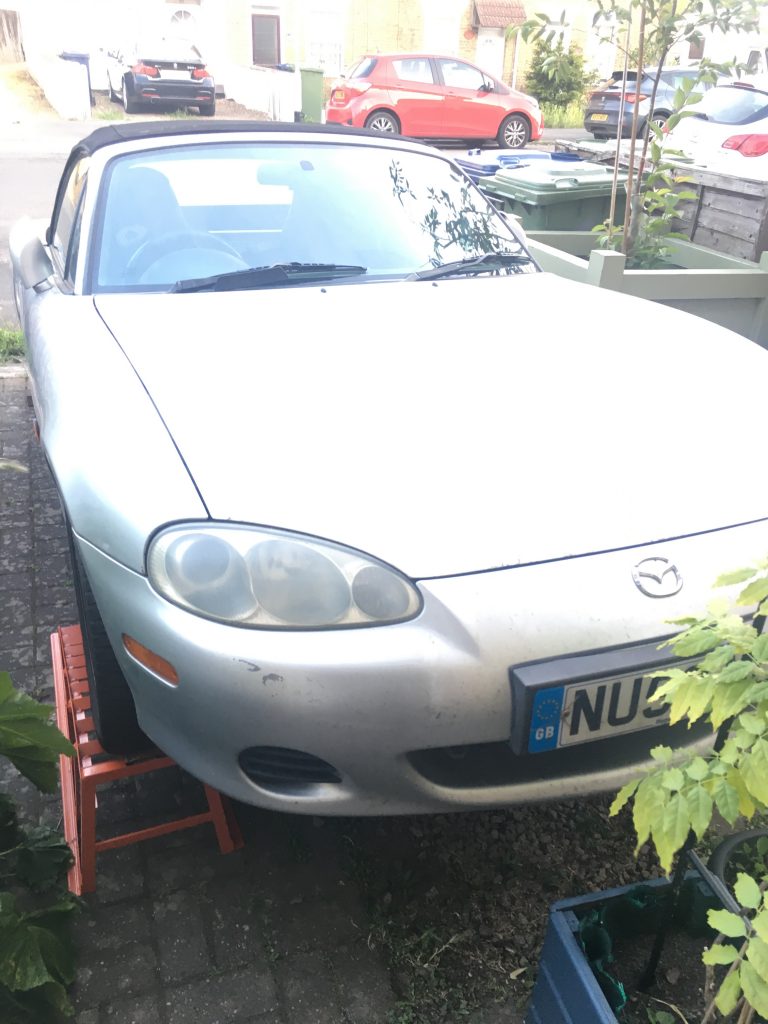
After our car died last Thursday, the AA got us home. At a not inconsiderable cost. So… with no money for repairs, what to do? I decided to get her up somehow, for inspection. I tried using a trolley jack I have, and some ordinary jacks. But no dice.
Bought these ramps from Halfords.
It was time to buy some ramps. Halfords in March did’nae have any. But the Wisbech branch had some, for £45 a pair. But without wheels, how was I to get ‘em? Fortunately our pal Ken was kind enough to give me a lift to Wisbech, so I could collect them. Cheers, buddy!
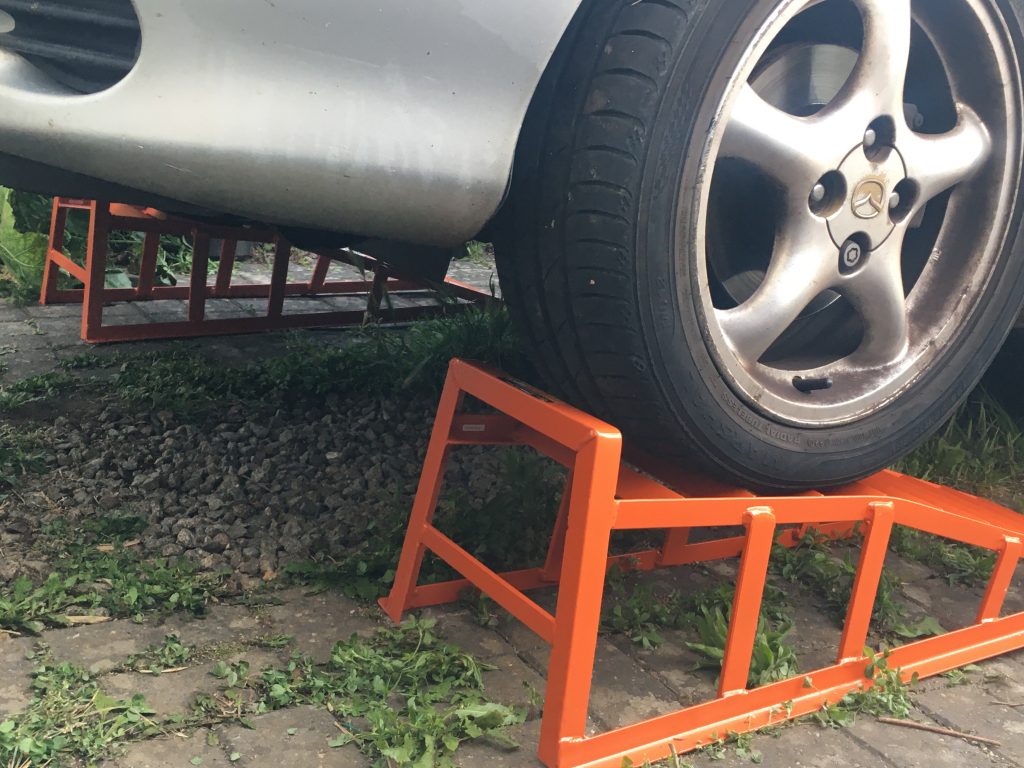
These ramps do the job nicely.
The ramps will be very useful if I need to access the underside of the vehicle/engine bay. And I imagine I will need to. But I didn’t need to today. Thanks are also due to our neighbour, Sean, for helping me get the car up on the ramps.
Step one in getting the rocker cover off.
I decided to photograph each step. And, starting with the picture above, that’s what this series of photos depict. All I was doing today was removing the ‘rocker cover’. So I could see if the cam-belt was indeed, as the AA engineer believed, broken.
Disconnecting wiring..
The first thing I discovered on starting this job is that YouTubers routinely make things look very easy. Usually they’ll be doing stuff they’ve done many times before. But if you’re not used to whatever it is? As an example, disconnecting some of the wiring junctions proved much harder than expected. It’s amazing how discouraging that can be!
… gradually got easier.
Gradually things got easier. Which was encouraging. The hoses all came off very nicely and cleanly. This was a relief, as old tubing can be brittle and perish, etc.
Each of these was easier than the last!And this was the easiest of them all!Front end of the spark plug wiring loom.Back of the spark plug wiring loom.There were a couple of points like this.
The above photo shows a point where a male peg goes into a female hole. But it wasn’t actually connected. This one was at the back. There was another, pictured below, on the left side of the engine.
Another unattached point.
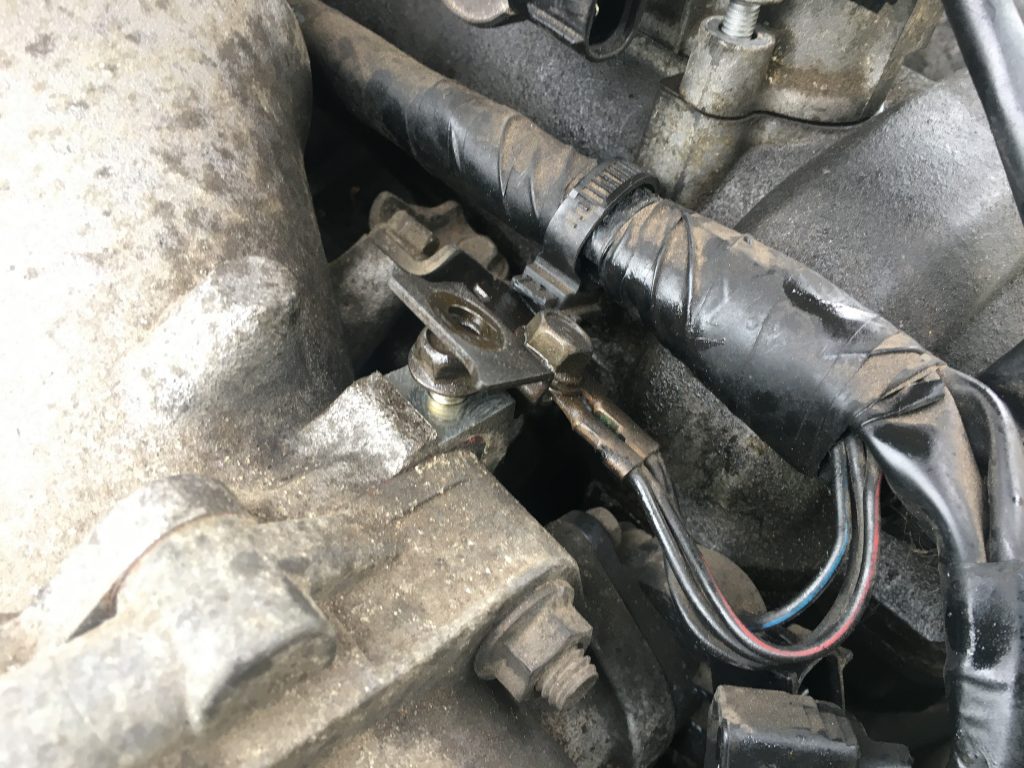
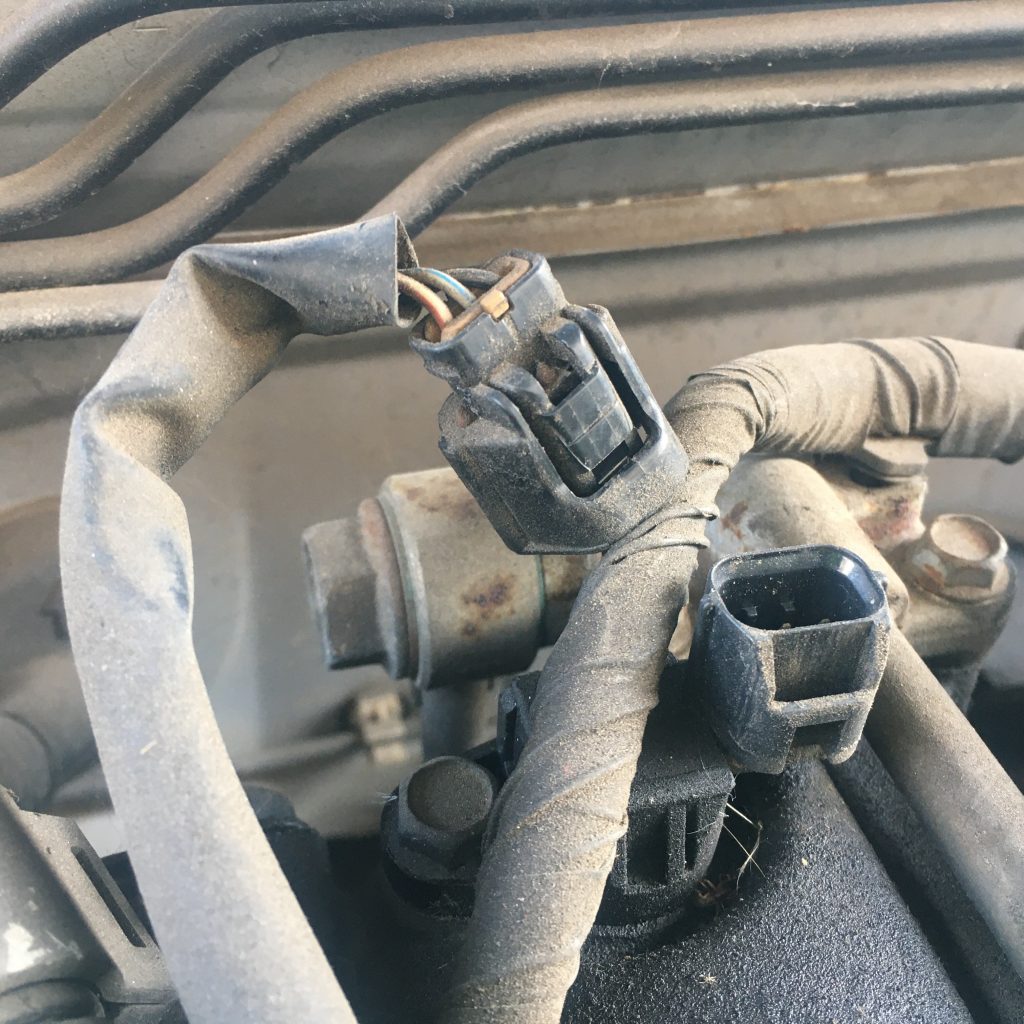
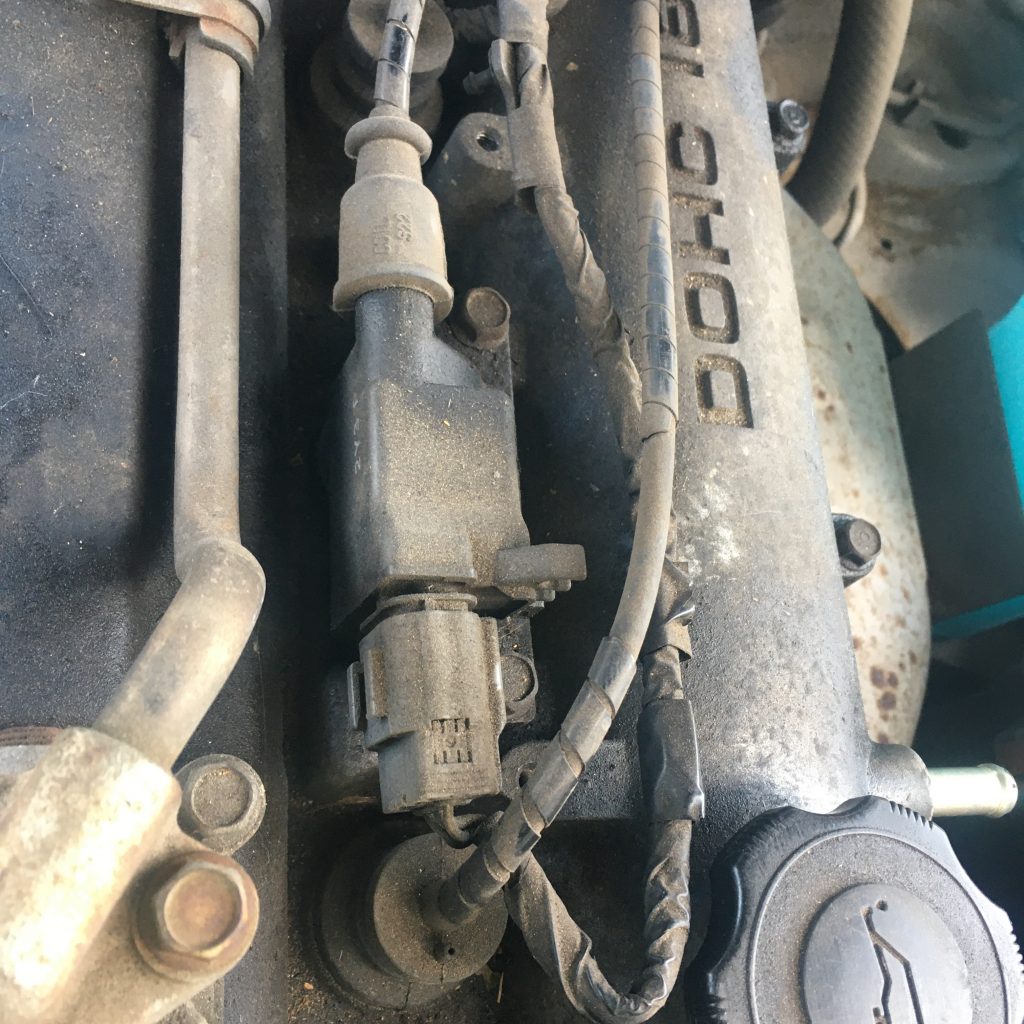
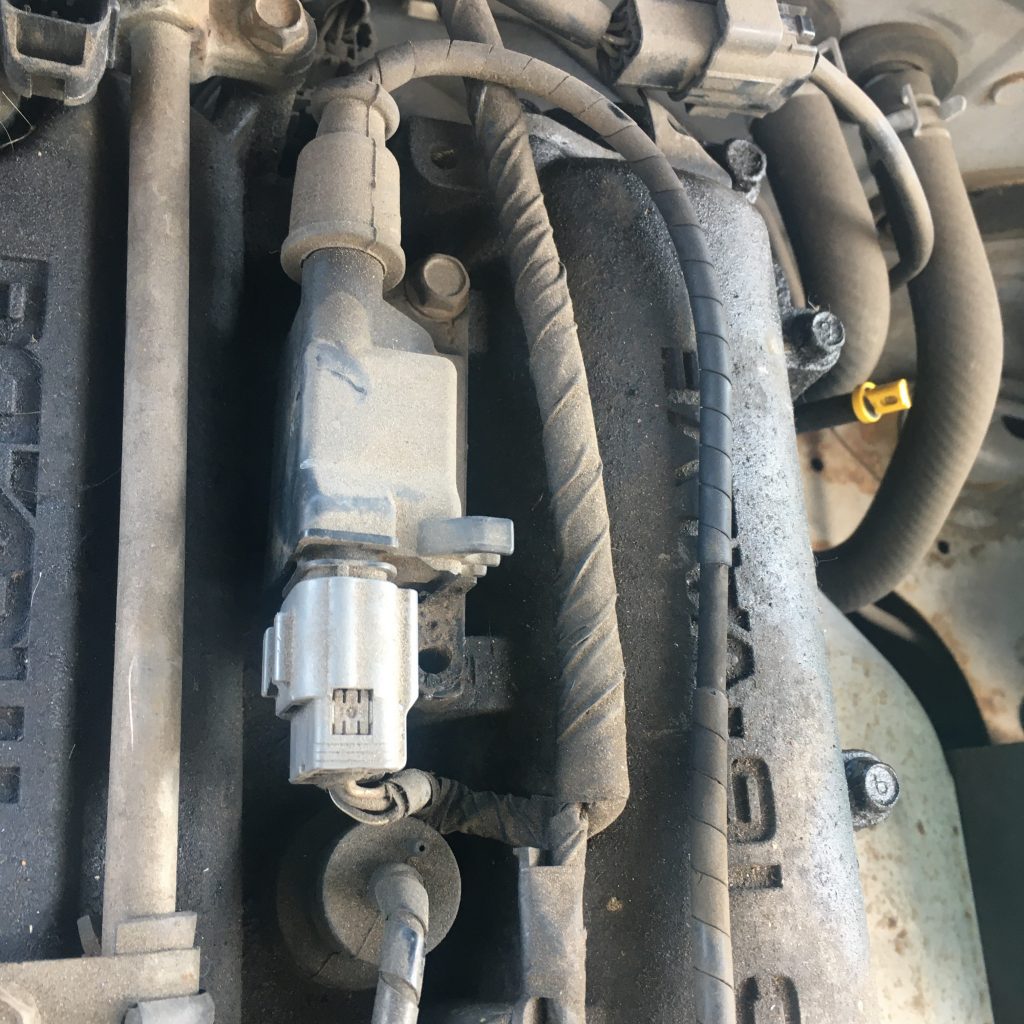
One thing that really spooked me was the long doodad in the image below, below the spark plug wiring. None of the YouTube videos I watched had any such parts, so I was stumped. Nor could I find any diagrams online that explained this mysterious appendage.
A complete overview of the spark plug wiring.
Luckily I stumbled across a video by an American dude that clarified the matter. Turns out it’s a thing called a VVT, or Variable Valve Timing mechanism. Guess I might need to look into that?
Jerry-rigged the variable timing mechanism.
One thing I didn’t photograph, and should’ve, was a 19mm nut at the rear of the engine cover, that was a real mother to loosen. I had to use a mallet to get that loosened off! Once I’d done that I was able to lift the whole thing up and secure it with a bungee cord.
Front end of variable timing thing, note gasket.
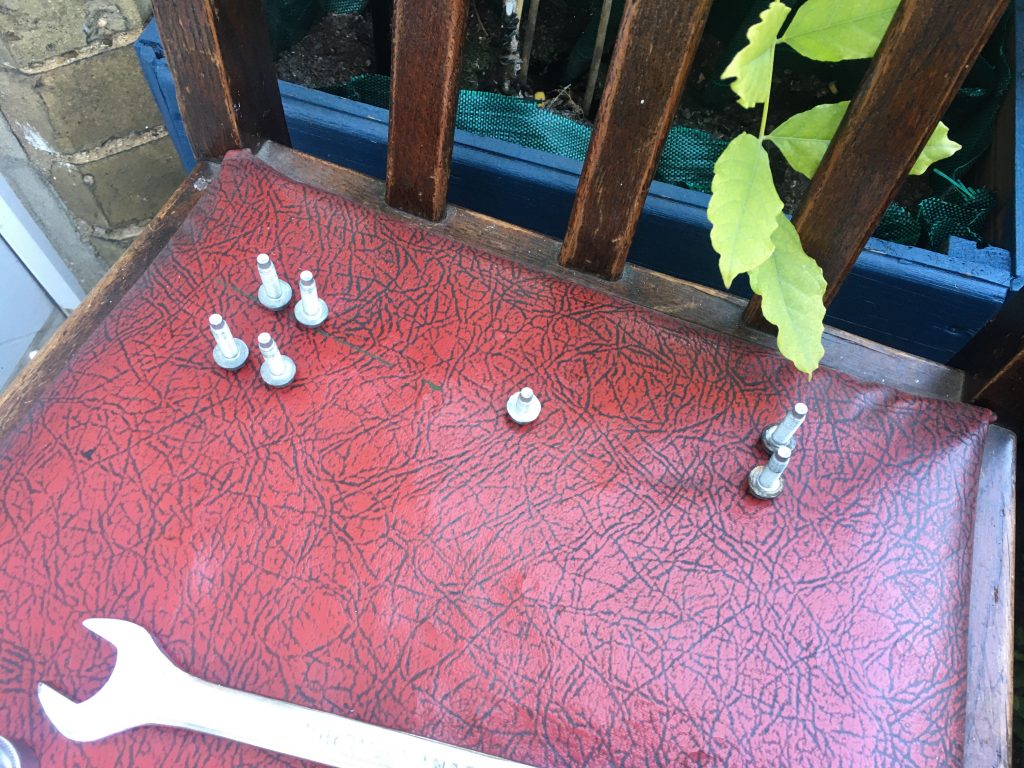
As the photo below shows, I tried to arrange my nuts n bolts in such way that they’d be easy to replace in their proper order.
I tried to keep my nuts in order.
As can be seen below, I got the spark plugs out okay, these were, once again, rather different to anything I’d seenYouTubers dealing with. Fortunately if anything my set up is easier.
This tube clips into the bracket.
And then it was the moment of truth; removing all the bolts holding the rocker cover in place, which I did in a cross-cross fashion, a la drum head tuning, to keep the release of tension/pressure even.
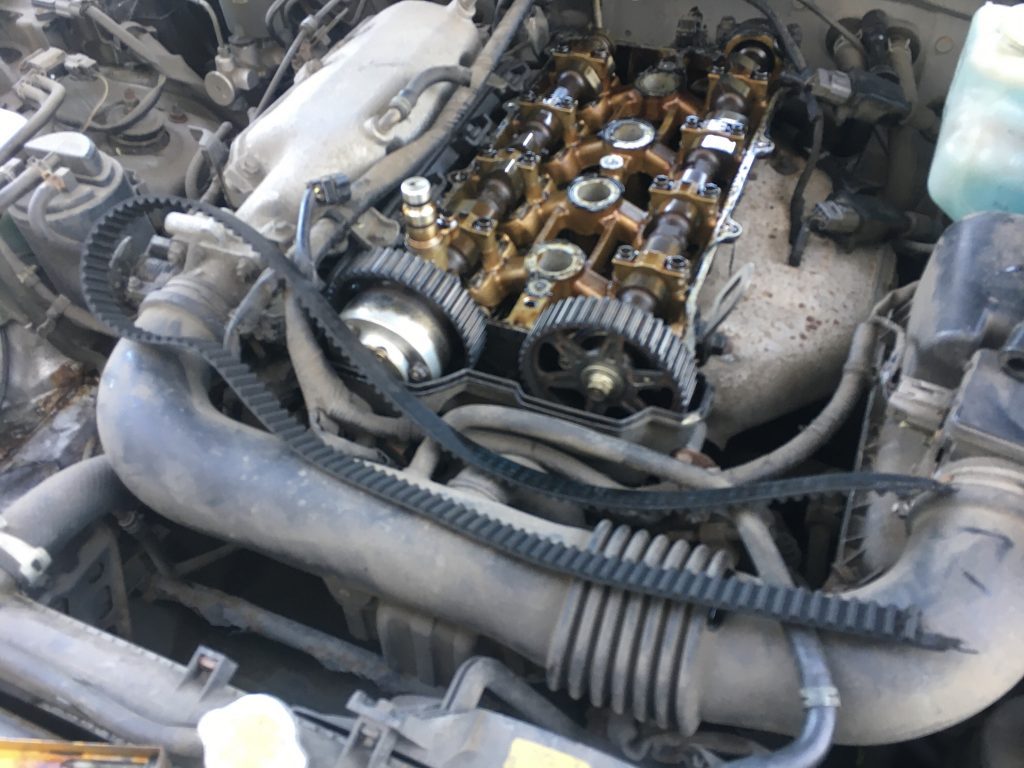
And lo and behold, a busted cam belt!
And so it was that, finally, I was able to get the cover off and see… And yea, verily, the cam belt was busted. The AA engineer spook sooth! I was able to gently work it out. And it’s lying there, rather tragically, in the above pic. But is the engine itself okay? I can’t tell, to be honest.
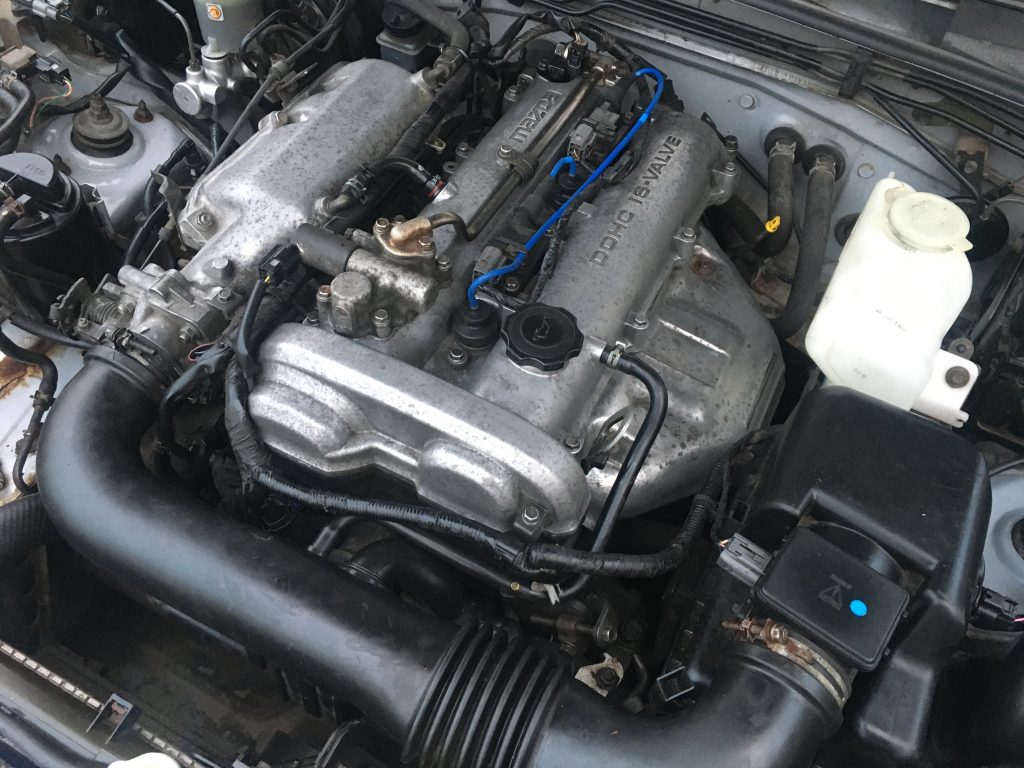
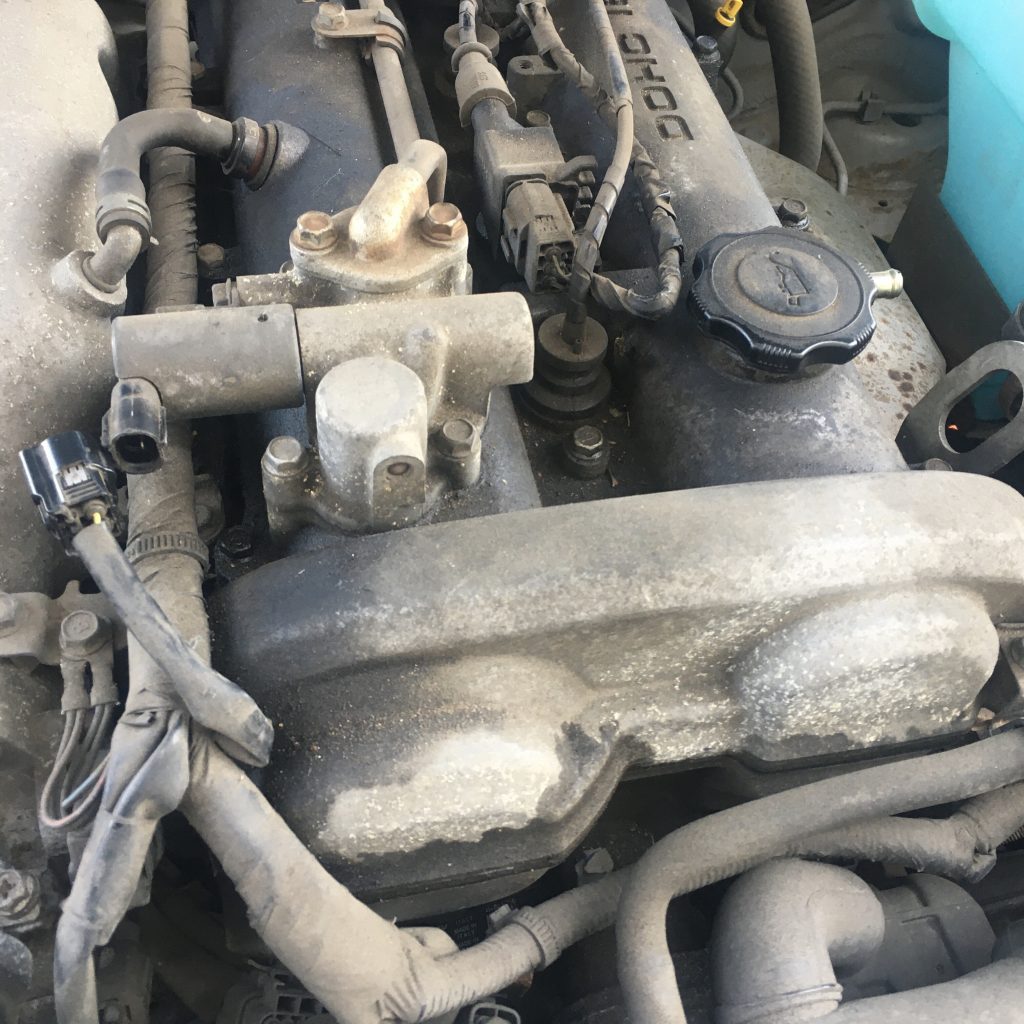
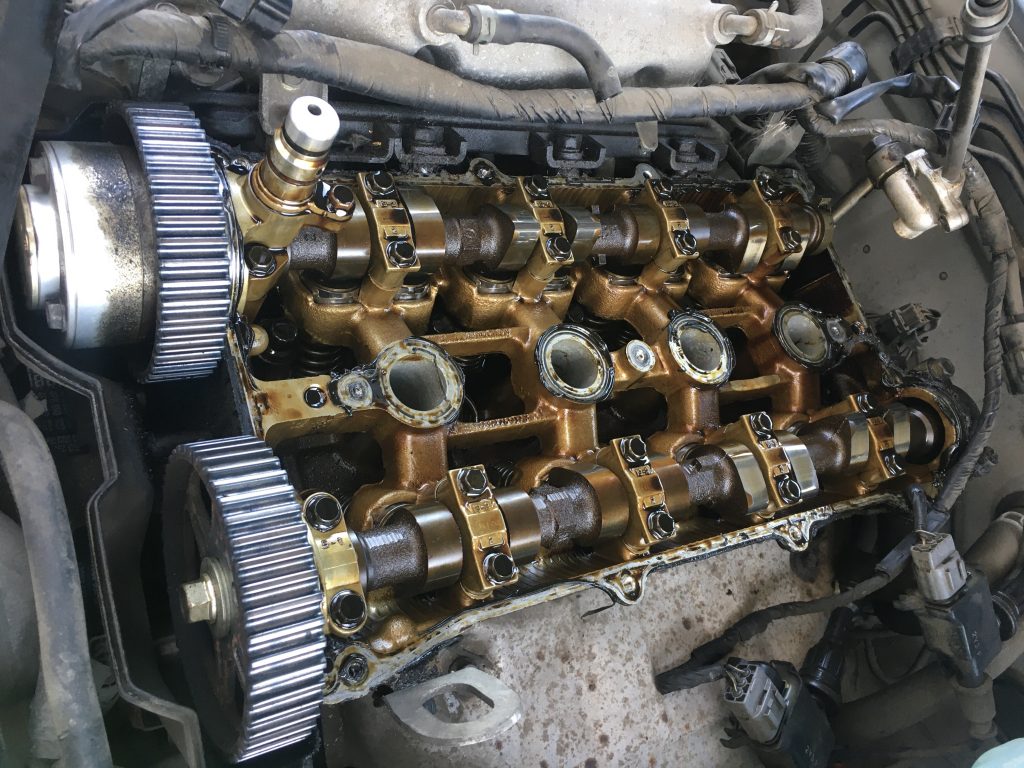
The engine, in all its glory.
So, I managed to get the engine apart, and find the source of the problem. And the AA guy was right. Busted cam belt. Now what do I do? I guess I have a crack at replacing the timing belt? But that’s an even more complex and challenging job.
Wow! I do love YouTube, for giving us all the chance to stumble across gems such as this. Thanks also to the NFB, or National Film Board of Canada.
Bill Mason, who made this film, and ‘stars’ in it, is Canadian. I have Canadian family and ancestry, on my dad’s side. So these facts set up something of a sympathetic resonance for me.
Then there’s Bill Mason himself, the man: he is, or rather was, an outdoorsman and artist, who made, I’ve subsequently discovered, numerous utterly gorgeous and fascinating films, of which this is one of the best.
The chief charms of this are simple yet kaleidoscopically rich, like the environment in which the film is set, on and around Lake Superior.
One of the things Bill addresses, a vexed issue for me, is spirituality. This was the only note struck in this otherwise perfect reverie of sound and vision, nature and culture, that – if not necessarily jarring – gave me pause for some (Indian!?) reservations.
But I’d like to take this post as an opportunity to consider a few things, and there are many, that this film either touches upon directly, or stirred in me by association.
First there are the ‘renaissance man’ and self-reliance aspects. Bill, who formerly worked as a ‘commercial artist’, was a conservationist, famed canoeist, artist, writer, family man, and all sorts. I love all of that! I have my own aspirations to living a multi-faceted life. Richer, one hopes -not fiscally perhaps, but in other better more important ways – than the monomaniac furrows our society drills us into pursuing.
So, there are many things Bill’s example encourages: to spend more time in, and pay more attention to, nature, and indeed all our environments. Art, get up, and out, and make some. Buy or build a canoe; get out and start messing about in the water!
It was also interesting to learn that Bill’s health wasn’t terrific. A sickly child, he has severe asthma all his life. And yet he didn’t allow this to stop him from adventuring. Maybe his derring-do contributed to his early demise? But then again, maybe not? And at least he lived a rich and inspiring life while he lived.
Some might laugh reading this next bit. And it may indeed sound facile. But I truly couldn’t care less! And that’s the fact that I like his style. And I’ve gone as far as to add elements of it – some were already there, others just a little tweak in already beloved themes – to my own sartorial repertoire.
I already had the neckerchiefs (though mine are too small!), and brown leather walking boots, and many a checked shirt. But the red outdoorsman socks are new! And so too is the very particular red and black check ‘lumberjack’ shirt!
Bill’s particular style of art – he favours palette knives over brushes, and cites J. M. W. Turner as his chief inspiration and influence – is terrific, albeit not entirely to my normal tastes. But that he does it all, is inspiration. It was interesting to see that he, like myself and several artists I’ve known personally, is highly self-critical bout his work, and often destroys what others. Might regard as decent work, because he’s unhappy with it.
Then there’s music. In other Mason films he strums guitar or plays harmonica. It amazingly, one might add. And his family aren’t exactly fulsome in their appreciation (does this remind any of us of our own domestic musical life? Or is it just me!?). But for Waterwalker, the music is supplied by (?) and (?). (?) is a star in his own right. And the music totally suits the subject!
Some of it, such as the actual ‘theme tune’, might induce cringing amongst some listeners. I’d understand why. It has a ‘new agey’ earnestness. But I love it.
Another facet of the whole thing that some might find they react to differently than I do, is the whole tenor of it all. It’s definitely dreamy, romantic, and perhaps even somewhat solipsistic? And it’s no surprise such movies helped created a cult of Bill Mason. But as a ‘fellow traveller’, and sympathetic romantic introvert soul-mate, I love it all. As did critics, numerous of his films, inc’ this one, winning a variety of awards and accolades.
Also interesting to me, is how stuff like this leaches into other areas. For example, I noticed, whilst watching a recent Jack Stratton ‘Holy Trinity’ episode, on YouTube, that he had created a logo and a whole invented Vulf Films thing suspiciously akin to the Canadian NFB (National Film Board) doodad.
Just as Bill Mason’s film is simultaneously about following one’s own individual and sometimes lonely paths, it’s also about connections. Be they to nature, or each other, immediate or indirect. Love it!
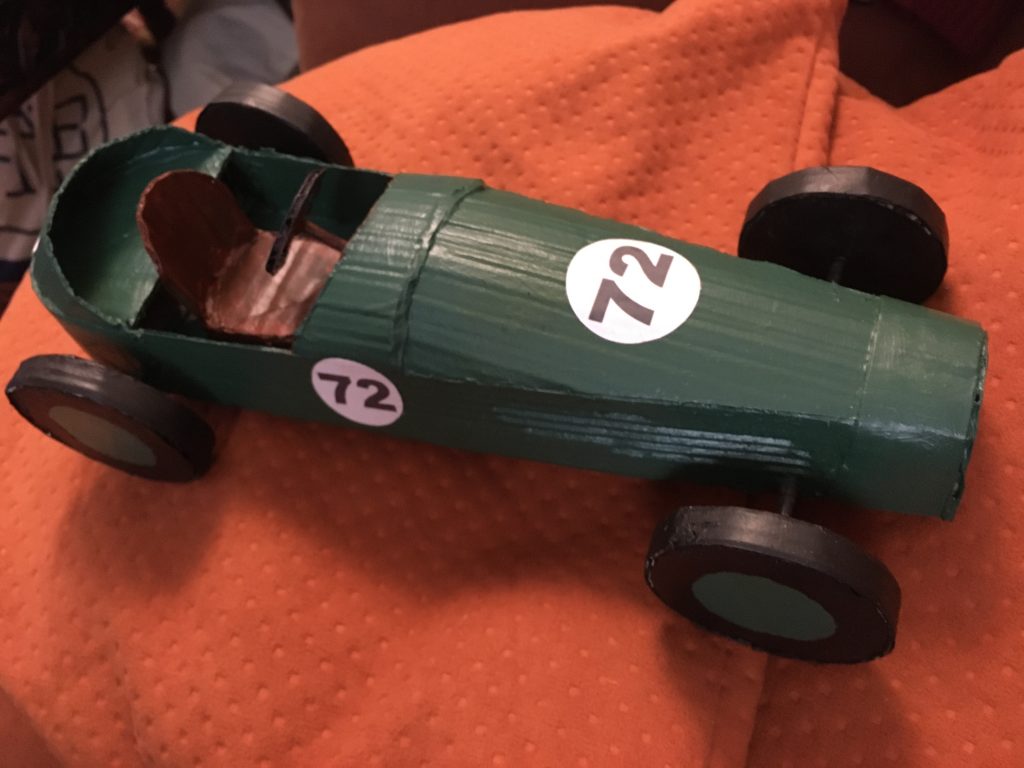
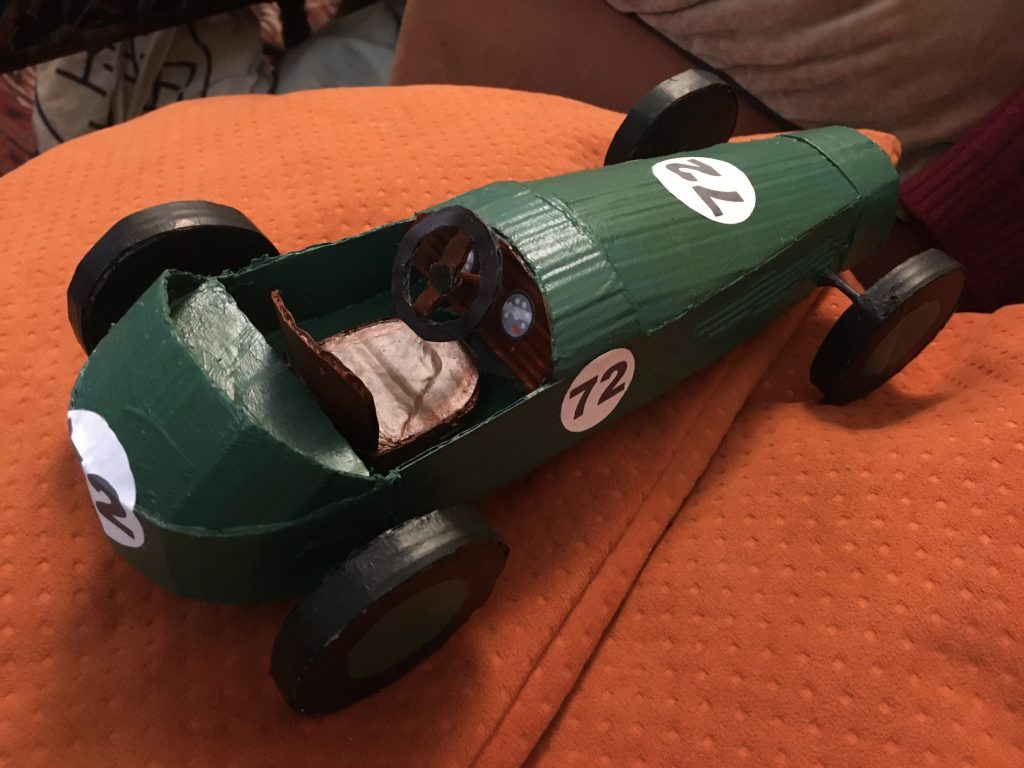
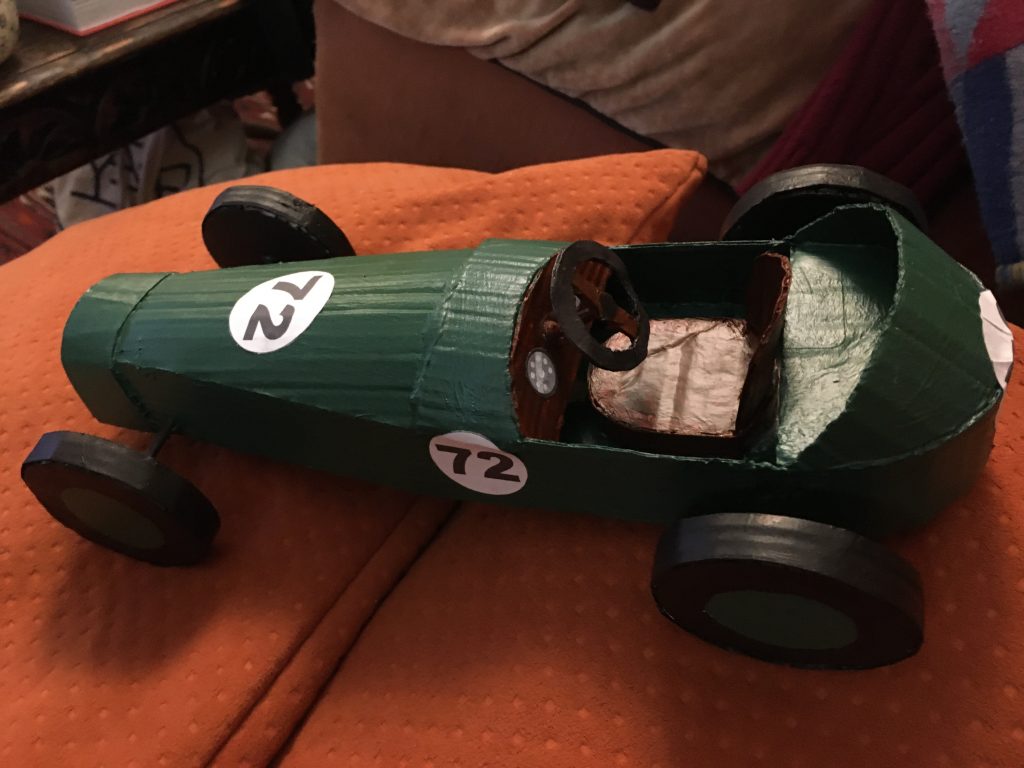
The car isn’t really 100% finished. But none of what I do ever really is. Still, it’s good enough for now.
Sitting on my Wah pedal, whilst I print ‘decals’.
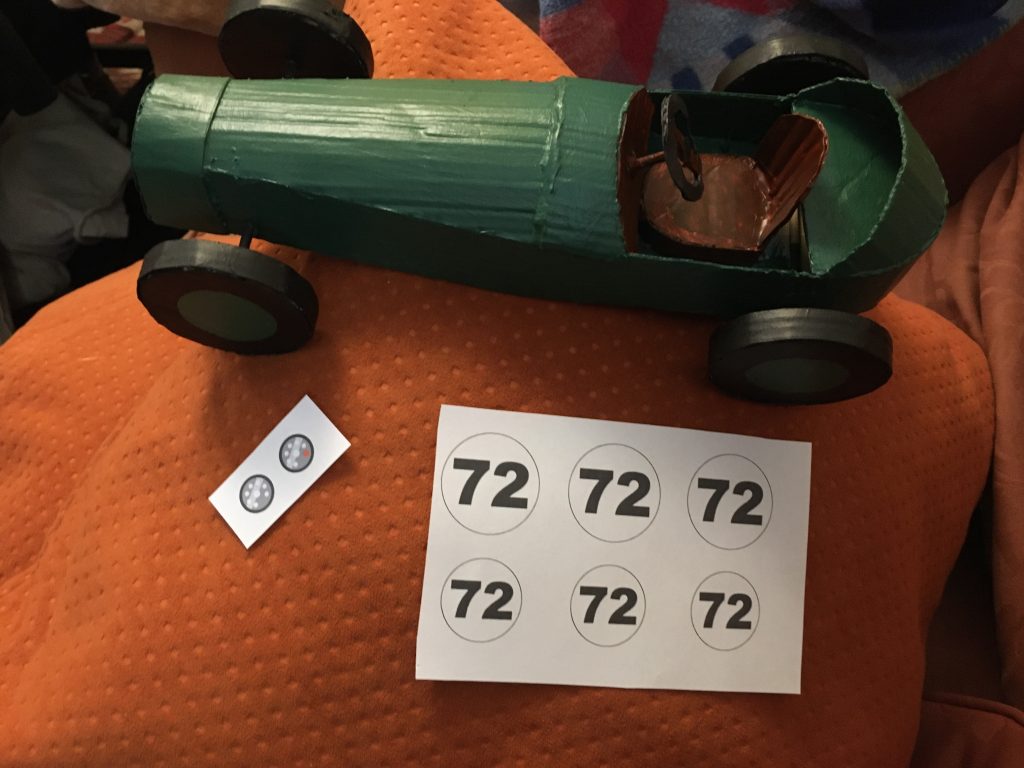
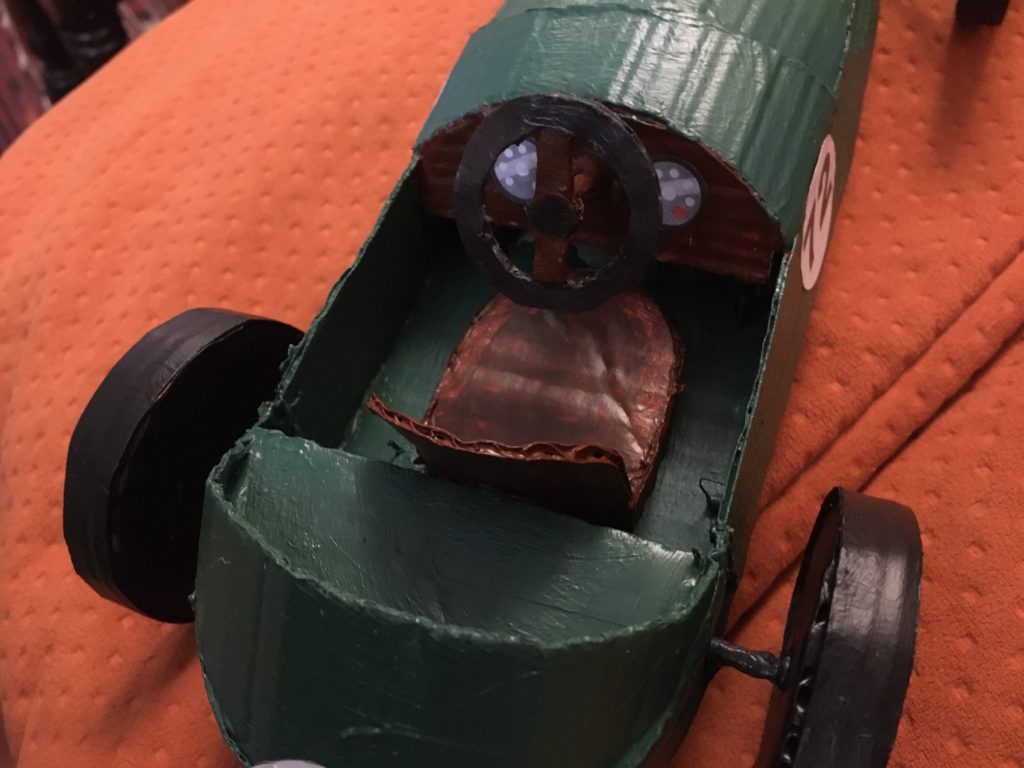
Today I printed ‘decals’, for the numbers and a couple of generic dash instruments.
Cutting out the decals.
After quickly knocking out the decals in Adobe CS5 Illustrator, I cut ‘em out, and Pritt-sticked them into place. simple but satisfying!
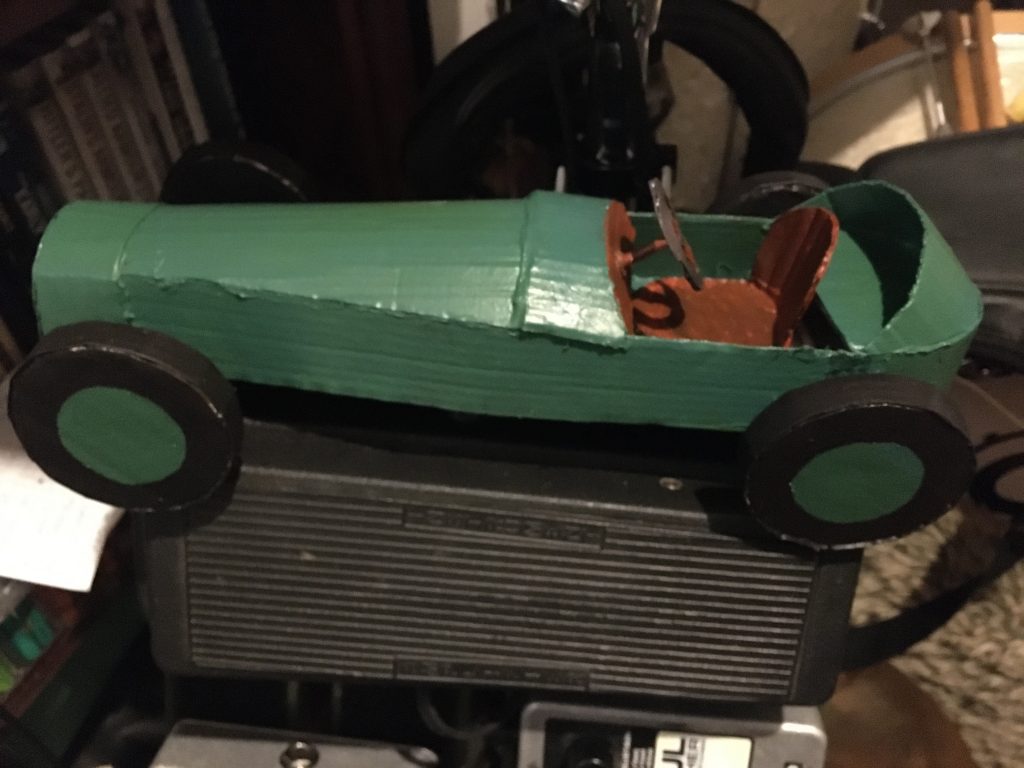
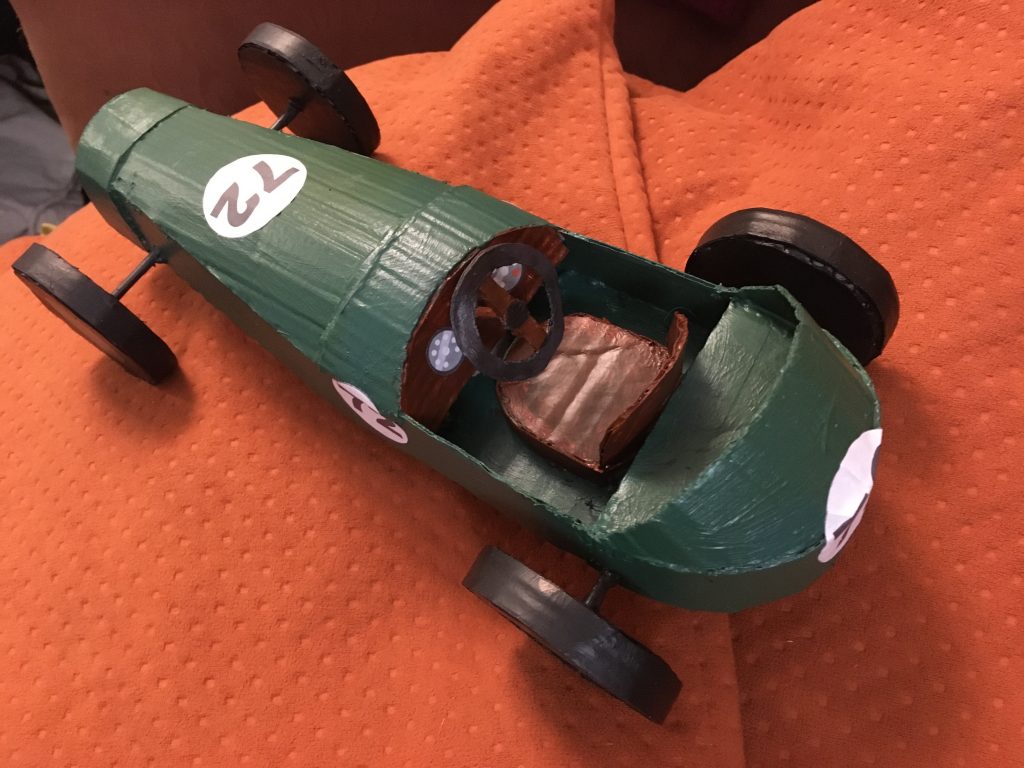
Numerous views…
I might add a dash of bold bright yellow to the front of the ‘hood’, as stripes, or around the radiator housing. Hmmm!? But for the moment, I’m stopping here and posting this as is.
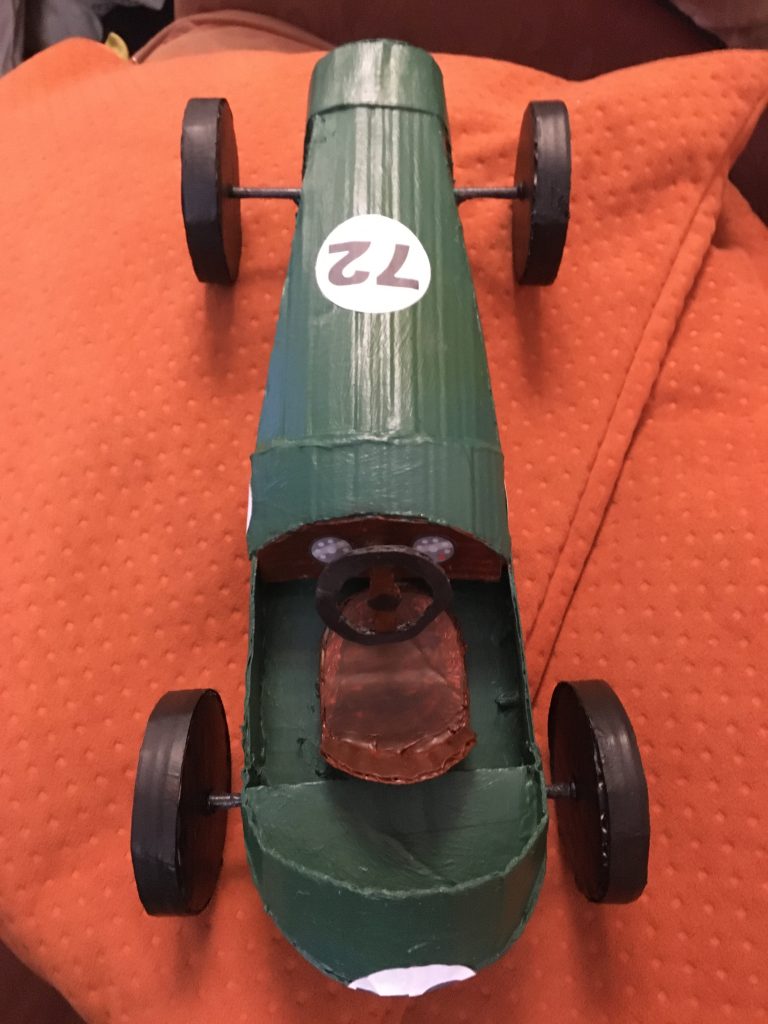
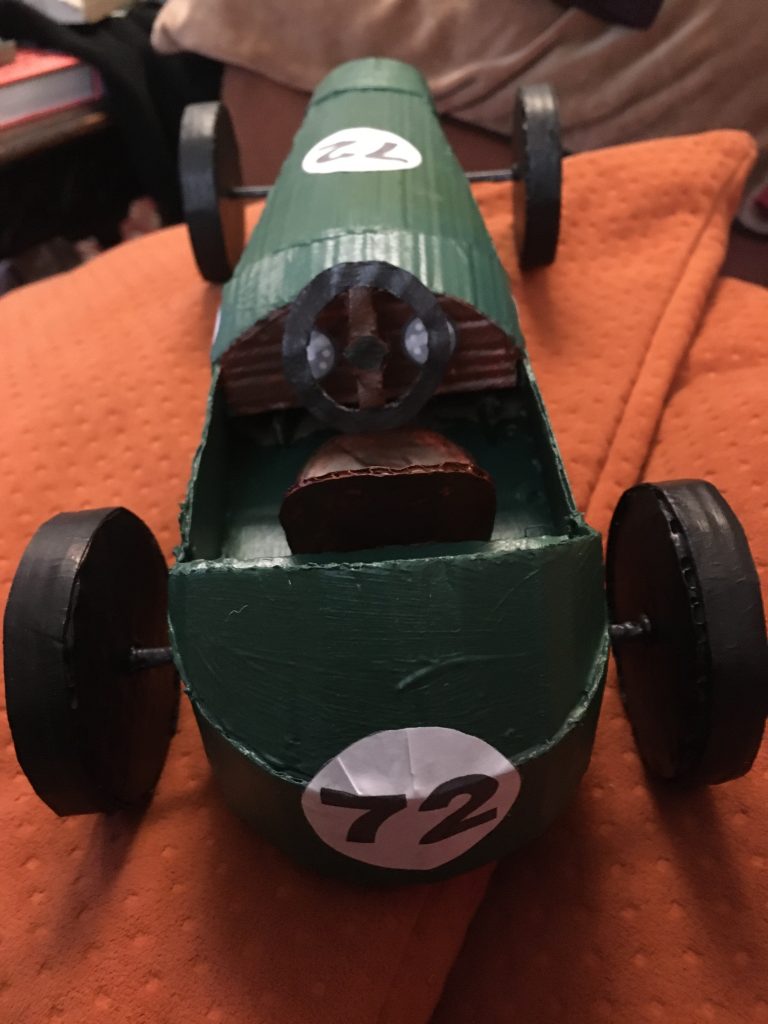
Do I bother trying to straighten the wheels?Trying to zoom in on the dashboard dials.Making the rear number follow the body’s contours was tricky.
This has never been about perfectionism or accuracy. It’s a generic ‘made up’ vehicle. And it was all never more than a bit of kiddie style crafting fun. Keeping the gremlins of anxiety or boredom, whilst convalescing, at bay.
Thar she blows!
And in that respect, even if no others, it’s been a success!
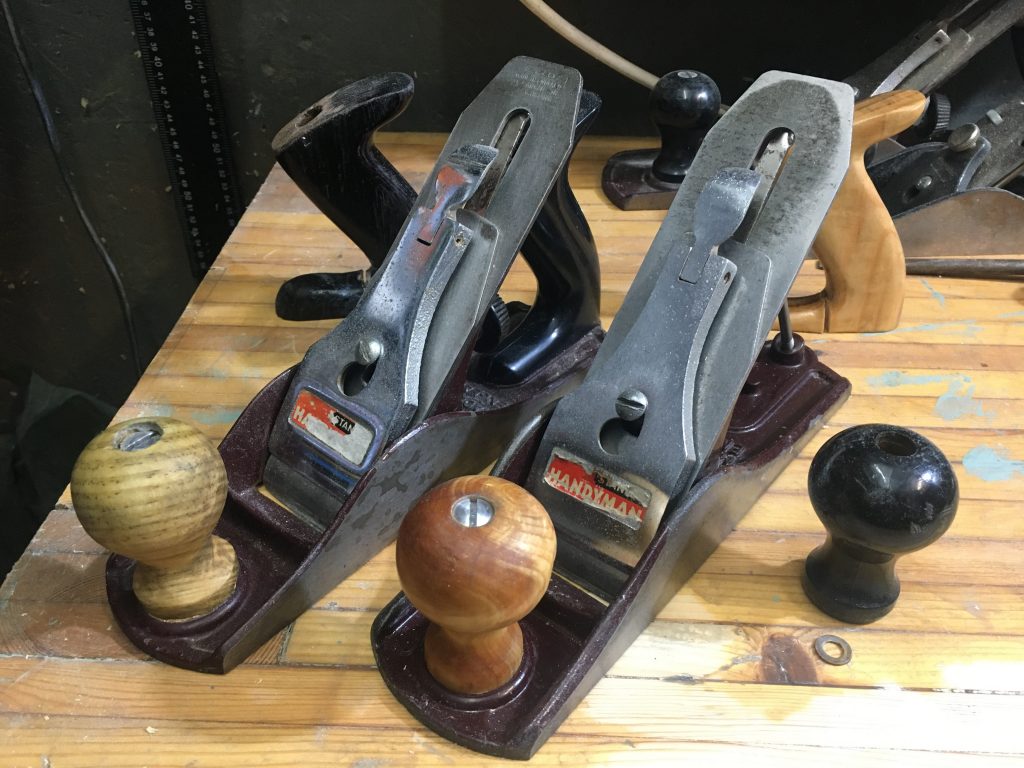
Above are my two new wooden knobs. Left is pine. Right? No idea. Some kind of fir tree!? But much harder/denser than the soft pine. In the background, the two broken DIY handles.
These planes have been my go to pair for quite a while. One is set up as a scrub plane. The other a finishing plane. They’re both working, but need sharpening again (groans!).
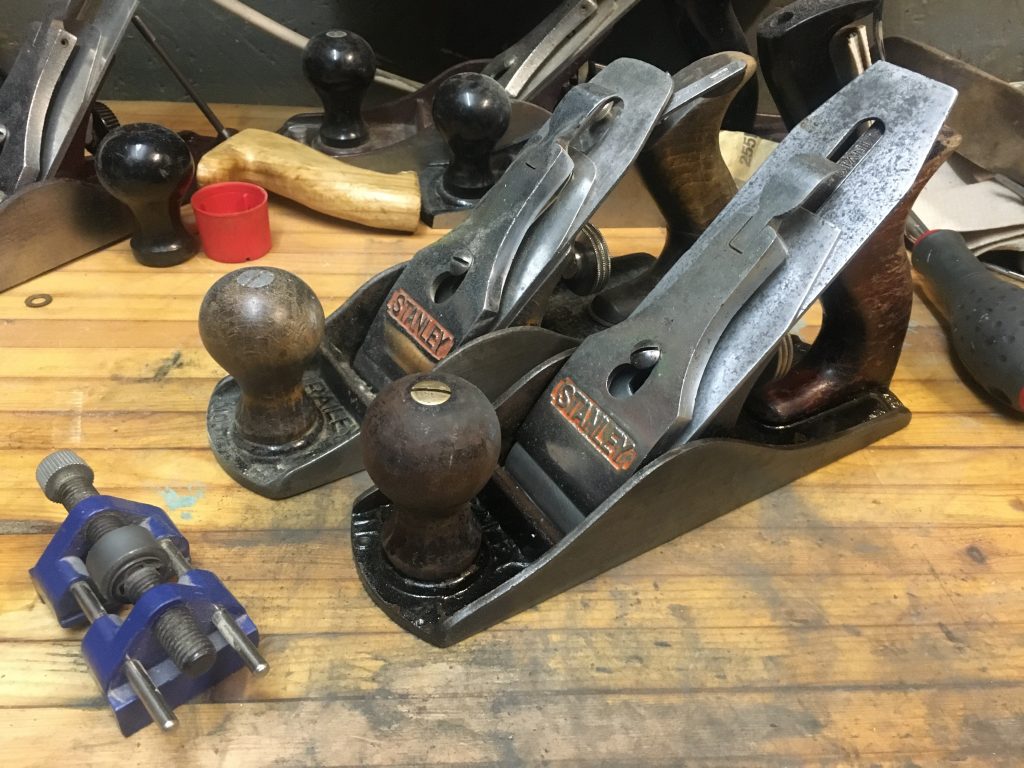
And my two Stanley no. 4 planes.
These are the real deal! But I’ve never really set them up that well. I have sharpened them once or twice, and one of them is good to go. But again, they needed both cleaning and sharpening.
So I cleaned and sharpened one of them this evening. Can you guess which? I’ve only sharpened the primary bevel. It’s sharp enough to shave the hair off (the back… steady!) of my hands.