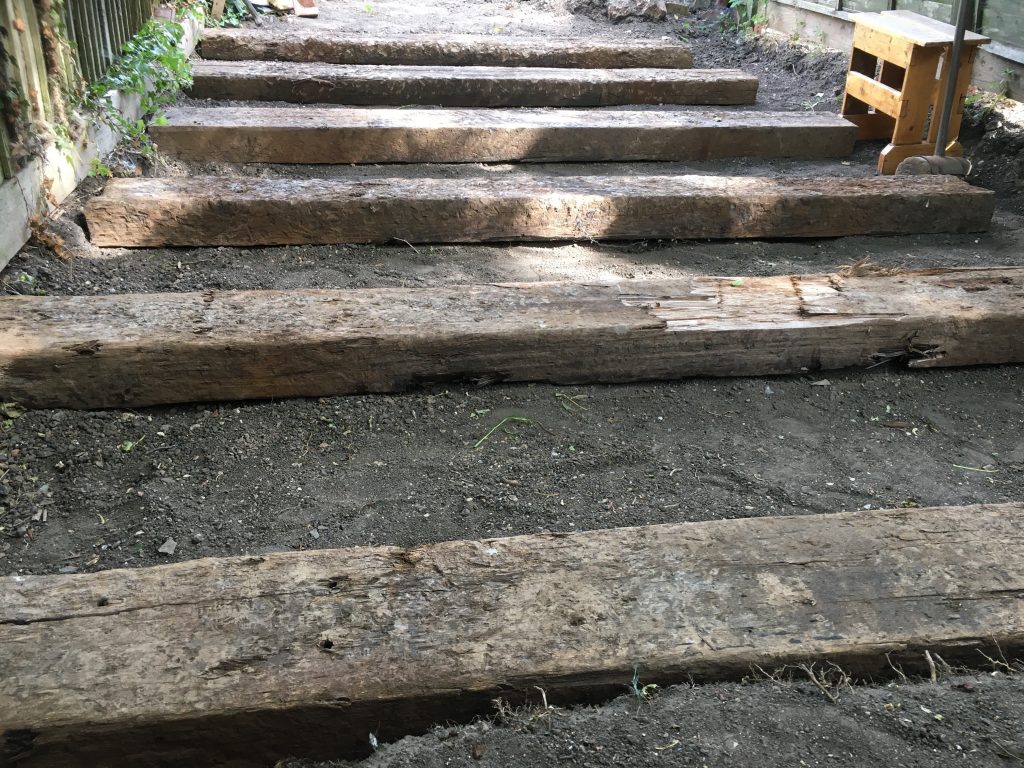
Got the sleepers roughly in place. They need tweaking to get them properly spaced and levelled out. They’re close though. Cross-wise they’re all pretty good, but along the length of the shed there’s a slight decline, as you get further from the house.
Workman’s hands!
It was pretty quick n easy, doing the sleepers, in the end. Somewhat surprisingly so. Teresa helped me shift the first one. But after that I was on my own. Just ‘drag n’ drop’, like Photoshop!
The foreman checks over my work. Seems to approve.
It was very sweet when Chester saw what I’d done. He evidently enjoyed clambering over them all, and even snuggled up to one for a little spell. I’m glad I have the guv’nor’s blessing!
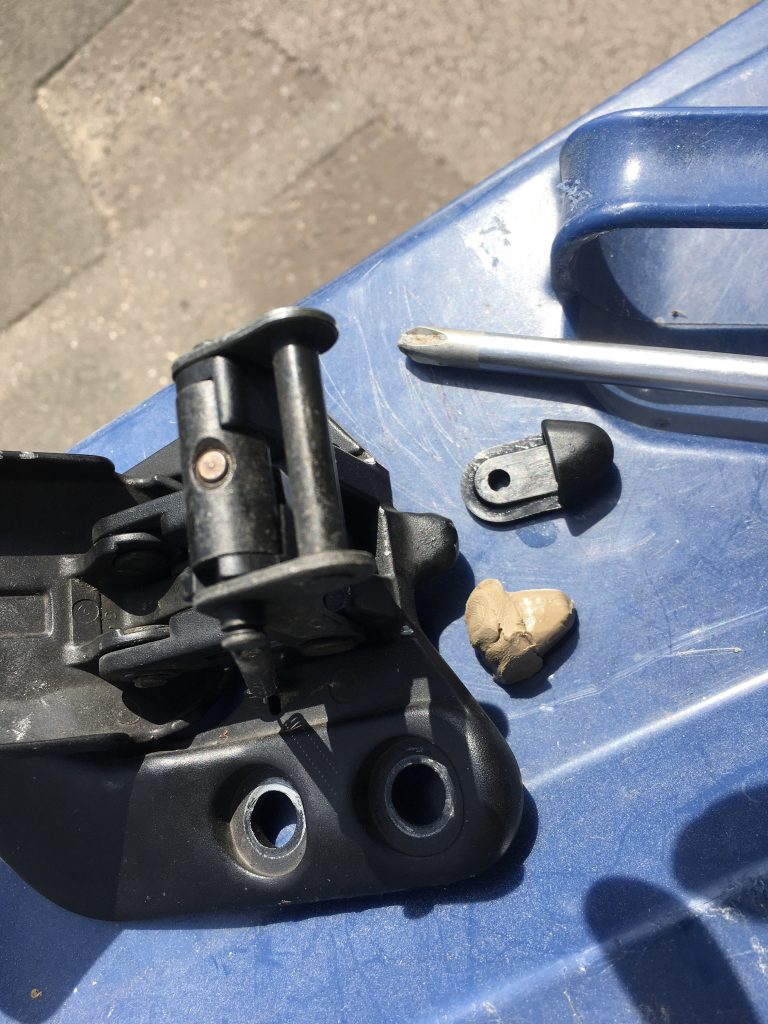
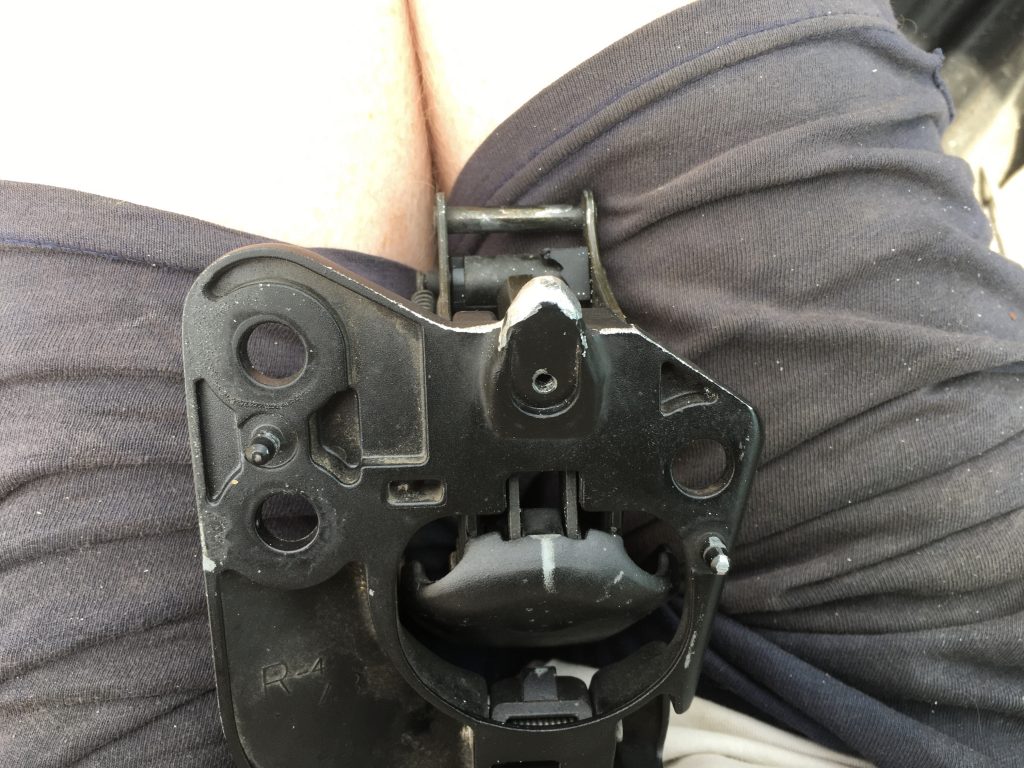
I used plasticine to profile the inside of my ‘nipple’.
A few days back I posted about how annoying this particular little job was becoming: first I get two new parts, but the one that prompted the work – the ‘nipple’ for the really poorly fitting/closing latch – breaks almost immediately. Back to square one!
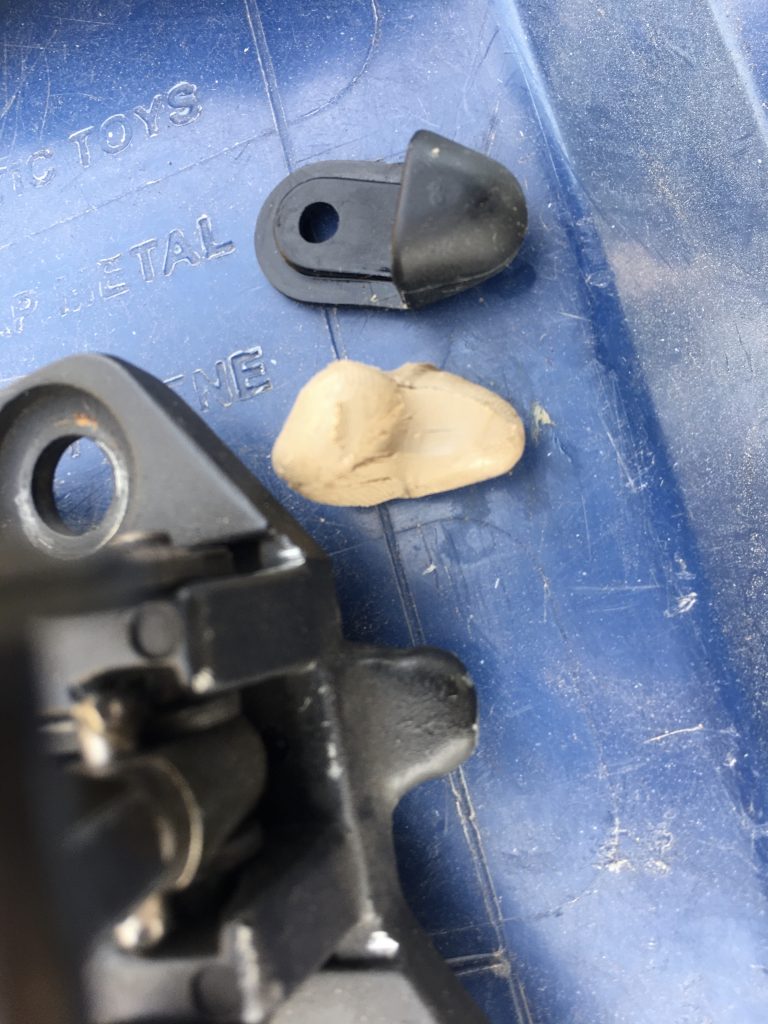
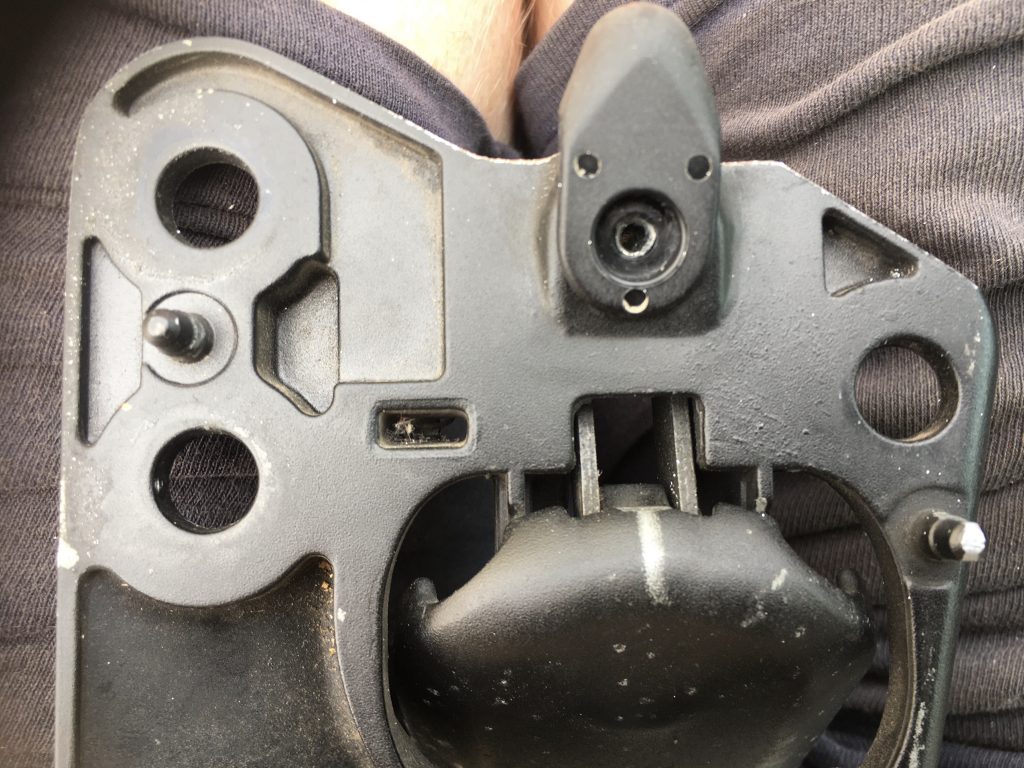
Another view; hopefully the different shapes are slightly clearer here?
So I order a new part. But it’s different, and doesn’t actually fit. It’s a more ‘pointy’ shape. At least this clarifies for me the type of latch and nipples (oo-er!) I had installed before, i.e. the more rounded type.
These differences in shape mean that the screw hole in the nipple doesn’t align with the threaded hole in the latch, necessitating either a different part, or making changes to one of the parts, so they do align.
The holes don’t align!
According to some sources it’s only the pointy type that are easily and widely available now. I don’t know if there’s any truth in that or not, as I definitely can get the other sort elsewhere. And, indeed, I already have done (on my first attempt).
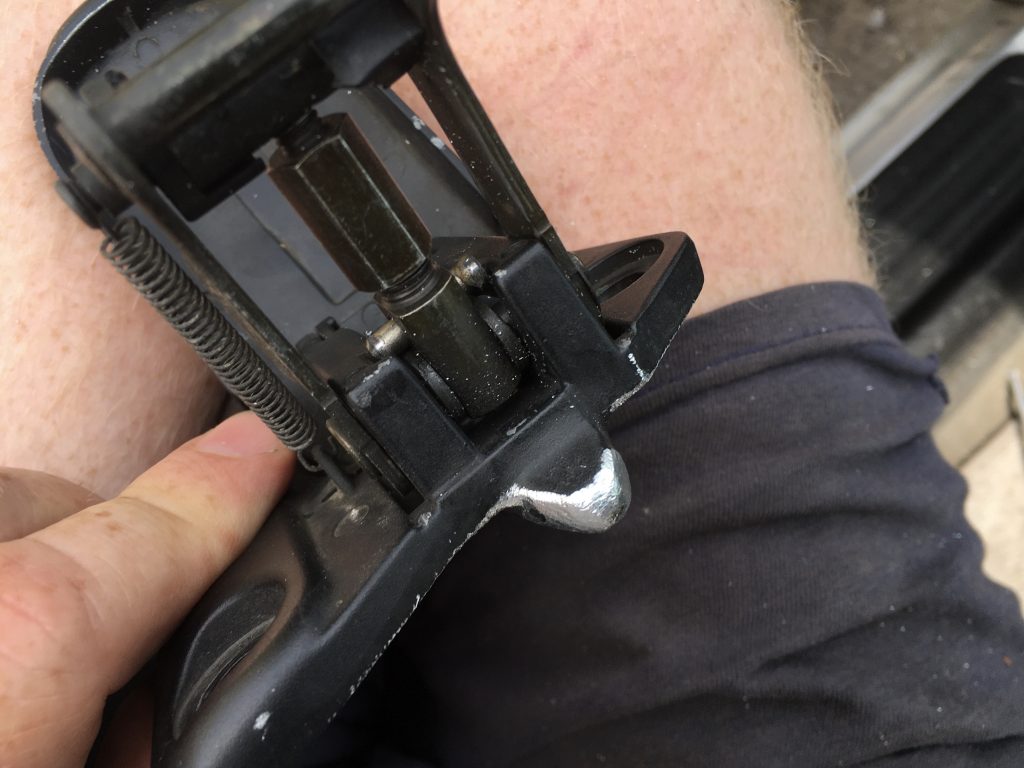
The ‘male’ latch part filed down a bit.
Anyway, as I’m broke, rather than buy a third one (or pair), I decided instead to file the metal on the latch to conform to the ‘nipple’, instead. That took a bit of work, but I think it achieved the desired goal.
Viewed from t’other side.After some filing, the two holes align nicely.
This job turned out to be a right pain in the rump. Firstly, with parts breaking or not fitting. Then, when I’d filed the latch to fit the nipple, I discovered that the entire soft-top frame seems somewhat out of alignment. I had to wrestle with it a fair bit to make everything align better.
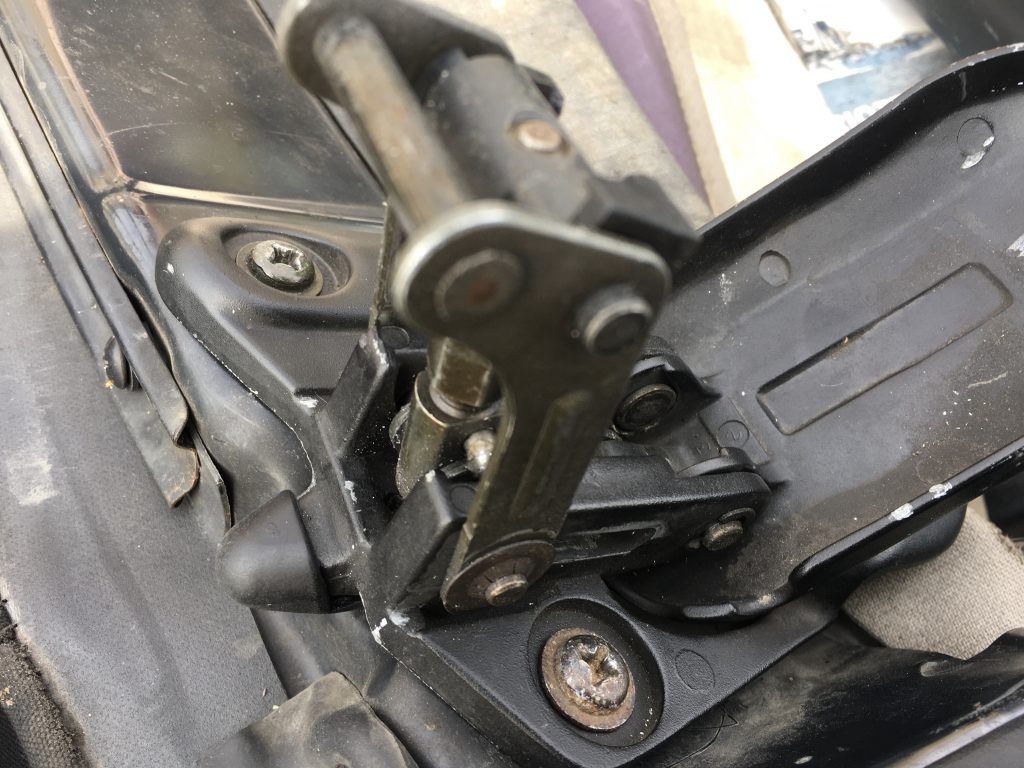
Reassembled and back in place.
Is this the price I’m paying for loading my little MX5 with all kinds of stupid burdens over the years? I’ve had all sorts, from fence-panels, timber, doors, to trees, chests of drawers, fridges, and lord knows what else, on the back of Maisie. Often sitting atop the folded away roof. Have I bent it all out of whack?
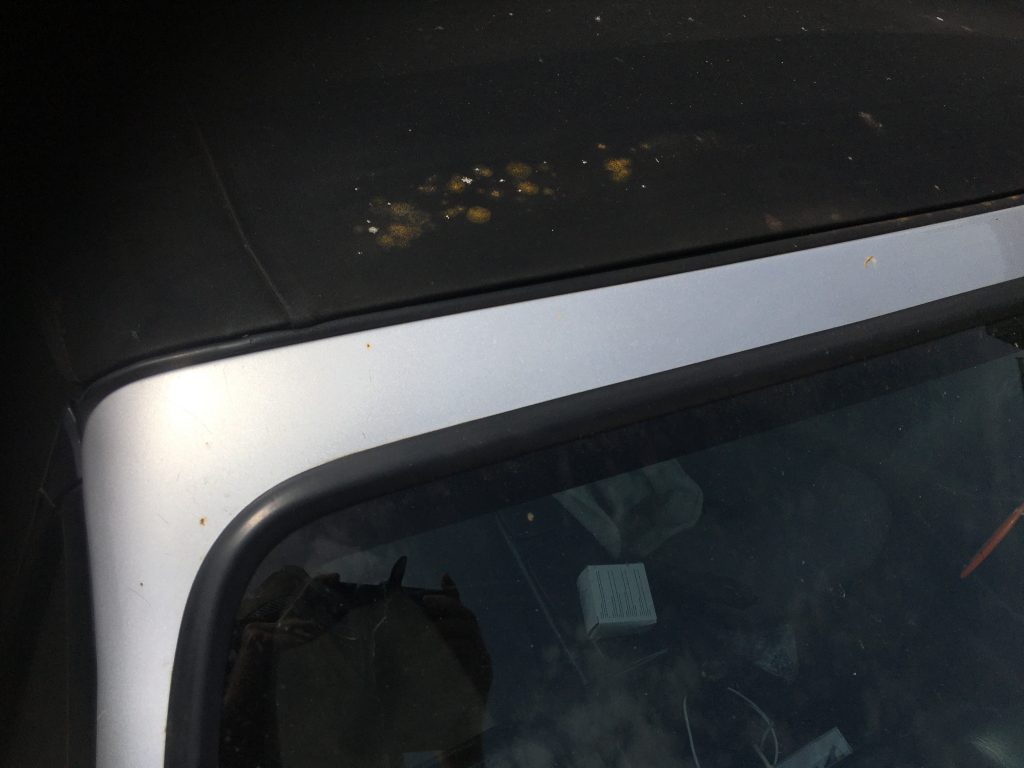
After struggling with this latter issue for a while, and fiddling with the latch adjustments, so that both are quite tight, but neither are fully tightened, I’ve finally managed not just to close the top, but to eradicate the very large (and formerly plainly visible) gap, on the driver’s side.
Sooo much better! Green algae points to next job.*
I can’t find any before pics (although I’m certain I took some!?), alas. But above and below are some after shots. Trust me, it looks waaay better!
I’m hoping it’s improved the ride as well, as before the sound of wind coming through said gap was really, really, REALLY, REALLY annoying! It was sooo loud – it literally roared – that music or conversation were pretty much out at over 55/60mph.
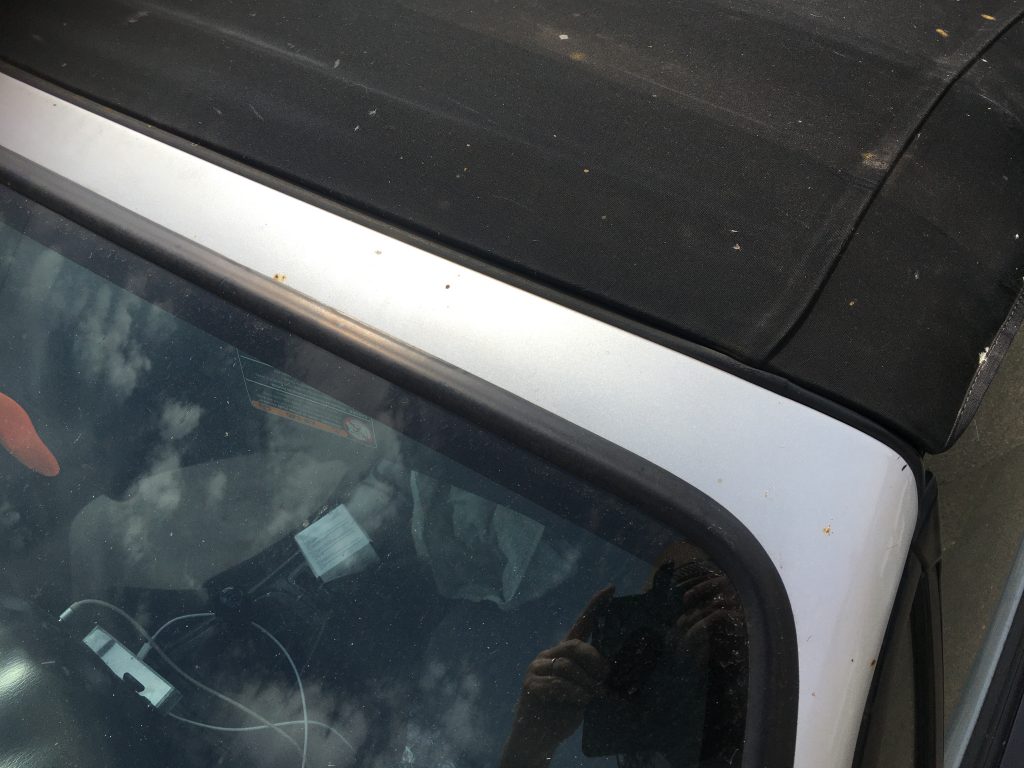
Passenger side, looking as it did both before and after.
I’ll be taking her out for a spin later to see how all this nipple play has affected things!
… A bit later the same day… Well, I took her out, with Teresa, for a brief spin. And, my oh my, what a difference! No roaring airflow, nor can I even feel any draught. And – although we’re currently in a heatwave – this’ll mean no more ingress of rain. Wahoo!
* Next? Either adding some of the silicone pipes I got from BOFIracing a whiles back , or using the Auto Glym products I have to clean and re-waterproof the soft-top. Hmmm!??
For quite a long time now the soft-top roof on my MX5 has not closed very well. It’s apparently a common issue. There’s a rubber or plastic ‘nipple’ (!?) that wears away, allowing the latch to become floppy and loose.
I recently replaced this part, on both sides, with a new pair. Can’t recall who I ordered them from (I ought to find out; I think they’re Jass parts via BOFIracing?). But I’m pretty miffed that one of them – the dodgy one on my side – failed almost instantly.
I’ve subsequently ordered yet another one, this time as I got an individual one, not a pair. Wound up costing nearly a tenner, for a £1.95 part! Really annoying. But even more annoying. It doesn’t bleedin’ fit!
My ‘only option’, at least via MX5parts.co.uk.
I’ve contacted Autolink, who I got the more recent one from, to let them know (via email). Not had a reply as yet. I’ve also contacted MX5parts.co.uk, and they say there’s no longer a choice of two parts, but just the one:
I know that there used to be, and via some channels – e.g. Autolink – there still are, two different parts that have formerly been sold, that do this job. One is curved, the other is more ‘pointy’ (but still a bit curved).
These are the two types.
So, what do I do? Keep buying these little bits? I can’t actually afford any expenses right now. Even a tiny trickle such as this has become. Or do I modify the metal part of the latch; file it down and make the latch fit?
I might be forced to go the latter route, for purely economic reasons.
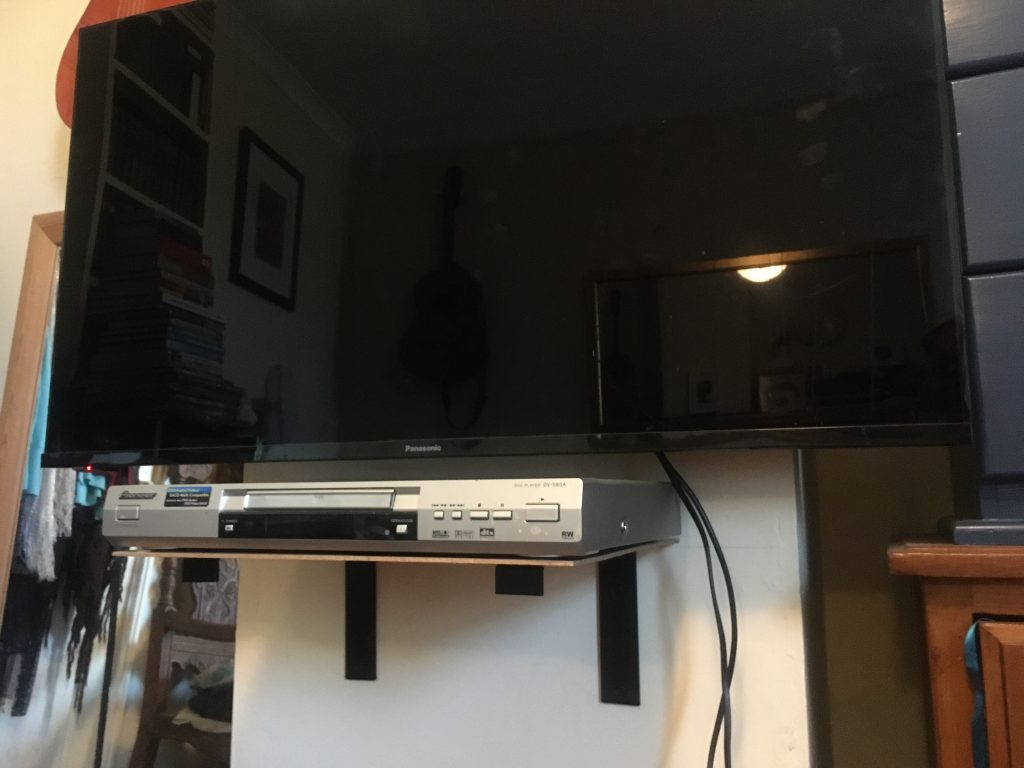
There was a very faint knock on our door at about 9am this morning. I’m amazed I heard it. As I was busy drilling holes in an upstairs wall, to mount a little shelf for a DVD player, ‘neath our bedroom TV.
DVD shelf brackets up; hardboard shelf is temp’!
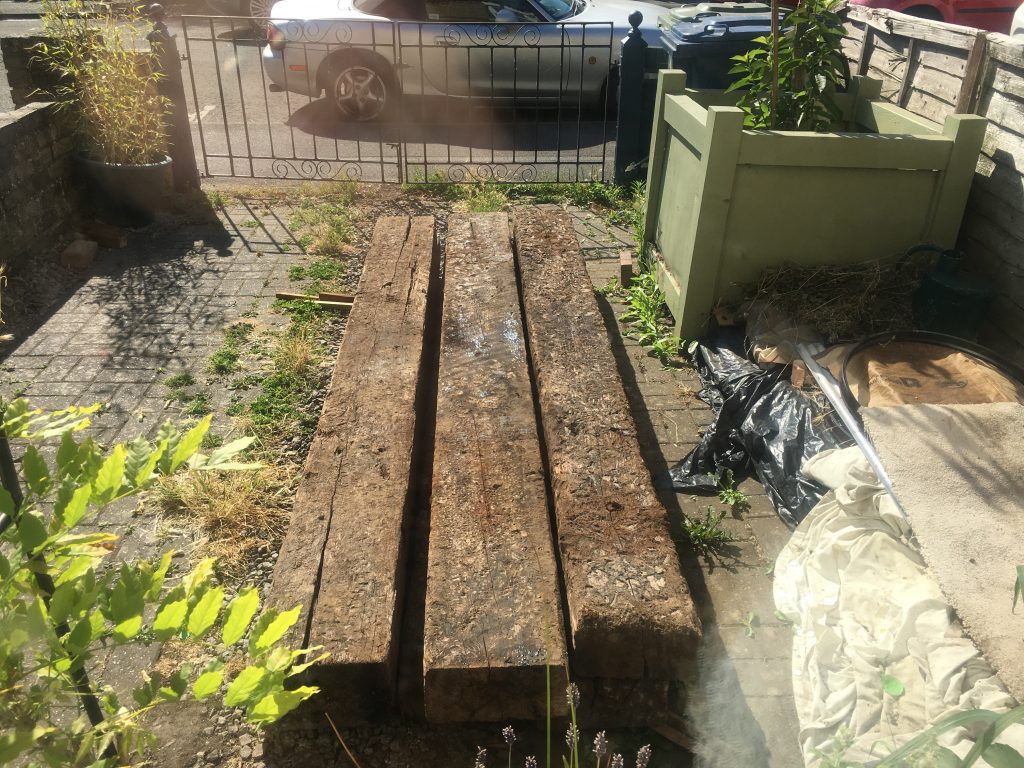
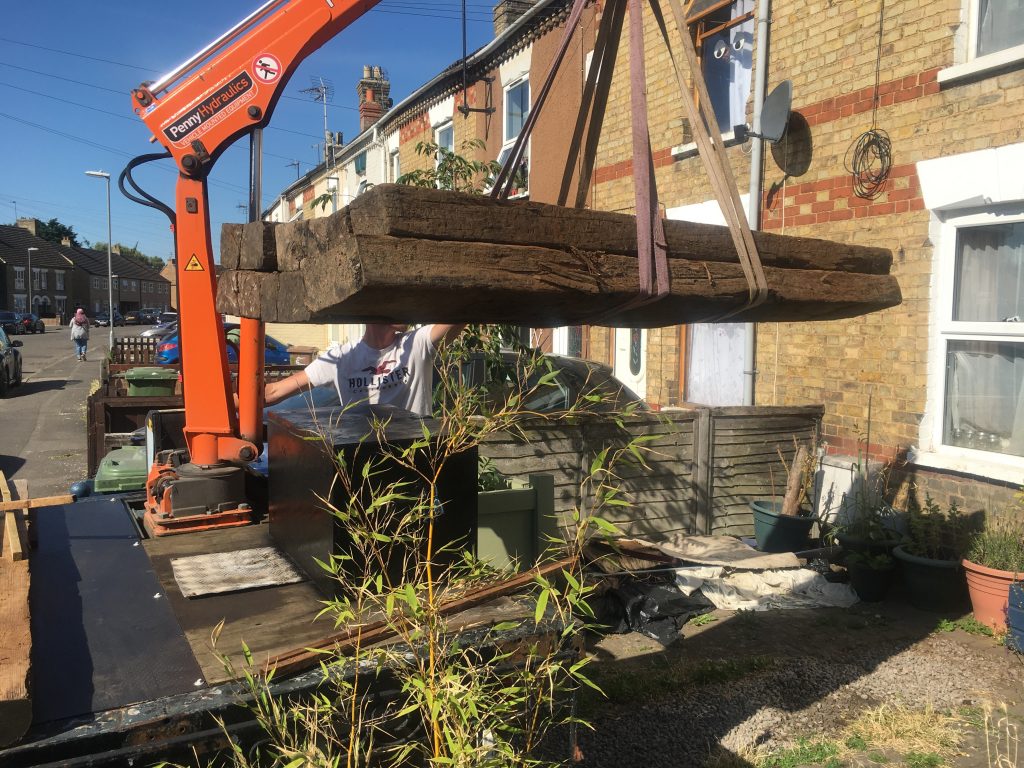
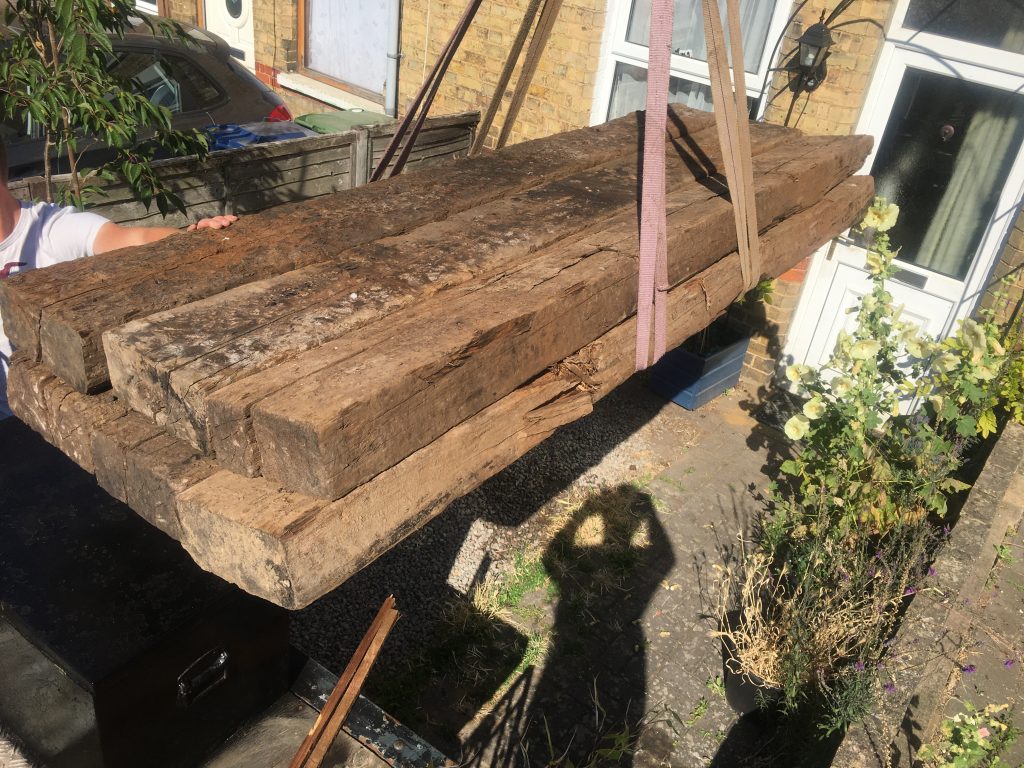
On going downstairs I spied a young lad with a lorry, with a crane on’t back, and six rather knackered old looking sleepers on it. It is a shame they’re B grade, in all honesty, as they have ruddy great cracks in them, splintered areas and missing chunks.
Unloading the sleepers.
But we were given them, in exchange for my help with some manual labour. So really we’re lucky to have them at all! Thanks, Ken, for helping us out.
Nearly there.
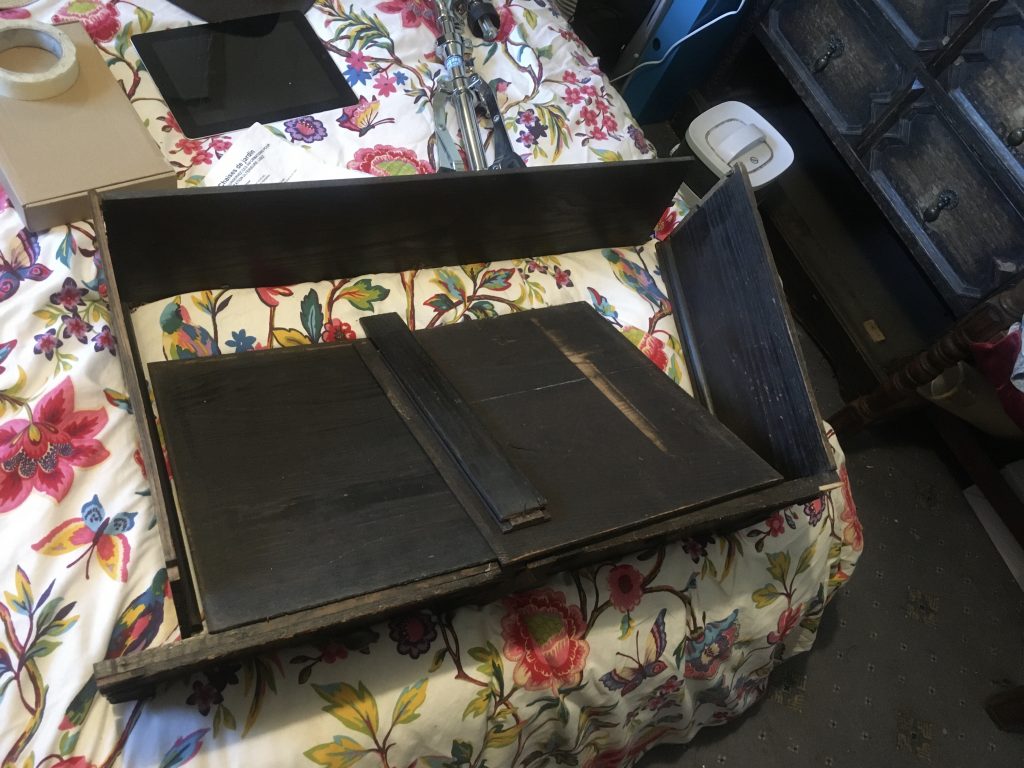
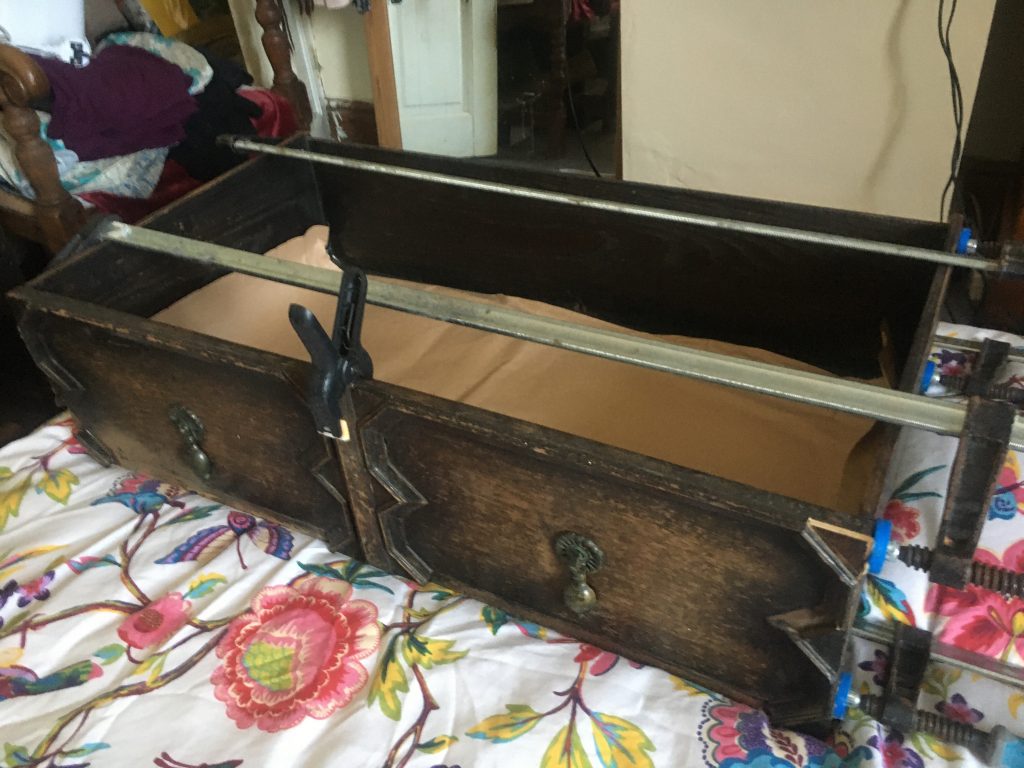
Two other jobs this morning: the above mentioned little DVD-player shelf in our bedroom, and (re)fixing – I already repaired it once – another knackered old drawer from a set of freebie (Freecycle this time, and ages ago now) chest o’mc-drawers.
The drawer in its broken state.
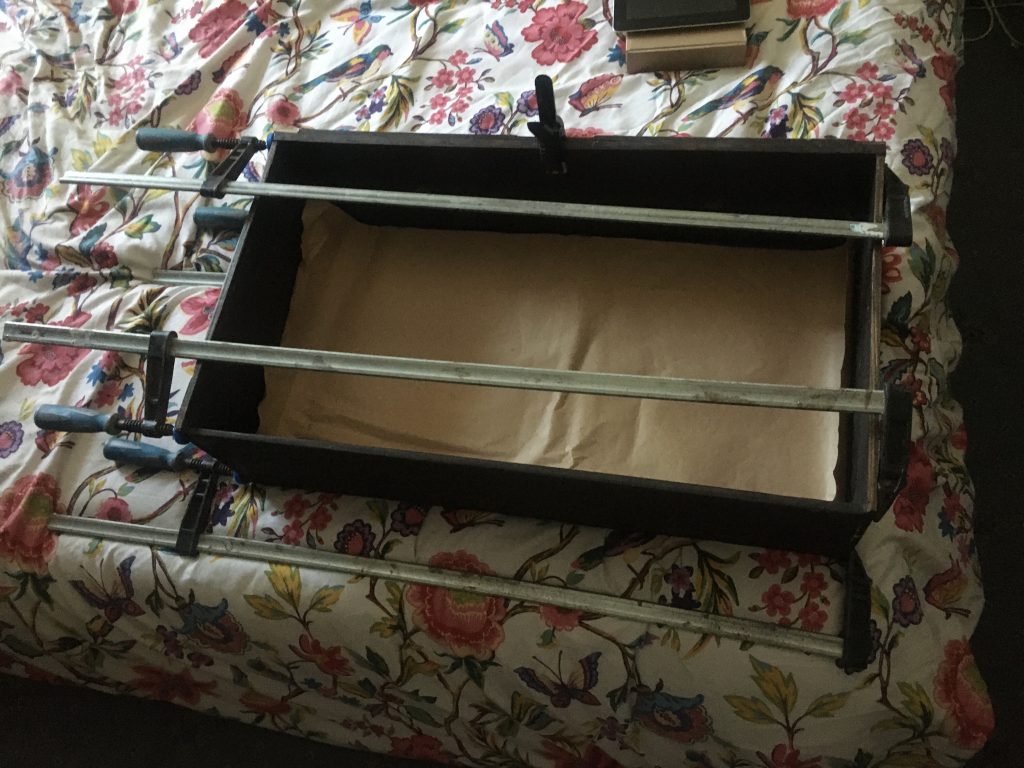
This set of drawers was full of my clothes till yesterday, as were two others. Leaving Teresa with just one set of drawers, and yet more clothes than me! So now we’ll have two chests each, and I’ll have mended us a drawer each in one of them as well.
The drawer fixed, the glue ‘going off’.
The heat today is ridiculous. I did some of the drawer fixing work out in the back garden. And now I’m back indoors, buck naked and sweating profusely (I think at heart I’m a naturist!). I’m going to hop in the shower and freshen up, and have a brief rest.
Another view. Note missing bits of fancy trim!*
Or should I delay the shower until after moving the sleepers? The latter would require enlisting a strong burly neighbour. I wonder… is Sean in at no. 72?
Yesterday and today I’ve been out in the garden, filling in a hole I dug a whiles back. I had hare-brained plans to dig an underground drum bunker music studio. Actually I still do. But I was eventually persuaded that, for now, such schemes weren’t really on.
More Hollyhocks.
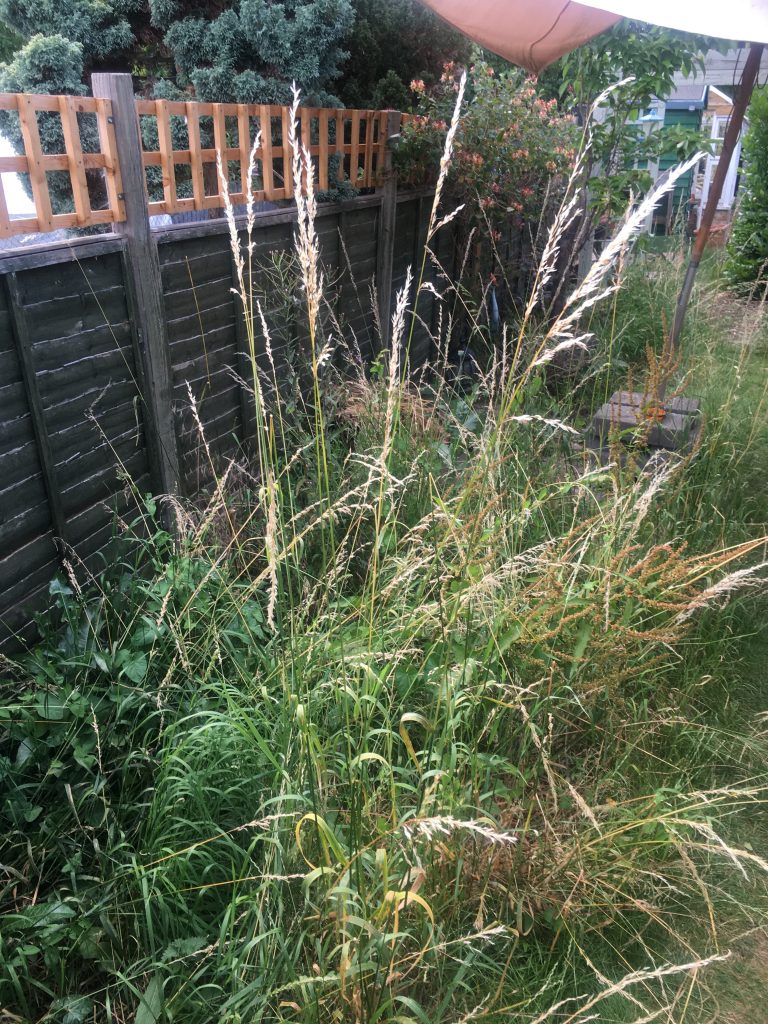
I took these photos whilst working in the garden. What an absolutely gorgeous day it’s been! Our long thin garden is looking lovely. To my eyes at any rate. It’s cluttered and messy, just like ever single room in our home! And that’s actually something I’m determined to start dealing with better.
Look at the roses. Lovely!
I haven’t bothered to document the re-filling of the concrete slab ‘ole. Tho’ I may take some pics tomorrow. As there’s (literally) tons more earth to shift. Pretty flowers and grasses seem more uplifting!
Our ‘cottage garden’ long grasses are out of control.
Fortunately the large tree at the end of the garden meant I was mostly in the shade when doing the earth-moving. We wound up inviting some new-ish neighbours over to have a look around our garden, which was very nice. But it did stop me from doing as much spade work as I’d hoped.
‘Strategic neglect’ creates meadow!
Yesterday I picked up two spades and two forks, all nice old fashioned stuff, from a local Facebook seller, for £5 each. I thought these would be useful for this job, and just to have generally.
Returning to the theme of clutter. I’m determined that 2022 will be the year I turn that side of our home life around. In every area: every room, every outbuilding, the garden. The whole damn lot!
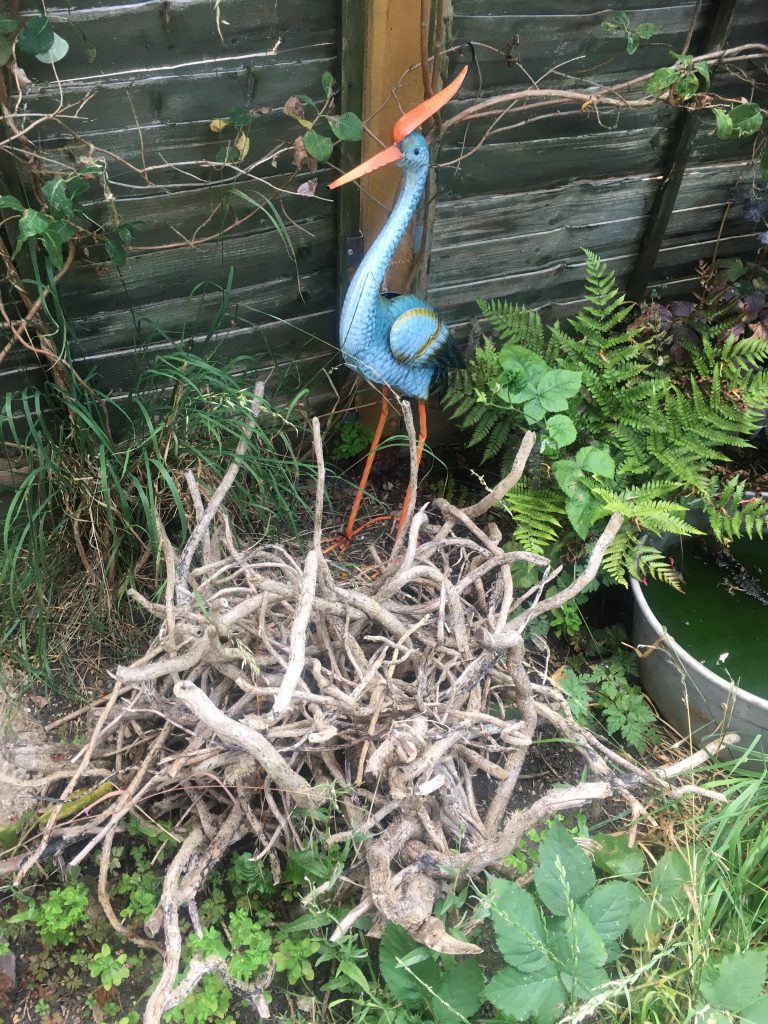
‘Egbert the Egret’, by his ‘nest’.
And to finish, a pic of a bird sculpture. We got two of these, one for us, and one for my mum. It’s not the sort of thing I’d normally go for. But Teresa wanted it, and I’m mellowing and allowing her to change me, in many ways. For the better, I hope!?
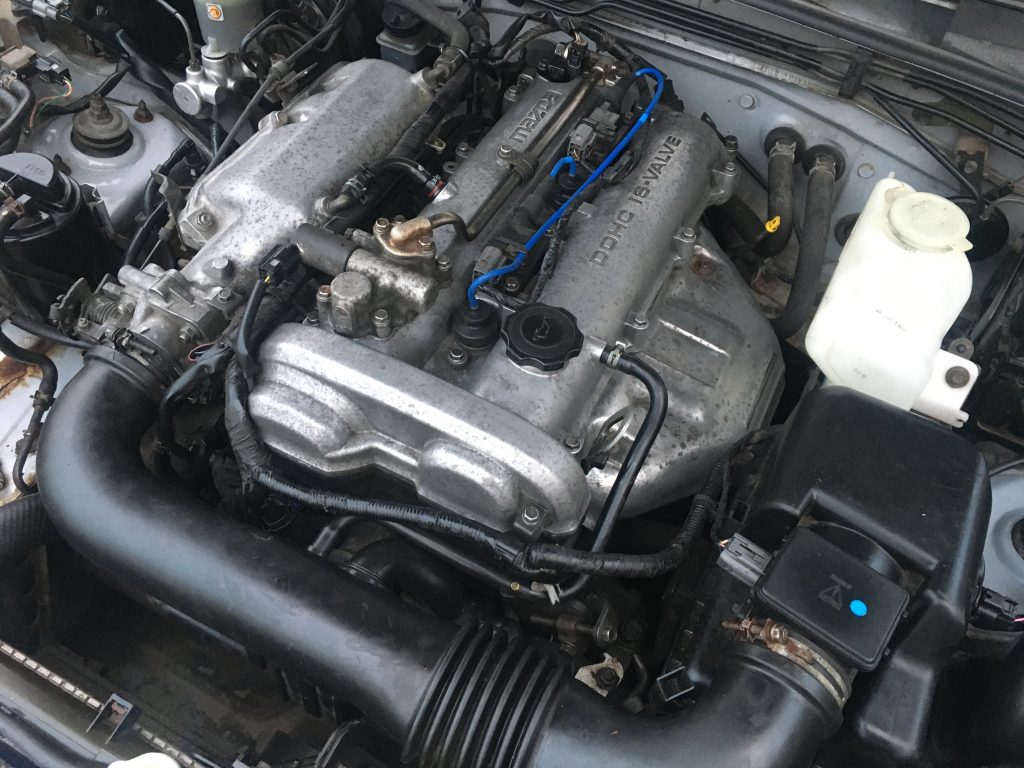
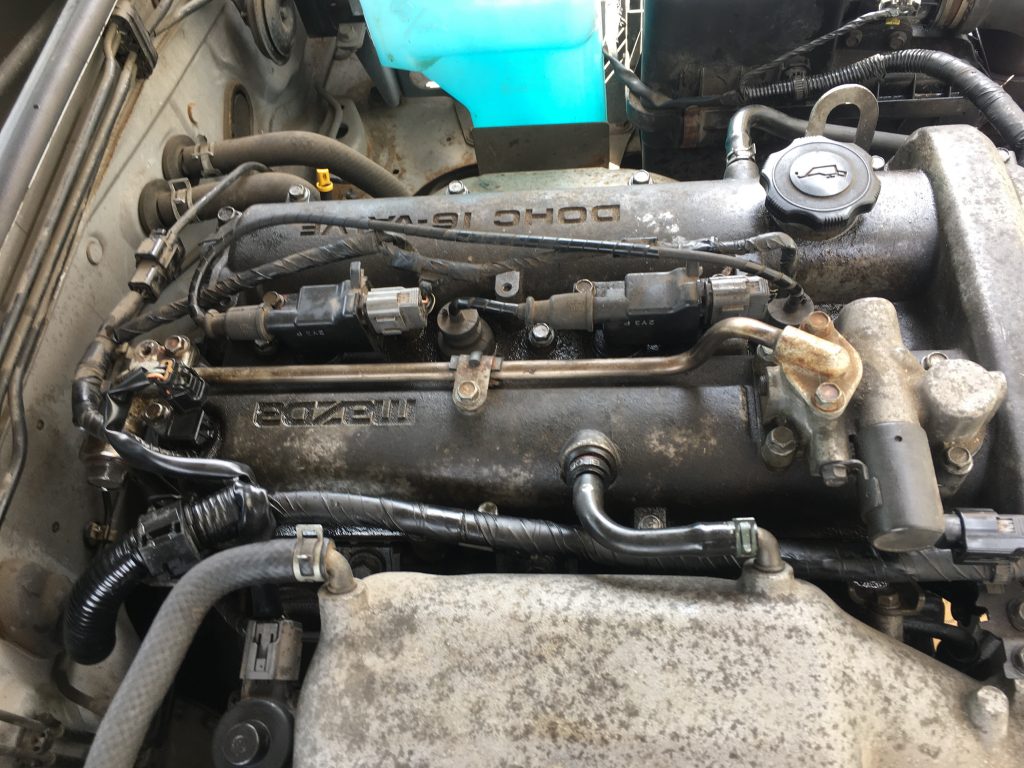
Since fixing the cam-belt the car’s been running pretty well. But it’s felt a bit syrupy, or even porridge-y recently. It’s hard to get across exactly how one knows or feels this. Things just feel a bit sluggish. There’s also quite a bit of engine vibration when one starts and moves off.
I’ve heard this can be either timing related or due to misfires. Hopefully if it’s either it’s the latter, as I’ve gone to great pains to get the timing properly aligned!
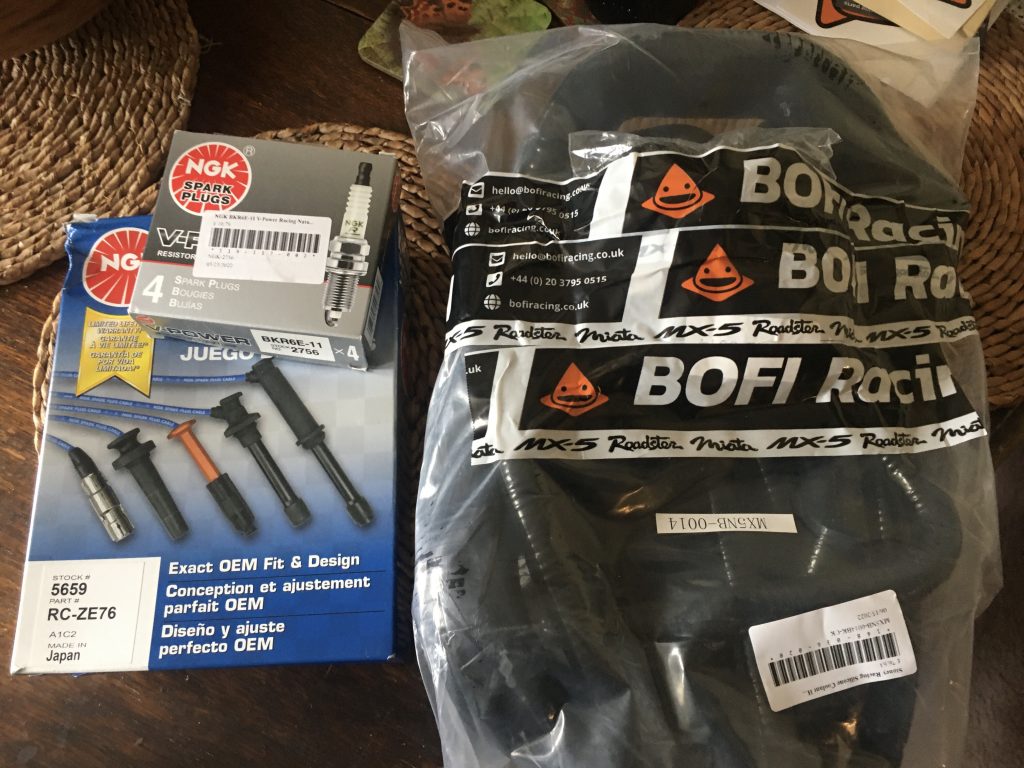
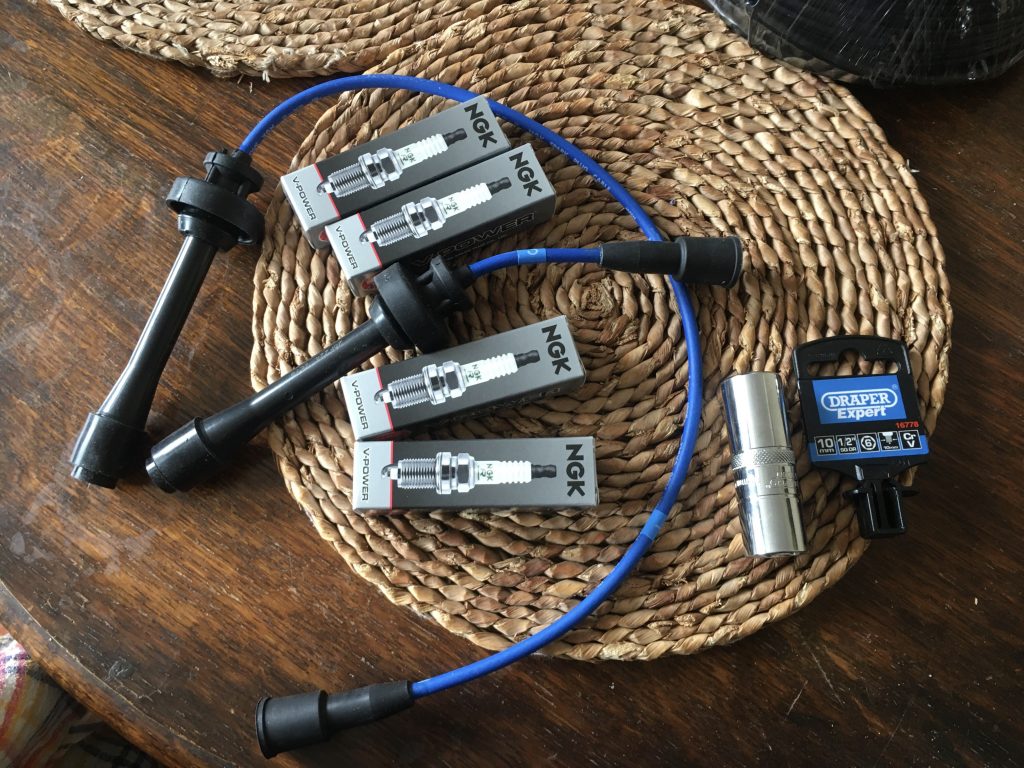
VVT spark-plugs, wires and spark-plug socket.
Rather disappointingly the VVT spark plug wire set is just two leads. In a normal engine it’s all four. This is because there are two ‘coil-on’ plugs or packs, which are rather complex, and, apparently, not available commercially. At least not easily, commonly or cheaply. Bummer!
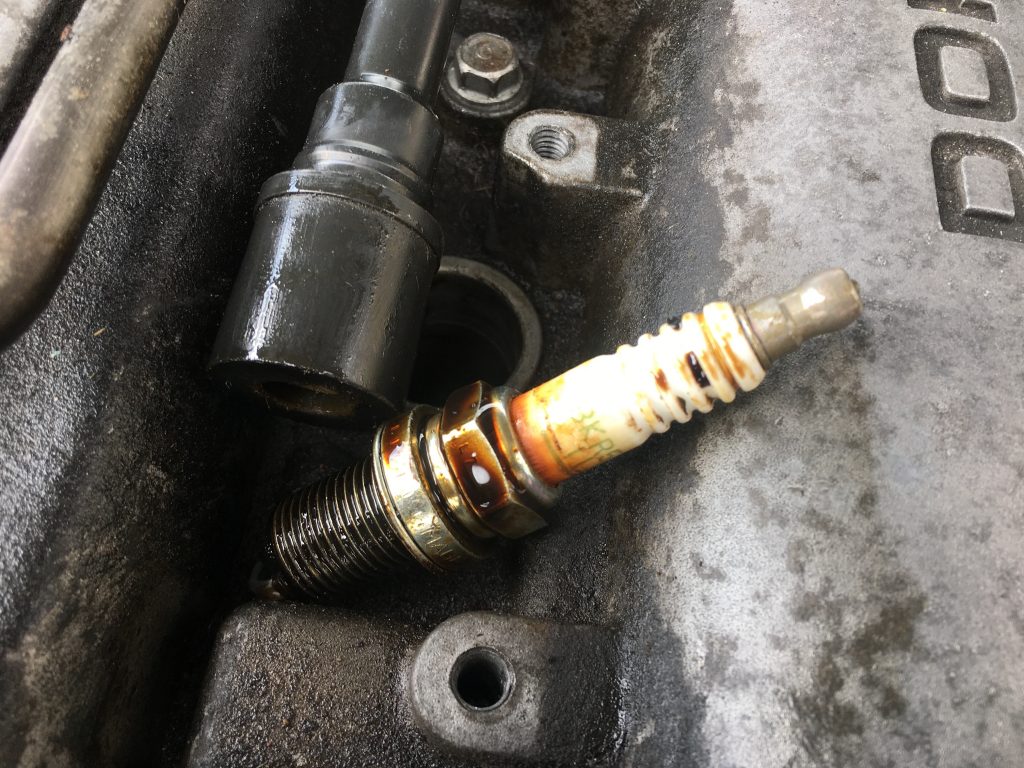
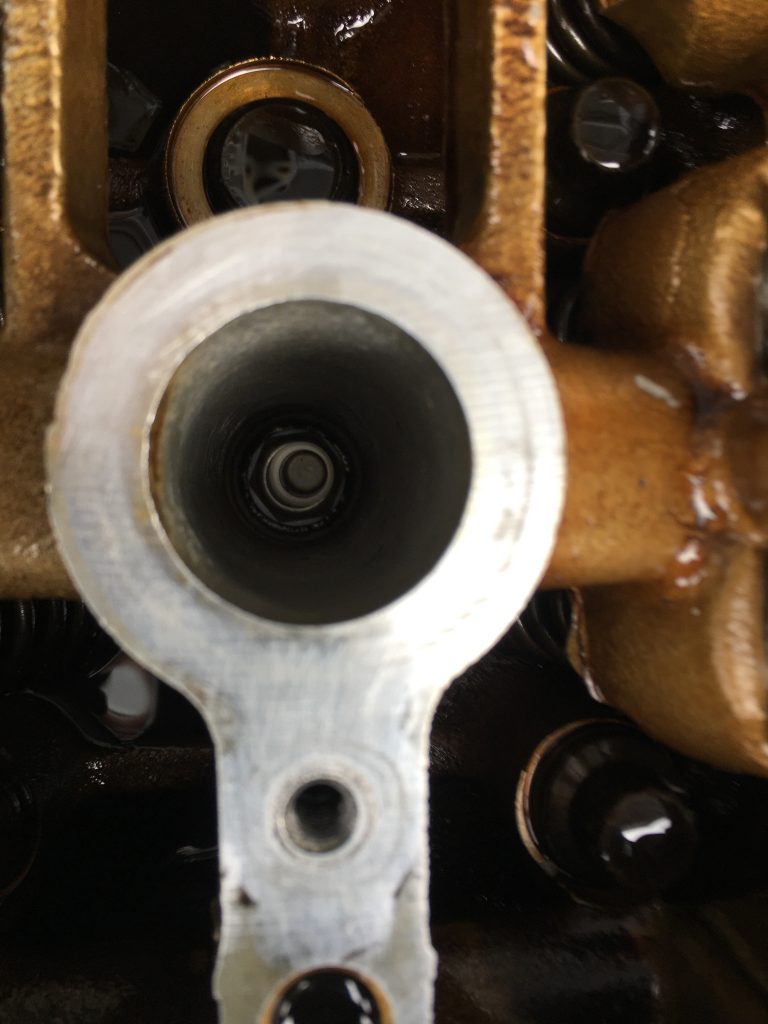
Uh-oh! Oil in the second spark plug chamber.
When I did all the cam-belt work I didn’t take the plugs out. I thought about it. But I was busy enough with everything else. I kind of wish I had now! Why? Because I found that there was oil inside the second from front plug well. It would be interesting to know if this problem predated my work, or was a result of it.
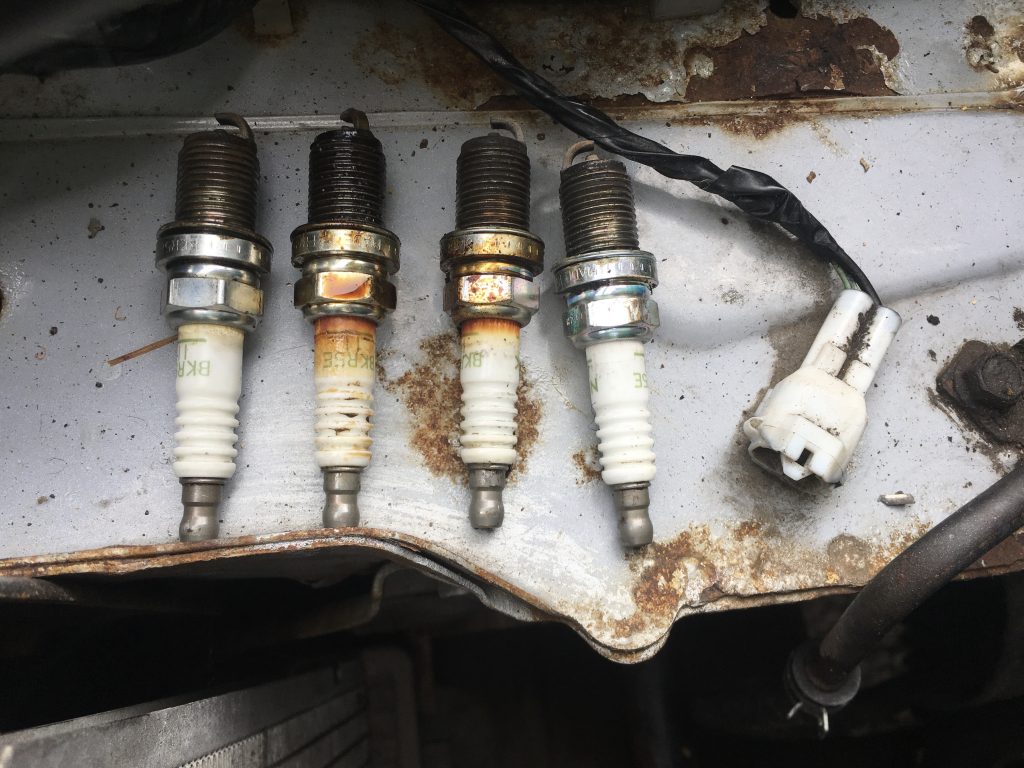
The old plugs. Second from left is the oily one!
I had the cam-cover off several times during the cam-belt and cam-cover gasket changes. According to several YT videos I’ve watched on the ‘oil in your spark-plugs’ topic, the most likely cause is a faulty gasket on the plug’ole.
Now mine is a new gasket. But has the on and off business damaged it? I guess I’ll have to check again after this job is done. But in the meantime, once the old plugs were all out (see above pics), I had the cam-cover off yet again, to really clean it.
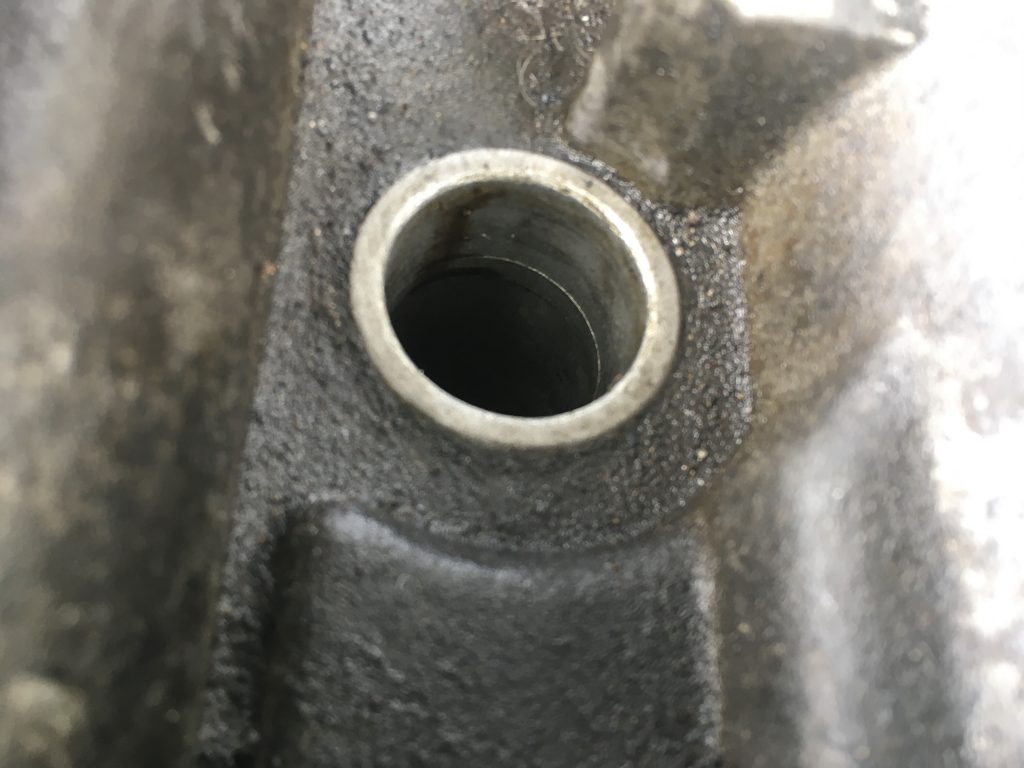
This is the oily one.
I took numerous pics of all the spark-plug holes, both before and after, for my own reference. But I’m only putting up one or two of those images, not all eight plus of them!
The cleaning of the cam-cover was the most time consuming part of this day’s work. And it’s only really a cosmetic thing, if I’m honest. I should’ve done this the first time I had this part off. And actually I did, just not so thoroughly.
Cleaning the cam-cover.
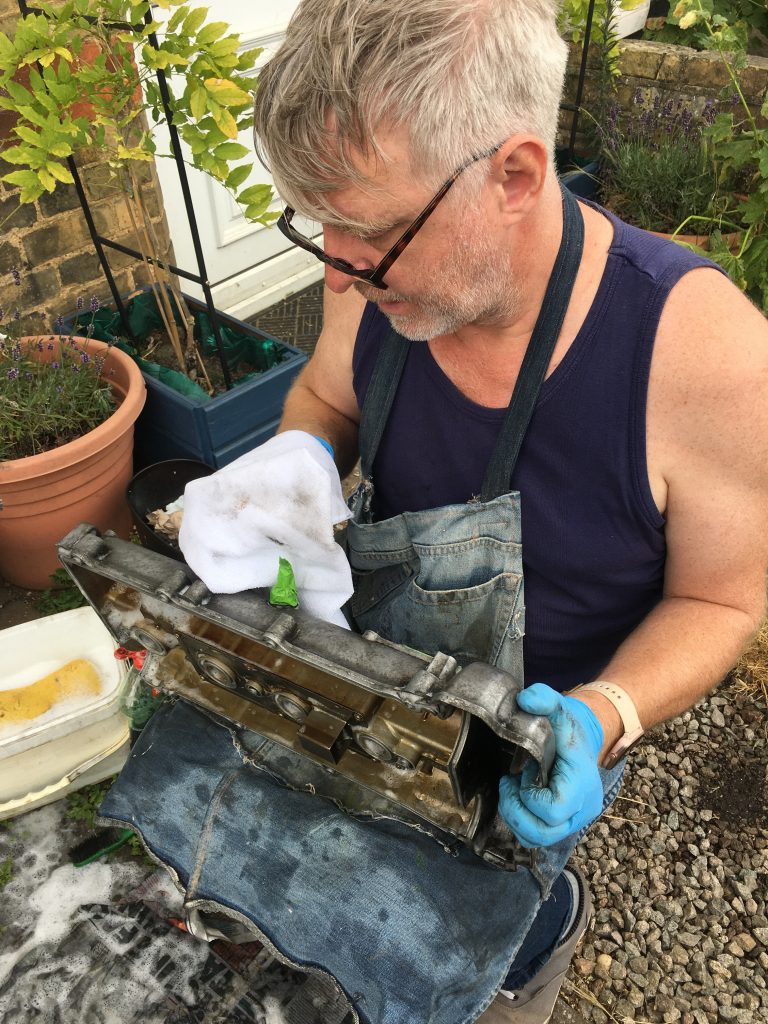
This time I spent a couple of hours, repeatedly washing the top, with a little washing up liquid in warm water. Then I scrubbed it, again repeatedly, using Swarfega, getting into all the nooks and crannies as best I can. I used wire brushes, wire wool, and plastic toothbrushes, both large and small, going over it all multiple times.
I then rinsed it all off in warm soapy water, and dried it using lint-free cloths. After that I went over the entire thing several times using wire rotary tools in a hand-drill. Then it all had a dry-clean with the lint-free towels. And to finish off, a thorough rub down with isopropyl alcohol, to clean up.
I had to remove or mask certain bits.
This whole cleaning period took ages! And during doing it my iPhone battery died. So I didn’t get any photos of the masking I did, nor the removal of sundry bolt-on bits, nor even much of the cleaning itself. Thanks Teresa for capturing me at work in my home-made denim apron!
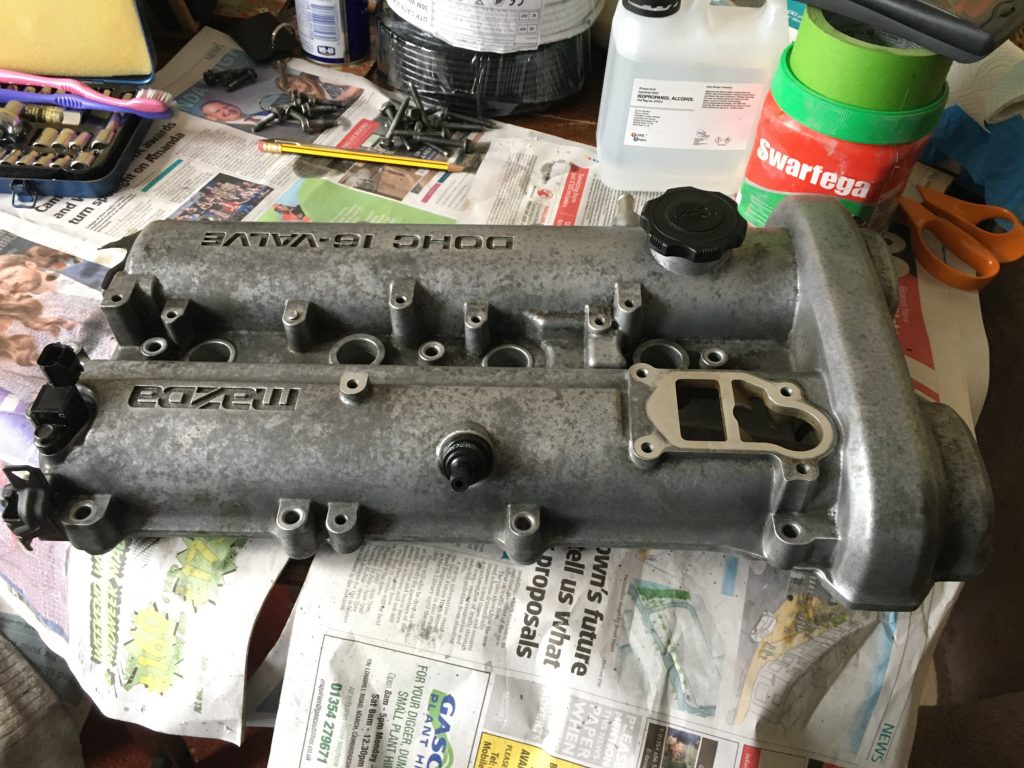
Whilst the cam-cover is certainly much improved, it’s nothing like as clean or shiny as I’d really have liked. There’s still a residual ‘rash’ effect. And the embossed lettering was hell to try and clean out.
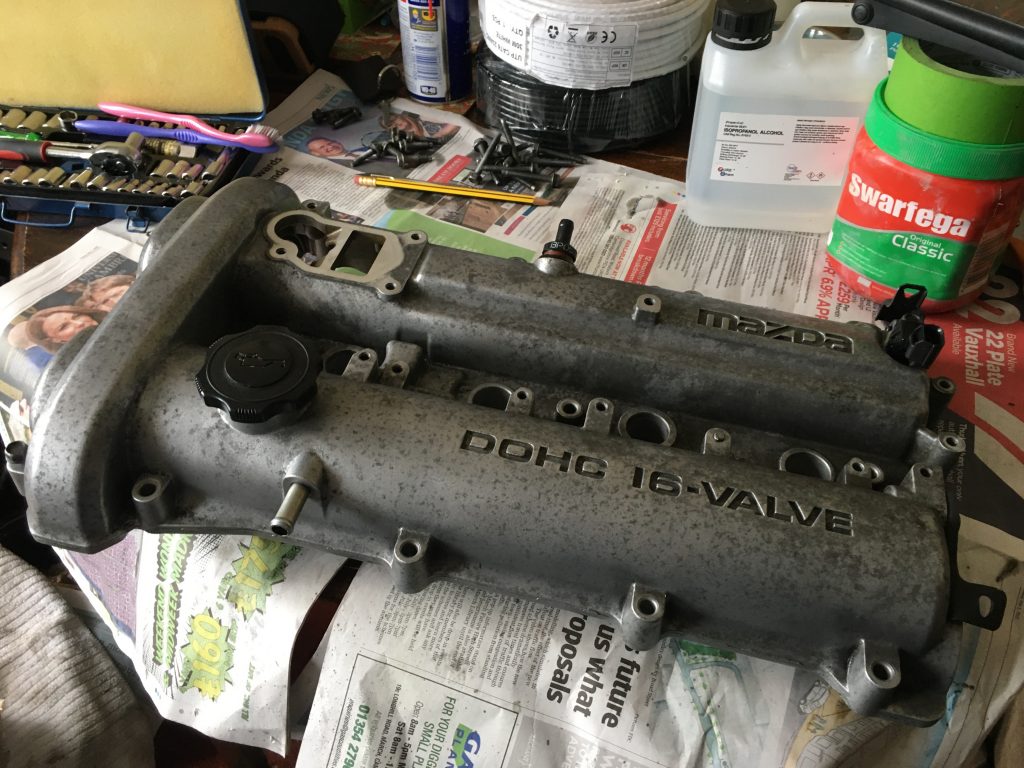
This and the above are the ‘after’ pics.
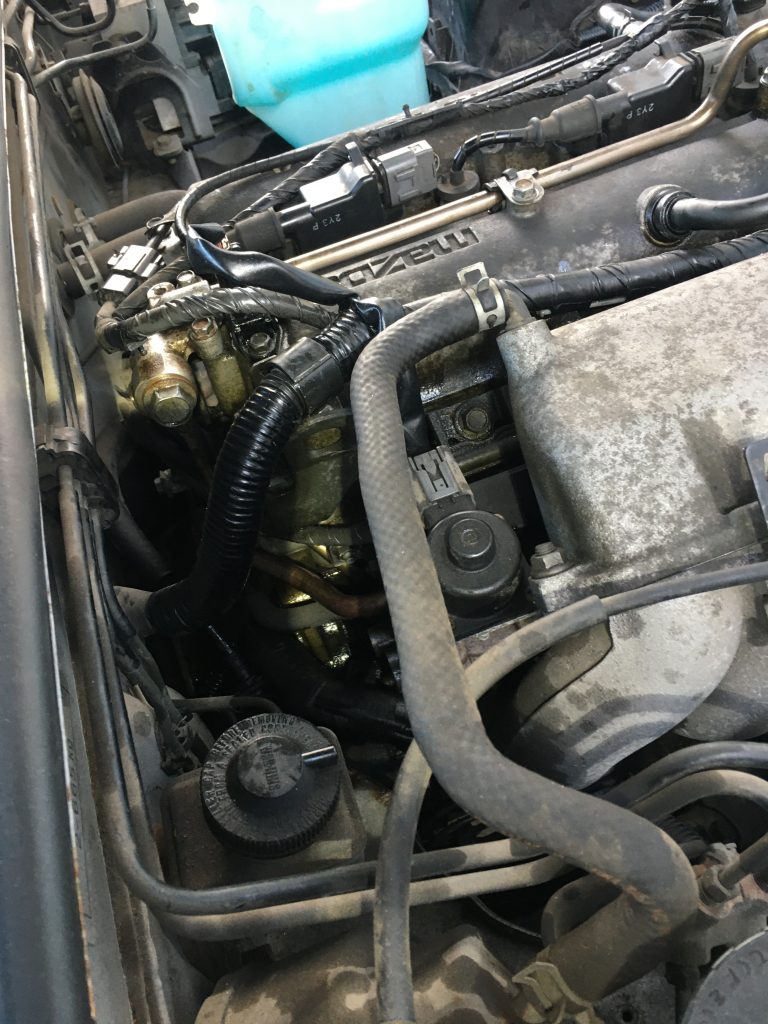
With the cam-cover cleaned, mostly top, but also bottom, and the gasket cleaned and re-installed, I put the four new spark-plugs in (see pic immediate below). It was at this point that one of my major frustrations with this day’s work came to a head.
Throughout the work I struggled to find all sorts of things I needed, from my car keys to the socket set I prefer to use (I have several!). And then – and this was the real cherry on top – part way through the work, I appear to have lost or mislaid a crucial socket-set adapter.
New plugs in.
This means I can’t torque the bolts down to specific settings, but have to guess, and do it all by feel. Not very satisfactory for a newbie grease-monkey like me. The room that leaves for anxiety over cock-ups is grand-canyon-esque!
So I had to ‘button everything up’ in an approximate manner. And at this juncture it’s worth noting that, if one’s learns from mistakes, I ought to be learning plenty! Here are a few I made during this particular session of maintenance:
I took all the VVT bolts out before loosening – or make that trying to loosen – the 40NM torqued banjo bolt. This led to the bending of a ‘hard line’ hose. I’ve tried to bend it back, but it’s still misshapen. This makes re-fitting the whole VVT arm harder. Doh!
I couldn’t find the ‘loosening’ sequence – tightening yes, loosening no – for the cam-cover bolts, so had to guess (based on reversing the tightening sequence… ‘ish).
When I did the sequence I got to the ‘end’, only to realise I’d somehow skipped one bolt, leaving that one tighter throughout, with the danger of deformation or even cracking of the cover. A visual inspection seems to indicate I’ve gotten away with it this time.
During cleaning myriad little things occurred: using tissues that leave debris everywhere; getting cleaning stuff meant for top only underneath; snagging the rotary wire brushes on the towel on which the cam-cover was sat, sending it flying (another visual inspection promotes a relieved sense that I probably got away with this).
Constantly mislaying stuff, from car-keys to tools. I need to tidy, streamline and get properly and thoroughly organised… in advance!
I’m sure there was more… but I forget!
I sincerely hope I do actually learn from this litany of errors! Some of these are already repeat mistakes, shoddy organisation being my most repeated ‘sin’!
All back together. Looks nice!
And at day’s end, when I took the car for a test-drive? After all that work it felt exactly the same. Grrr!!! Has oil gotten into that spark plug chamber again? Do I already need another cam-cover gasket, having had this one on and off repeatedly?
Two other new parts – a thermostat gasket and a little plastic doodad that’s supposed to fix floppy roof latches – both failed more or less immediately. So perhaps the new cam-cover gasket has as well?
At least the engine bay looks a bit nicer! But what good is that if she still runs iffily? Guess I need to check to see if oil’s still getting into the second spark-plug well. But without the torque adapter I’m not keen to be taking stuff apart again right away.
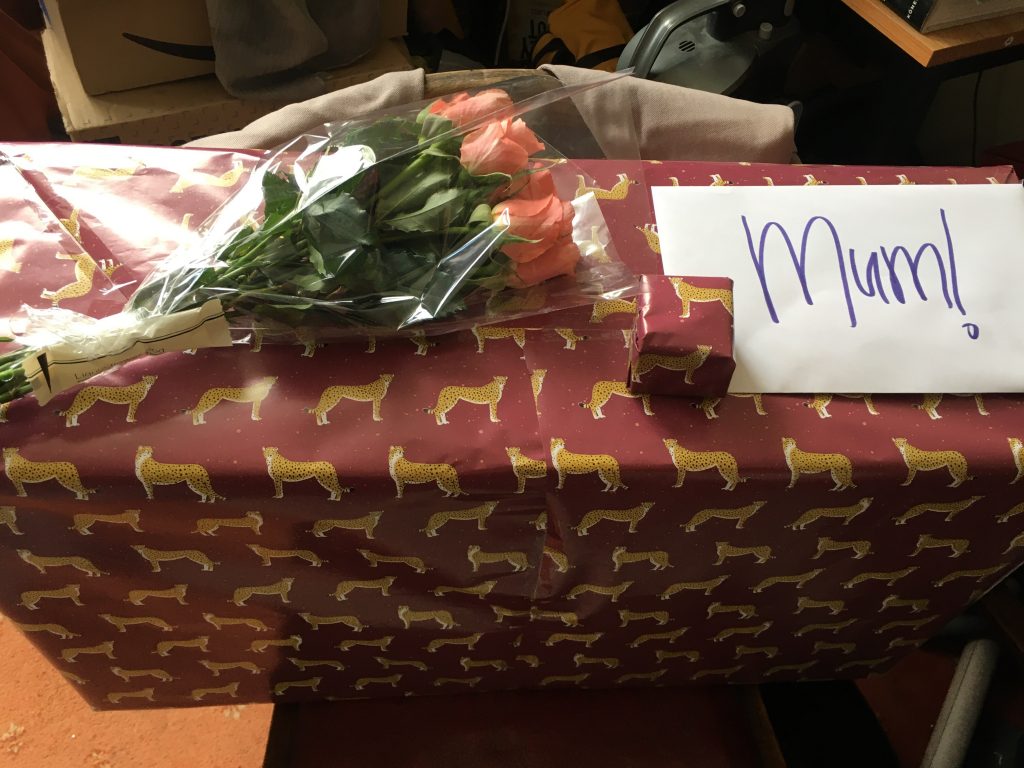
Birthday stuff for mum.
Plus we’re due to go out today to meet my mum for slightly belated birthday tea and cakes at Anglesey Abbey. So no further fiddling about under the hood! I just hope we don’t have a repeat of the original ‘on the road to Anglesey’ debacle, which required an expensive AA tow home!
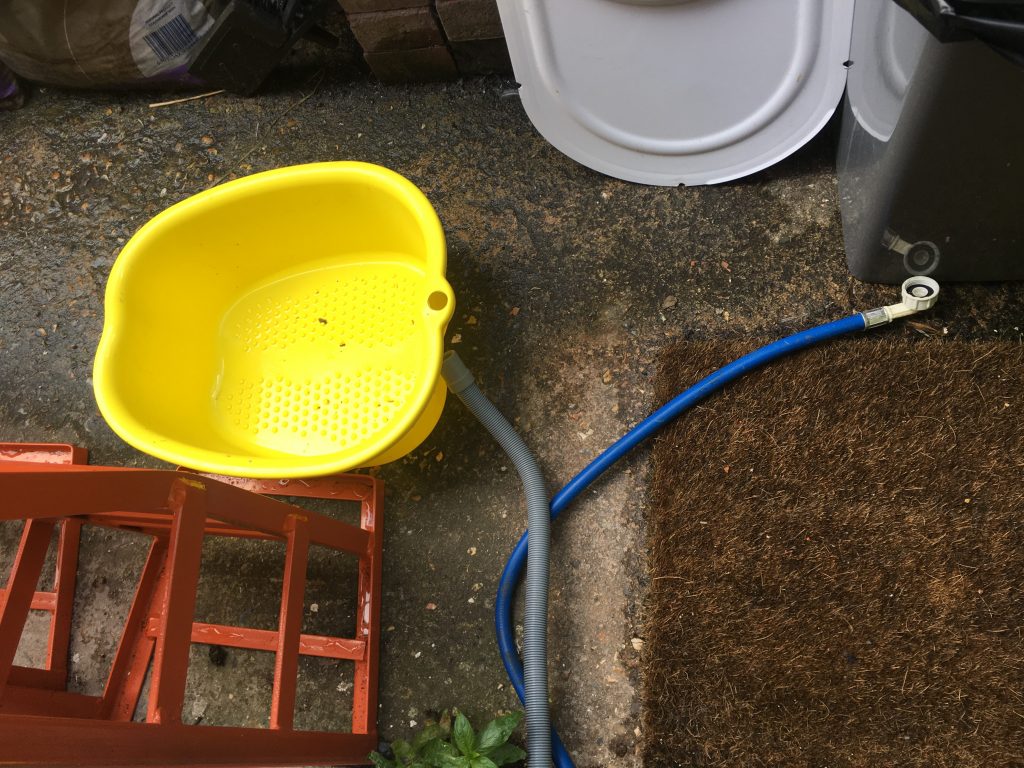
Today I decided I’d try once again to sort out our washing machine. I’ve tried several times before, without succeeding. According to the rather scant Hotpoint support, on YouTube, 90% of issues are due to the filter getting blocked.
I’ve attended to this filter several times. It’s occasionally had a little crap in it. And I really mean a very little. But mostly it’s been pretty clean and empty, i.e. free of any serious obstructions. Never enough to have caused the blockage and drainage issues we’ve faced.
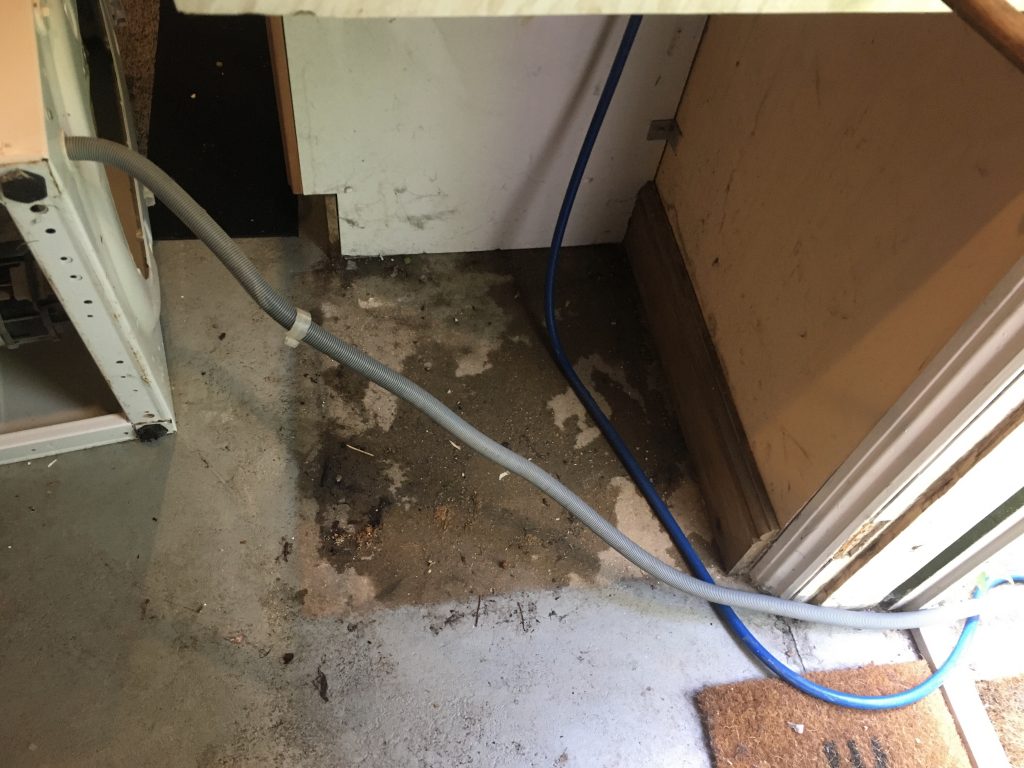
Eugh! The area under the machine was horrid.
The most recent and worst of these was when it stopped draining altogether. Meaning that we had to empty the drum using a measuring jug. A faintly unpleasant smell gradually but inexorably turned to a truly rank odour!
Intuition and common sense suggested that as the filter was pretty clean and totally not blocked, then logically the blockage must, surely, be in the drainage hose?
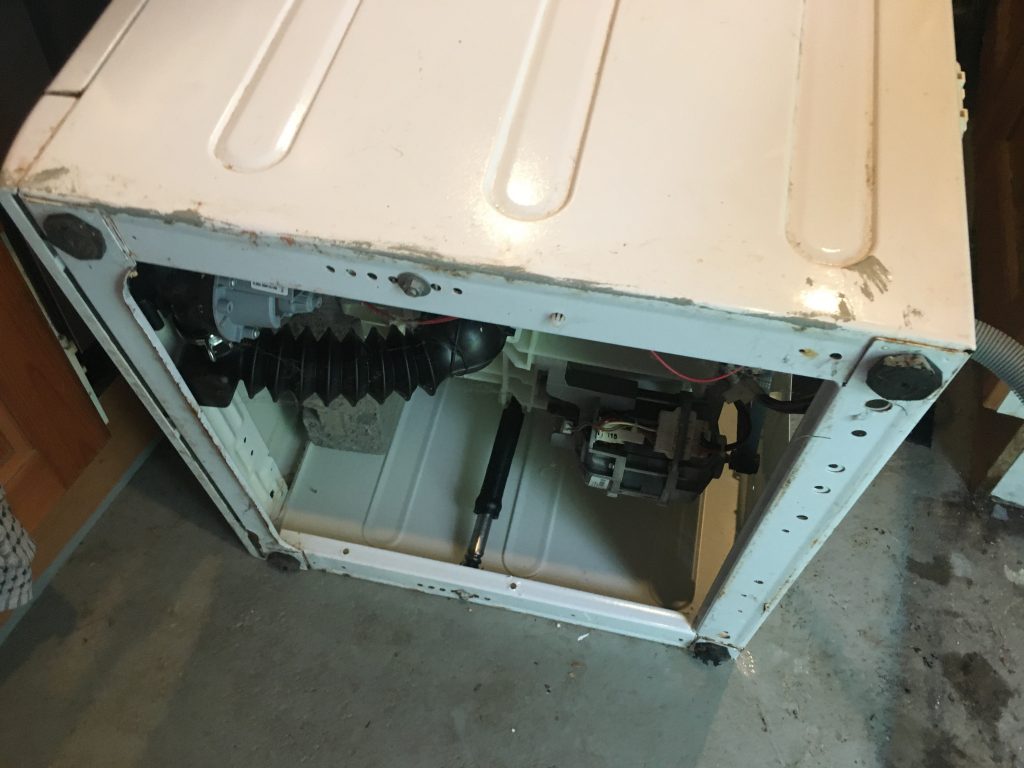
So I took the hose off – much easier said than done! – and stuck a trombone cleaner down it. Alas, the ‘bone unblocker isn’t as long as the hose, so I had to attack it from both ends.
Tipped her on her side, to access the hose.
After this, I rigged the pipe so it was on a constant downwards gradient, and started running hot water through it. After about five or six flushes, the stinking opaque effluence had turned, if not into wine, at least into clear clean water!
After re-assembling the washer, and clipping the hose back in place, I ran a cleaning cycle with some soda crystals added to the drum. It was then that another recurrent fault reared it’s ugly head: the machine never reaches the end of any programme.
Not sure why, exactly, but whatever program we run, the machine always ‘hangs’ on one minute remaining… forever!
Hoses and a tub, outside, in case of overflow!
To finish any program off, requires turning the entire machine off, and restarting it set to a rinse ‘n’ spin (which in turn won’t actually finish!). Bit of a palaver. And a lot of a pain!
But not having to bail out stinking dirty water is a tremendous improvement! Compared to which having to fudge finishing wash and rinse cycles is but a minor issue.
I’m not a slick blogger or YouTuber, and very rarely if ever document these things thoroughly, let alone well! But the few pics here do give an idea of just how dull a job this is.
The black clip in the centre releases the hose.
That said, and despite the as yet unresolved ‘won’t finish’ fault, improving the situation does come with a certain pay off.
It’d be great if we could fix the ‘one minute remaining’ issue. And we do also need a new front door seal, as well. But, little by little, we’re getting somewhere.
Spark-plugs reminder photo.Working in dazzling sunshine.Note that banjo bolt (rear of VVT) leaketh not!Later in’t day, torch now required.Happy grease monkey; engine starts!
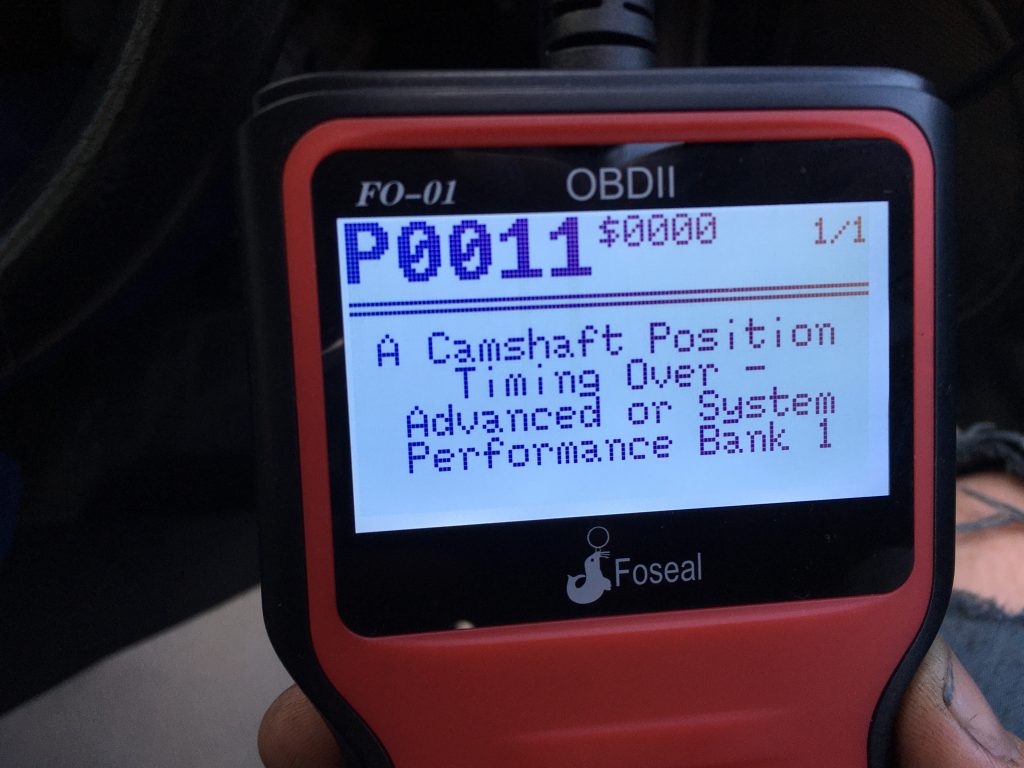
And lo, it came to pass, that ye olde engine was fix-ed! Hence the happy mien, and Churchillian two finger salute above. The image below is just a reminder of an earlier – and at this point gratifyingly absent – OBD fault diagnosis.
Adopts Inspector Clouseau voice ‘Yes, I know that, you fool!’
But at this point I still have a major coolant leak.
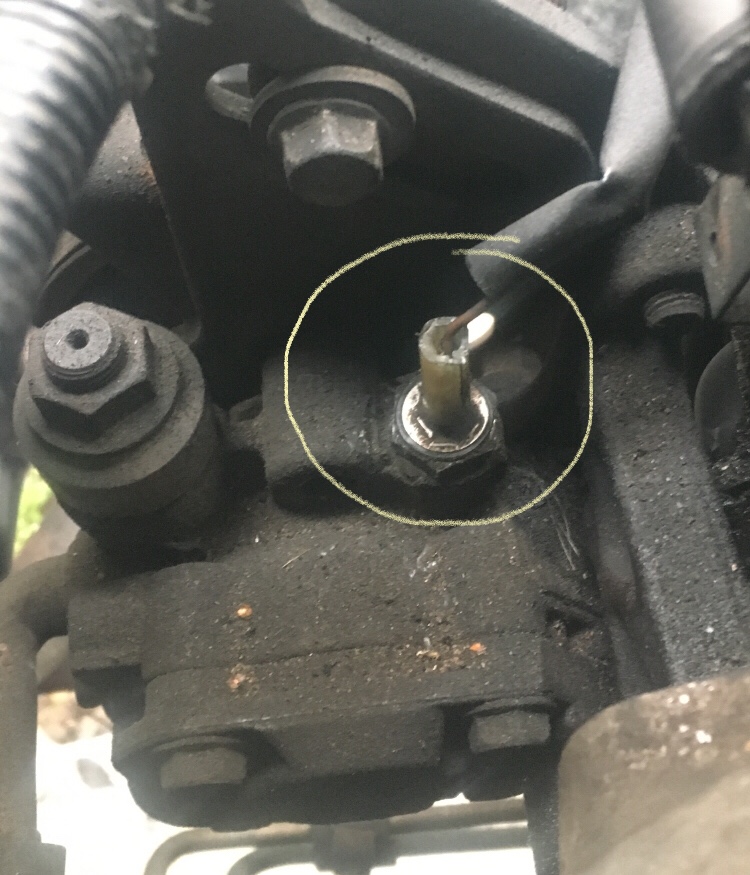
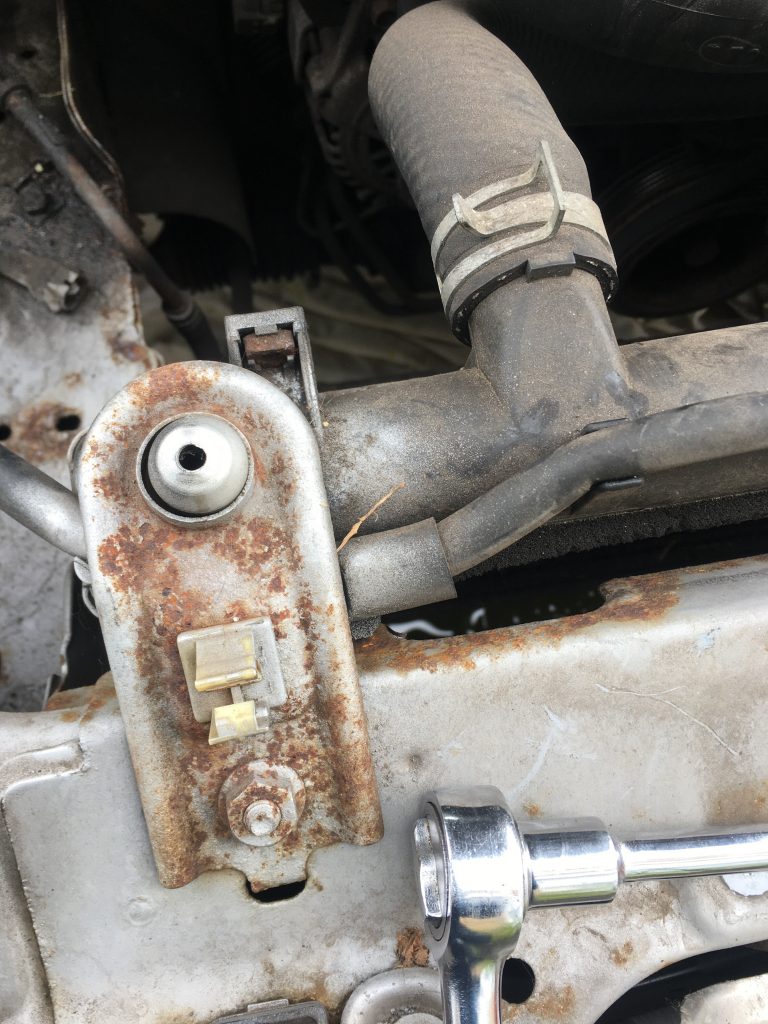
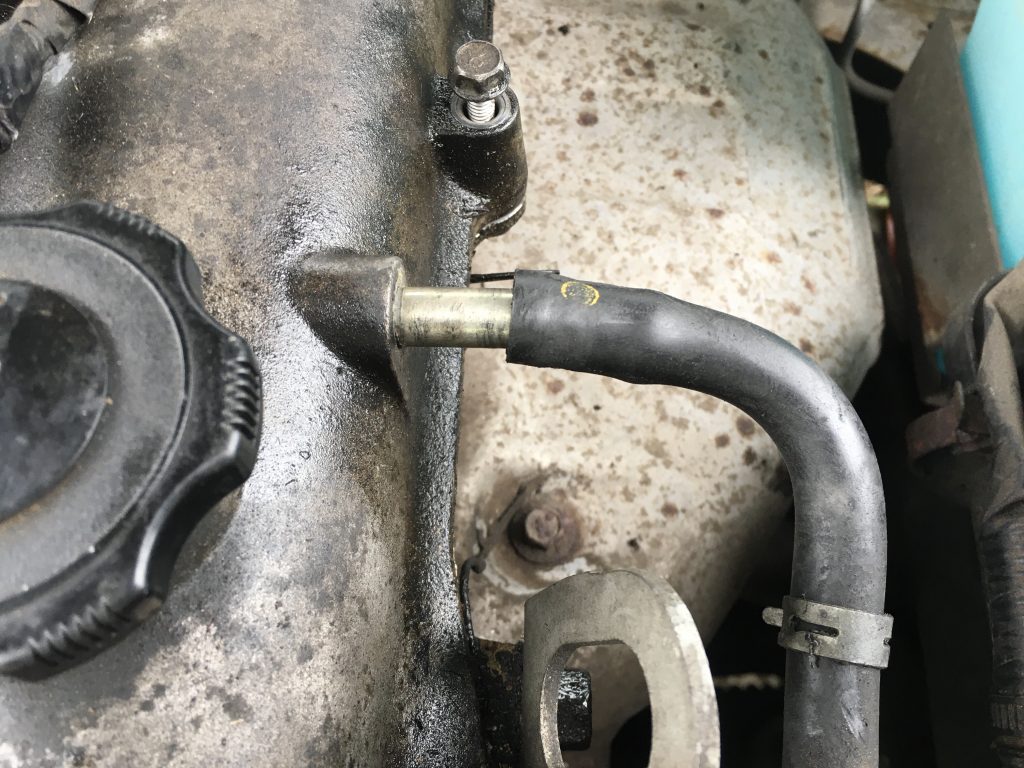
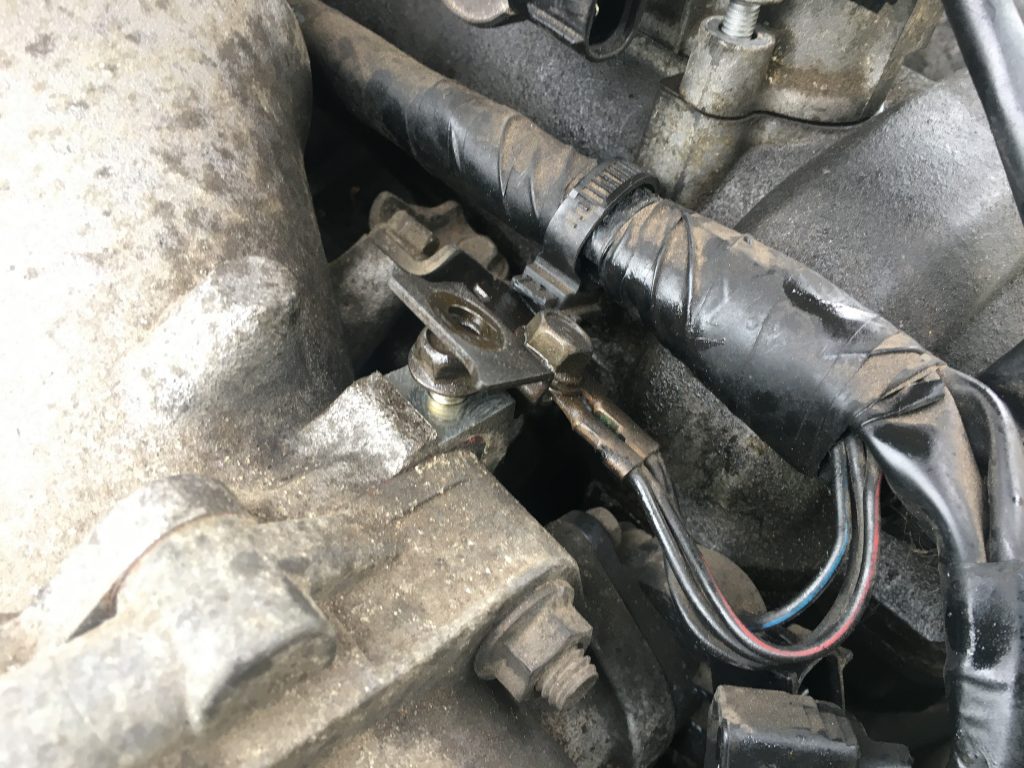
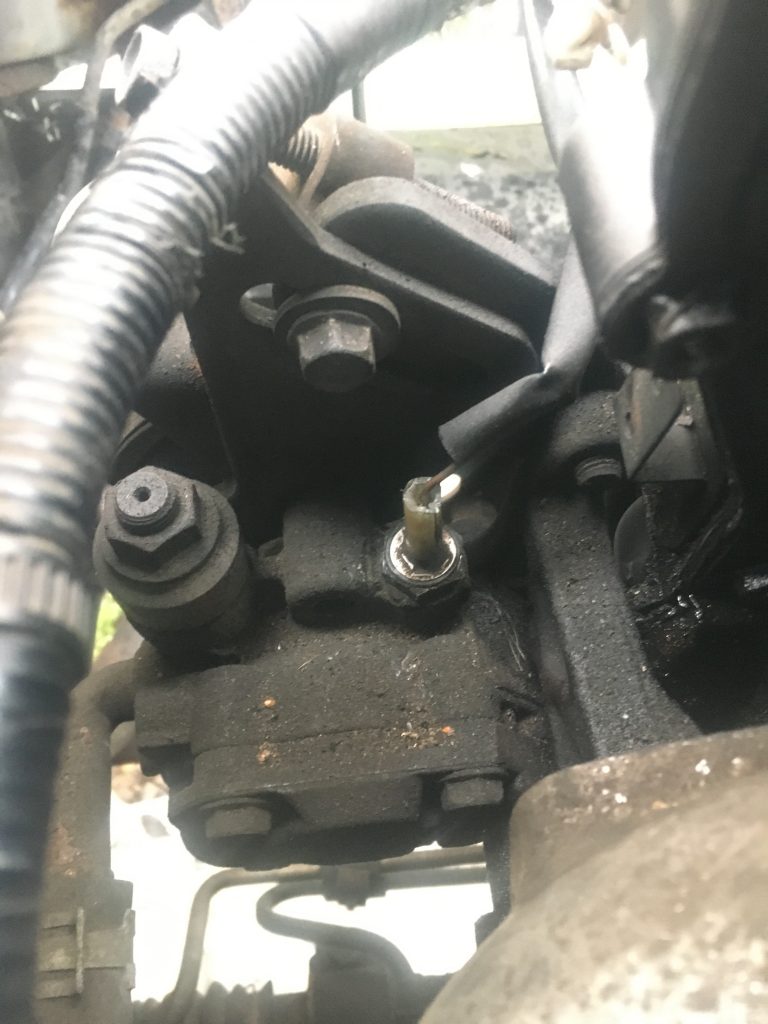
Last night, after emailing Greg Peters at ‘carpassionchannel’ (thanks, bro’!), and much – mostly fruitless – googling and watching of YouTube, I finally found out what the thing circled in the image below is.
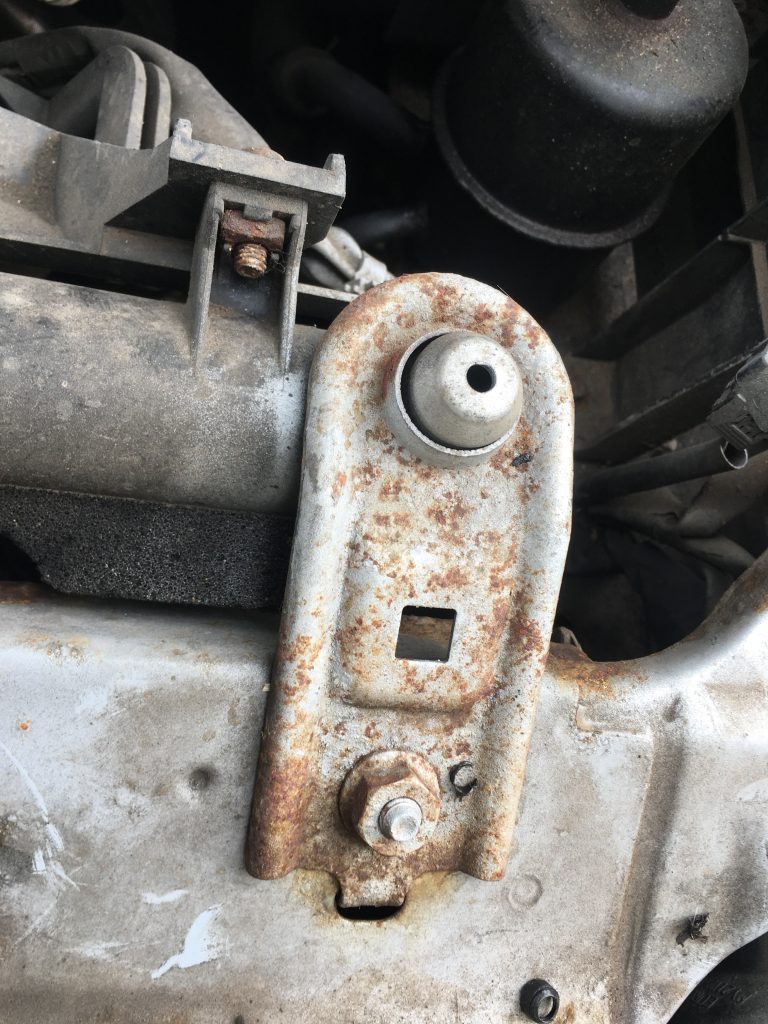
Turns out this is a power steering pressure sensor.
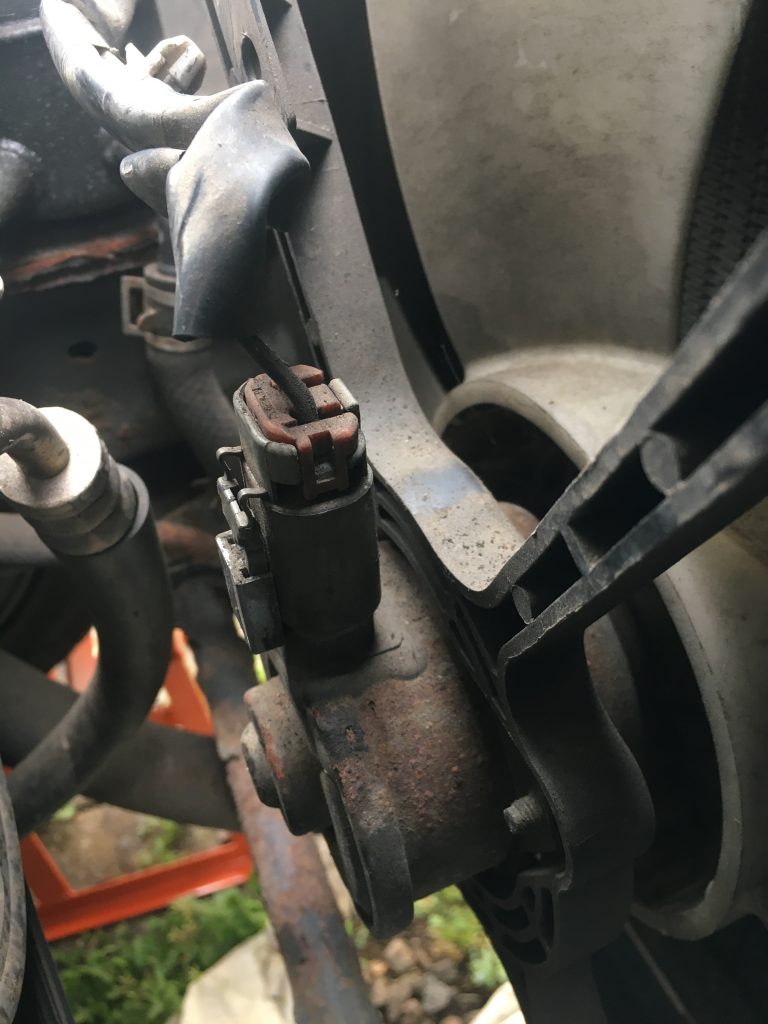
Having established what it is, I was able to find a YouTuber removing it, and thereby learn how to do so myself. I did that late last night, sporting a head-band style torch, as it turned dark.
In the YouTuber’s video, as so often, it looked super easy. In real life, for me, it was very, very, very tricky. I used needle-nosed pliers to simultaneously grab the whole thing whilst depressing a tiny little lever, all the while also pulling upwards.
After lots of worrying (about breaking it whilst manhandling it so roughly!) and a fair bit of swearing, the ficker funally came orff…
The pic at the top of this post is how I looked and felt at day’s end. Note the new mechanic’s style overalls! £20 from the local Boyes.
Yesterday it was raining in the morning. And it remained damp, drizzly, and cloudy all day. But the afternoon was workable. Today the sun is out, the sky is blue. It’s beautiful, and so … wahoo!
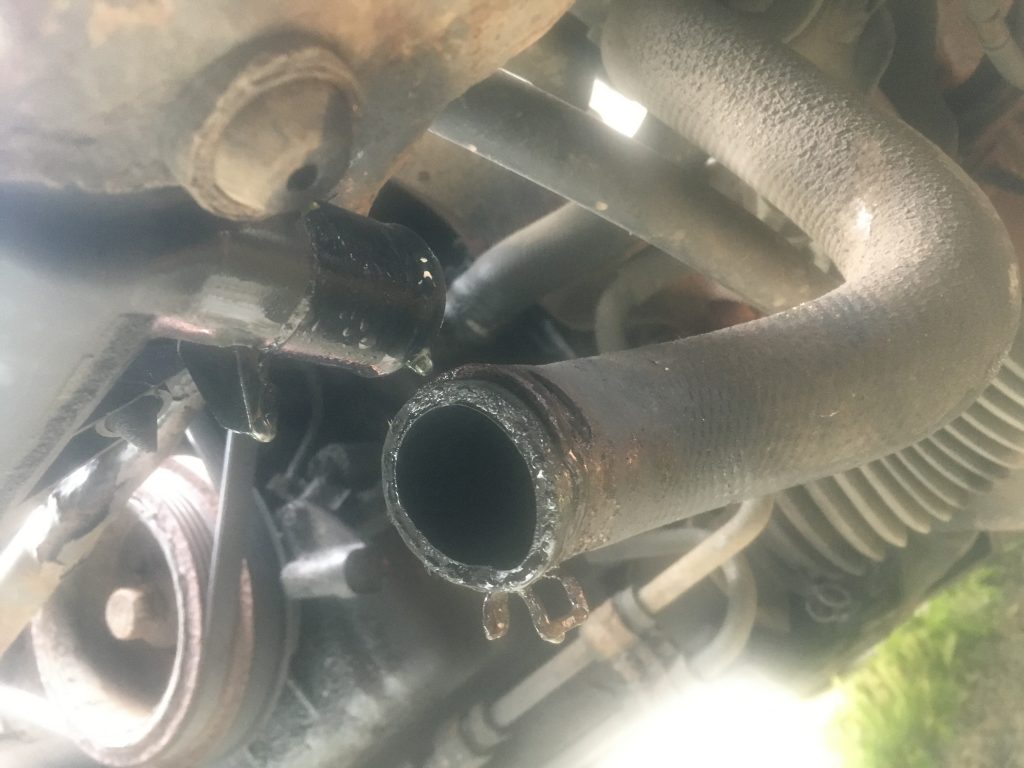
The radiator overflow, disconnected. Main top cap off. Then I drained the coolant, using the plug at the bottom. Did’nae photograph that though.
Disconnecting the main radiator pipe. Turned the radiator clips through 180°.
Ditto the right radiator clip.
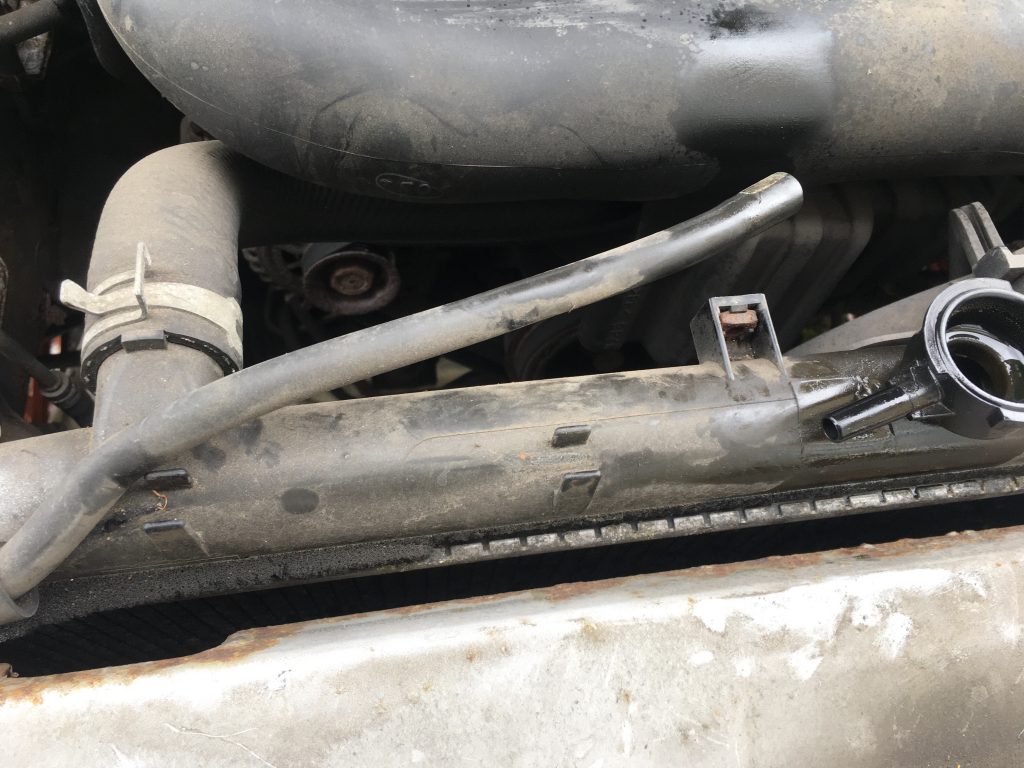
Removing the main hose in the front engine area. What’s this one called/for?
Popped this thinner tube out of a plastic clip.
Disconnected the right end of the large tube. Popped it in the passenger seat. This clip was a real mother! I might want to replace it with a different sort, when it comes time to reassemble things.
Popping off another of the simpler smaller tubes.
A lead that runs to the fan clips in place behind said fan. There are one or two plastic doodads that clip into a plate at the front.
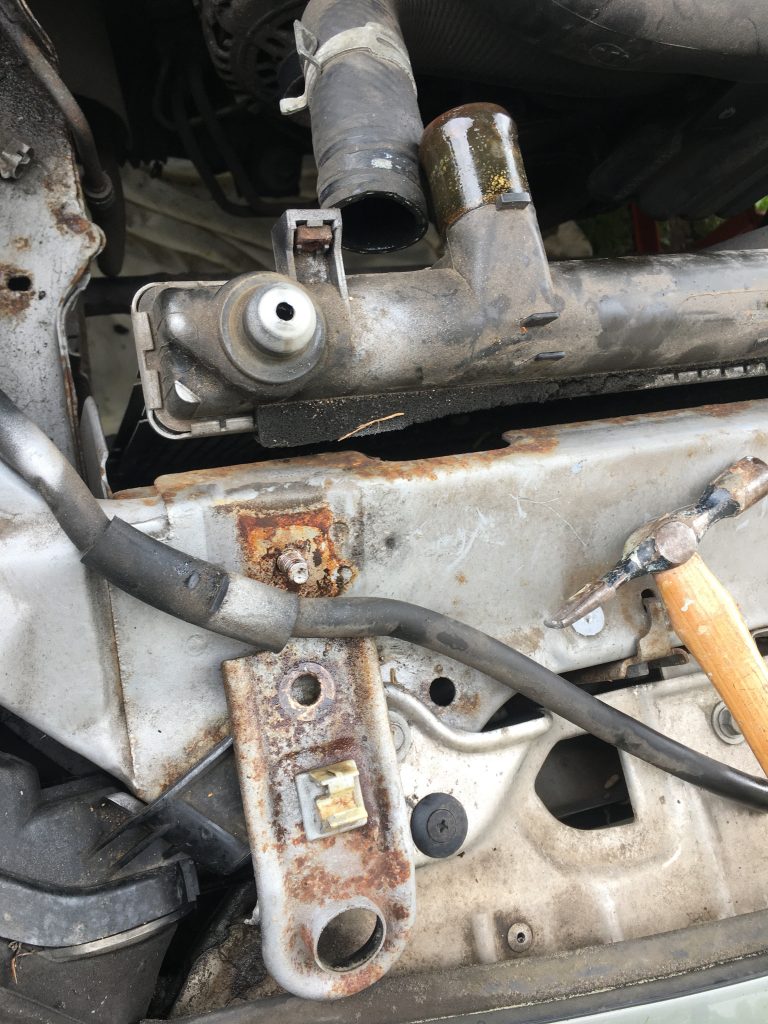
And, lastly, removing a larger pipe from the bottom of the radiator, and draining more coolant! This pipe isn’t in the best condition. And the clip holding it in place is even worse. If the car can be brought back to life, these parts are prime candidates for upgrading.
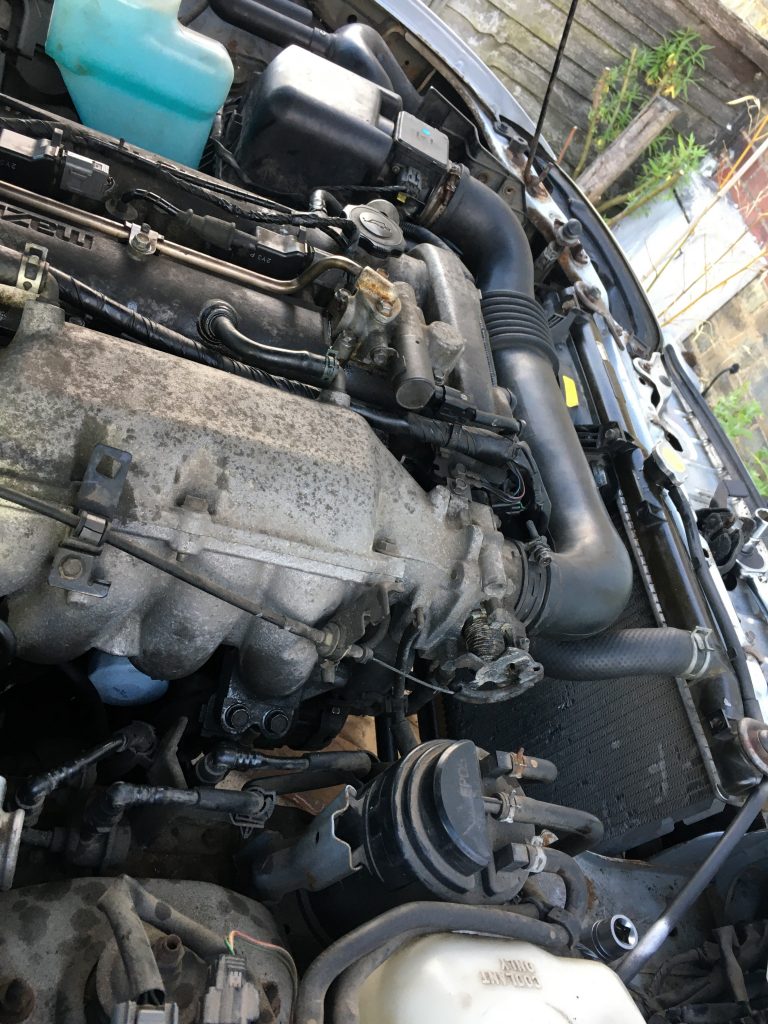
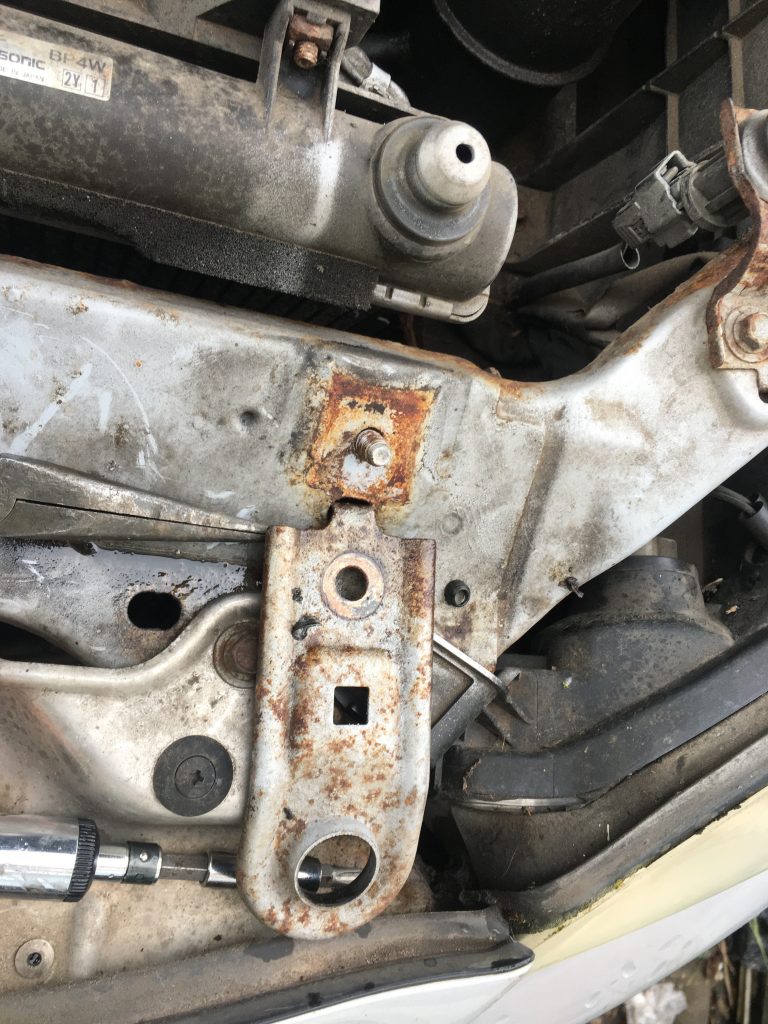
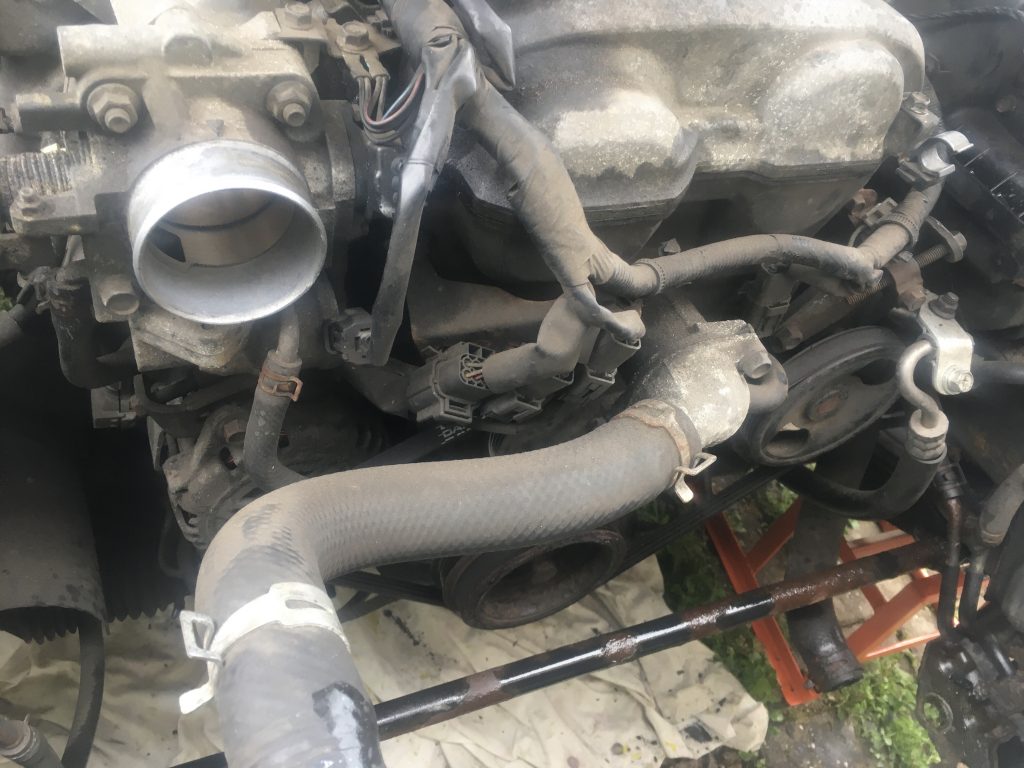
Just a general shot, trying to keep track of engine layout. The bar along the bottom of this shot is called a ‘sway bar’, and keeps the front wheels in proper torsion and alignment. The silvery doodad in the centre is the thermostat housing. Two thin pipes go into this, one to the right, the other directly below.
With the radiator out, and the biggest of the pipes removed, it starts looking a bit more spacious up front. This extra space should be great for working at the the front of the engine. Which I’ll be getting to later, hopefully.
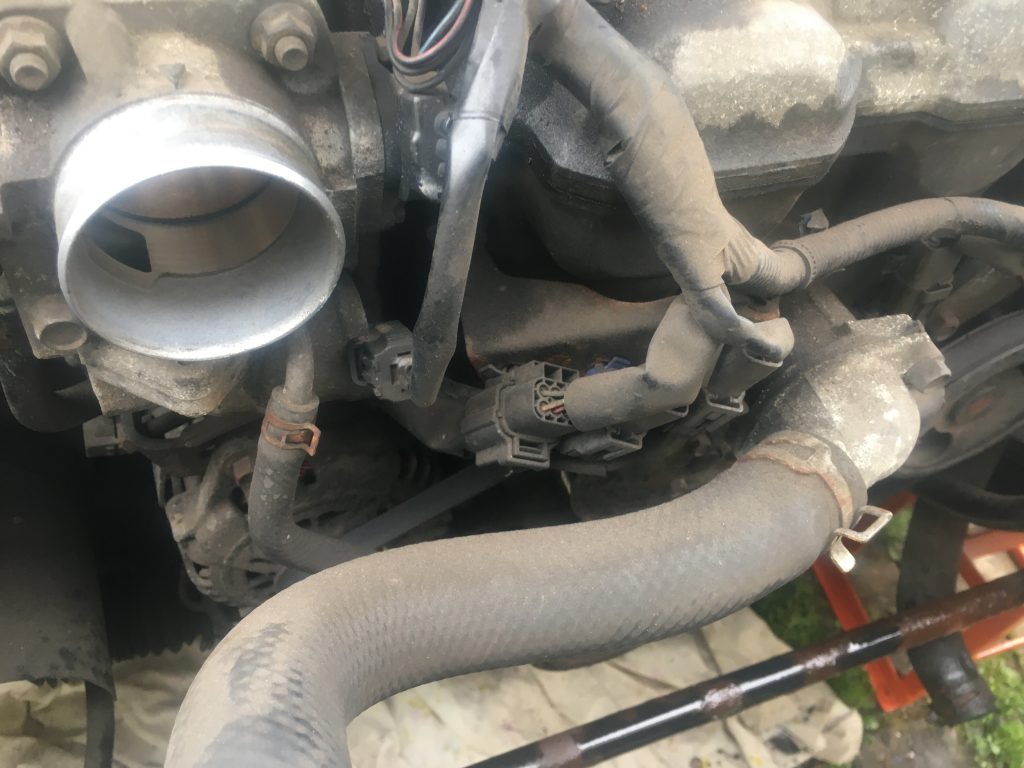
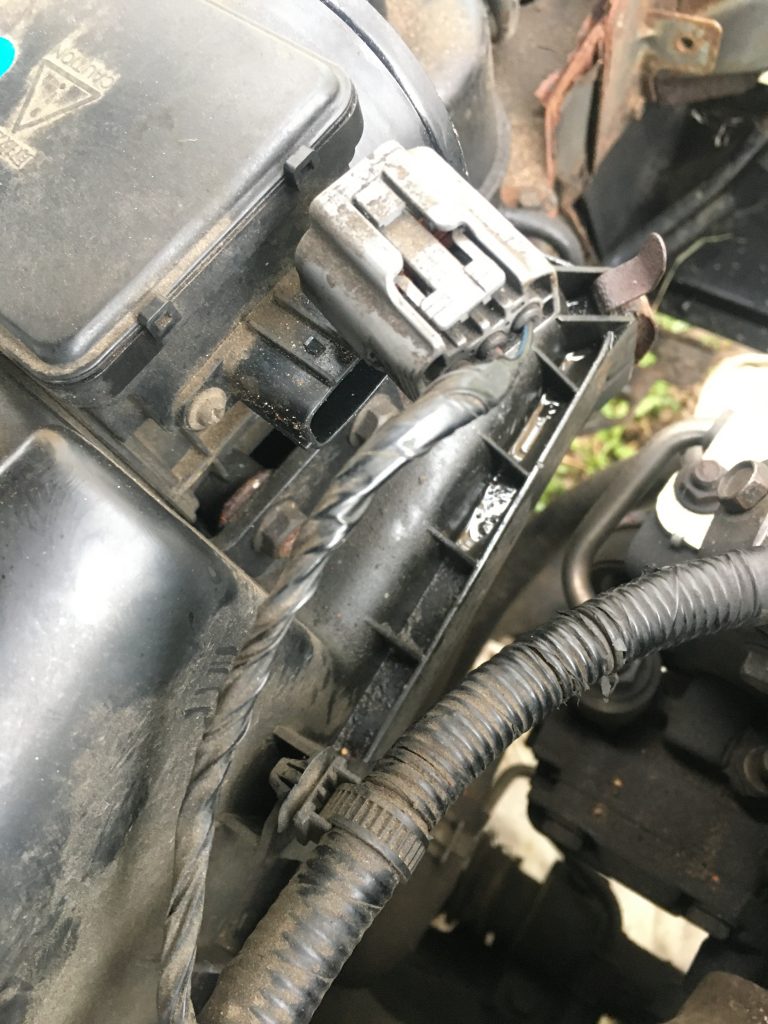
Zooming in a bit. Look at all the electrical leads/cabling (and adaptors/connectors!), and the several sundry pipes. Lots to keep track of!
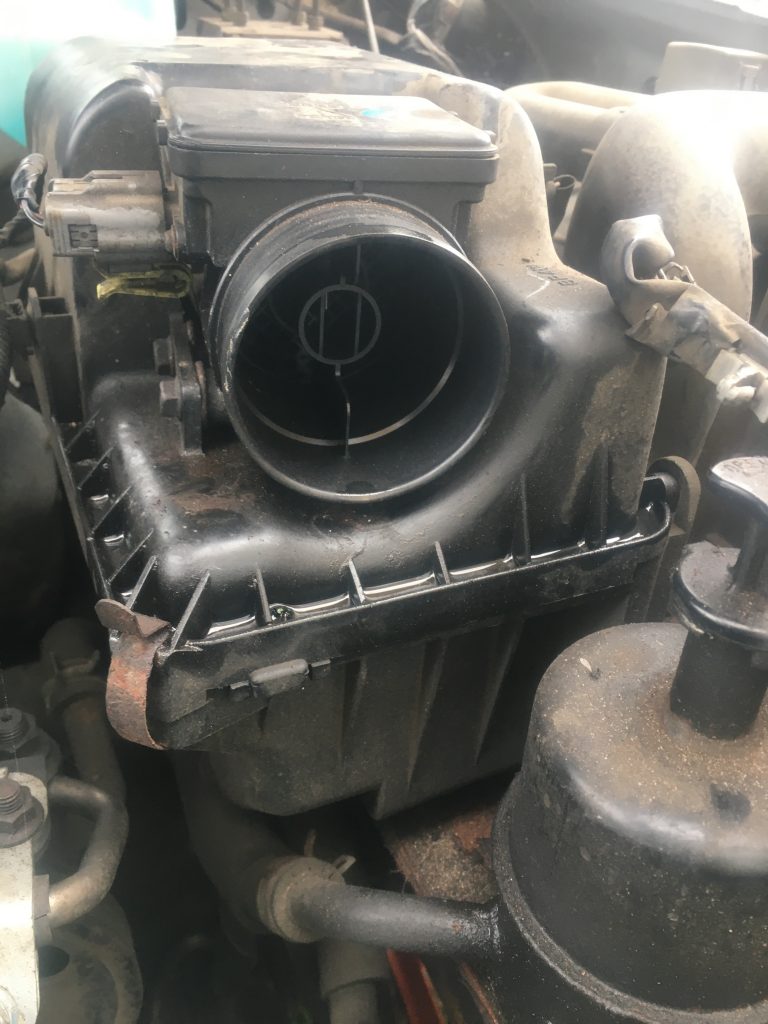
Clips and leads on the air filter.
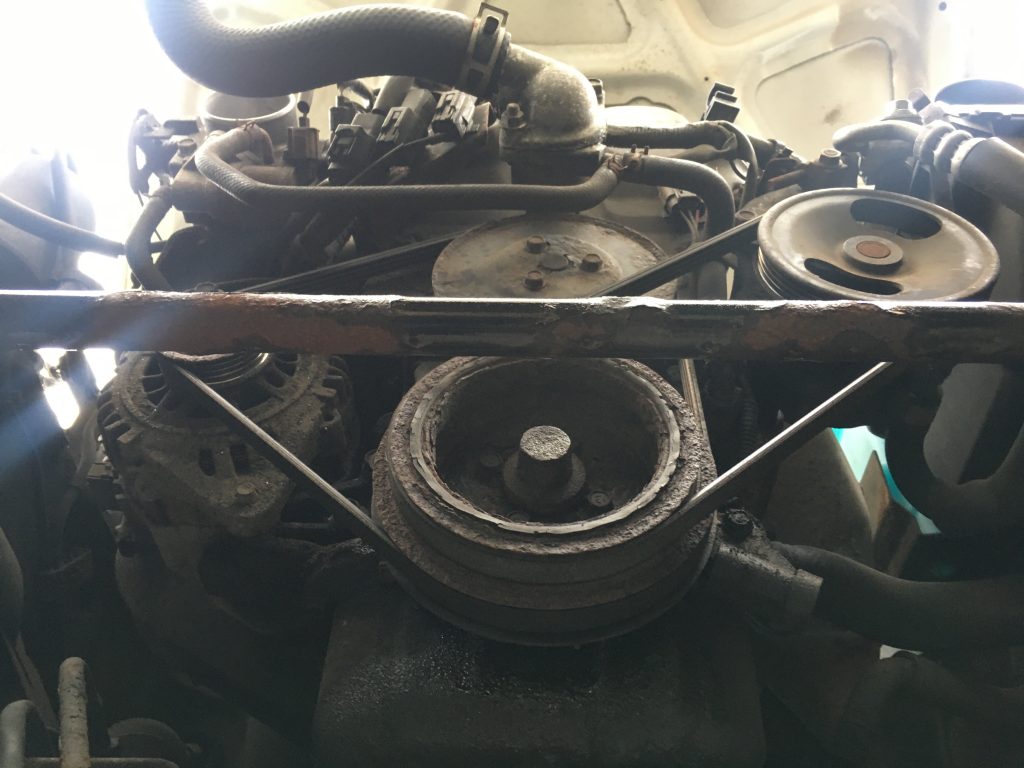
I wanted to capture a general view of the engine as seen from below, under the car. Cool! As can be seen, the sway bar will be in the way of loosening the bottom wheel.
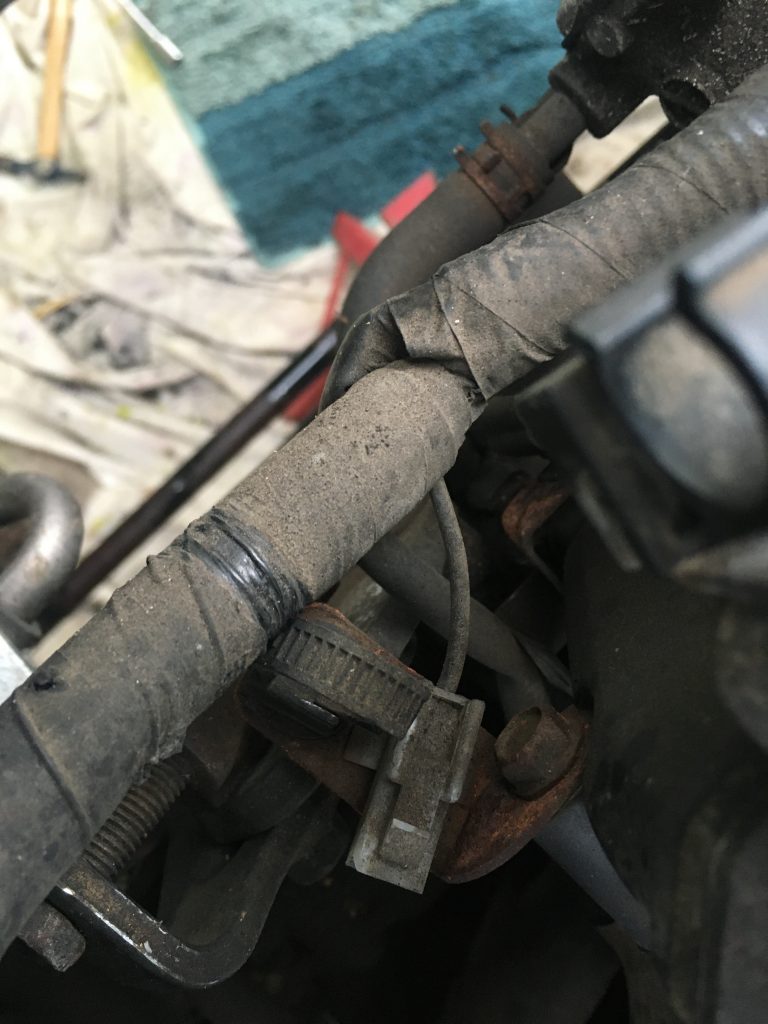
Right side of the air filter. Or is that the left side?
Umm… getting confused. Where is this!? Is this the left or right of the air filter, and adjoining wiring.
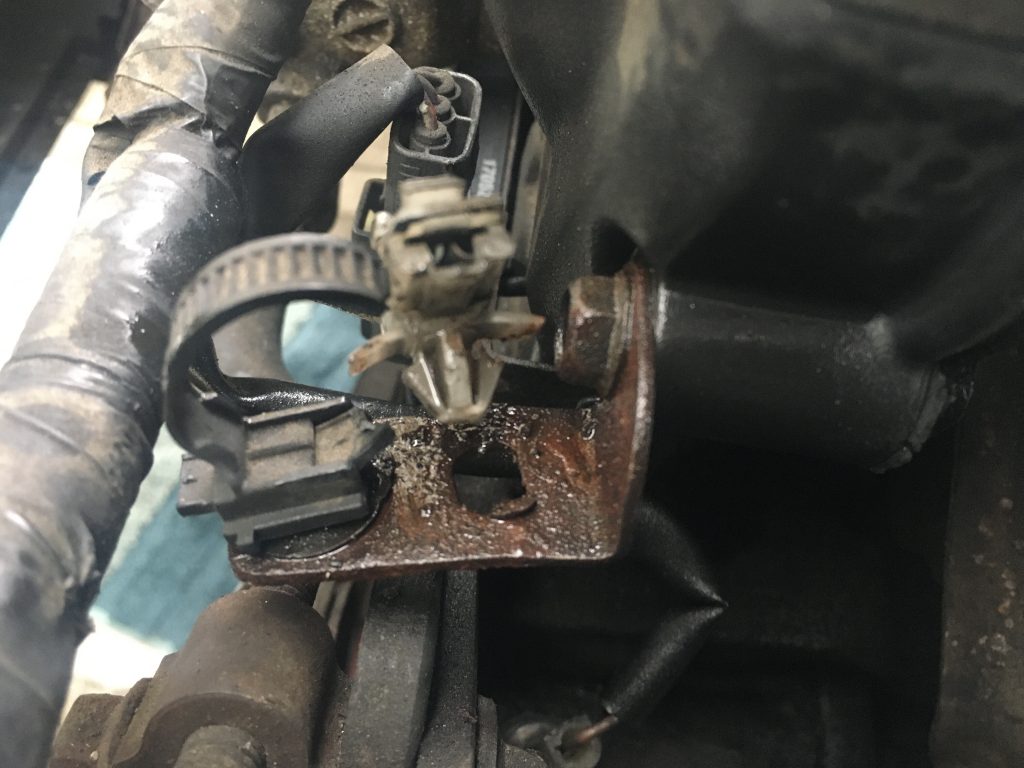
A broken clip, and a tricky one. The second being the off white one, to the right of the broken black plastic ring. Can’t recall how I got that one out!?
The same as the above, with the tricky clip out, and the broken one more clearly visible.
Numerous electrical connections had these weird sprung clips. They’re tricky to pop out. I used pliers to squeeze them together, which helped.
Some of the hoses and hose clips were pretty stubborn. BTW, the red jack stand, visible under the ‘sway bar’, supports the latter, which I needed to loosen up, so it wouldn’t be in my way.
Thought it’d be easier to remove the above wiring, as pictured, i.e. still attached to the clip.
More photos of parts of the wiring loom.
Removing another chunky coolant pipe. Note that there are markings on the pipe which align with little nodules on the metal piping.
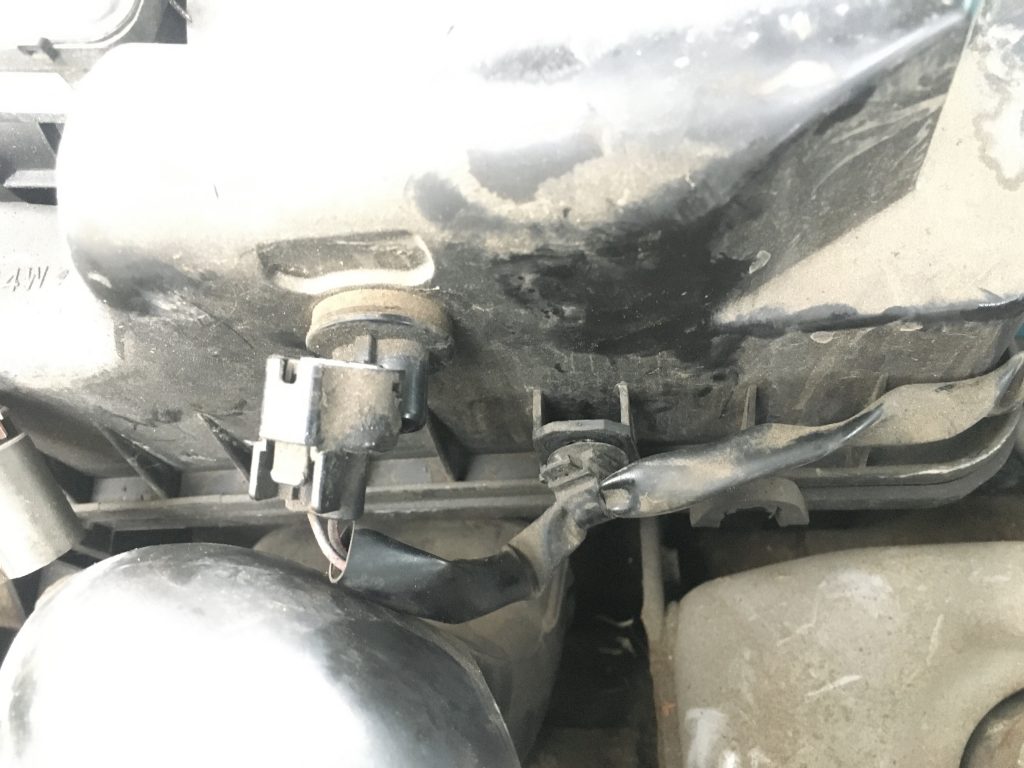
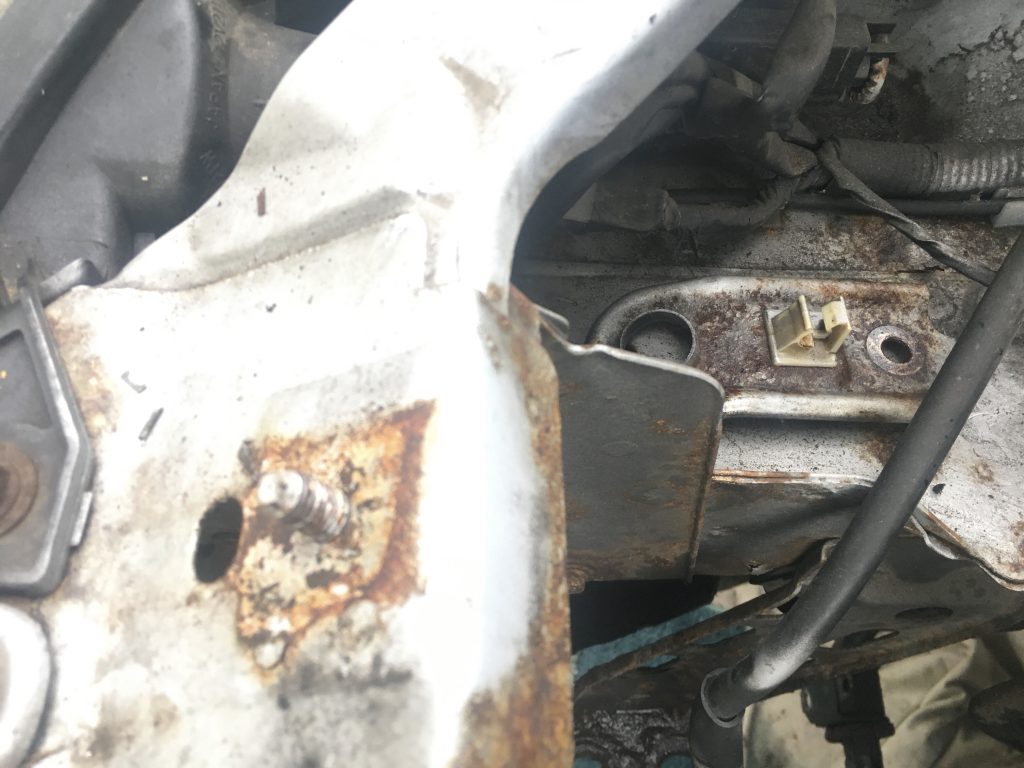
Can’t recall why I photographed this nut? Possibly this is the lower and harder to see/access nut, for the plate that’s on the front of the engine cover, which holds many parts of the wiring loom.
This tubular plastic lead junction has caused me some grief. I can’t work out how to disconnect it. And until I do, it’s not possible to finish getting the wiring loom out of the way.
Her you can see I’ve put the radiator clips inside the engine bay. Just so as not lose them!
And the other one!
So that’s it for tonight. A few other things I did, but didn’t photograph, include numbering all the wired connections in pairs.
Tomorrow I’ll drain the oil out of the engine. And disconnect the negative pole of the car battery. Then there’s more disassembling before doing the gasket and cambelt.