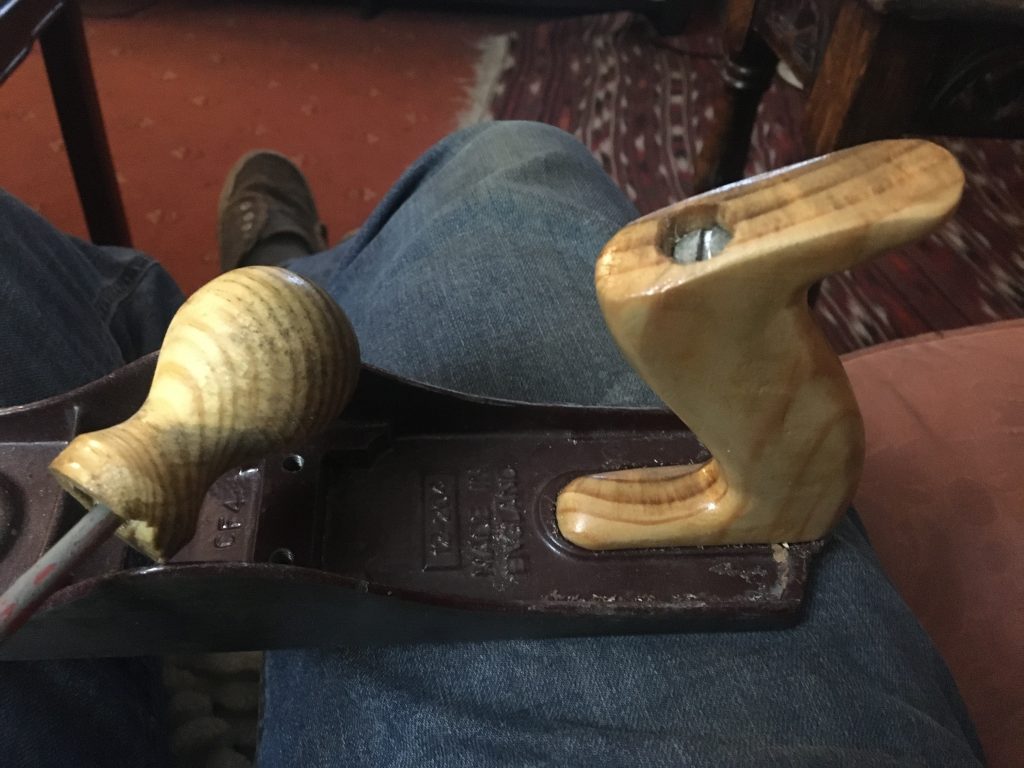
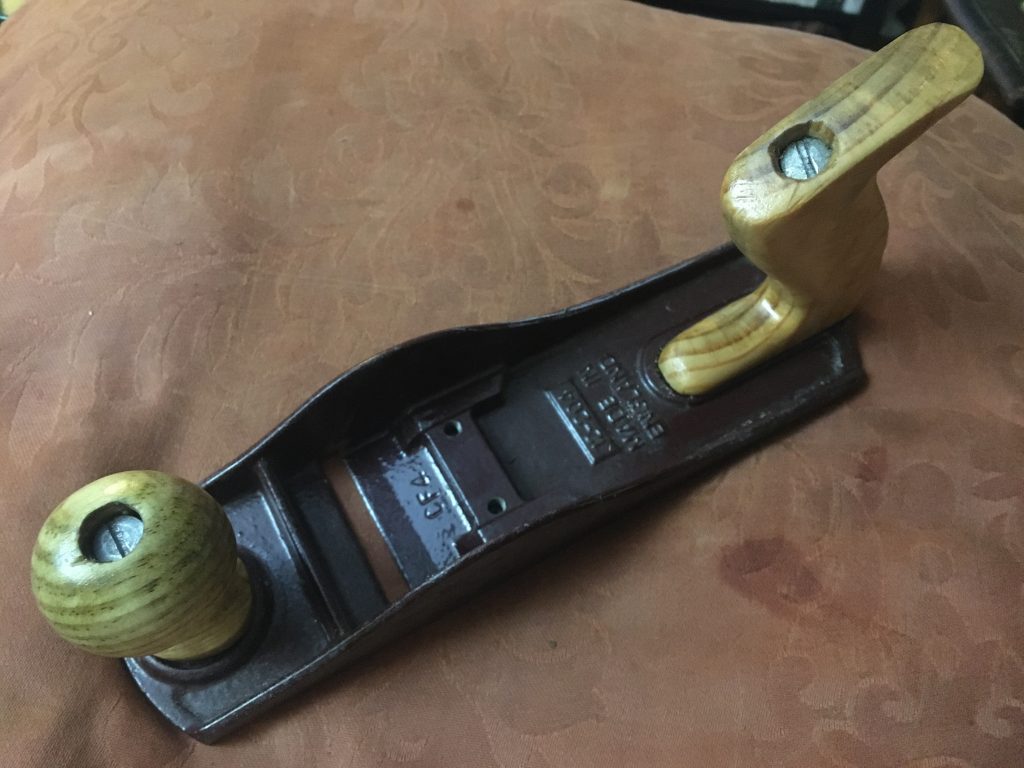
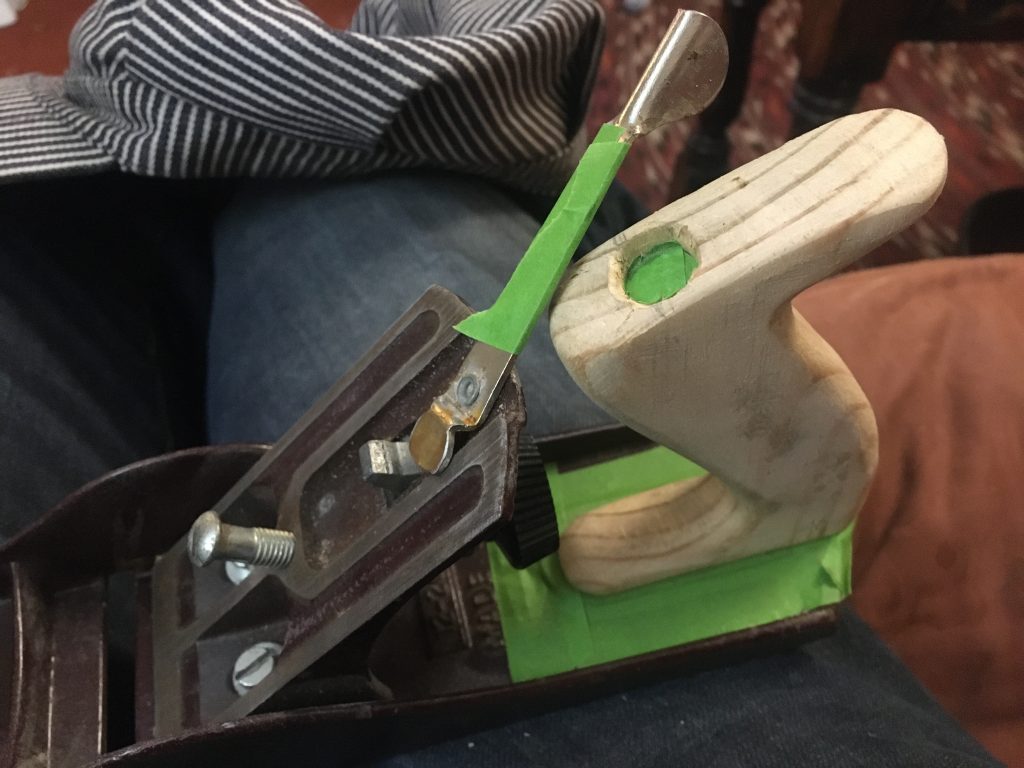
Today I made a knob for the Handyman plane I’ve been working on, to go with the handle I recently made. Both are made from quite soft construction pine.
I had to set up the bandsaw to cut a blank.
Cutting blanks from a big block of pine, I quickly realised my bandsaw was all out of whack. So I had to take a break to sort that out. Took a while! I needed to adjust pretty much everything! I even had to drill new holes in the fence clamp to help get the fence properly aligned.
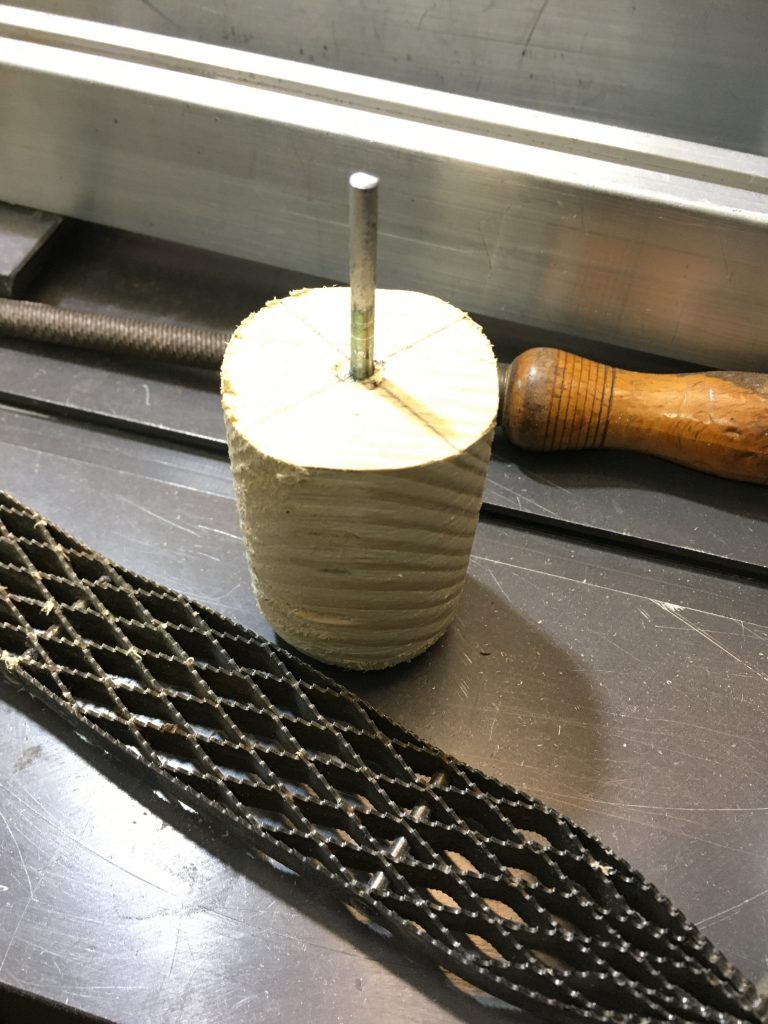
I drove a screw into the blank, cut off the head…
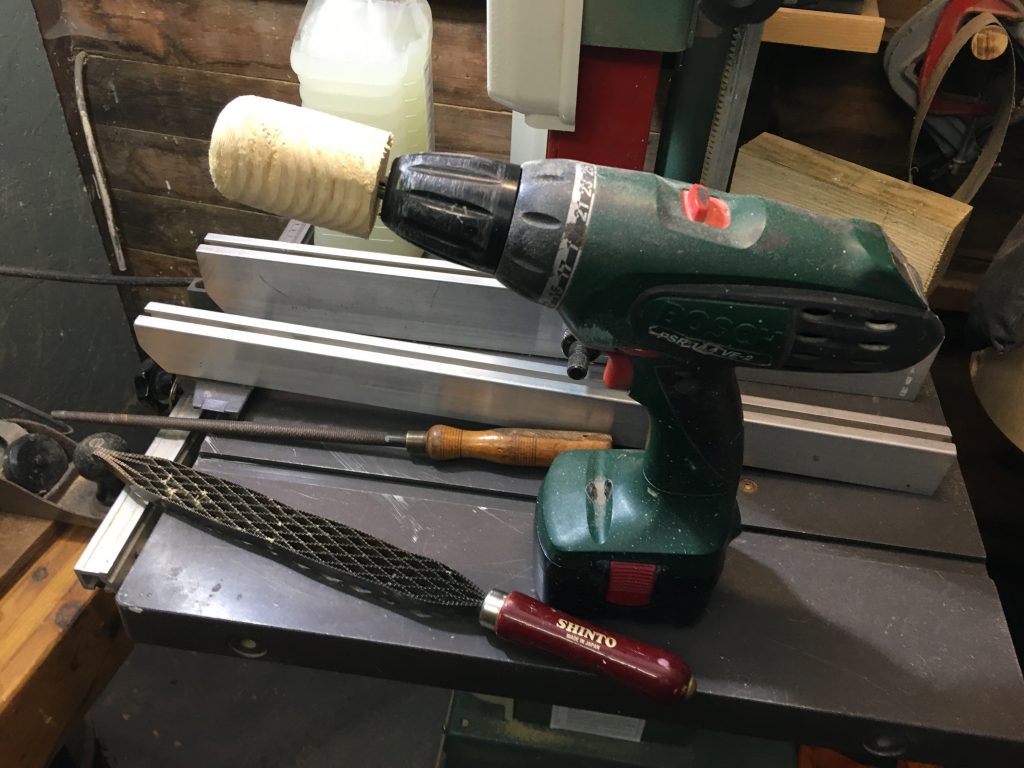
The angle-grinder took the head off a long thin screw, so I could put it in the chuck of a drill. This then meant I could ‘turn’ the block, kind of primitive lathe-style, into a large tubular rod.
… and used this hand drill as a mini lathe.
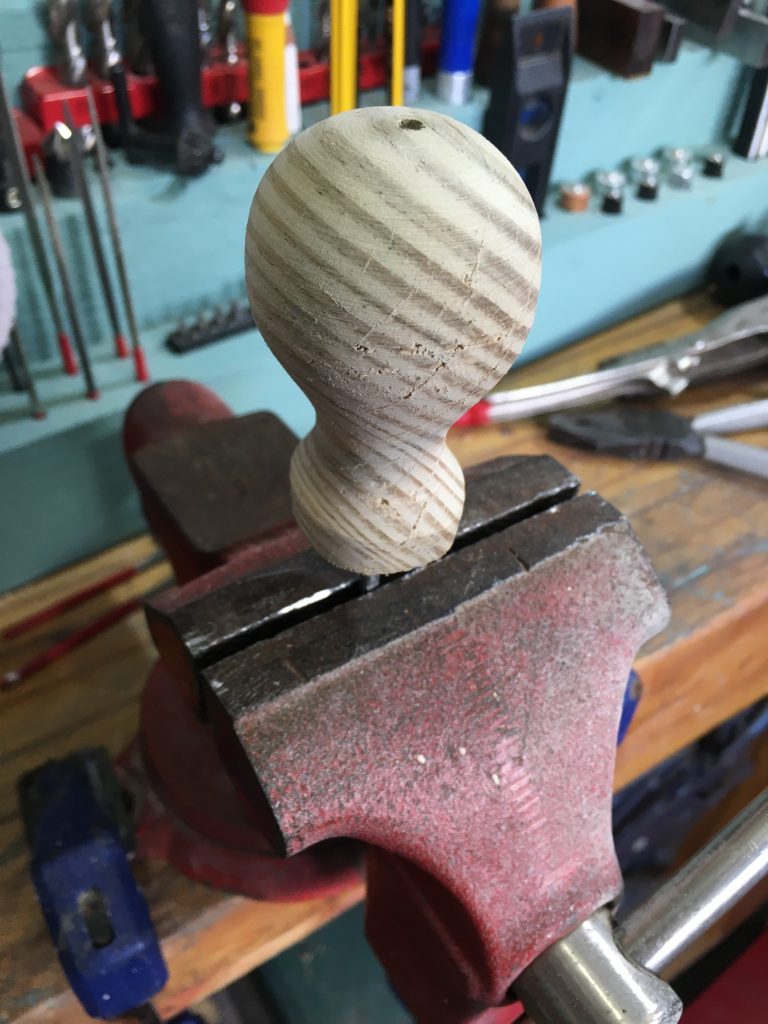
After this initial rounding stage, I took a lead out of Paul Seller’s book, and used a hand saw, followed by chisels/rasps, to narrow the circumference of the lower basal part of the blank. After that it was just a case of rasping, filing and so on, until I attained the desired curves.
Fully shaped, I used the vice to extract the screw.
Once I’d got a shape I was pleased with, I put the screw/shank in the vice and rotated the shaped knob off. Then the drill-press did the holes for the threaded-rod and fixing doodad.
In these pics my rather slapdash work looks ok. And I’ve learned lots. But one thing I’ve learned is I need to remake these in harder wood, and be more accurate and neat in doing so.
Much varnishing and sanding… as ever.And done, for now.
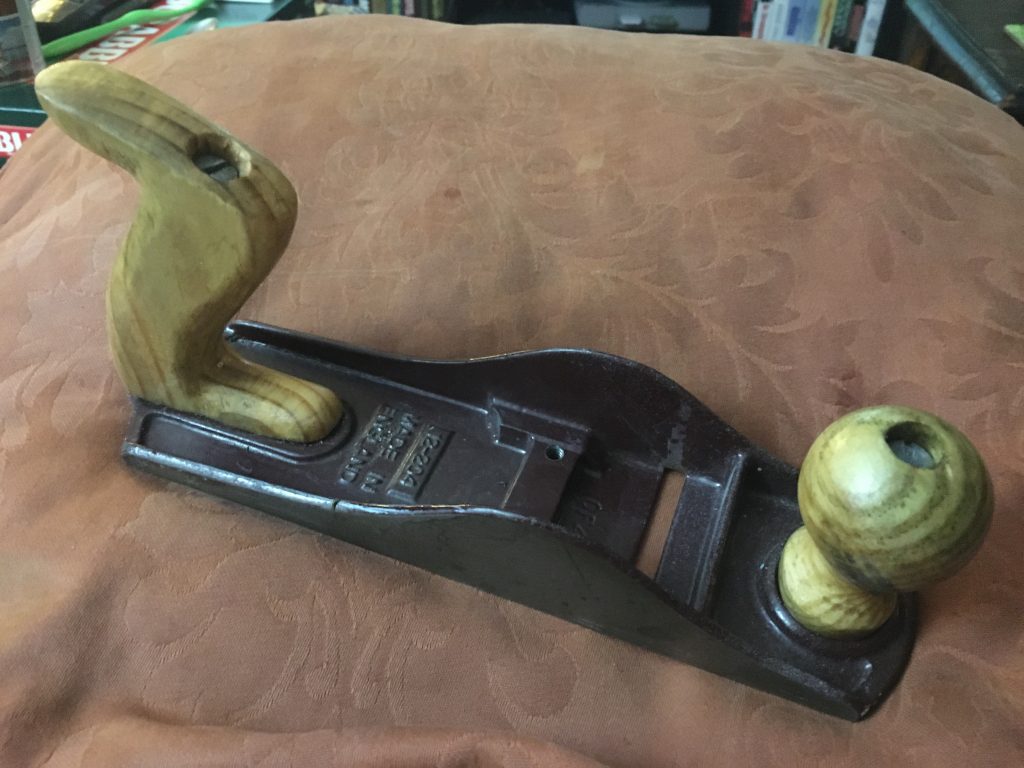
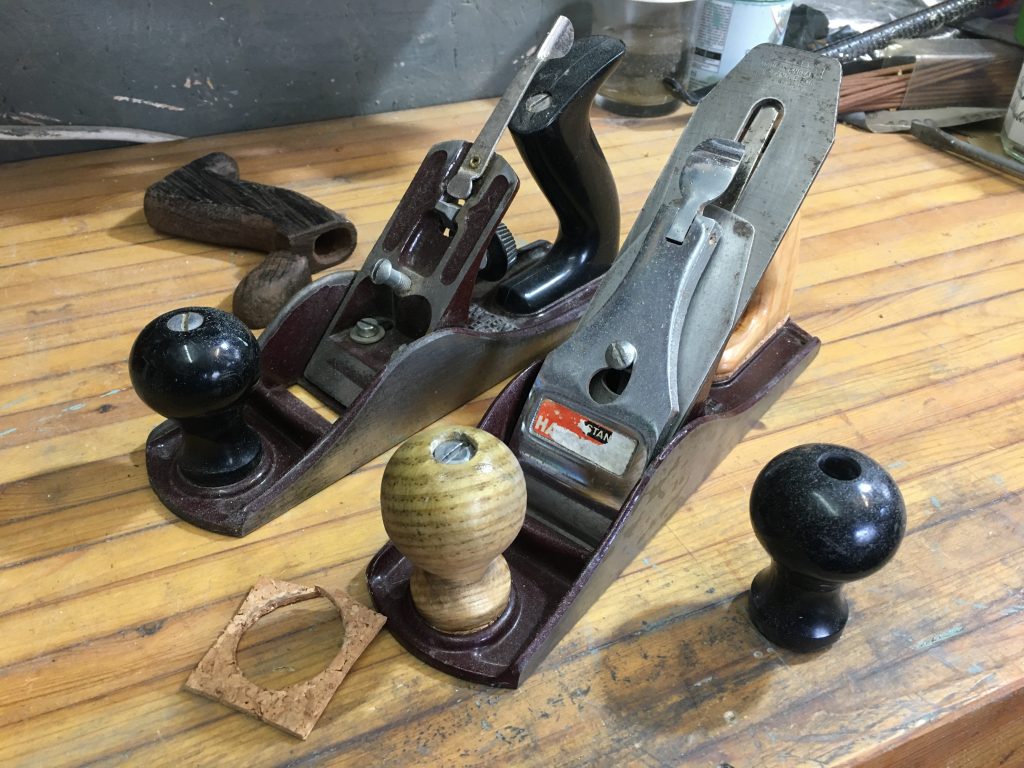
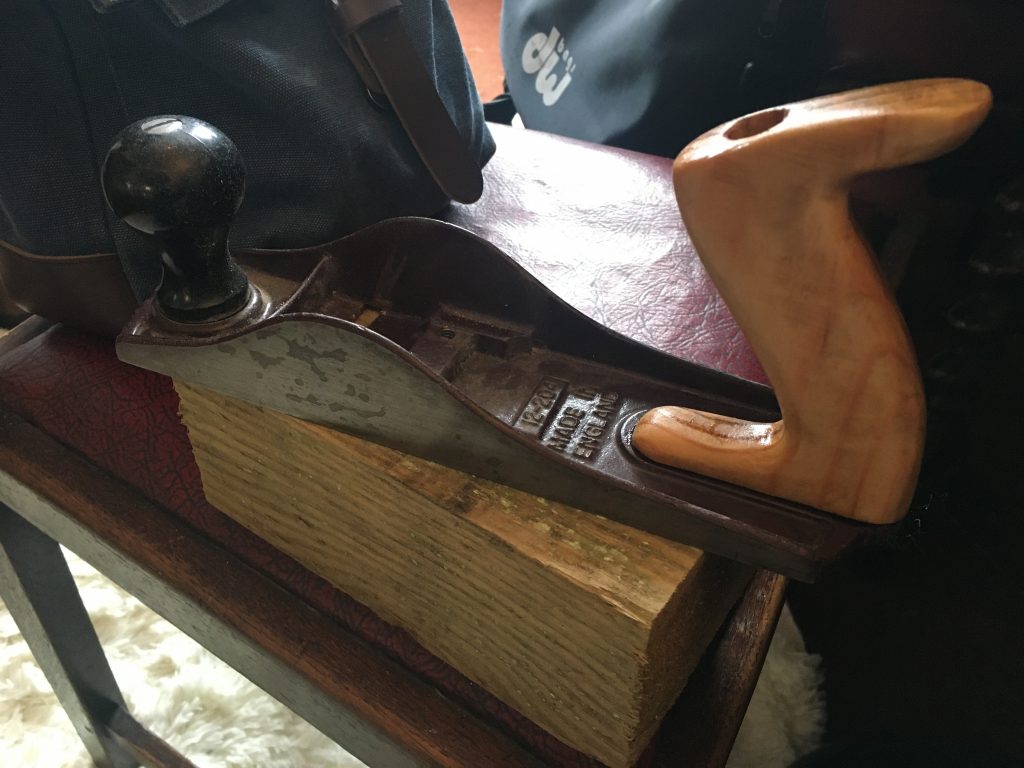
The day after making the front knob, I put this plane back together. Turns out it’s the scrub plane. I felt the handles I’d made weren’t seating quite right, so I made a pair of cork ‘gaskets’, using the footprint of each piece. I also had to add a bit of dowel back into the top hole of the ‘knob’. But all told, with the final bit of fettling, I’m actually quite pleased.
The new look, in front of an unmodified plastic one.
I made a wooden handle for one of my Stanley Handyman planes some few years back. Don’t recall now if that was ‘cause the plastic one broke, or simply because I just prefer the aesthetics of wood.
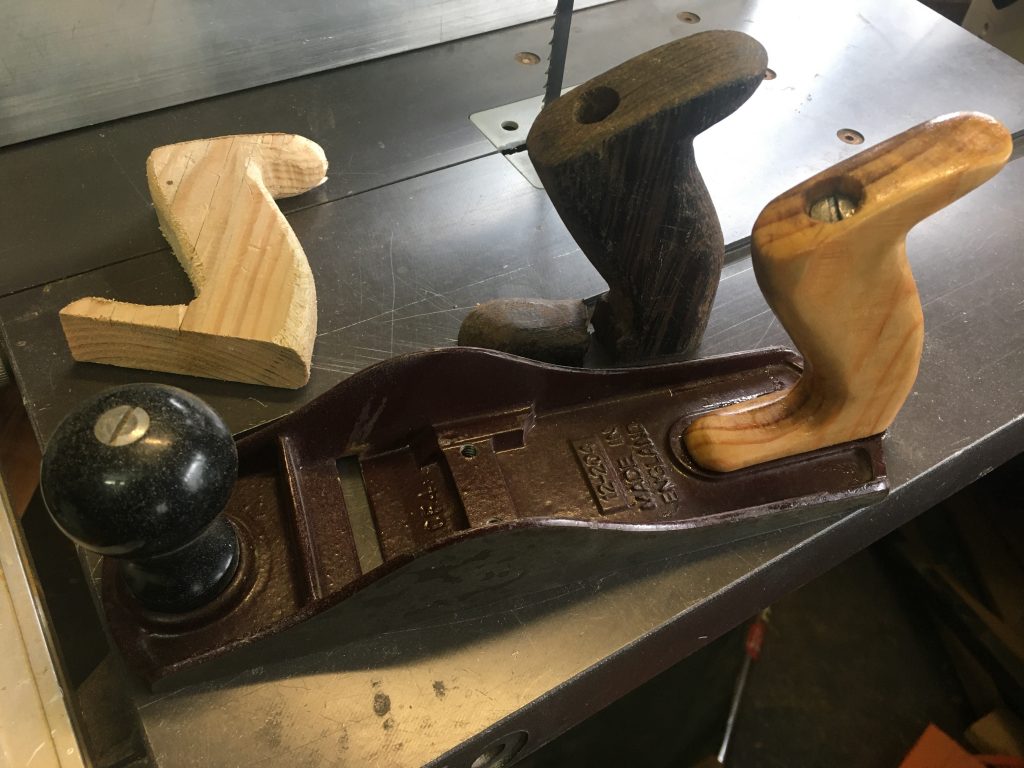
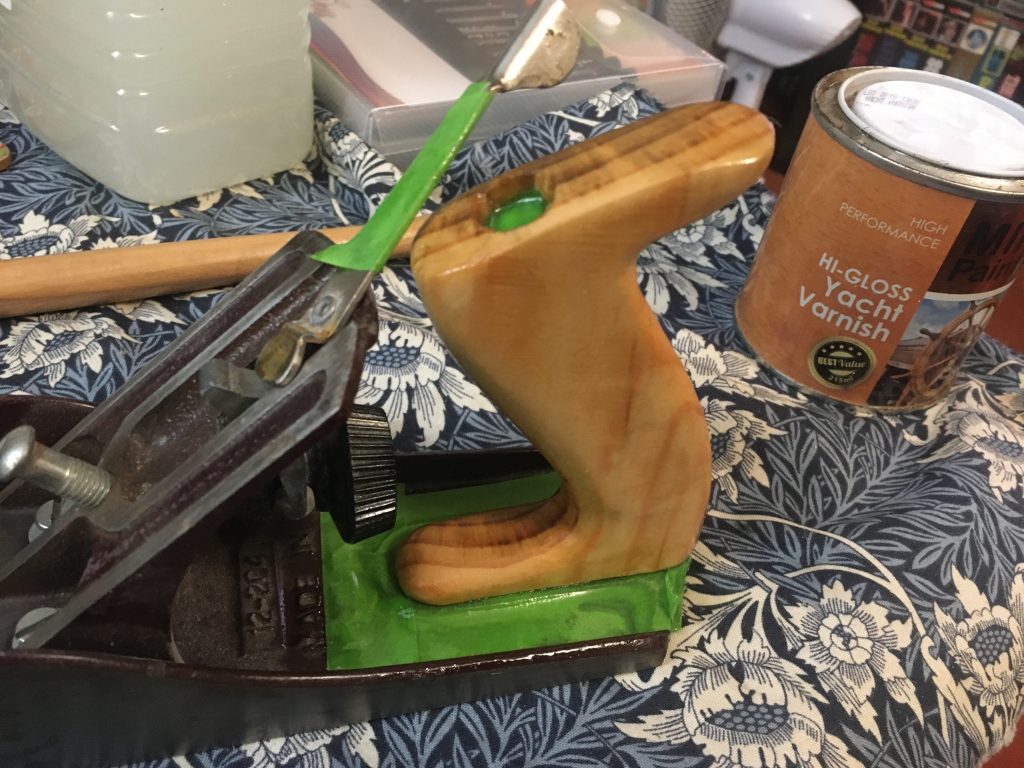
The old broken DIY handle (dark!), new one, and a ‘blank’.Masked it off in situ’… why not?
Anyway, I made the original replacement from some very, very hard wood. Very hard, but also very dry and brittle. So, not like oak. Don’t know what type of wood that previous handle was. It lasted longer than I expected, but finally broke, just a day or two ago.
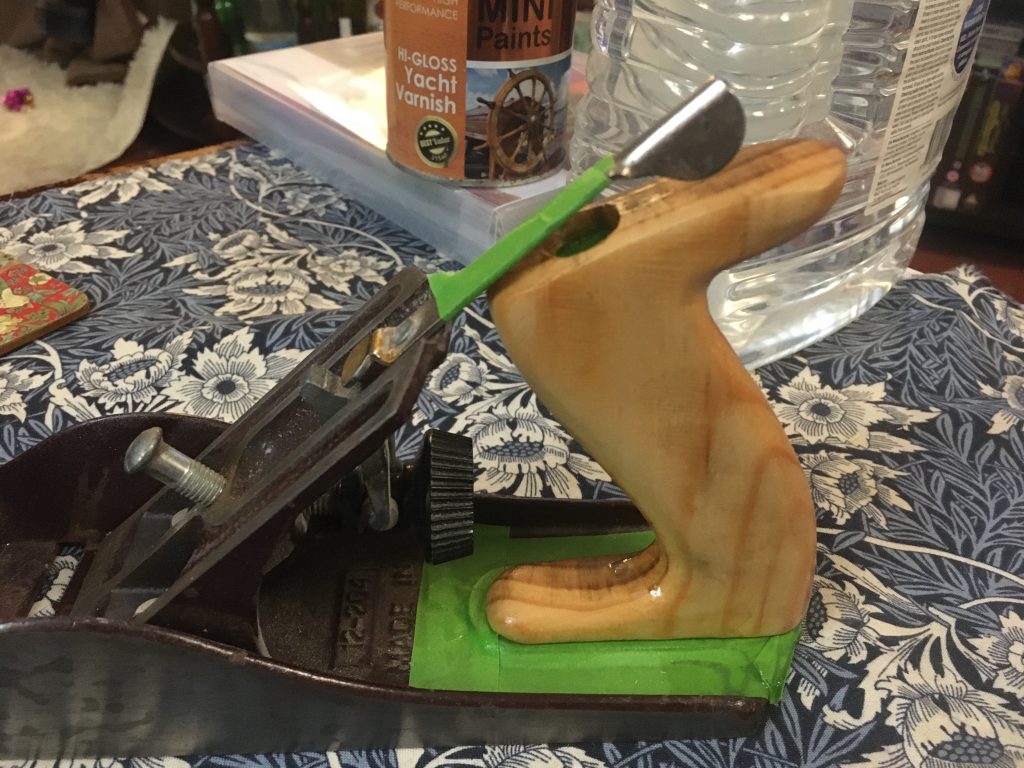
Varnish, coat #1.
My planes all need cleaning, setting up and sharpening. And I really ought to sell a few. As I have more than I need. I’d like all the planes I keep/use sporting wooden handles and knobs.
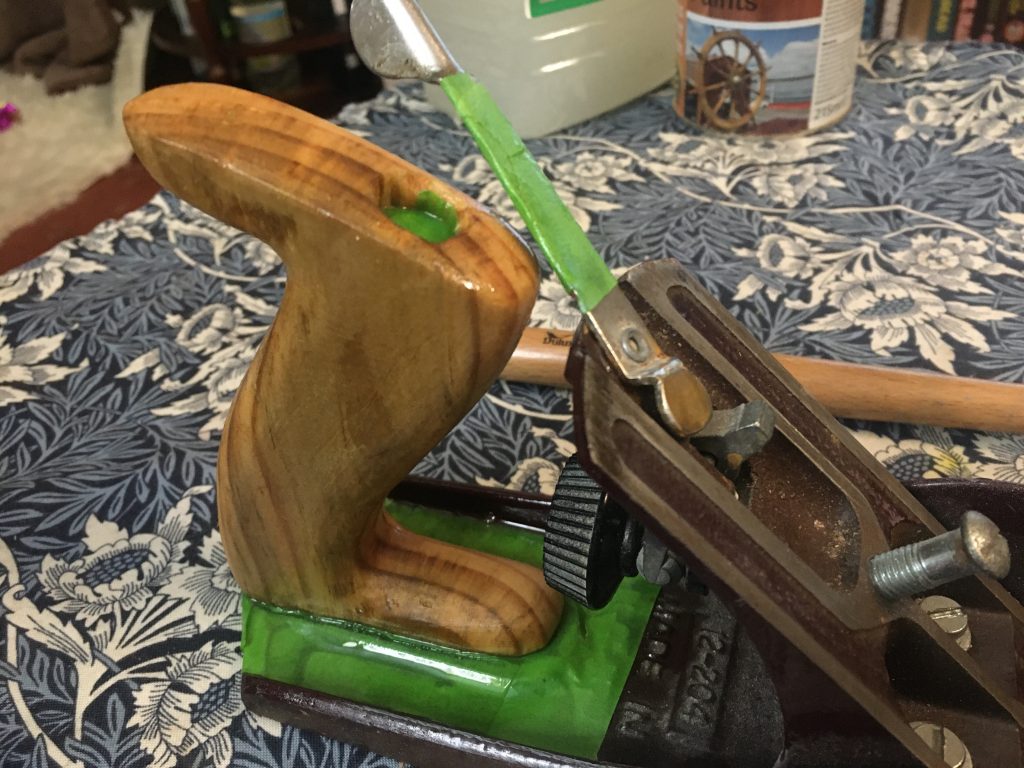
Varnish, coat #2.
Making the handles is relatively easy, with gear I already own. And it’s really pleasurable, shaping all the curves. But the near spherical knobs would be a lot easier to do on a lathe, a tool I don’t as yet have.
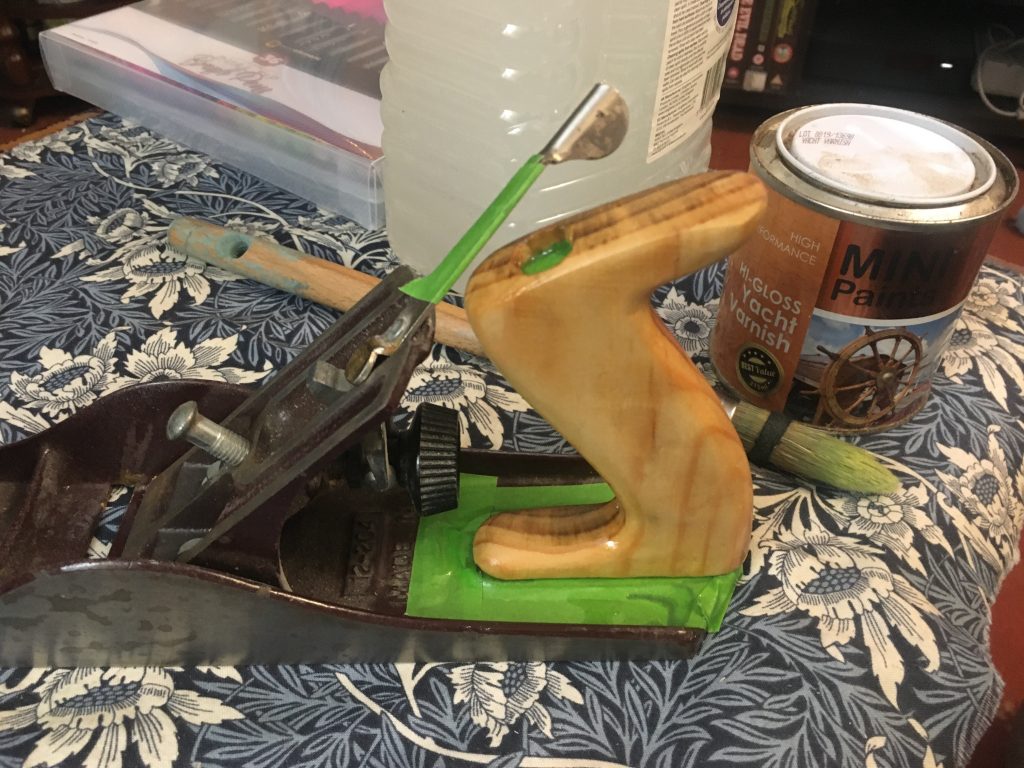
Varnish, coat #3.
I tried to make two handles today, using soft construction pine. So, if they fail – and the first attempt did split on the thin forward ‘foot’ of the base – it’s all good practice for when I finally get around to making some in a more durable (perhaps prettier?) wood. Not sure what might be best: oak, cherry, yew? I really don’t know! Something to look into.
Varnish, coat #4.
And… whaddya know!? As I’m sitting working on this, Steve Ramsey gives way to Paul Seller’s on YouTube, and – with no input from me – after videos on saw horses and other stuff, up pops his plane handle tutorial! Serendiplodocus or what!? It turns out he uses yew. So I’ll try and get me some o’that.
Varnish, coat #5.
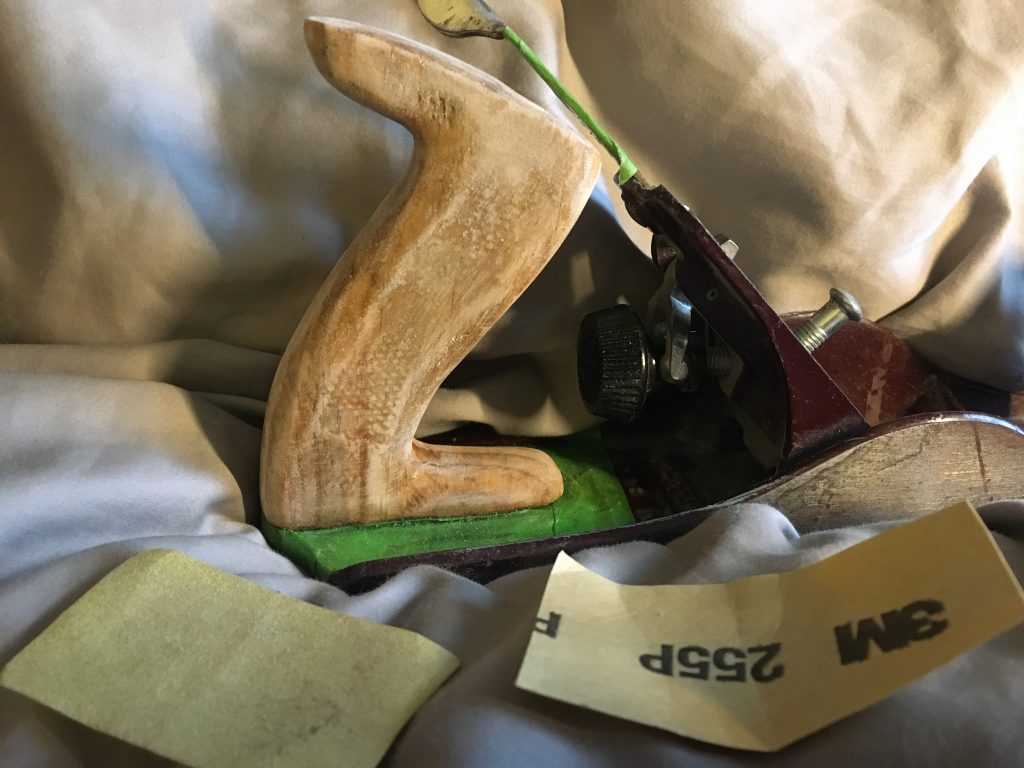
And now, the following day, a sand with 255 grit, and a sixth (and I hope final?) coat of varnish. I’ll give it an hour or so to dry. And if it’s still tacky – the previous coats were still a bit sticky after 24 hours! – I might speed things up with a hair dryer.
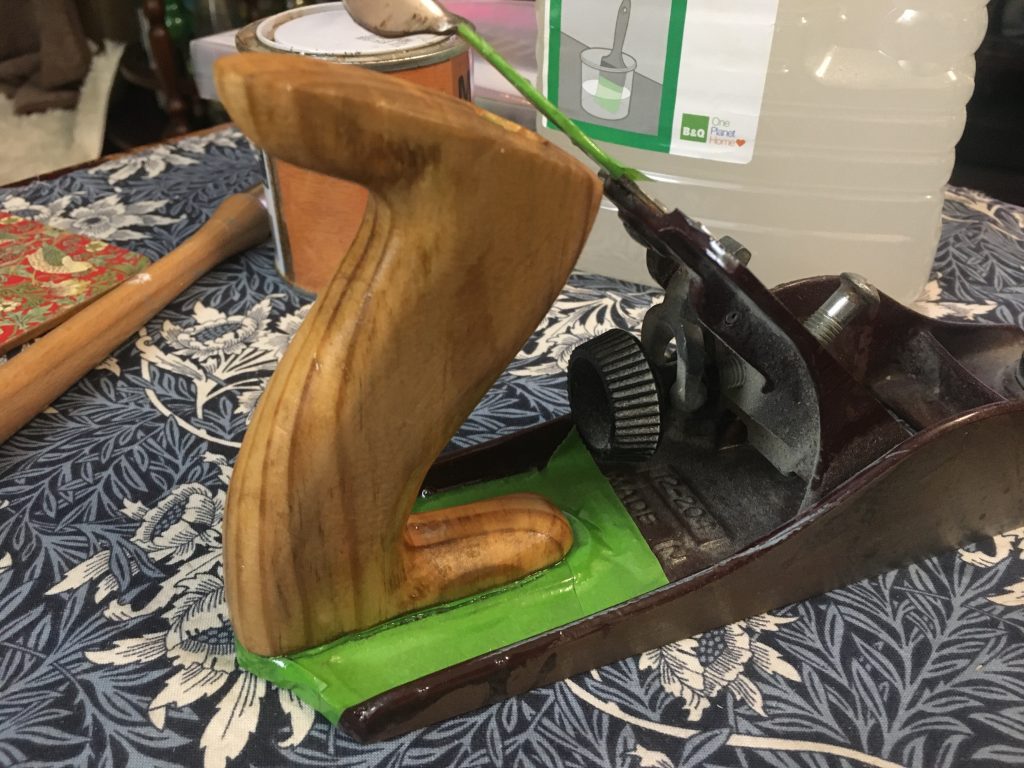
Sanded and lacquered.
Then I’ll remove the masking tape, clean and polish the rest of the rest of the plane, and sharpen the blade, reassemble, etc.
Hmmm!? Can’t stop fettling it! Wasn’t quite happy with the previous ‘final’ gloss varnish coat. There were some odd full spots. So I’ve sanded with 255 grit again, and will do one last ‘final’ coat later today. And that really will be the last, however it comes out. As I need to move on to the front end k-nob!
Lightly sanded with 255 grit paper.
Well, I think that’s seven coats of gloss varnish in total? And three or four bouts of light sanding. I finally threw in the towel, finish wise. It’s far from perfect – but then the handle is pretty rough ‘n’ rustic anyway – but one has to stop fiddling and move on at some point!
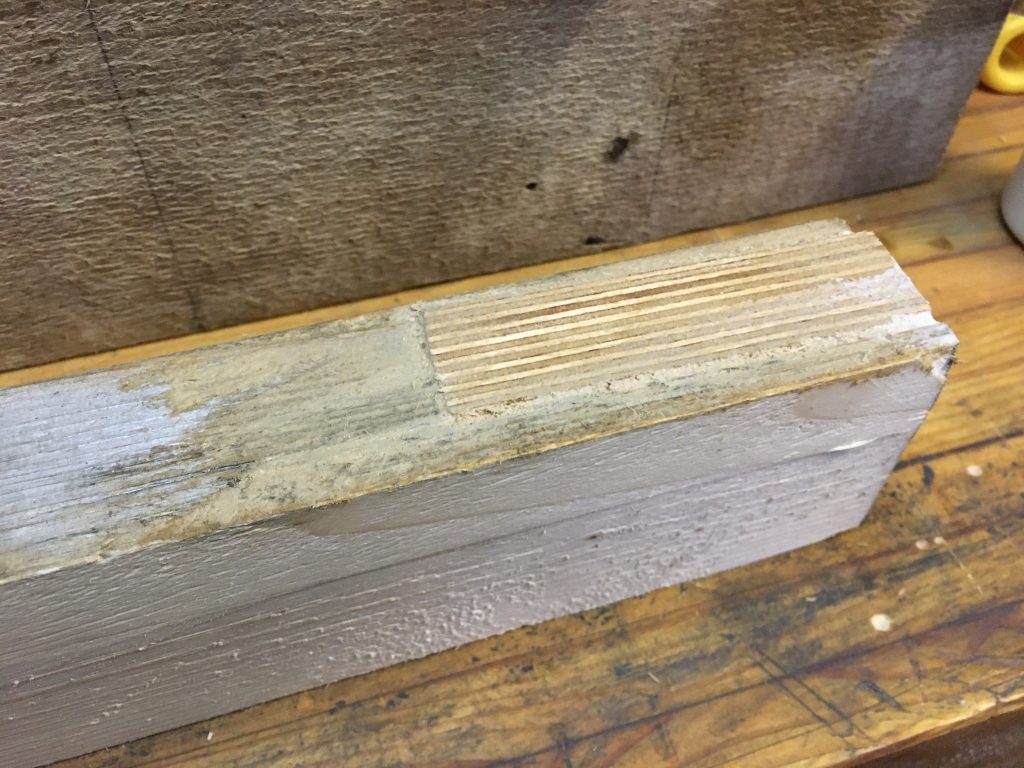
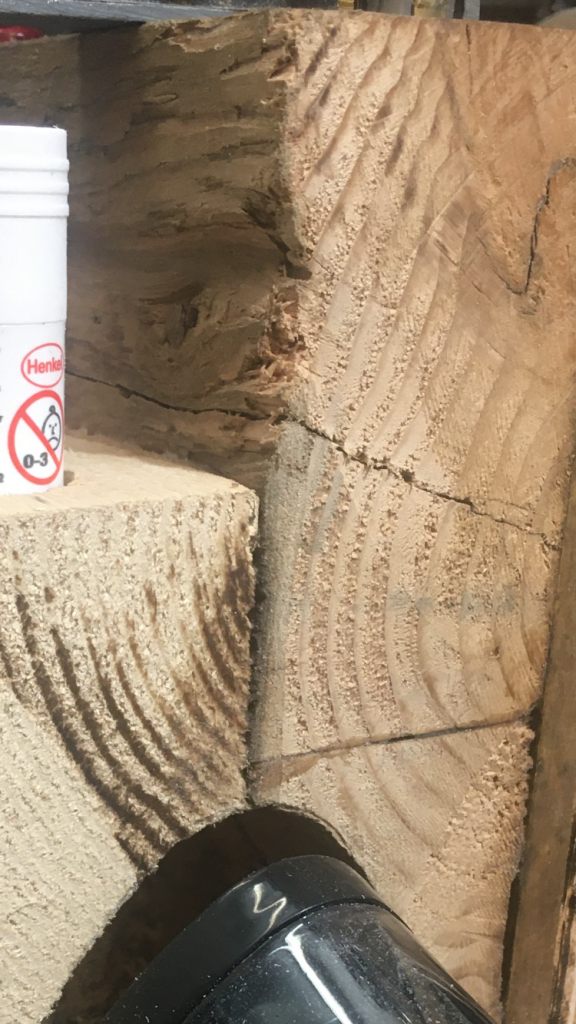
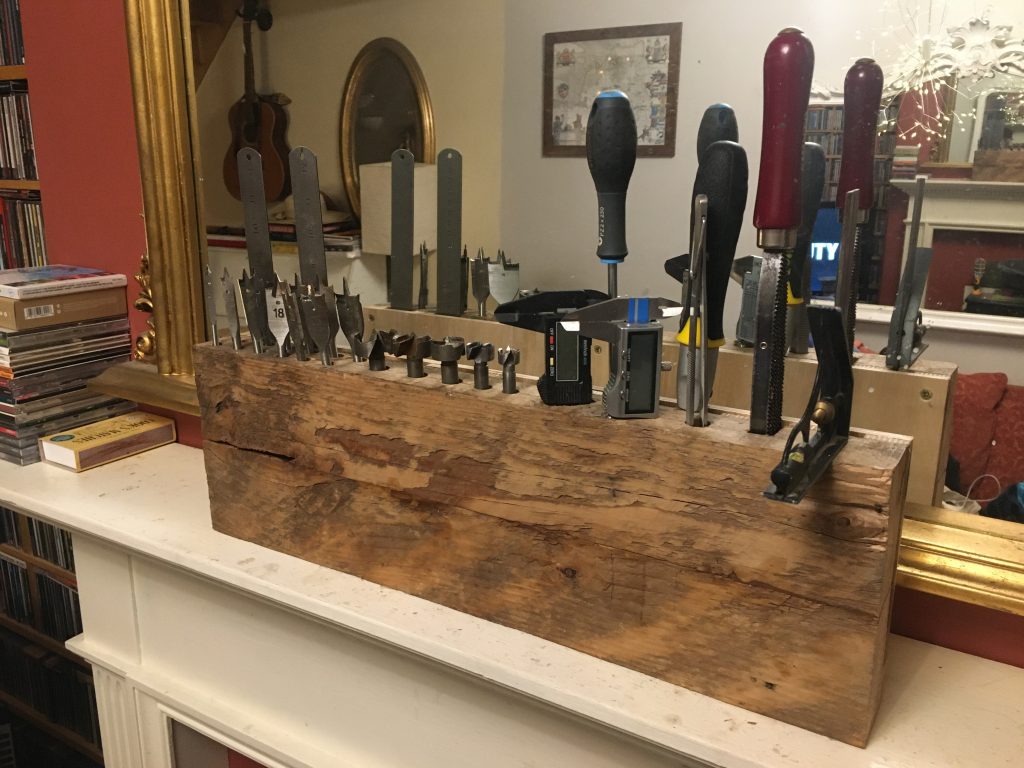
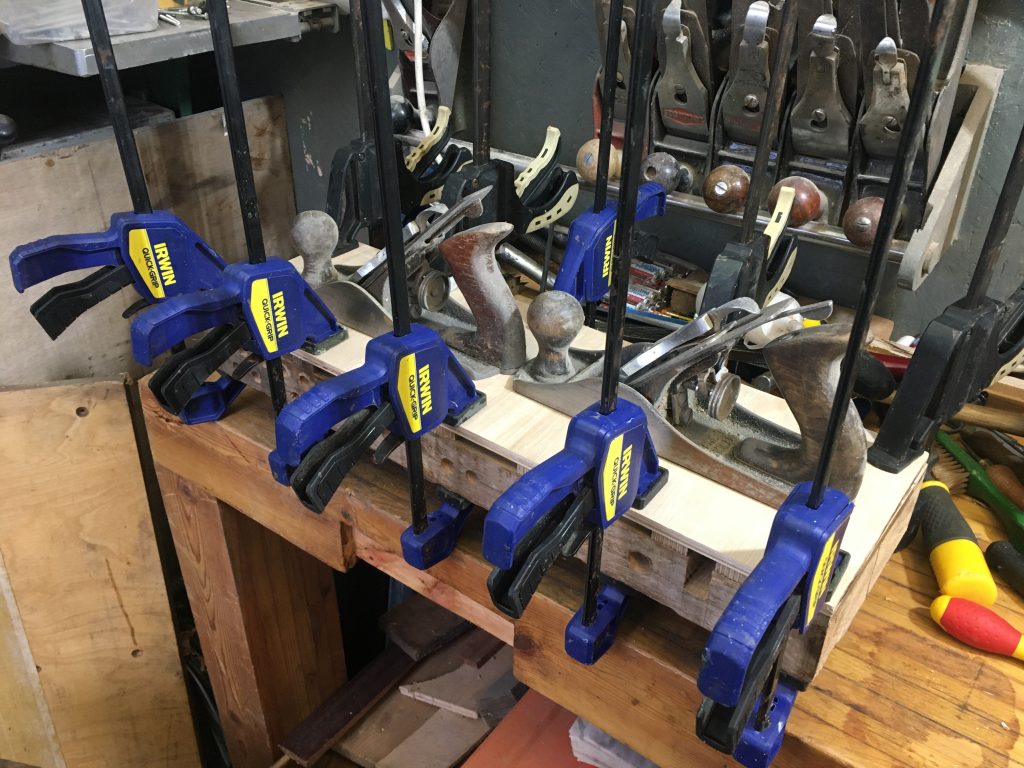
The block of timber beneath the de-frogged plane, as pictured below, is going to furnish me with a number of knobs, I hope. How long will such softwood replacements last, I wonder? What I need is to find some yew.
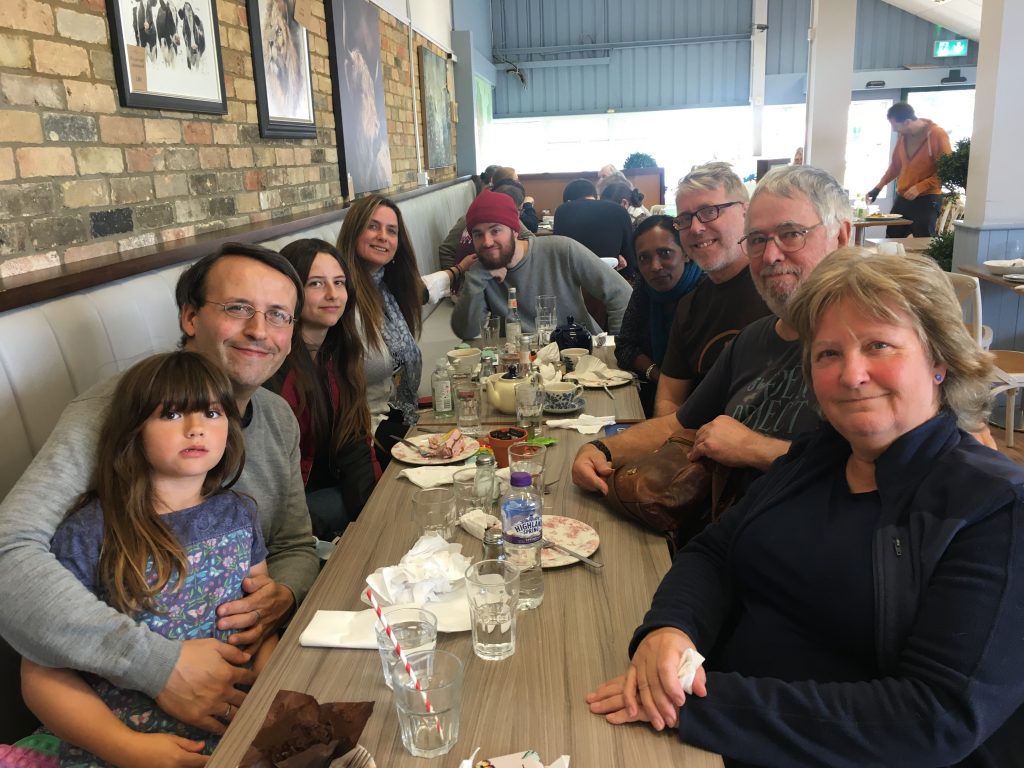
My sister’s back from Spain with her family. Which is terrific. Her birthday is actually tomorrow. But we got together today, with Dad, Claire, Sam, Hannah, Antonio, Ali and Sofi, for lunch at Coton Orchard garden-centre.
Post meal family portrait.
I had ham, eggs and chips, Teresa had fish ‘n’ chips, and we shared a raspberry and white chocolate roulade for pudding. Lovely!
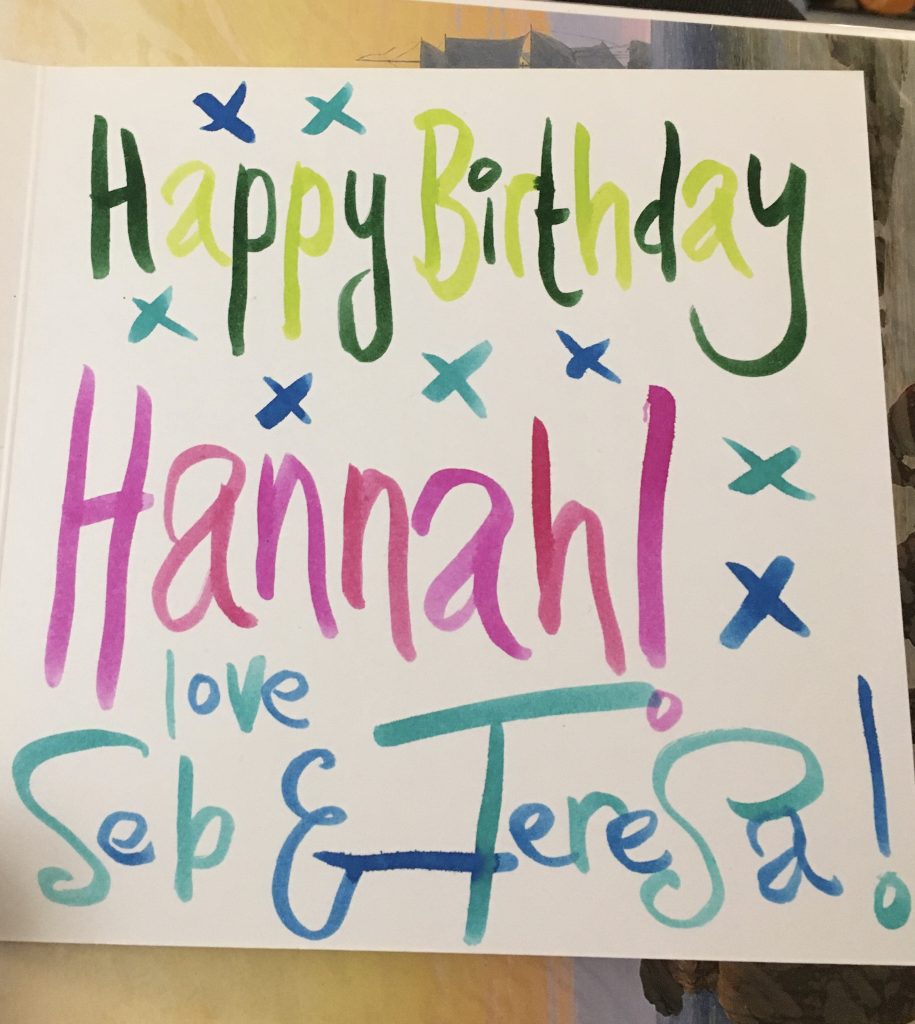
We got Hannah a couple of rosins, for her violin bows, and Ry Cooder’s debut album on CD. She was pleased with the gifts, which was gratifying. Pictured below the writing inside Hannah’s b’day card.
The above was written with a fun set of coloured felt tip pens, of the dual-tip variety (one fine, one larger and more brush like), that we recently got via Amazon Vine.
It was nice to see folks, and eat, drink, chat, etc. Many happy returns Hannah, my beautiful sister! Love from Teresa and I!
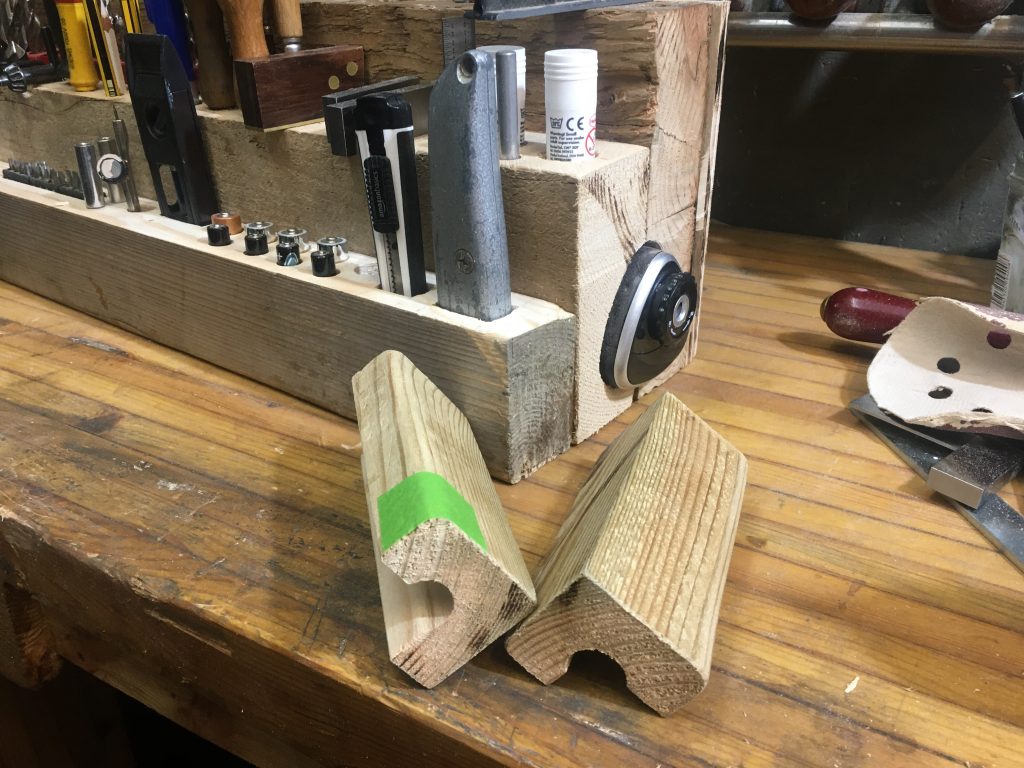
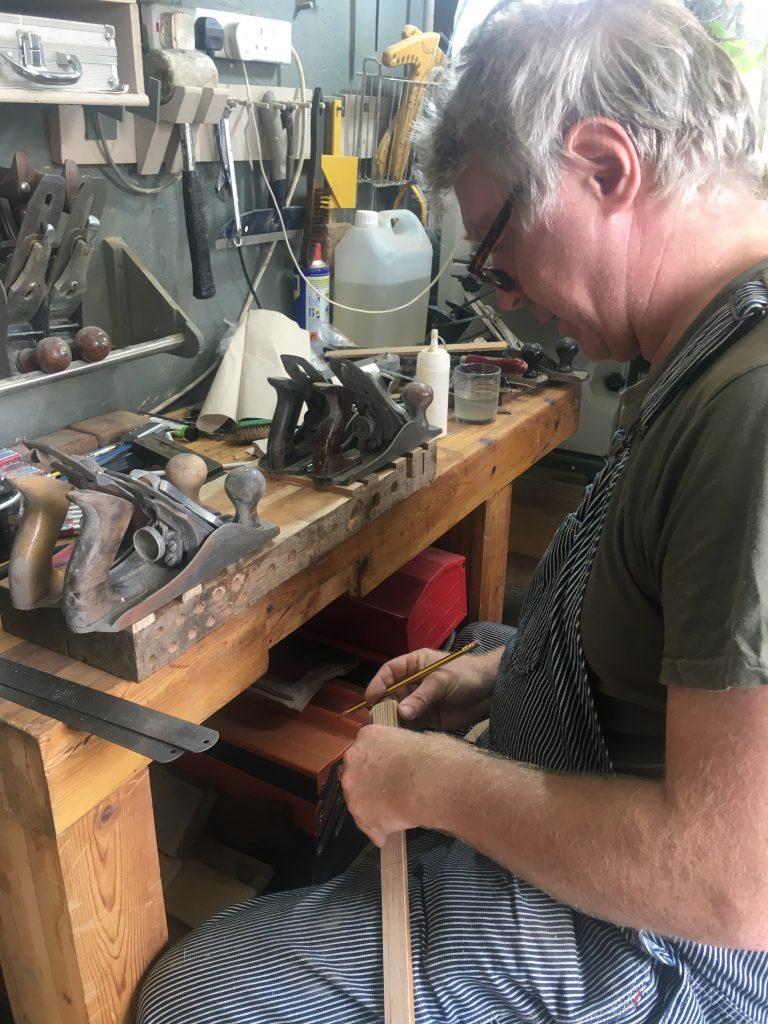
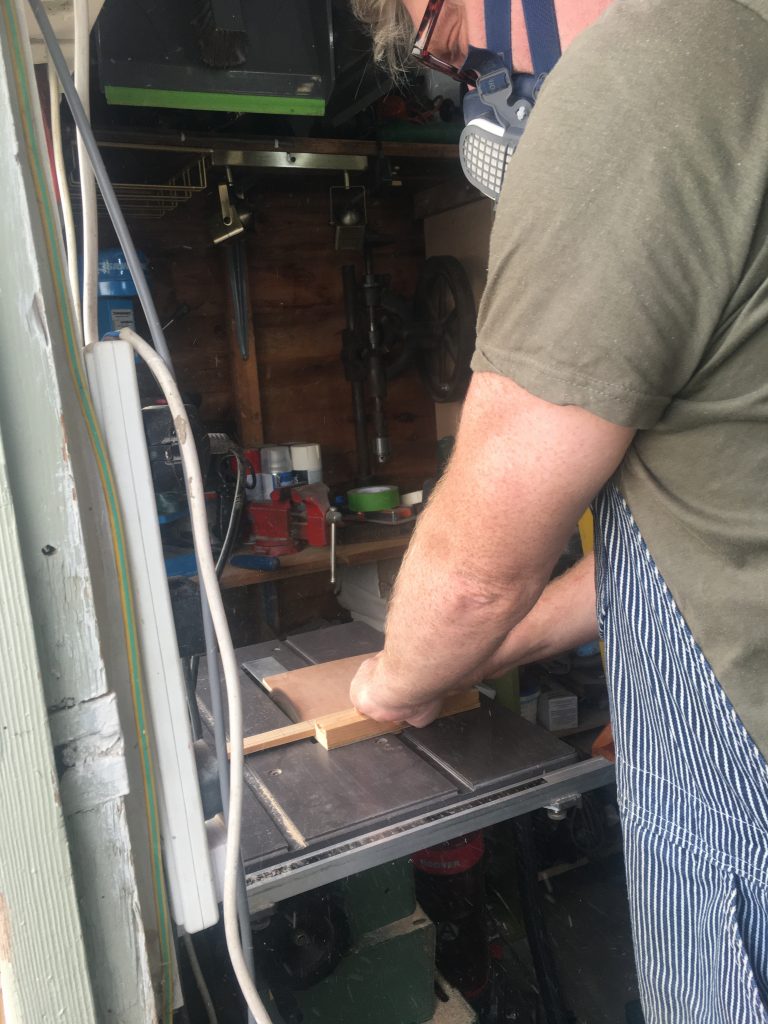
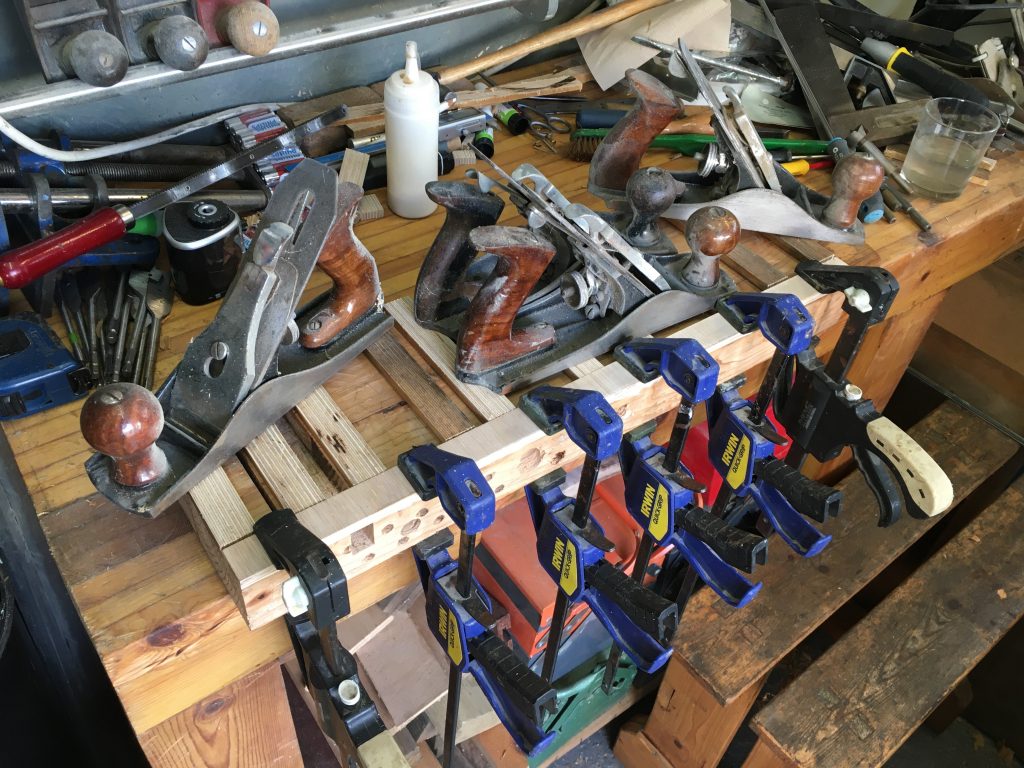
Sunday, and I’m keen to finish the caddy project ASAP. But with lots else to do, all I managed was these handles. Cut on the table saw, with my primitive but effective sled. And then sanded/rasped into the curved shapes seen above.
And on they go.
The handles are glued and screwed, belt ‘n’ braces style. Making and fitting these was hard; the shaping of the innermost curves took much time and effort. Slow sanding gave way to more rapid rasping! The fixing to the caddy took less energy.
In the lounge.
I brought the caddy inside to photograph it with less clutter around it. And I’m pleased with how it’s turned out.
Left handle and tape measure.
The last things are: a clip for the tape measure (which is just perched on the handle in the above pic), and somewhere for a hammer to reside.
Right handle.
The right hand handle needed a tiny curved smidgeon knocking off with the rasp, and sanding smooth, in order to get the ‘lectric sharpener back into its cubby hole. That was both easy to do and very satisfying!
Do I paint this thing? Or stain/varnish it? Hmmm!? Anyway, just the clip for the tape measure left to do. Oh, and somewhere for a hammer!
I’m into the final furlong with the tool caddy now. The third tier is coming along nicely.
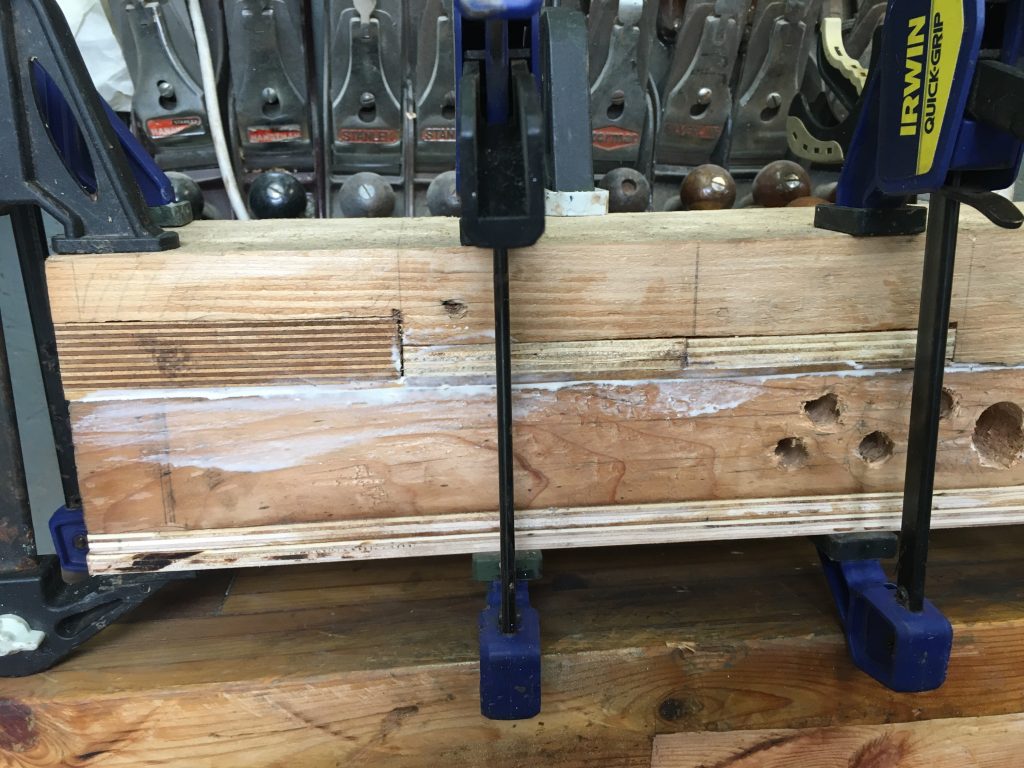
Plugging bottoms (titter!).
I had to cut some holes all the way through the block, for a few of the larger items. That then required that the resulting holes be plugged, to stop things dropping through.
Bottoming out again…
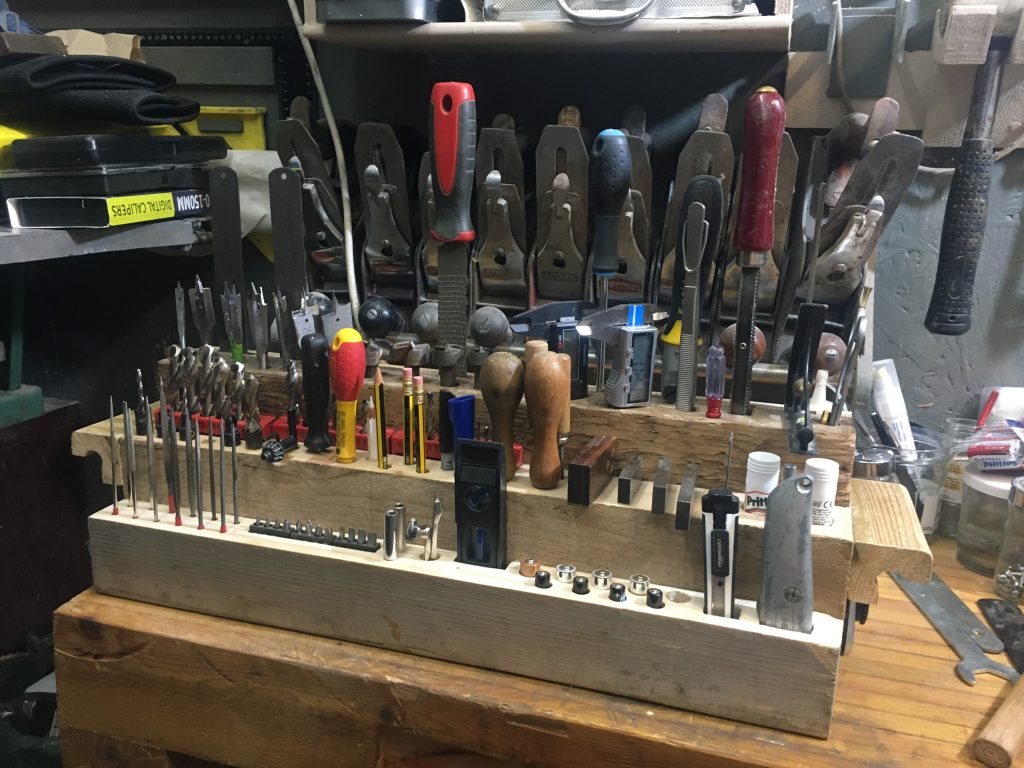
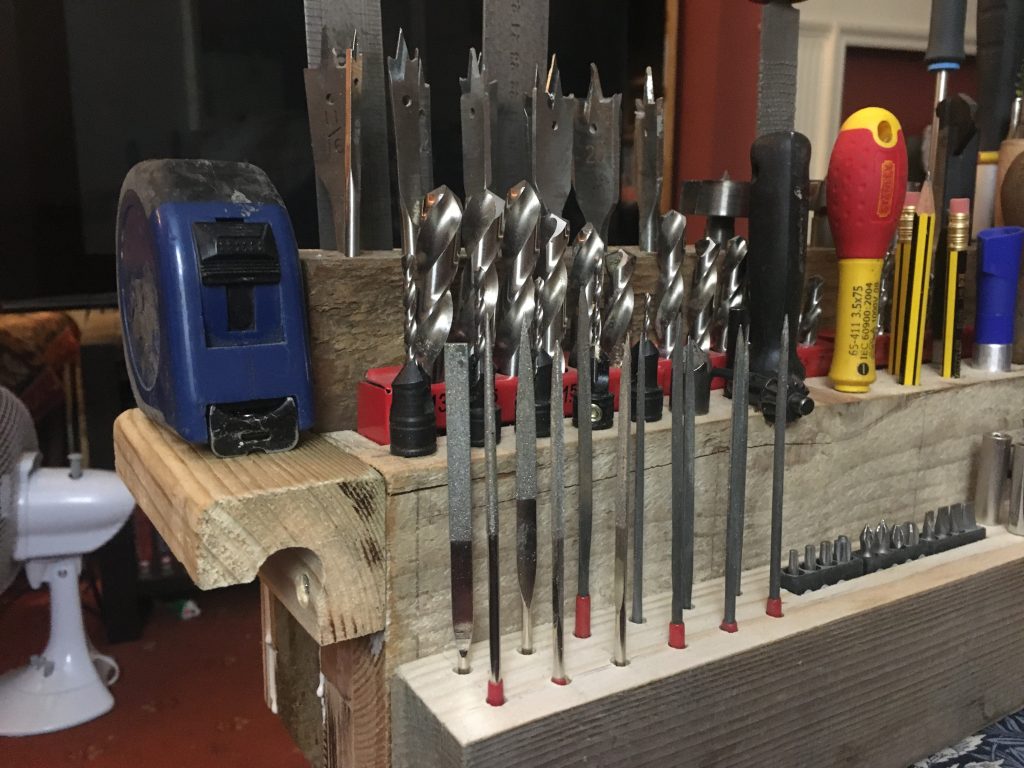
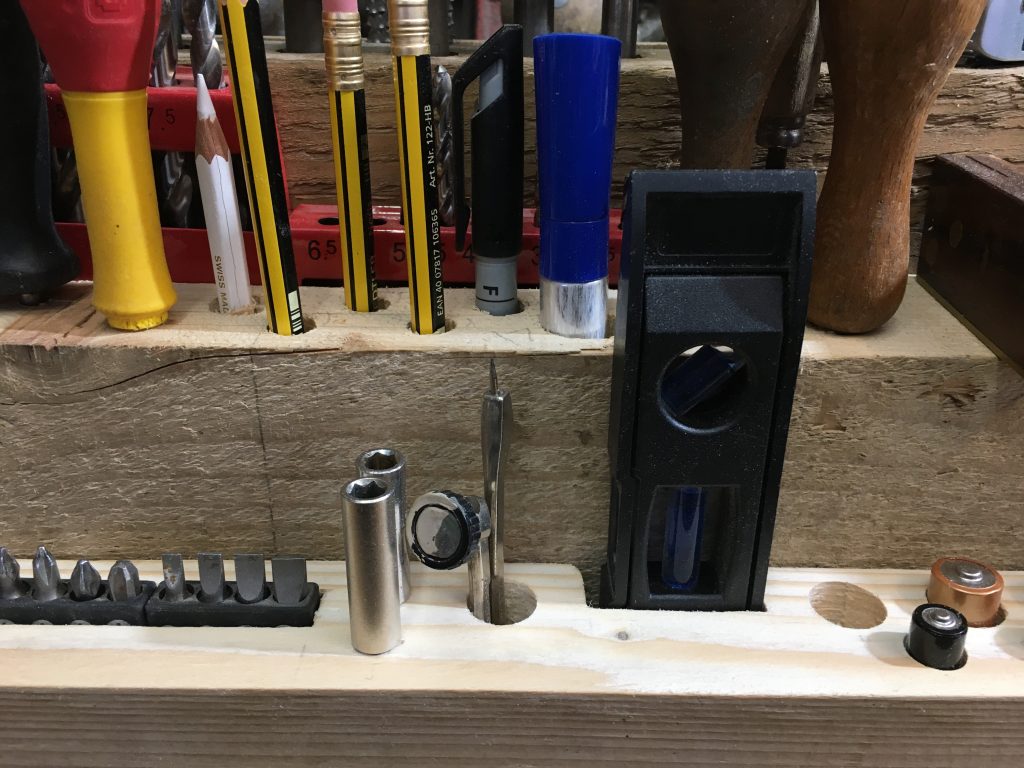
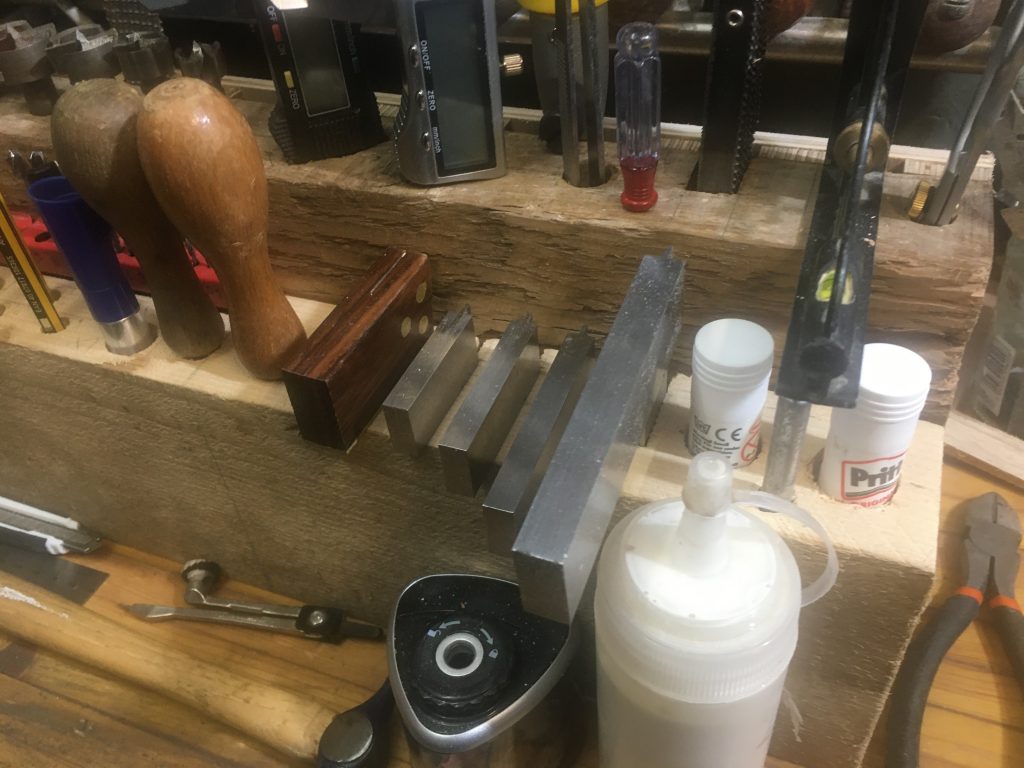
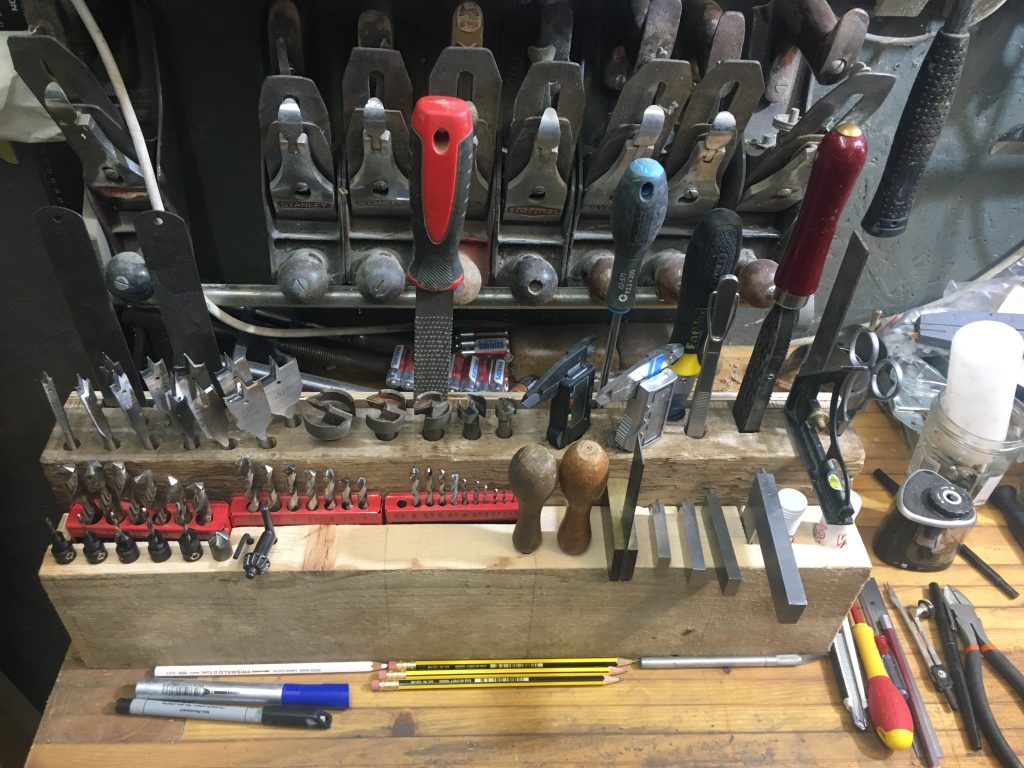
Initially I wasn’t sure exactly what was going in to this section, as almost everything already had a home in the other two tiers. But there’s actually plenty: small files, a small compass, various interchangeable hex shanked drill bits, AA and AAA batteries, a couple of knives, and sundry other oddments.
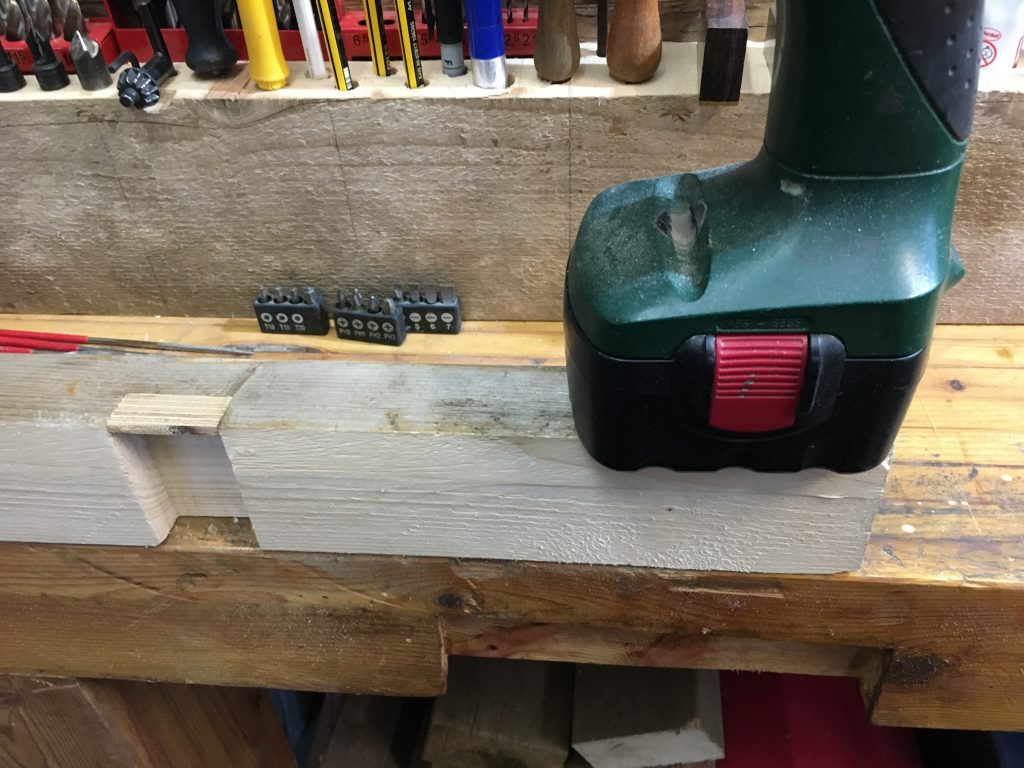
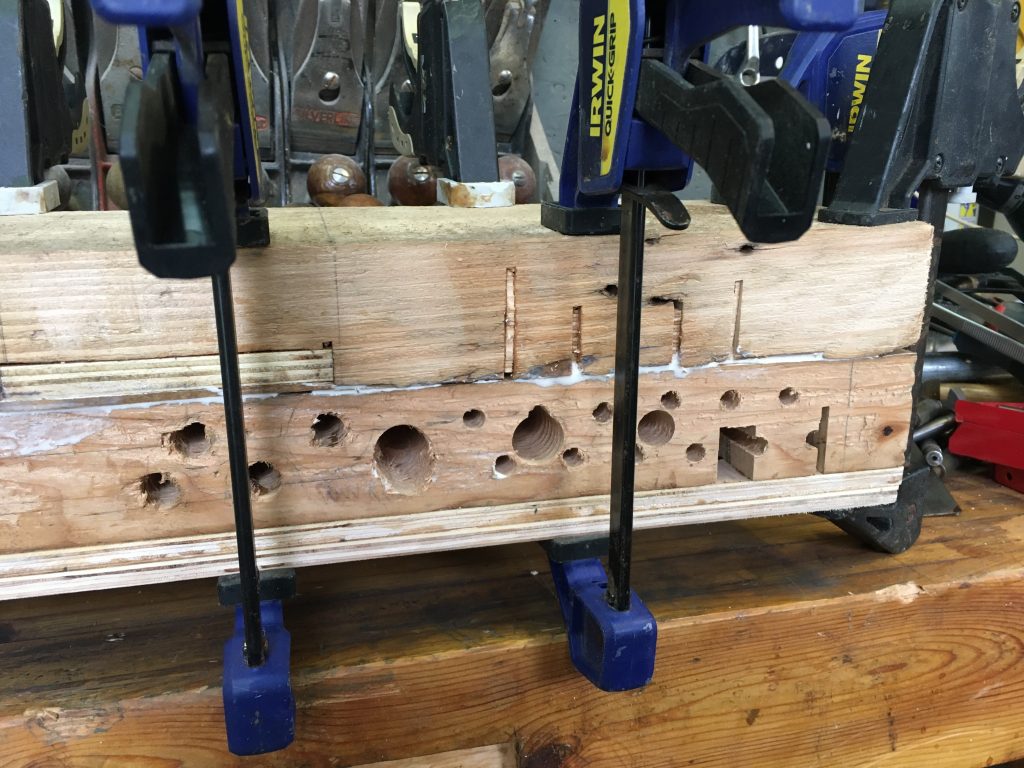
Cut a groove out the back…
Only just visible in these pics, you might note that I staggered the battery holes; there’s a row of five AA, and a row of four AAA. I tried to space these out so they’d be simple to pull out. And the depths are also set to make that easy as well.
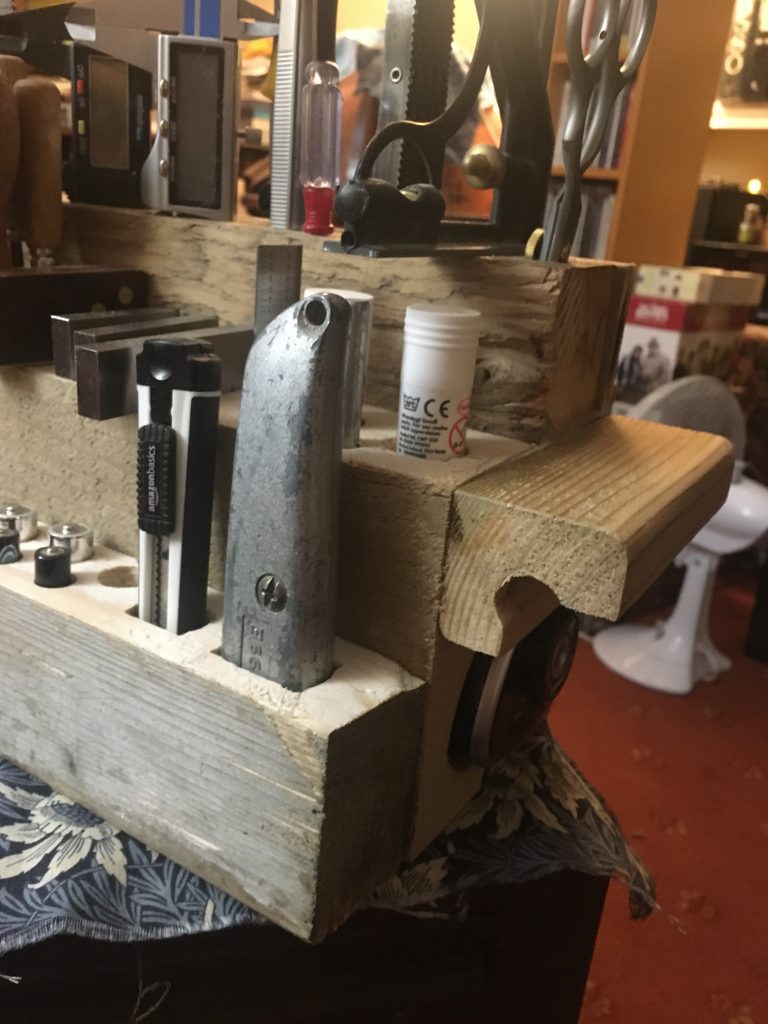
… for a mini spirit-level.
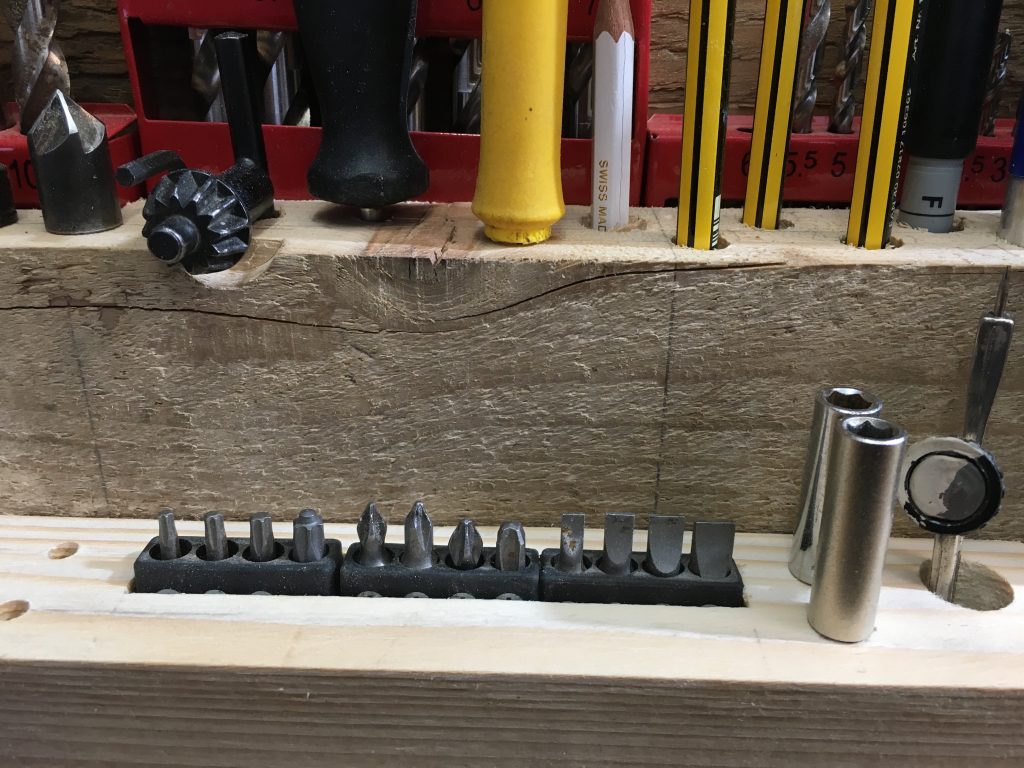
In the image below you can see the drill bits, in their little rubber pluggy things. I drilled a line of holes with, I think(?), a 15mm dia’ bit, taped for depth, and then chiselled out the remaining ‘waste’. Perhaps I should’ve set them a bit further back? Or forward? There’s room for more in that section.
Cut another little groove for these screw-dads.
It was hard to resist the temptation to go out this evening, and take off the clamps. But I was strong in resolve! So… this third and final section is now gluing to the others overnight.
Tomorrow we’re meeting Hannah and co, inc dad and Claire, for a walk along ‘The Backs’, and then lunch at The Copper Kettle. It’s Hannah’s pre-birthday meal.
I’m hoping I’ll find the time either before, or more likely after, to add two handles and a clip for the tape measure.
Today I glued tiers one and two together. Took a lot of clamps! I should’ve waited, perhaps, until I’d cleaned up the top faces. But I forgot to do so!
Clamping/gluing tiers one and two.The plywood drill bit support blocks are visible here.Some slot bottoms are ‘capped’.*
I did some work on tier three of my tool caddy today. I drilled and chiselled out holes for two knives, on the right hand end. Down the other end I drilled ten or twelve identical holes for various files.
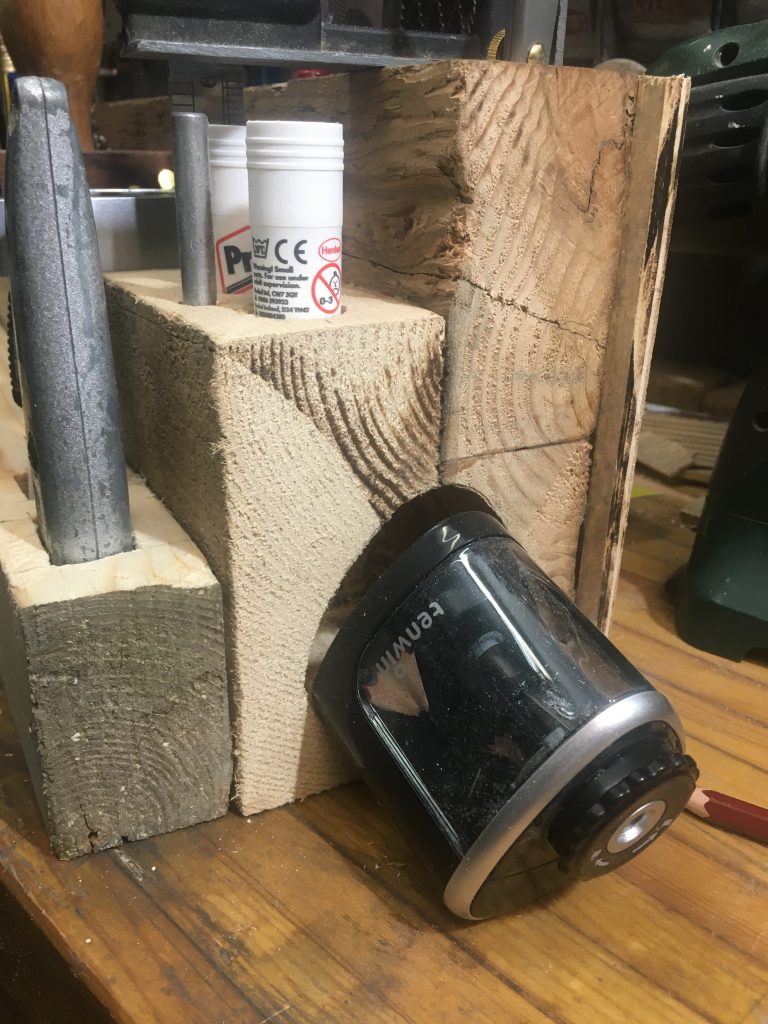
But the thing that gave me most pleasure and satisfaction was drilling and chiselling out a pretty sizeable hole in the right side of the caddy to take this chunky electric pencil sharpener. I got the latter off Amazon recently. And I love how easily it allows me to get nice sharp pencils.
Drilling and chiselling the hole for this…
I used my largest Forstner bit (35mm), mounted in my corded Hitachi drill; the caddy is too long to drill on end using either of my pillar type drills. I started the holes using the Bosch cordless drill, but it just wasn’t powerful enough. These holes – three, one in each ‘corner’ of the triangular shape – needed to be about two inches deep, or thereabouts.
Once the three holes were drilled, I chiselled out the remainder of the wood that I needed to remove. It took a fair bit of tweaking to get the right shape for the sharpener to fit snugly.
… was hard, but fun. Bingo!
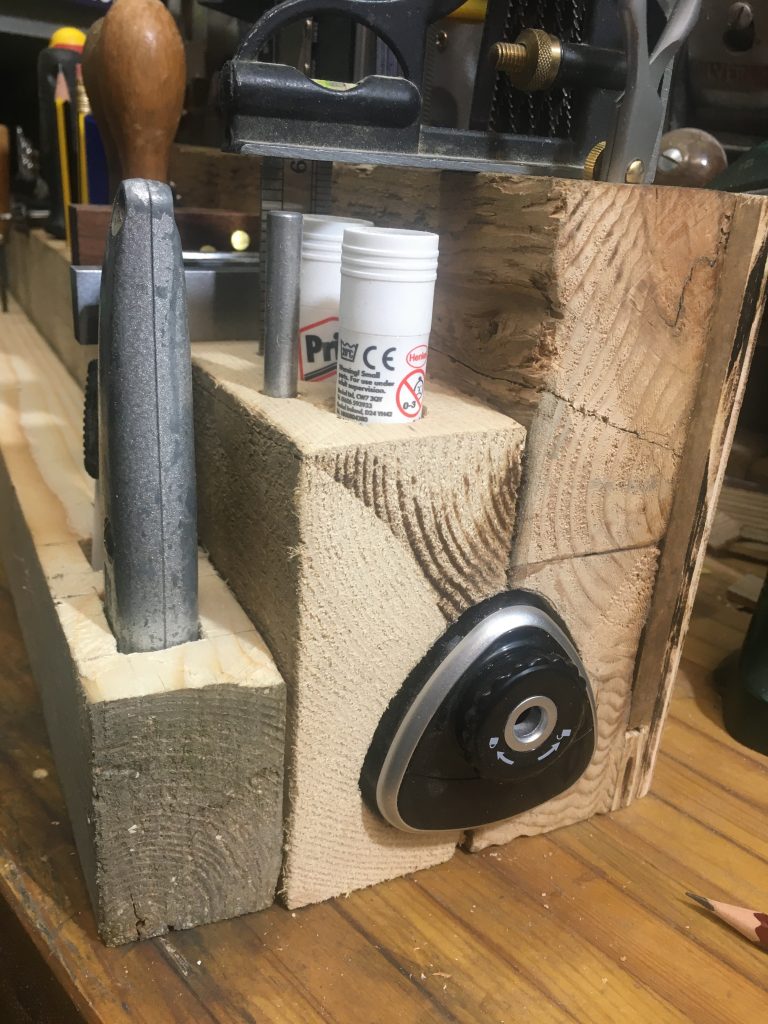
I love how the sharpener sits here, just sufficiently proud of the wood to allow easy removal for emptying as and when required. I also love the various wood grains on view.
I love wood!
*The rather messy holes from my first attempts are visible during clamping. But as these are on the base, they’ll not show when the caddy is in use.
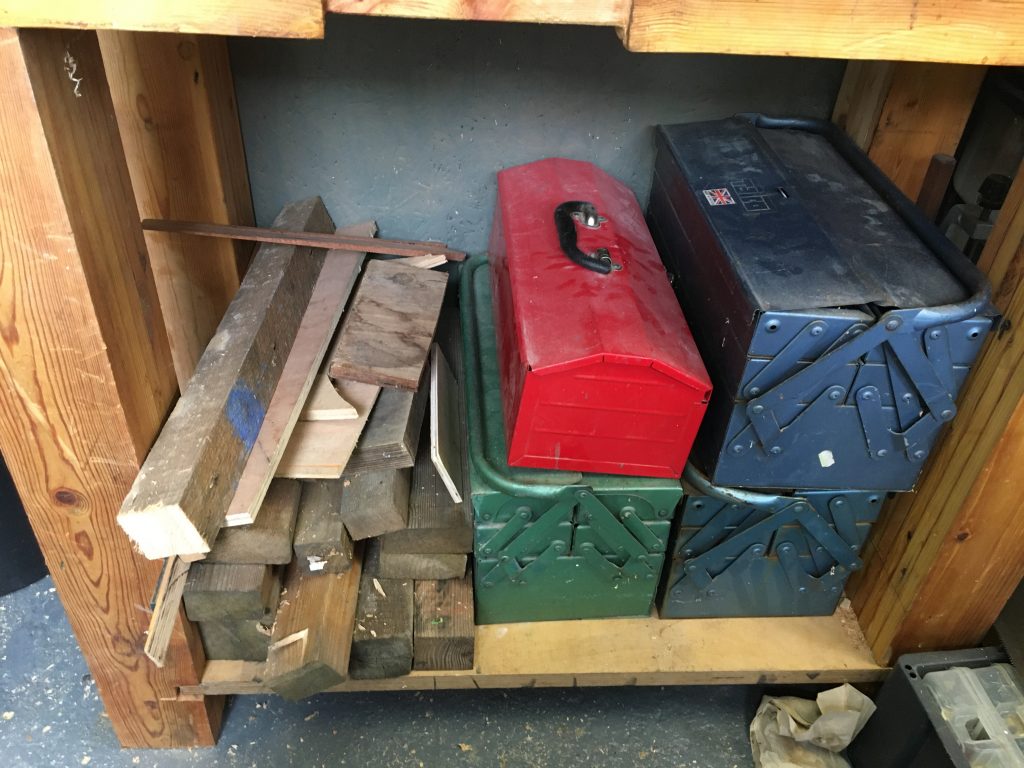
The base of my bench, loaded with toolboxes and timber.
Wasn’t sure if I’d shared a picture of the laden workbench base. Four or five toolboxes (one is out/in use) and a bunch of timber add stabilising weight to the beast!
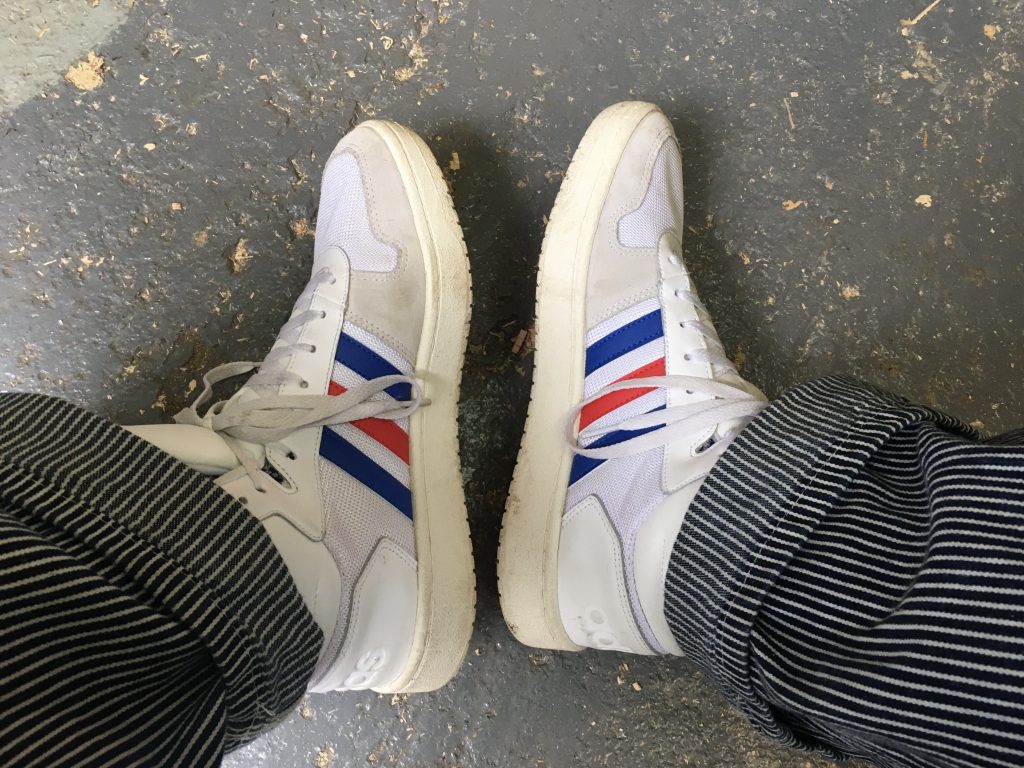
Also pictured in today’s post… footwear! A pair of Adidas retro-ish ‘80s basketball type sneakers, that I wore whilst working, and some much older shoes I can’t bring myself to throw away.
Picking up where I left off yesterday, I wanted to finish the second tier. This meant adding holes for pens, pencils, screwdrivers, the dovetail square, and various other odds n sods.
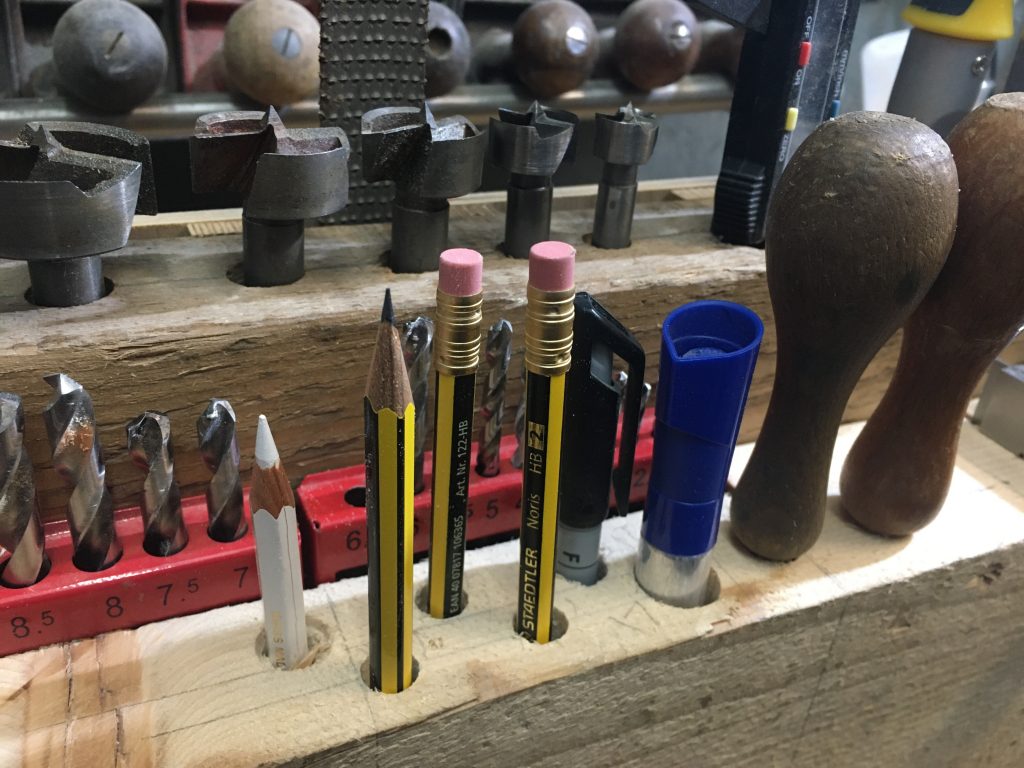
The pen and pencil area.
The pens and pencils are the first instance of possible overcrowding, as they get in the way of easy immediate access to some of the drill bits behind them. One solution might be to make the holes deeper. But. Think I’ll leave them for now, as that runs the risk of shorter pencils disappearing into the holes altogether.
Added a hole for an x-acto knife, by the glue.
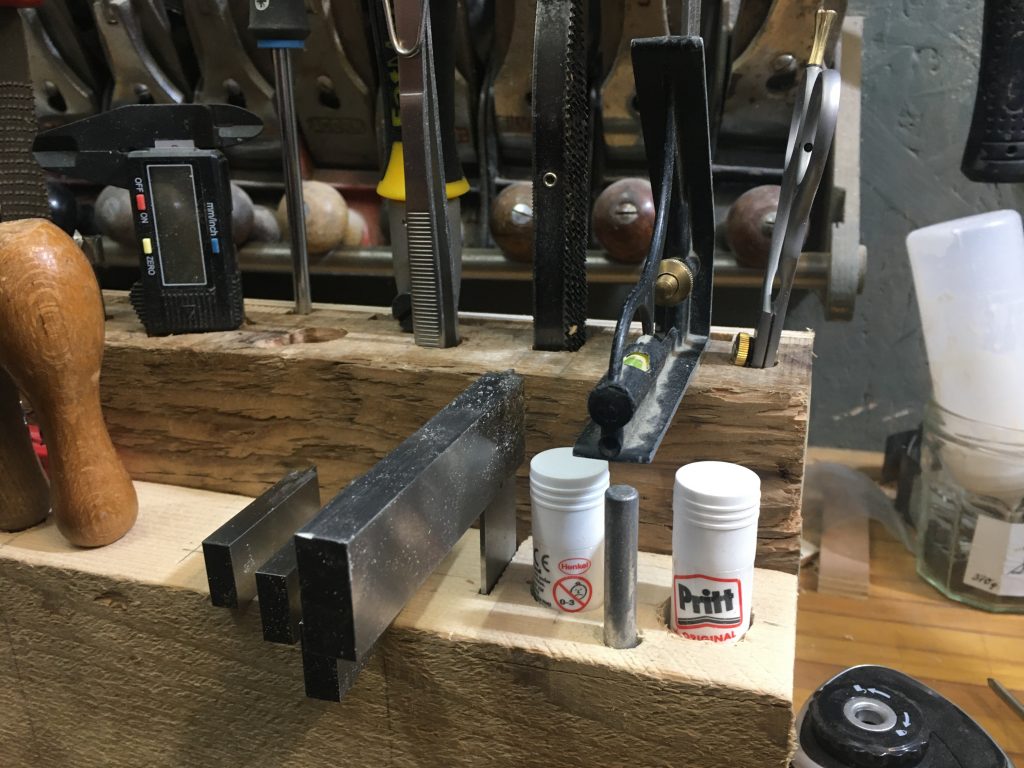
I’m happy with how three of the machinist’s squares are stored. Only the largest one presents an issue. I made little strips to fill parts of the slots that the smaller ones go in. But the larger one is too tall to sit plumb with the others. What ought I do?
Camera went a bit misty!?
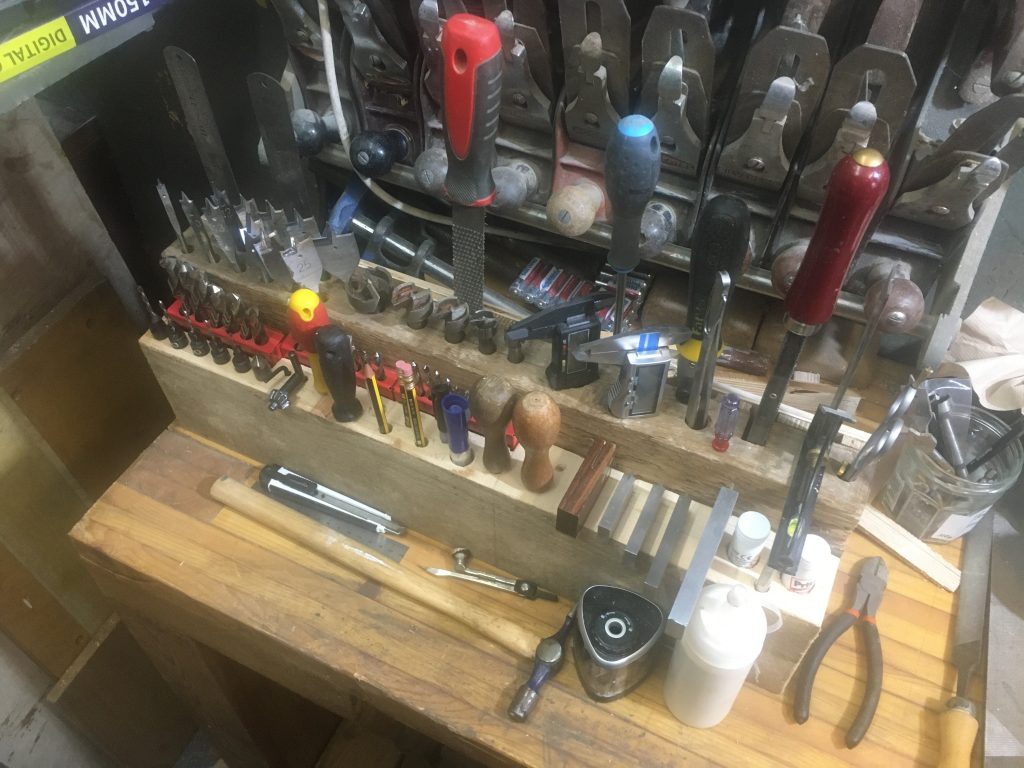
This slightly misty view shows tier two fully loaded. And, in front of the whole shebang, a few of the remaining tools I want to incorporate somewhere, poss’ some in a third tier. Certainly I want to incorporate the pencil sharpener. And the little glue bottle would be handy as well. And some AA and AAA batteries…
I think I’ve mostly avoided overcrowding. But one notable exception is the area in the front middle of tier two, where screwdrivers and pens/pencils block access to the drill bit set immediately behind. Time will tell if this is a problem or not. For now I’m going to leave things as they are.
The squares end includes glue and an exacto knife.
The third and final tier, as yet unbuilt, will house the few remaining tools. Hopefully!? This said. I might leave a third tier/block, as there’s not that many bits and bobs left over. And one or two of those that are still without a place might be best in tiers one or two (the hammer is quite big/tall, and should go at the back).
On the other hand, an argument for going ahead with tier three is that it’ll create space for batteries (AA and AAA), the small glue dispenser, and the electric pencil sharpener (which I adore!). Hmmm? These are tomorrow’s decisions/projects!
* One solution might be to swap out the current screwdrivers for shorter/smaller handled ones.
Today I wanted to continue work on my tool caddy. But I slept in late. This is a bit of a problem at present; often unable to sleep at night, I’m then exhausted and in need of sleep during the day!
This hat arrived today. Was supposed to be blue!
Once I was up and about, I went to Wright’s Tools, for the missing bits for the HSS metal-drilling set I have, with a view to incorporating that into the caddy. Once I’d got those (and a set of tapered countersink bits), I had a long overdue haircut.
On finally getting home and getting started on the caddy, it was time to begin work on tier two. I needed to find a bit of wood that was suitable. Fortunately I have plenty of scavenged timber lying around, and very soon had what I wanted.
The second tier at close of play today.
One other thing I ought to perhaps note, is that the lumber I’m using for the big blocks, or tiers, is very rough. It has required planing flat. For which I have had to set up and sharpen my main plane. That has been going better than in the past.
The primary plan for today was to incorporate the multi-part HSS drill bit set into this part of the caddy. This involved working out how to accommodate the three mini-caddies. Here I diverged from the way Patrick Sullivan did his ‘instant access tool centre’.
I also committed the cardinal sin of not planning so much as busking it! But so far that’s not proved disastrous. Still… time will tell!
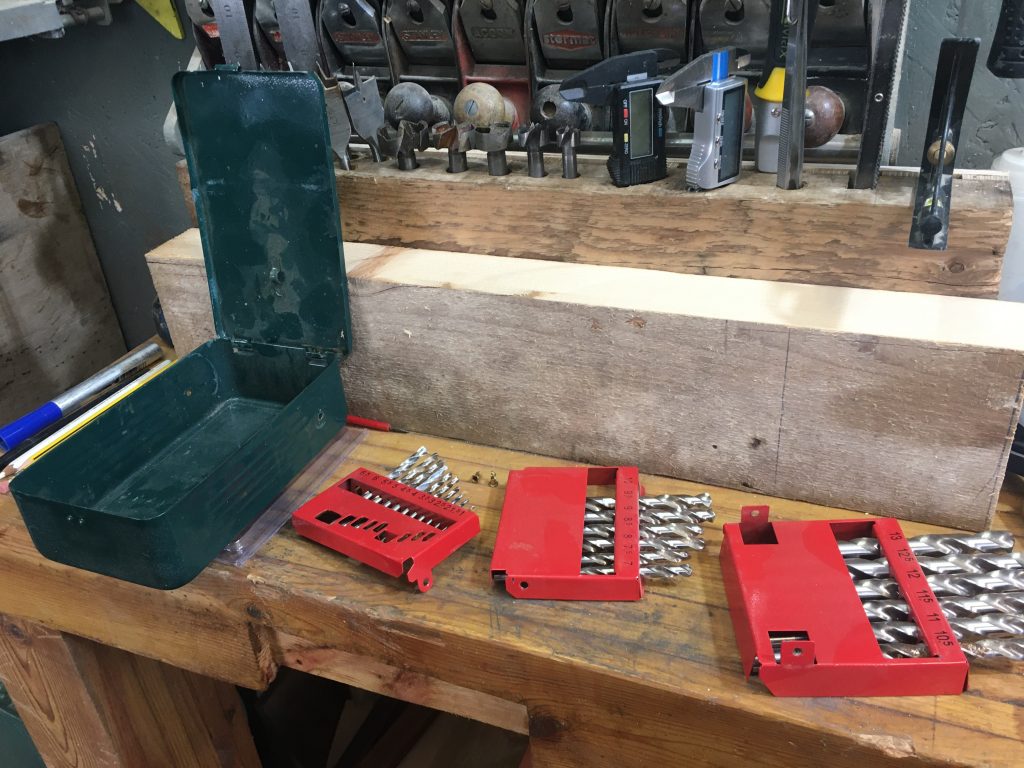
Disassembling the drill set.
I finally knocked off working on this at about 9.45 pm. And now I’m typing this. I could easily have carried on all night, or until this phase was complete.
As relayed above, I decided to buy the missing and/or broken drill bits from the HSS set of metal drilling bits I already have, rather than buy an entirely new set. And then disassemble that unit, retaining the individual drill holders.
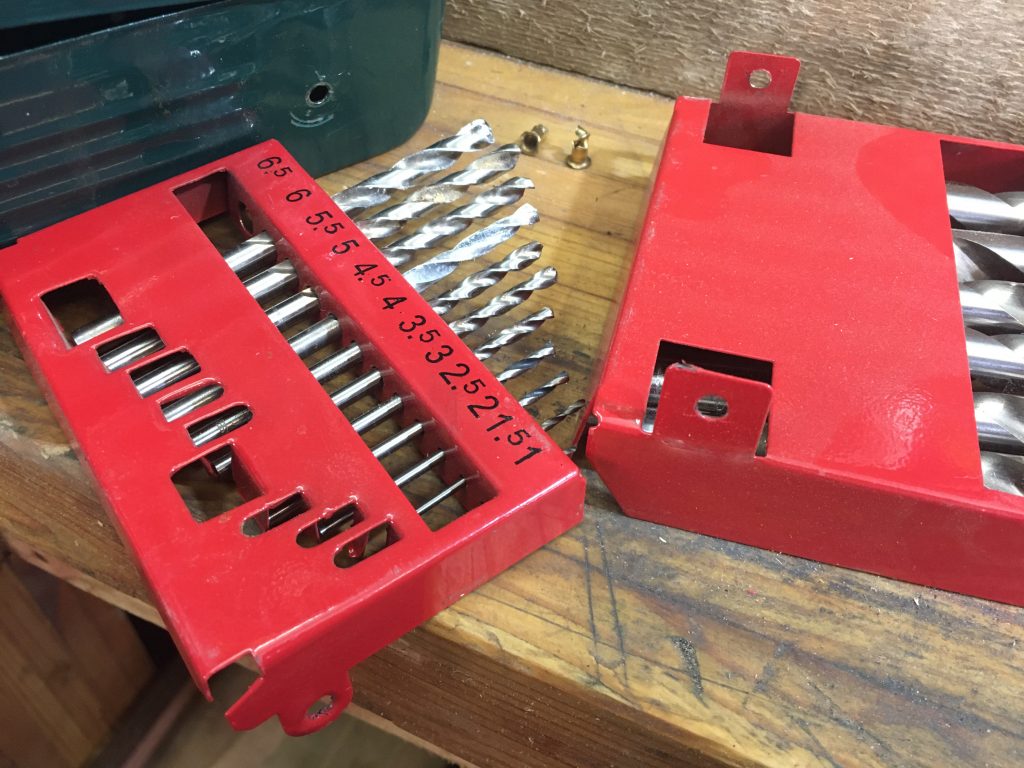
Some tabs needed removing or bending.All done, ready to go in situ’.
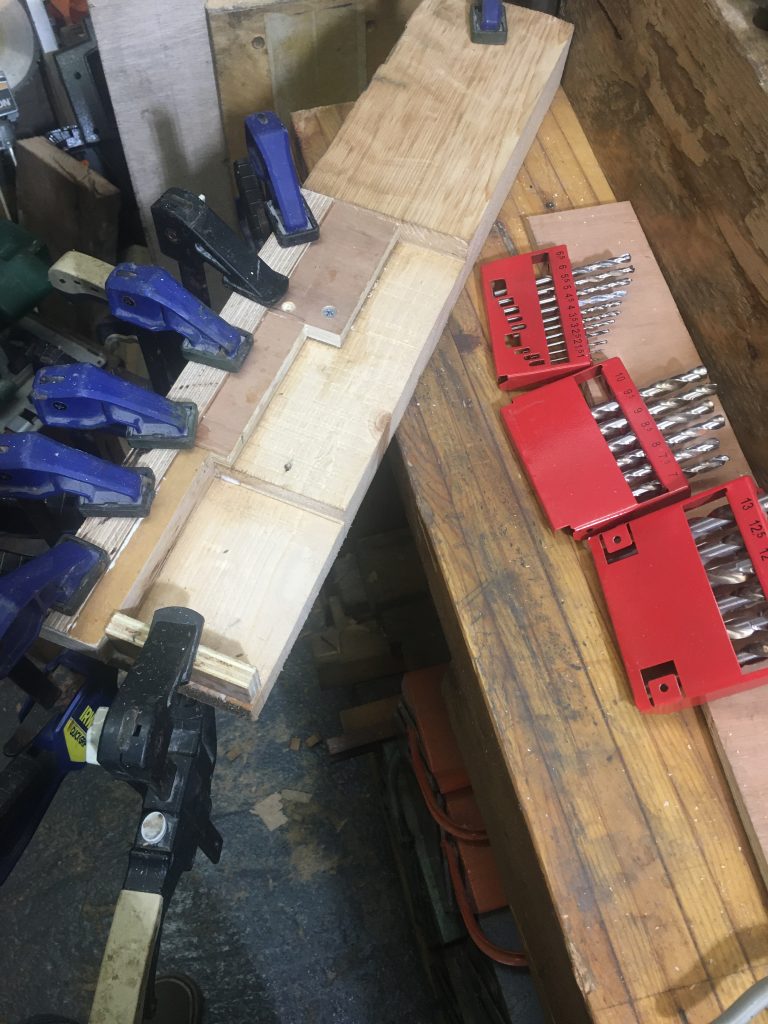
To make the recesses into which these drill bit holders would go I cut a load of passes on the table saw, snapped off any residual ‘fins’, and chiselled, rasped and sanded the resulting recesses relatively flat. This went ok-ish. But I could’ve been a lot neater and more accurate.
Gluing support blocks into the recesses.
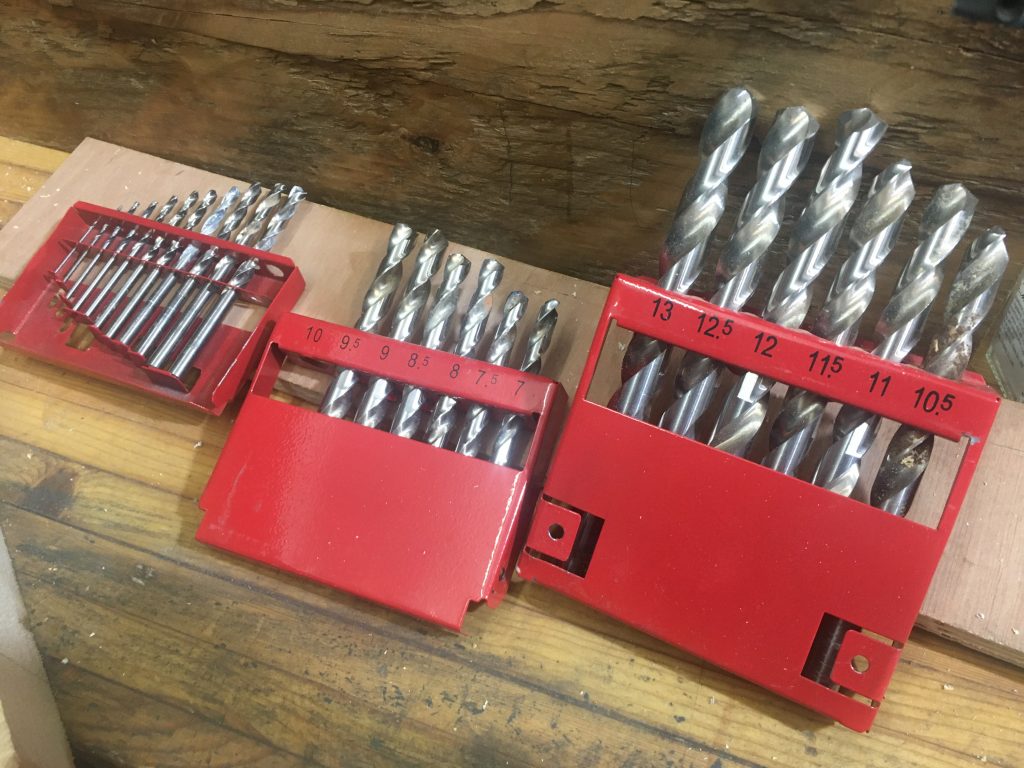
I then glued blocks of varied sizes into the bottoms of the recesses, on top of which each of the three drill holders would sit, with enough of each little red caddy showing to allow easy reading of the bit sizes, that are handily printed there.
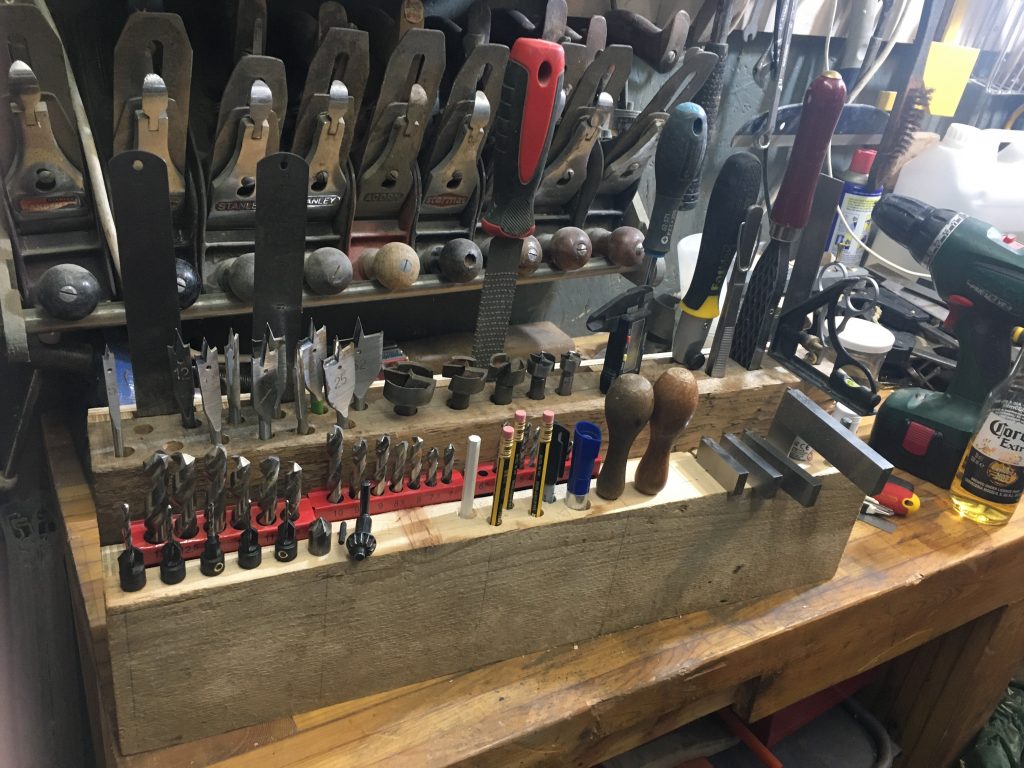
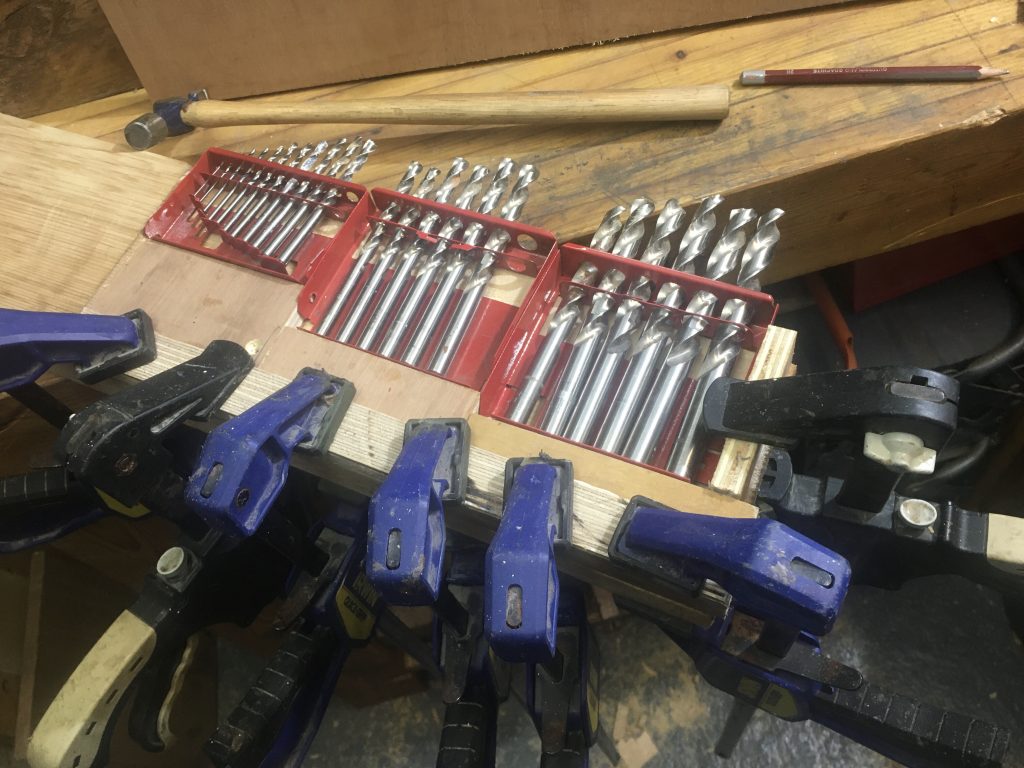
‘Mock-up view’, testing fit during glue-up.Lots of stuff given a new home; but plenty of space for more.
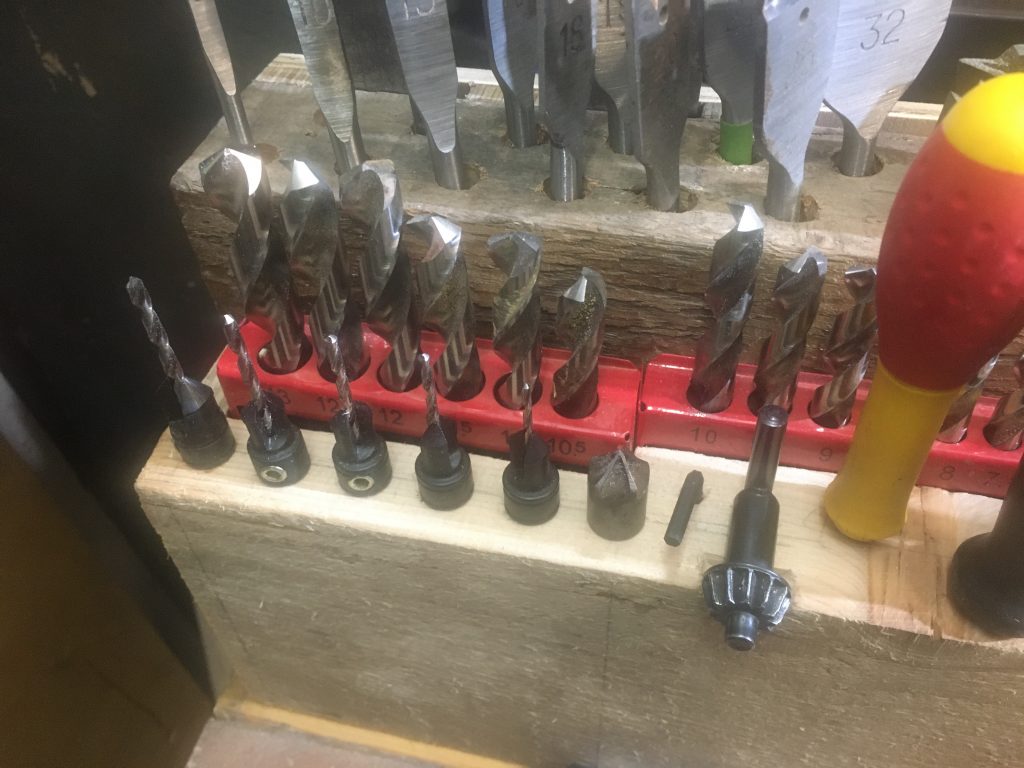
Here’s another near identical photo to the one up top, showing the stuff I’ve made homes for in tier two: the HSS drill set (1-13 mm, in 0.5 mm increments); five tapered drills with countersink attachments; an allen key for the former; a countersink bit, and drill-chuck key; two awls (round and square); four (new!) engineers squares, two glue-sticks, etc.
I didn’t cut the slot for the dovetail ‘square’, visible in these pics, as Teresa was on the warpath about me stopping for the night! But I did add a rasp/file, to one of the rear ‘tall-boy’ slots. I also added a small round hole to the top tier, at far right, for the scissors I recently got off Amazon Vine.
They’re actually hairdressing scissors, but they’re great for the workshop as well (oh, and as previously mentioned, I had a haircut, at one of our several local Turkish barbers*).
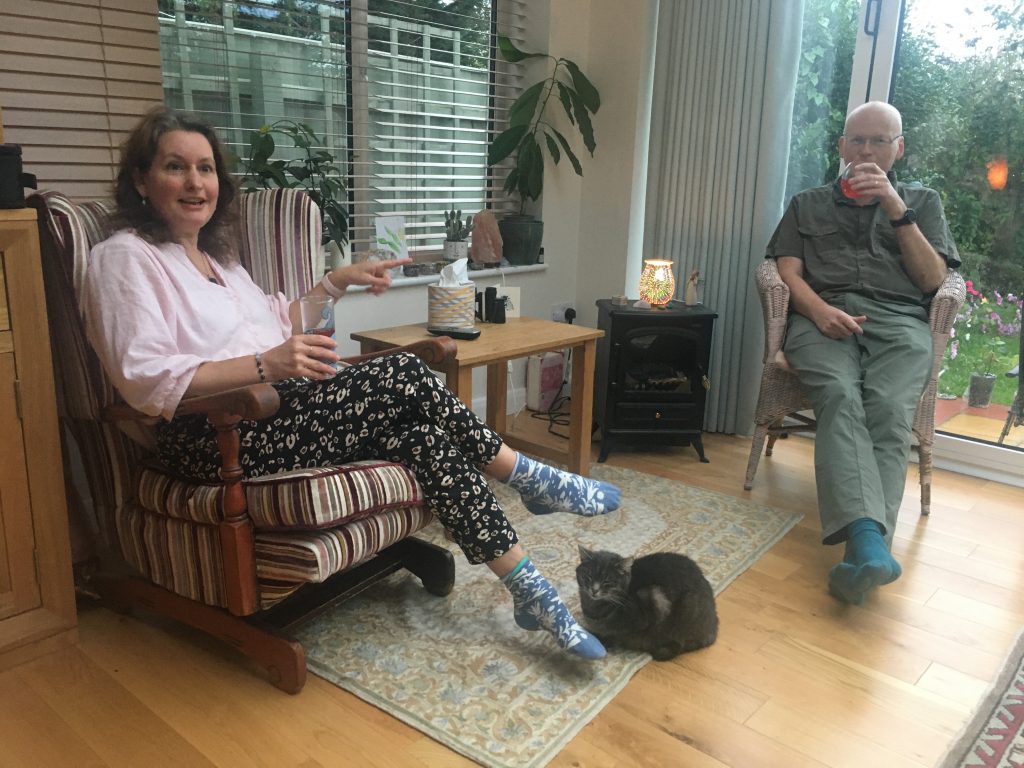
Amy, Misty and Dan, chez Ellis.
Earlier in the day I collected Teresa from town, after she got off work. And we dropped in on Dan and Amy, for a cuppa and a catch up. Dan has his fourth chemo’ session tomorrow. Apparently, at his most recent meeting with his specialist, they reported that treatment so far has been going exceedingly well. With a better than expected response. That’s great news!
* Daniel, my barber, was (and doubtless still is) Bulgarian. The post haircut massage – scalp, neck, shoulders, arms, etc. – was the best I’ve ever had!
I followed up phase one of my tool caddy build, with the second step: adding a back panel/spacer strips, for taller and thinner stuff.
Much to my surprise and delight, since my most recent major tidy up and reshuffle, whilst things are far from complete or ideal, I can at least work in the shed workshop space now.
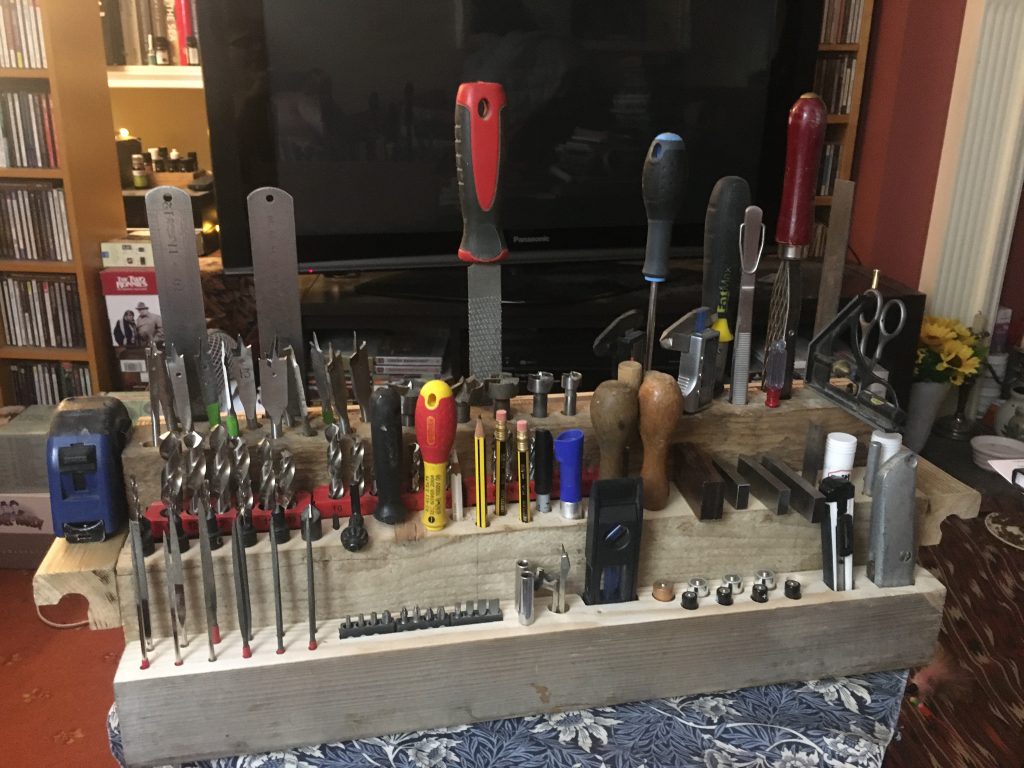
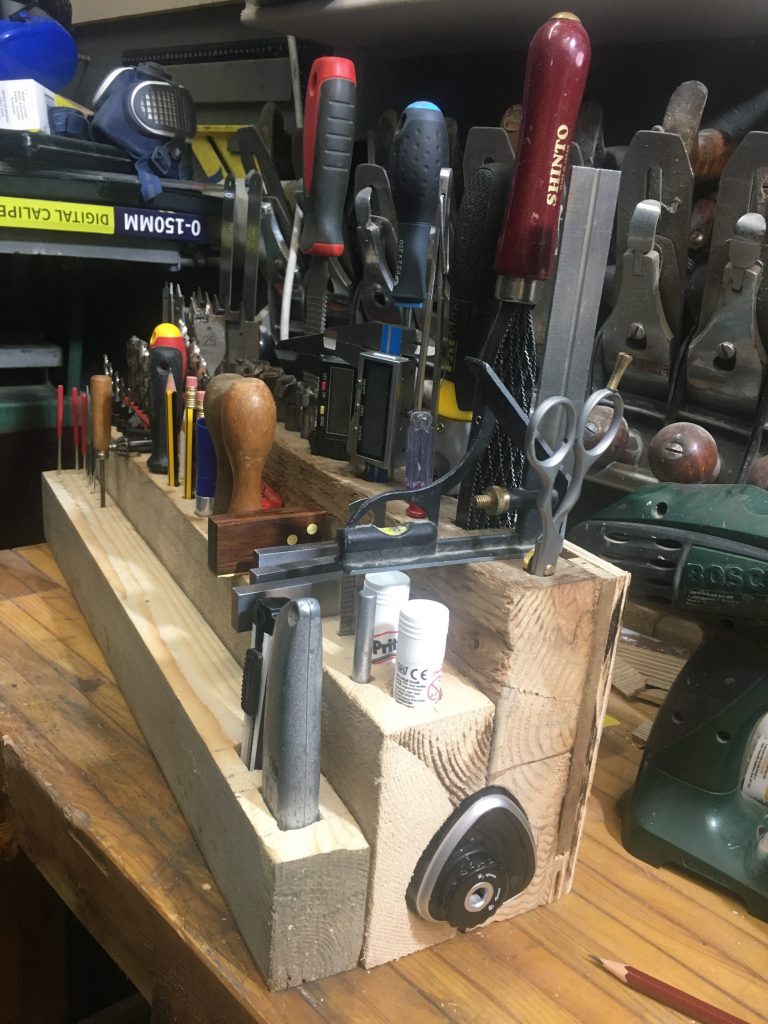
This ‘instant access’ tool caddy should help increase efficiency.
Cutting and gluing spacer strips for the back panel.
I used marine ply for the spacers, busking the dimensions completely. It would later transpire, rather miraculously, that these spacers turned out to be near enough the exact same thickness as a piece of random ply I bought from West End DIY. How unlikely must that be!?
Cutting spacer strips with the super basic sled.
Cutting stuff on the Kity is going well at present. Although I think the blade – the same one that was in the machine when I bought it – needs either sharpening or replacing. And the very basic cross cut sled I made/adapted is doing sterling service.
Gluing the base strip on the rear of the tall segment.
The strip that runs along the bottom at rear is there to stop certain things, such as rulers, dropping straight through. I chiselled a few little bits away here and there; not all the way through. Just sufficiently to add more depth for some of the tallest ‘tall boys’.
The back panel gluing up, clamped and weighted.
After gluing the back panel in place I also screwed it in position. After which I planed some of the faces a little, to smooth and square things up a bit. Like Patrick Sullivan’s version of this idea, which is my inspiration for this project, mine will have two more sections, or tiers.
The single most satisfying part of todays work on this project arose out of a real pain in the ass: when I went to glue my spacer strips to the rear of the tall segment, I discovered there was a hump down the central axis of the chopped/glued board.
I have a planer-thicknesser for exactly this job, but I’ve still not got it hooked up to a motor, and running. I must attend to this ASAP! So I had to go old school, and simply plane the mother flat. That entailed sharpening my smoothing plane.
Time was, not that long ago, when I hated doing this, as I’d spend ages getting nowhere. But I now have the right tools – a plane-iron guide, a whole range of abrasives, etc. – and a few planes in basically good shape, that just need fine-tuning type maintenance. So it was pretty quick and easy restoring a keen edge. And once done, planing the rear face of this block proved easy as pie!
I’m quite keen to continue covering swathes of work from my favourite musical artists. With Genesis this basically means from when Phil Collins joins up to the 1980s, or put another way, the decade of the 1970s. So mostly the Peter Gabriel era, but also the earlier Phil Collins period, when they were still more prog rock, rather than clever pop.
Discography: From Genesis to Revelation, 1969, Trespass, ‘70, Nursery Cryme, ‘71, Foxtrot, ‘72, Selling England by the Pound, ‘73, The Lamb Lies Down On Broadway, ‘74, Trick of the Tail, ‘76, Wind & Wuthering, ‘76, Then There Were Three, ‘78, Duke, ‘80.
Not sure if I’ll do any of the albums after Duke? Indeed, I may stop at W&W. It’s really their ‘70s prog-rock era that interests me most, and within that the earlier era, with Peter Gabriel is, at present my favourite.
ALBUM REVIEWS:
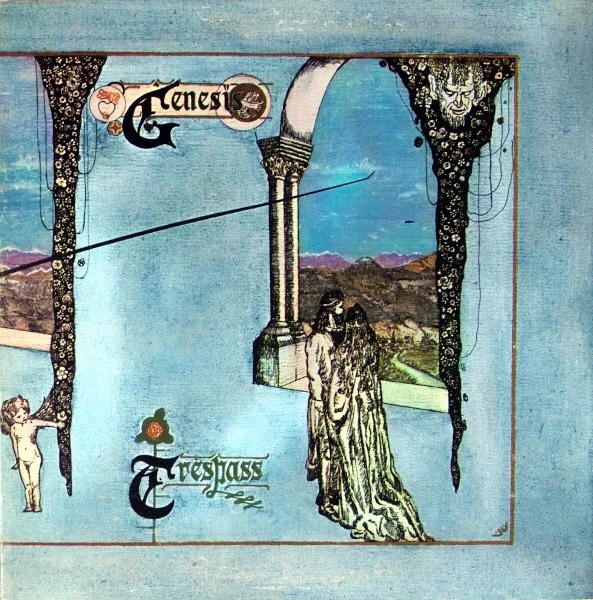
Trespass, 1970
After a debut recorded whilst still at school, by a band aged 15-17, and comprising efforts aimed squarely at pop, Genesis came back, after exams, and …
Nursery Cryme, 1971
Foxtrot, 1972
Selling, 1973
Lamb, 1974
Peter Gabriel goes out in style.
I’m not totally sold on the whole ‘concept album’ aspect of prog. It’s a bit too much like musical theatre for me. Something I’ve never really dug. And the whole theatrical side of prog can be the least appealing aspect of it, partic’ in hindsight. At least for me
So the whole story schtick, with the associated imagery, and Gabriel’s surrealism gone long-form, none of this is what attracts me to or is what I really enjoy about Genesis. What I enjoy, pure and simple (in a manner of speaking!) is the music. The sonic worlds they create leave more room for my own personal response to the synaesthetic and poetic aspects of what music, as the most inherently abstract of the arts, can potentially be.
Having said that, undoubtedly the very attempt to tell a story across a double-album does of course have its consequences, such as the bookending (-ish) with the two ‘on Broadway’ variants. And this aspect of the ‘grand project’ I find less irksome. Indeed, it can give this more ‘pop’ type sound world something more akin to the scale and scope of what’s commonly called ‘classical music’. And that can be, in the right hands, as here, a good thing.
And as Peter Gabriel’s final work with the band, it’s a pretty magnificent way to bow out. I’ve often wondered, esp’ when watching film or video footage of the group, what the internal band chemistry around Gabriel was like.
The rest of Genesis are very focussed on their jobs as musicians. Gabriel, with his bizarre hair cut, exaggerated mannerisms, costumes, and flirtations with instrumental involvement – the flute and tambourine aren’t too unusual, but his own personal kick drum? that’s a bit odd – cuts a lone and very pronounced theatrical figure. Part vaudeville, part po’-mo’ neo-Dadaist performance art, I can’t help but feel it might’ve been both blessing and curse.
The blessing is that it draws attention, the curse that it draws attention. And as an interview included in the fabulous concert footage from Paris, ‘73, below, testifies, Gabriel’s pop star antics can become a distraction from the ‘pure music’ side of Genesis.
A Trick of the Tail, 1976
The first post-Gabriel album is, perhaps a little surprisingly, a relatively smooth transition. Musically and lyrically things appear, at first glance, to be little changed. And Phil Collins sounds remarkably Gabriel-esque.
But, truth be told, something has changed. Well, obviously… Gabriel is gorn!!! But that does have a knock-on effect. Even though the material seems very similar. It’s hard to quantify precisely how and why this might be so. But it indubitably is!
It’s interesting that the first two numbers are heavily vocal, and have no drums or percussion. Almost as if they’re settling Collins into his new lead vocalist role by temporarily switching off the drumming! Dance On A Volcano and Entangled are very much standard ‘70s Genesis lyrically, melodically and harmonically.
Once the drums are back in, on track three, Squonk, and the remainder of the album, it all sounds even more Genesis-ish. Although, having said this, there is something imperceptibly changing.
For me this album reaches its greatest heights on Ripples and the title track. Ripples could easily have been happy at home on a Gabriel-era album. But the title track, A Trick Of The Tail, sounds like a band feeling it’s way tentatively into new territory. And doing so very effectively.
Los Endos is, for the most part, pretty frantic, and one can’t help feeling there’s more than a little Brand X jazz-fusion vibes entering the picture here.* Tony Bank’s synth sounds help anchor things in Genesis territory, but the frantic hyperactive drum and bass combo may sound, to some, a touch like ‘trying too hard’, perhaps?
I like Trick of the Tail. A lot. It’s still very much classic ‘70s Genesis. But you can hear, with Gabriel gone and Phil on the mic’, that things are starting to shift.
* Brand X were (indeed, still are!) are jazz-fusion group formed in 1975, for whom Phil Collins was the drummer for a number of years. And Trick of the Tail came out in ‘76, the same year as Brand X’s debut disc, Unorthodox Behaviour.
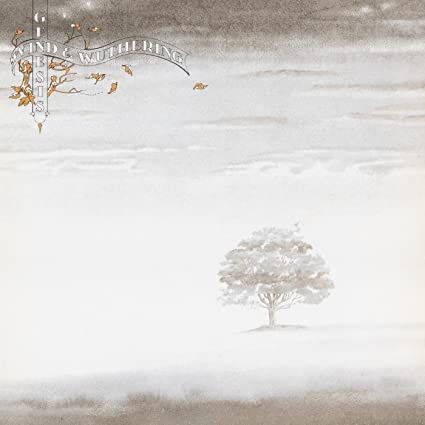
Wind & Wuthering, 1976
Goodness, Phil Collins was productive in ‘76! Two albums with Genesis , as well as the debut for Brand X. Perhaps a little strangely, coming after Trick of the Tail, Wind & Wuthering actually sounds more like the pre-Collins Gabriel Genesis. At least on the first two tracks, Eleventh Earl of Mar and One For the Vine.
Having just listened to several mid-70s Genesis albums in succession, it’s quite amazing, especially given how distinct both Peter Gabriel’s and Phil Collins’ voices are individually, how alike they are in the context of Genesis! Remarkable!!
There are, as with Trick, signs of the musical evolution of Genesis from prog behemoth to pop leviathan, even just within the many parts of the epic second track, most notably during a brief slightly disco-beat inflected segment. One For The Vine is properly prog-tastically enormous, clocking in at about ten minutes, and maintaining interest the entire time. Amazing to think music like this one cracked the upper reaches of the album charts!
What a cracking album! Your Own Special Way is an absolutely beautiful number. And whilst sounding totally ‘70s Genesis, does subtly hint at a gentle move towards pop melodicism, especially in the marvellously pretty choruses. Could this be my favourite Collins-era Genesis album. I certainly think so!
After the beautifully melodic mellowness of Your Own Special Way (a definite contender for my all time favourite Genesis track), we’re somewhat rudely awakened from our reverie with Wot Gorilla? A reminder that ‘76 was a Brand X year as well as a Genesis one! The music is very Genesis, but the drum rhythms are high-octane jazz-rock fusion.
After the brief blast that is Gorilla, we return to the more epic and lengthy soundscapes of All In A Mouse’s Night, whose cute lyrics are simultaneously very Gabriel-esque, if a little lighter. Again the keys-heavy sound is pure ‘70s Genesis, and gorgeous. But the drum sound is morphing into something more muscular, intense, and modern. A heavier direction other progsters – King Crimson spring to mind – would take to great extremes in years to come.
Blood On The Rooftops starts with some utterly gorgeous classical guitar from Steve Hackett, on what was to be his final album with Genesis. And then Collins comes in on vocals, and Banks on mellotron, and finally the whole band. And, lo, it was good! It’s worth noting that this was originally a love song, but new lyrics of a more cynical cast, about TV news were chosen instead. The juxtaposition is odd and unusual, but both music and lyrics are terrific, so that the odd marriage works extremely well.
Like Wot Gorilla, Unquiet Slumbers is uncharacteristically short, for Genesis. But otherwise it’s very unlike Gorilla. Both are instrumentals but where Gorilla is intense thanks to Collins’ Weather Report-ish drumming, Slumbers is spacious, mellow, and drum free.
As if to make up for this, it then segues into the rhythmically intense and bombastic In That Quiet Earth. Surely rather misleadingly titled, the power and energy here again bring Collins’ Brand X jazz-fusion chops to the party. But Banks’ synths keep things sufficiently Genesis to balance the fusion flavour.
The album winds up with Afterglow, which also returns us to the album’s more dominant mellow feel. Gorilla and Unquiet Slumbers were relatively aberrant, as overall this a gently intense slow-paced disc.
OTHER ALBUMS: Abacab, ‘81, Genesis, ‘83, Invisible Touch, ‘86, We Can’t Dance, ‘91, Calling All Stations, ‘97…