HOME/DIY: Workshop – Mini-saw-bench, Chest o’drawers, Shooting-board & Plane #3, etc.

Saw bench timber
Old floorboards, roughly cut to size for my little saw-bench.

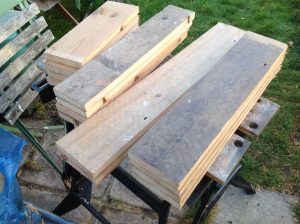
Yesterday, when I started this post, I rough cut the timber for my mini saw-bench. It’s all come from reclaimed floorboards. I think they’re pine? So that’s all ready and waiting to be cleaned up and dimensioned for the build. I’m planning to do this some time this week, as I’m on half-term.

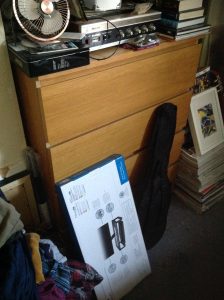
I also recently picked up a few more items from Freecycle: a new front door and frame, a few days ago. And, on Sunday, parts of a wardrobe, and a chest of drawers.

Chest o'drawers
The drawers, as photographed by the Freecyclers I got ’em from.
Broken drawer
The second drawer down. In pieces.

The front door is actually too big for our house. But it can probably be used either as the door to our art/music studio, whenever I get around to that, or simply as a source of decent quality hardwood. In the latter eventuality, the fixtures and fittings can be saved and recycled.


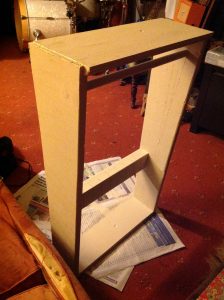
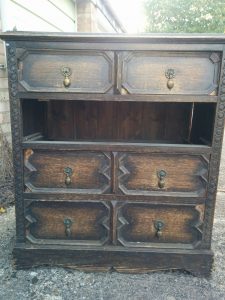
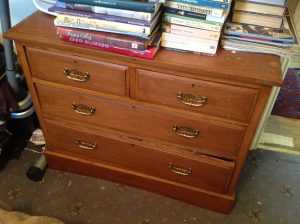
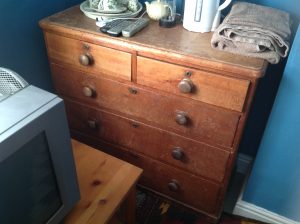
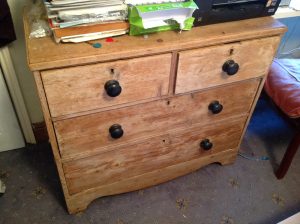
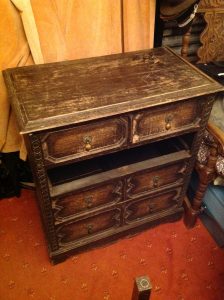
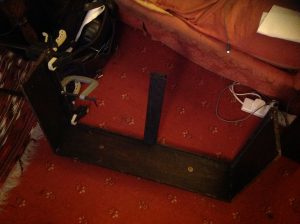
The funky old chest of drawers will be my fourth such renovation project. Pictured below are my first, completed about a year ago, second, done about six months back, and third, which is still unfinished.

Drawer reno 1
My first set of renovated drawers. Bought at a Emmaus, for £30.
Drawer reno 2
The second set, off Freecycle. Actually the third acquisition. But second completed reno’.
Drawer reno 3
Our pal Patrick gave us these. Currently they’re only partially restored.

This latest one I plan to complete, structurally at any rate, during half-term. Almost all of what has broken or fallen off is actually present, and just needs reassembling. That said, there are one or two missing or irreparably damaged elements I’ll need to fabricate. But it should be both fun and feasible.

Chest o' drawers #4.
Chest o’ drawers for renovation, #4.
Ikea drawers
Ikea drawers. Destined for the dump.

When it’s done I plan to trash my current Ikea chest o’drawers – veneered chipboard – keeping just the drawer-slide mechanisms for use in future build projects (such as our kitchen, which I plan to totally rebuild, custom stylee, at some not too distant point).


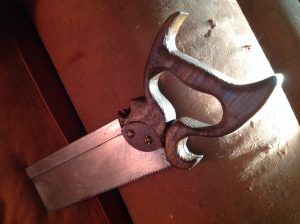
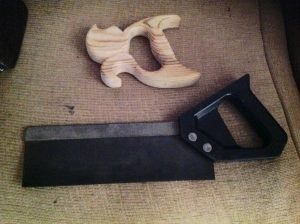
Returning to the saw-bench momentarily; having cut all the timber to width, and then sawing it to rough length – using my restored rip-saw, which is cutting beautifully – I realised I have no means, at present, of accurately achieving 90° ends.

Try as I might, I cant get decent square cuts from my chop saw. And my hand sawing skills are still too basic. Freehand planing? As things stand, forget it… more undulations than the Cotswolds!

Shooting board
My first shooting-board, gluing up.

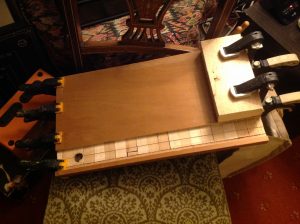
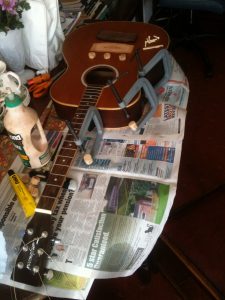
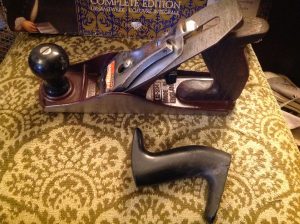
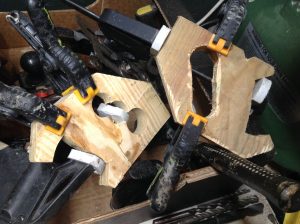
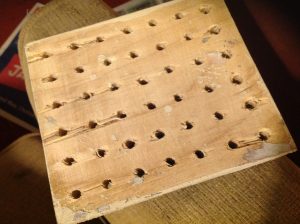
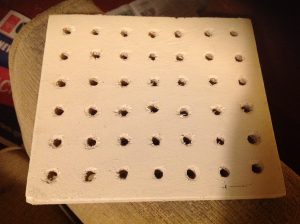
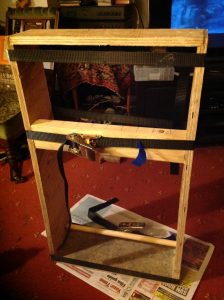
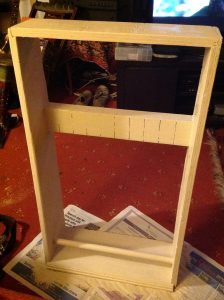
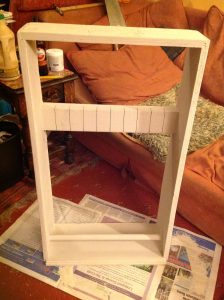
So I decided to make a shooting-board, from some scrap wood. The problem of my inability to achieve properly square cuts made this a challenge in itself. I decided to rout out a channel, as a guide track, for my larger Handyman plane, which may well become my dedicated shooting-board plane.

Shooting board
The two blocks, glued and now also screwed in place.

I recently dropped my router, and the cast-iron base fractured, which is a great pity. Annoyingly the depth-stop adjustments appear to have been affected as well, meaning that it’s nigh on impossible to prevent some movement on depth. This resulted in a channel that’s not uniformly flat … grrr! Can’t I get any tools to give me reliably accurate cuts?

Shooting board
Tigger’s not interested!

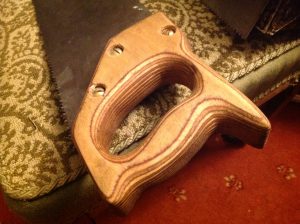
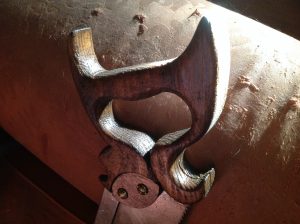
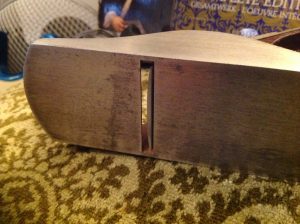
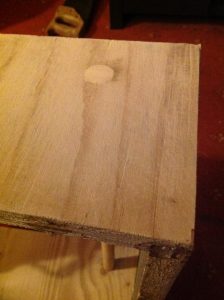
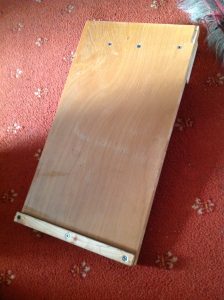
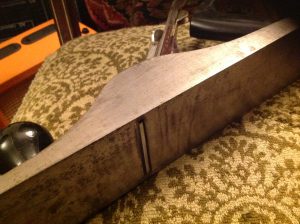
And then to top it all off, the wood I chose to use for the base of the shooting board, some former shelving, is super-laminated. Not just a laminate on the horizontal plane, but also, as the picture above shows, cross-wise; it’s made from a row of thicker internal sticks of timber. I wasn’t expecting that!

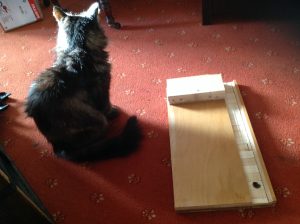
Still, it’s all a learning process. This is my first attempt at a shooting board. I imagine I’ll make another and hopefully better one at some point. But this one will probably allow me to do the saw-bench, which can be a fairly rustic affair anyway.


So, back to the chest of drawers…

Chest o' drawers #4
Crap picture of first part of renovation, re-attaching one of the internal rails that holds the bottom of the drawer.
Chest o' drawers #4
Gluing up and securing the drawer-framing elements.

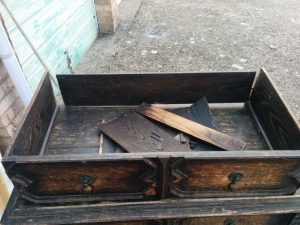
To help me wind down this evening (sound of trombone with plunger mute… ‘wah, wah, waaah’!) … I wrastled with the second drawer down, which is the most broken of the lot in our recently acquired chest o’drawers.

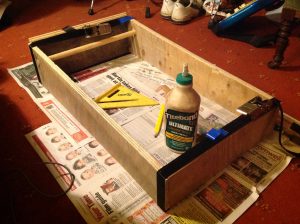
After spending ages fruitlessly trying to work with the ridiculously bowed original pieces (what had been the drawer bottoms) – inc. attempts to flatten them using moisture – I decided to simply glue up the framework, with a view to finding some suitable flat wood for the bottoms. Poss’ some of what I salvaged from the top part of the wardrobe will work?

Drawer bottom
Drawer-bottom gluing up.

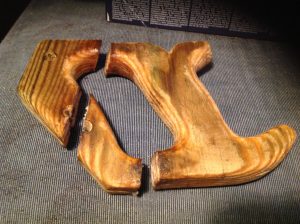
In the end, however, after a successful overnight glue-up of the drawer-frame, I was able to slide the original bowed bottoms back into their rightful places. With a little help from a block of wood and a hammer or two.

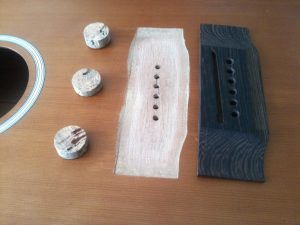
The panel on the left only split along the original (pre-dating my ownership) glue-line. Whereas the one on the right split into five separate pieces, requiring four glue-lines! Still, it’s great to be using the original wood.

The main body of the chest also needs some pretty serious attention, what with a major split across the top panel, and one side-panel split  and partially coming adrift. Indeed, the whole ruddy thing needs quite a bit of, as the Freecycler who gave it to me said, ‘tlc’.


Large Handyman
My larger Handyman plane. Now honed and set up for ‘shooting’.
Large Handyman
It took quite a lot of faffing about to get the blade set up right.

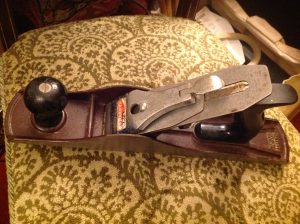
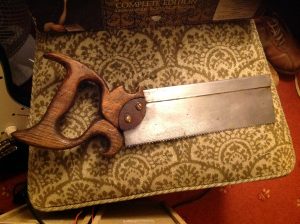
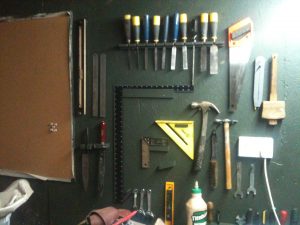
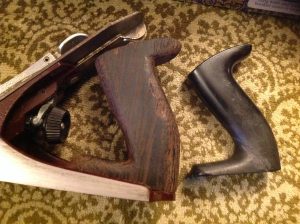
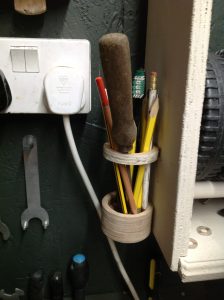
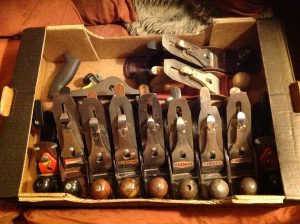
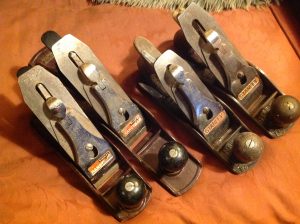
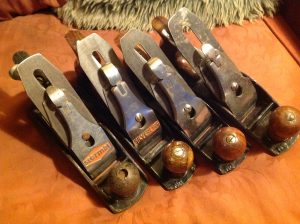
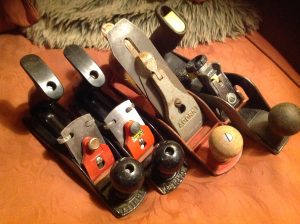
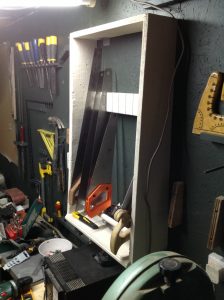
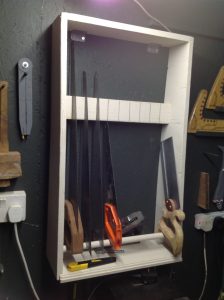
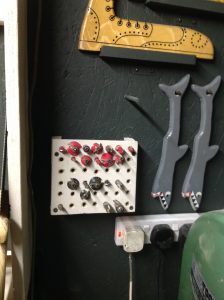
And last of all, as I let the drawer start gluing overnight, I decided to set up and hone the blade in my third and larger Handyman plane, ready for shooting-board shenanigans tomorrow. This done, I’ve now set up all three of my Handyman planes. Next I’ll start on the two Stanley no. 4s. I ought to make a rack for my planes. So much to be done!

Workshop: saw reno’ update

Tenon saw
Tenon-Saw, looking nice in the sunrise.

So, here’s an update on my saw renovations, with before and after comparisons.

Clive's old rip-saws
Clive’s old rip-saws.
New handle
The new plywood handle.
Handle
Two coats of linseed oil, and one of wax.

The first saw I did was the top of the two ripsaws pictured above, which now has a rather fat plywood handle. I might be thinning the grip part down a bit, as I’ve found the extra girth tires my hand (oo-er, missus!). I sharpened the blade, and it’s cutting a treat.

Tenon saw orig state
Tenon-saw, original state, with new handle, before it broke.
Stained handle
Stained the handle a bit darker.

The next saw I did was the above tenon-saw. I love the more intricate shape I came up with, visible in raw wood two pics up. But sadly it broke. I bodged a fix with some much harder, darker wood, that I simply glued on, thinking the two-tone effect might be nice. But I felt it was a bit too much of a contrast, and wasn’t working, so I stained it a bit darker, to homogenise the look.

This saw has also been sharpened, twice, and does cut somewhat better. But I think it might need filing flat, and all new teeth re-cutting, as the profile is rather uneven. So not all the teeth engage, and they vary in size and shape.

Rear wall, peacoat
The tools ‘n’ stuff look nice against the darker wall.

My third saw is a much smaller rip-saw; the orange handled one, in the top right corner of the workshop tool wall, pictured above. This one has galvanised teeth, whereas all the others don’t. I believe this means it’ll be tough, perhaps impossible, to sharpen?

I cut a rough shape, using the original handle as a starting point – as I have with each saw – and then add ‘horns’, and a little more shaping. This one hasn’t gone so well, with the too soft pine splitting on me repeatedly. But I’m determined to keep gluing it back together!


Fail
Saw handle #3… a failure!

Well, I’ve had to concede defeat on saw handle no. three. Not only does it keep splitting, no matter how often I re-glue it, but I’ve also been unable to get the holes I drilled in the wood to align properly with the holes in the blade. And that’s prevented me from assembling the saw, as well as contributing to more splitting issues.

Hey-ho! I have another handle blank. I may try working on that one.

Tenon saw handle
Tenon-Saw handle, this morning.

Books/Art: The Dandy’s Perambulations, 1819

The dandy
The dandy dresses.

I love how the Interweb can lead one places exotic in the most unexpected fashion. Having watched Carry On Screaming last night, I found myself reading up about Joan Sims, so oft the screeching harridan, and then Hattie Jacques, rotund comedienne, and one time wife of John leMesurier.

The dandy
The dandy meets his chum.
The dandy
The dandy and his pal lay their plans.

It was because Mr and Mrs leMesurier, as they were then, both appeared in the short film The Pleasure Garden (1958), that I stumbled upon the subject of this post, The Dandy’s Perambulations, via the excellent strange flowers blog.

The dandy
The dandy and friend go for a ride.
The dandy
The dandy scared by geese.

Sadly neither the post itself, nor the linked facsimile of the original book in which these charming images appear credit the artist responsible for the prints. Looking across the ‘net, it seems it might have been one of the Cruikshanks, with Robert the front runner.

The dandy
The dandy comes a cropper.
The dandy
The dandy taken in.

As strange as it may seem to those who know me, and despite my tendency to go everywhere, including work, in my workshop jeans, I consider myself something of a dandy. Not so much in the ‘Task of dressing alamode/According to the present code’, so much as in the inferred decadence of dressing as I please. Which, at home, might mean not at all.

The dandy
The dandy and the sow.
The dandy
The dandy back in town.

After their peregrinations leave them discombobulated, the dandy and his chum return to safer territory, ‘Where they could walk, and be admir’d/Without  their being so bruis’d and tir’d.’ Vain, pathetic, preening? But aren’t we all, to some degree, even if only in the privacy of our own minds?

The dandy
The dandy with grandmother.

I love this little book, and most especially the terrific illustrations. Whilst lampooning the vanity of the dandy, it also touches quite sweetly on common foibles, and the vintage patina it has now acquired helps portray something wonderful that transcends the specifics of the time it was made, nearly two whole centuries past.


Here’s the post where I learned about this delightful book:

https://strangeflowers.wordpress.com/2013/02/13/unknown-the-dandys-perambulations/

And here’s the link to a complete facsimile:

http://www.archive.org/stream/dandysperambulat00cruiiala

Workshop: plane renovations, progress

[pics]

Well, I’m mightily chuffed with how my scrub plane turned out. And my smoothing plane is working okay as well. So I now have two Stanley Handyman planes that work like they should, and I’ve started using them.

Pardon the low quality of the videos, but this is my first foray into video content on my blog. Hopefully I’ll get better and slicker with more experience!?

Now that I have these two working planes, I feel much better equipped to start getting into more build projects. I think the first will be the previously mentioned saw-bench. And after that, a proper full sized workshop workbench.*

The latter is very necessary, as trying to plane on a Black & Decker Workmate is really annoying. It’s way too lightweight, and bucks and jumps and rocks around like a crazy mule, even with a leg/foot bracing it.

[pic/vid?]

Next week is half-term, so I have more than the usual amount of time available. I hope I can be super productive! In addition to the two projects mentioned above, I also have a new (old!) hardwood front door that needs fitting.

this last is a very daunting prospect, as it involves taking out the old door, plus frame and ‘light’ (or window). And leaves the home insecure during installation. Gulp!

[pic: new front door]

* But this in turn requires a further build project: long reach clamps! I bought some Keruin timber for these today.

Music/Workshop: replacement bridge on my FC Tanglewood

NB: This is the first in what will be a pretty large series of archival entries, covering stuff I’ve done in the last year or two, prior to starting this blog.

Tanglewood bridge
The guitar laid out, ready for glue-up.

Some while back I got a pretty nice Tanglewood acoustic guitar, complete with soft-case, off Freecycle (I absolutely  love Freecycle, and use it loads!).

The owner was giving it away on account of the bridge failing. Thanks to a less than ideal manufacturing process, whereby the bridge is plonked on to the body with areas of the raised veneer overlapping its footprint, it’s bound to be a potential weak spot.

This bridge had pulled off and away from the body, thanks to the heavy load of tension the tuned strings generate. It was still attached, but flapped around like a barn door. And made tuning up properly impossible.

Tanglewood clamps
I attached cork to the long-reach g-clamps, to protect the body.

I was a bit stupid about removing it, and omitted a step that would’ve made the whole job better: I should’ve scored around the old bridge with a sharp knife, or scalpel, before removing it. As it was, when I prized it off, it took some fibres with it that were outside its footprint.

A new bridge was then made from some suitable looking dark wood I’d been given by a local carpenter. It’s quite a bit larger than the original bridge (you can see a ‘ghost’ of the latter in the pics), and  I kept the shape simple, with a full rectangle giving more area, for better adhesion to the body.

The bridge itself is another jazz jobbie, in as much as I didn’t really design it so much as wing it. I did of course transfer the alignment of the holes to receive the strings from the original bridge. And I tried also to get a good height, for a nice low action. But with the latter it was more luck than planning.

New bridge
The new bridge, alongside the prepped soundboard.

I really like how it turned out, design wise, as I love how it looks. And the new action is really nice. It actually took two attempts to successfully glue my new bridge to the  body, my first attempt resulting in the bridge pulling off again, in a repeat of the original debacle.

However, not one to be too easily discouraged, I tried again. The secret of success proved to be really going to town on the soundboard prep. I scored around the footprint of the new bridge, and then diligently sanded and lightly chiselled, etc, until I’d achieved a decent flat uniform surface, with a rough texture, ideal for maximum adhesion.

Clamping bridge
Clamps in situ, bridge secured and gluing. Books etc. for weight.

Gluing up bridges is tricky, because of the limited and awkward to reach access. I had to buy three dedicated long-reach G-clamps, with the added length being in the depth of mouth, i.e. horizontal, rather than vertical, so as to reach from the sound hole back to the bridge. Acoustic guitars also have numerous internal ribs or struts, which one needs to avoid damaging.

So, this was a tricky job, and took two goes. But, as I intend to one day build my own (predominantly classical) guitars, this was a good way to get my hand in, as a proto-luthier. After all, if I couldn’t simply replace a bridge, what chance have I of building a whole instrument?

Tanglewood bridge
Ta-dah! The finished article.

Anyroad, I’m really chuffed. This is now a decent playable acoustic, and sounds and feels much nicer than my old Hohner, being closer to being on a par with my lovely Yamaha classical.

Guitarist friends have been very positive about it as well. One guy, Rob, even saying that he didn’t normally like Tanglewood, but thanks to my improved bridge, really liked this one.

Workshop: making my 1st scrub-plane.

I’ve taken a Stanley Handyman #4 from my new stash of planes, and, following advice and info gleaned from several sources, primarily Paul Sellers and James Wright, I’ve turned it into a scrub plane.

Scrub plane
Stanley Handyman #4, converted to scrub-plane, with replacement handle.

Previously I had just one plane, also a Stanley Handyman #4. It’s because I already had one, and because they’re not top of the line planes, that I chose to make my second Handyman #4 into a scrub plane.

I set my home-made workshop compass to a radius of six inches, and made a paper template, and then inked in the radius on the plane iron, a la Paul Sellers. I ground the blade to remove the inked in areas and produce a curved iron, and a suitable 30°-ish bevel, using my Bosch belt-sander, and a pot of water to keep the iron from overheating.

Scrub plane iron
Here you can clearly see the curved iron.

That part proved to be the easy bit. While dismantling the plane to inspect it, the plastic handle broke. I’ve superglued it back together. But I was going to replace it with a wooden one anyway, at some point. This rending asunder brought that point into the immediate present!

This particular part of the plane renovation wound up taking ages. I’m not sure what wood it is I’m using – sapele, perhaps? – but it’s very dark, very dense, and gives off a strange smell when being machine-tooled. I spent hours shaping the handle, with a rasp, file, and sandpaper. But, I’m not too happy with it; it still looks, and to some extent also feels, very… erm… well… rustic?

Scrub plane handles
Rather rustic replacement handle. Needs more work!

As well as spending way too long shaping the new handle, I made a pigs ear of drilling the hole through it, so as to pass the long screw through it, and attach it to the plane body. Next time I make a plane handle – and I plan to replace all/any plastic plane handles with good ol’ wood – I’m going to have to be a lot more efficient.

Anyway, I finally finished a round 12.30. As in half-past midnight. I’ll have to be patient and wait till this evening, after I’m done teaching, to try it out. I’m a little concerned that the iron protrudes too much, but it’s wound back in as far as I can get it.

sensor-activated light
Newly installed worskhop sensor-activated light.
Saw handles
Two more saw handles, in their roughed out state. Gluing up splits.

Other things I did in the workshop today included hooking up a sensor activated light, for illuminating our very dark back passage (snicker), when walking to and from the shed. I roughed out two more wooden saw handles, both of which split and required gluing. And I also made a pen/pencil holder, from scraps of circular plywood, to go on the side of the new saw rack.

Pencil holder.
Pencil holder made from off-cuts.

Not sure whether to paint the pencil holder in ‘elk antler’, like my saw till, or just use some oil or varnish to bring out the laminated layers. Hmmm!?

Well, it’s a long working day tomorrow. Or, I should say, later today. And it’s coming up to 1a.m. Time to crash out!

Workshop: score!!! 12 new planes…

New planes
My box of new planes!

Wow! I just got me twelve new old planes, for £90. That’s just £7.50 each!

I was looking at new ones in Mackays* the other day, and they started around £50-60, and second-hand ones I was seeing, e.g. on our recent antiques crawl round Kings Lynn and environs, seems to start around £15-20, and then head for the stratosphere.

Stanley planes
Stanleys and Stanley Handyman.

I had to drive to Grantham to buy this lot. If that cost me £30 in fuel, then my planes are still only £10 each. Result!

I haven’t had a proper look at them yet, other than before deciding to buy them. There are about six Stanleys, of which two are the Handyman type, two are SB3s, and two are the classic Bailey #4.

There are an Acorn and Stermat – both new names to me – one Silverline, and two or three of as yet unknown provenance. One of the latter uses small disposable blades, with the spare blades kept in the handle. Weird!

New planes
More new planes!

Most of them – nine of the twelve, I think – are no. 4, although there are two smaller ones (the SB3s) and one larger one. I started typing this post sat in a café, on my way home, having restorative tea and jam tarts. When I get home I plan to start looking into exactly what they all are, and what condition they’re in.

More planes
Two more Stanleys, the smaller SB3s, an Acorn, and… ???

They look pretty good. Several having nice clean, sharp, sound looking blades. One of the Stanleys has clearly had much heavier use than the rest, as the iron is visibly far smaller/lower in the plane than all the other comparable ones. None are too rusty, nor even too dirty. Reckon I’ve lucked out!

My plan is to recondition any that need it, keep a core set, and sell the rest to cover my costs. Who knows, I may end up with planes that are practically free, or perhaps even earn me a couple o’ squid?

* The marvellous old tool shop in Cambridge.

Workshop: saw-rack and router-bit storage.

Saw rack
Saw-rack in situ.

Got my saw-rack, built yesterday, up on the wall in my workshop today.  It did prove necessary to re-cut the blade grooves, and I used my small recently renovated saw to do so. To my surprise and pleasure the two-part handle didn’t fall to bits.

Saw rack
Another view.

I also made a little doodad for storing router bits. The latter was a bit frustrating, in that despite putting a sacrificial backer board underneath the plywood, whilst I was drilling, I still got massive amounts of tear-out.

Router bit rack
The underside of the router-bit rack. Very messy!

Even worse, the top side entry holes are also raggedly fibrous. I even tried to clean these up by chamfering an edge around them, but that just added to the fibre-fest!

Router bit rack
The upper side of the same.

I was just going to glue this on, but ended up having to screw it in place. I had to re-drill the holes, as they were too tight. Doing this and using a counter-sink bit to chamfer the tops, both with my Bosch hand-drill, made the torn fibres a little less tatty looking.

Router bit rack
Router-bit rack in situ.

I ought to neaten up the paintwork, but haven’t done so as yet. Finally I loaded up the router bits I currently own. This new arrangement saves me having to look for them in their original boxes, which I can now bin, saving a little more space.

Router bit rack
A closer look… bit messy!

Workshop: One-Day Project

After a midday trip to Kings Lynn, with Teresa, to visit three antiques shops, I decided I wanted to build a one-day workshop project.

I considered doing a saw bench. But I think that’ll be next, and it’ll be a two-day project, I reckon. Instead I settled on a saw-rack. I was inspired by James Wright, but made mine smaller, simpler, and rougher, knowing I’d be painting it, not leaving it in raw wood form.

Saw rack
Gluing up my one-day saw-rack.

This is one of my many ‘jazz’ style workshop/DIY projects, inasmuch as I didn’t really plan too much or at all, really – I just grabbed what was to hand, and improvised. So nothing was set to a certain length, and then measured, etc.

Of course I did measure and reference parts relative to each other, e.g. when finding the width for the grooved saw-rest beam. And the overall size was determined first by the length of my longest saw, giving an approx. height of the frame, and second by a guess-timate of what width I might want, based on currently having  five or six saws that’ll probably wind up in here.

Saw-rack blade-rest
Adding the blade-rest.

As it is, there’s room for nine saws of a similar size to most of the ones I currently have. I may need to add a second blade-rest beam, lower down, for shorter saws. I only have one such at present, and it’s still mid-restoration, awaiting sharpening, and possibly even further handle strengthening.

The top and sides are plywood, the bottom is chipboard, and the beam and dowel are soft white woods, probably pine. As mentioned above, I just worked with whatever scrap wood I had on hand. And I had very little choice, since not much of my available wood was appropriately sized or shaped.

Dowel joint
The large diameter dowel handle rail, 20mm.

As can be seen from pictures at the top of this post, I didn’t have long enough clamps (another future project!), so had to ‘clamp’ this using ratcheting straps or belts.

The top and bottom panels are currently just glued to the sides using routed out dado joints. The dowel handle-rail is set in circular holes. And the blade-rest beam is butt-joints glued up, with two additional thin custom wooden dowels in each end, also glued in, to strengthen the joints.

Saw rack
Painting the saw-rack

And finally, whilst Teresa watched The Lord of The Rings: The Fellowship of The Ring, I glued up, drilled holes for and inserted dowels, did a little sanding, and then painted the thing in a Valspar off-white called, rather nicely I think, Elk Antler.

Saw rack
Blade-rest channels cleaned out.

I had to clean out the paint from the blade-rest channels, which was fiddly and time consuming, and will possibly need doing again, if I apply a second coat of paint. Actually they’re only the width of the recently restored rip-saw’s kerf, and will likely need opening up a bit more anyway.

Mounting this and getting some saws into it will have to wait till tomorrow. But I’m pretty chuffed, as I did actually build (and even paint) a project from start to finish, in just one day. Indeed, really in just the latter half of the day.

Saw rack bottom
The unit up-ended, so I can paint the bottom.

Admittedly it’s a bit rough and rustic. But hey, it’s just a box for storing saws. And besides, I learn something – often quite a bit, thanks to my many mistakes! – on each new project, so it’s all good. Pictured above is how it looks now, at 23:24, or close of play for today.

Home: flooring and insulation in the loft.

Given the massive amount of stuff we have, mostly clothing and art-materials in Teresa’s case, and everything under the sun in mine, putting down floorboards in the loft, to make it viable for storage was imperative.

The old insulation, and the state of the ‘floor’ of this upstairs ceiling area, were incredible. It seemed that the builders of these dwellings, or some other tradesmen at some time since, had this area as a dumping ground for construction waste. And the whole mess was then covered first by a thick layer of soot, and over that by the old and very dirty insulation material.

I would ascend the stepladder looking like Michael Jackson after he started bleaching his skin, and come down looking like he did before. And the countless buckets full of rubble, slate, and goodness knows what that I removed… it a wonder the ceiling stood the weight!

I wound up spending what, for me, is/was a lot of money, on the foam insulation blocks and tongue-and-groove chipboard flooring. The former I decided upon after watching numerous YouTube vids, with an eye to achieving insulation in a much smaller vertically compressed space. I’ve never felt entirely happy that I used the right stuff, or as to its efficacy.

The latter just seemed like standard materials for the job, making it a relatively easy if hard and tiring job. It was late summer when I did this, and I would come down regularly, for a cuppa, a wash, and a brief rest, mucky as hell, breathing heavily through my respiratory mask, my glasses misted up, sweating profusely. Ah me, what fun it was!

But it has given us a fair bit of extra storage coach, which is in continual heavy use. So… result!