Workshop: Chest o’Drawers Update, and Local Dump Score

Chest o'drawers
The drawers, fixed and in position.

This morning I had to chisel off a little bit off the new runner I had made, to support the second drawer, in our new old Freecycle drawers. Excepting for the missing bits of trim, this is now complete. And it’s already in place.

We’re off out to Oxburgh Hall, a (fairly) local National Trust property now, to make the most of a beautiful sunny day, and both having the day off work. When we get back, I’ll load all my clothes into it.

Writing box
Bought this writing box for £2!

Whilst disposing of the old Ikea chest of drawers at our local municipal dump/recycling centre, I spotted the writing box, pictured above, in the waste wood tip. Unbelievable! It’s such a lovely thing. So I asked one of the guys who work there if we could fish it out, and – if it wasn’t too bad – could I have it? In the end he charged me two pounds for it. Score!

Writing box
It’s a lovely thing, but tatty.

It is fairly dilapidated. But not so far gone I don’t feel able to have a go at restoring it. It needs new fabric; we’re going to try and match the lovely original dark green velvet. There are some marks and dings, and a few little bits of wood that need replacing. And internally, there’s need of a fair bit of restoration to the internal components, which include some lovely little drawers. It also has a lock. Will I be able to retro-fit/source an appropriate key, I wonder?

Writing box
I found these dedications or inscriptions inside.

Whilst examining it in the company of the dump employee, I found the above inscriptions. One reads ‘Ely—* Margetts, a Present from Edward Hodson, Esq, September 1850’ (or it might be 1858?), in a lovely copper-plate script. The other, dated May 18th, 1943, says ‘C. Edwards, 32 Creek Road, March, Cambs, Age 18.’ We live on Creek Road… fabulous!

Rescuing and restoring a bit of local history feels great. I’m going to give it to Teresa, as a bonus Xmas gift

Chest o'drawers
Note Philips record player, another recent project.

Returning to my first subject, kind of, on top of the chest is another fairly recent restoration job, a Philips GF 446 portable record player. This was yet another Freecycle acquisition. Did I say I love Freecycle?

When I got it it wasn’t working properly. In the end it turned out all it needed was a new stylus, which I got for under a tenner, via the interweb. Here’s a video of it in action, sat atop our former Ikea drawers.


* I can’t quite make the whole of this first word/name out!

MiSC: The Boss Approves

Tig-bench
The ultimate seal of approval, Tiggy takes his place.

I actually had my saw bench in my workshop today, and stood on it whilst painting the higher regions of the rear wall. It then came back in the house, with a view to Teresa using it.

Tig bench
The Boss approves.

But our moggy had plans of his own: a new object in the room? It must be there for me to sit on. What else could it possibly be for? He’d wanted to sit on it earlier, but had detected the Danish Oil wasn’t 100% dry.

I enjoyed making the bench, and I already love using it. It’s even nicer when other folk, be they human or cat, choose to use it.


Chest o'drawers
The renovated chest, in our room.

Oh, and I moved the chest o’drawers up to our room. I still need to fabricate a few bits of missing trim. And the second drawer still needs some fiddling before it’ll go back in. But most of the major repairs – gluing, nailing, fabricating trim and missing components (e.g drawer-stops and -slides) – is done.

I ejnoyed taking the Ikea drawers apart. I’m keeping the drawer-slide components, for possible future use. But the chest of drawers itself is destined for the local municipal dump.

Workshop: Clearing Up & New Paint

A little while back, inspired by the colour scheme in the background of a Paul Sellers video, I repainted the back wall of my workshop. The colour I chose – a little different to Paul Seller’s scheme – was a very dark green, in the grey-green spectrum, from B&Q’s Valspar range, called Peacoat.

Paul Sellers
Paul Sellers, in one of his several workshops.
Saw rack
The back wall in ‘Peacoat’.

However, I wasn’t entirely happy with how it was looking. For one thing it’s too dark. And for another, it’s not grey enough! So I went back to B&Q, and ordered some more sample pots. I find them a cheap and useful way of testing colours in situ. And sometimes the little pots are all I need.

Workshop painting
New colour on the back wall.

The new colour is called ‘Campground’, and I reckon it’s perfect. The single little £3 sample pot  was almost enough for the job! I also bought a pot of a pale creamy beige, called ‘Lark Song’, for painting any more storage units or cabinetry.

Workshop
A view of the saw till.
Router & Spade Bits
Added a little doofer to take spade bits.

I added six spade-bit storage holes to my router bit doodad, and a couple of dowel pegs, one on the saw-rack, for ear-defenders, and the other just below the router bits, for safety-goggles and face-masks.

Planes
The rest of my recent crop of planes, awaiting restoration.

I got my new planes – the four I’ve currently restored are all in the saw-rack at present – out of the cardboard box they were in when I bought them (put that in the recycling bin!). It’s nice to gloat over them!

Workshop: saw-bench… finished!

saw bench
The finished saw-bench. Ta-dah!

To my great satisfaction, I’ve now finished making my saw-bench. Sanding, knocking back corners, and a coat of Danish oil occupied me for about three hours this morning.

Saw bench
The bench, up on an old ‘workmate’, in the back garden.

Thanks to James ‘Wood by’ Wright for both the inspiration and the knowledge on how to go about it. I chose to make mine much smaller, as my shed/workshop is tiny. And where he has funky 45° bench ends – which look very cool – I opted for a simpler space-saving regular rectangular design.

Garden
Another beautiful autumn day.

Once again, it’s turned out nice, and I did my two or three hours hard labour in the garden, under a clear blue sun-filled sky. Bliss!

Saw bench
My favourite bit of joinery in this project.

In terms of successful joinery, my proudest achievement in this project are the mortice and tenons on the top, that hold the seat/cutting boards. These fit pretty snugly, and – to my eyes – look lovely, with the contrasting grain orientations.

Saw bench
More mortice and tenon joy.

Truth is, they’re far from perfect. And, like the whole thing, they’re  bit ragged. But they’re a heck of  lot better than one or two of my dove-tails! In the end I haven’t, as yet, filled in any of the voids left by the sloppier joinery. I may yet. But for now I want to get on with other stuff, like finishing the chest o’drawers restoration.

Saw bench
It’s very rough and ready, but I like it!

It’s only had one coat of Danish Oil so far. I’ve ordered some Liberon Finishing Oil off Amazon. I might put another coat of Danish on, or poss the Liberon … hmm?

I’m hoping Teresa will use this for her bedside laptop table, until I’ve built her a dedicated one, and cleared some space in the workshop for this ‘un. I have to confess, as shoddy-woddy as my woodworking abilities currently are, I’ve really enjoyed making this; I’m quite pleased with and proud of it. Result!


Workshop: saw-bench, day 4

Saw bench
All four stretchers in place, gluing up.

Well, an attack of insomnia is biting right now. It’s 2.40 a.m. and sleep, she jus’ don’t come. After an hour or so pottering around the lounge, gingerly tidying things up, I’m back upstairs. No nearer sleeping, it seems.

So I’ll start this wednesday’s post now… why not? I do hope I will get some kip in, as I’m hoping that today I might finish the saw-bench. Structurally, at any rate. Sanding, knocking corners back, and staining/finishing…  perhaps thursday?

Saw bench
Some fairly inaccurate joints.

I also have the chest o’ drawers to complete. I’ve hit a bit of a block there, in the mouldings used as decoration; I can’t find the right profiles in local DIY suppliers or builders merchants. But I can at least make the body and drawers relatively structurally sound.

There are several other projects either on the go or in the offing: Teresa’s asked me to make a small bedside table, to perch her laptop and/or tablet on. I want to make a medicine cabinet for the bathroom. A set of small drawers for my model making and painting area would be handy. And there’s a knackered chest to fix for tool storage in the workshop.

Saw bench
Getting ready to cut the tenon joints, for the top panels.

I wonder how much of this lot I’ll get done today, or during the half-term? And then there’s the front door, the cold-frames, the greenhouse, the workshop roof, the guttering on the house. So much to do. And my sleep patterns are shot to hell at present. Not very helpful!

Anyhoo, accompanying this post are several pics taken throughout the day. In the one below, the far left leg board split. Hence all the clamps. Next I’ll be transferring the peg shapes to the top boards, and drilling and carving out the holes to receive them. So, I think basic assembly will be completed today.

Saw bench
The ‘teeth’ of the tenons cut out.

There are a few voids to be filled, in some of the less accurate joints. Then it’ll be a matter of knocking back some corners and edges, sanding, and finishing.


Saw bench
The completed saw-bench.
Saw bench
And from another angle.

Well, I finally finished the basic build for my mini saw-bench. It’s very rough’n’ready. But it’s been worth doing: my first half-lap joints, my first dovetails, and my first mortice and tenons. And to make it required restoring several old saws, and overcoming numerous other issues, as the build progressed. So there’s been a lot of learning.

Tomorrow I’ll sand it, and poss try filling some of the bigger gaps. Teresa can use it as her laptop table until I make her a dedicated one! And in the meantime I can clear up in the workshop, and make some space for this new bit of equipment.

Saw bench
Dramatically lit!

One little footnote: despite practically all the pics, and quite a bit of the work itself, being situated in our living room, the bulk of the work, e.g. the cutting and dimensioning, was done in the garden. The weather has been absolutely gorgeous.

I haven’t got any room in the shed workshop itself. Occasional bits are done in there, such as drilling out the holes that will accept the tenons, before chiselling them square. But it’s way too messy and cramped in there at present. It goes in cycles: I clear up, and then as I work it gets messier and messier. I clear up, and then as I work it gets messier and messier. And so on, round and round!

Home: upstairs floors, etc.

Another entry from the archives.

Within about six months, or perhaps less, of moving in, I got a load of floorboards off Freecycle, with a view to putting nice old wooden floors back into this property.

Downstairs the fooors are concrete slabs, with carpet overlaid. Upstairs it’s all chipboard.

In the end, however, the first room I did was the box-room. And I put in a parquet floor, bought for £60 off gumtree. It had come out of a beautiful old half-timbered cottage, somewhere in Herts, parts of which dated back the the 14/15th C.

I’m not sure what wood the parquet is. The seller said oak. It seems to be two types of wood, one a kind of mushroomy grey/beige, the other a more orange/yellow-ish colour. I reckon the former might be oak, whilst the latter is probably some form of pine.

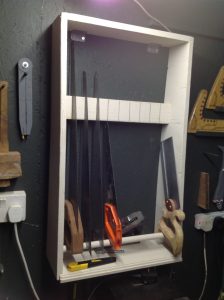
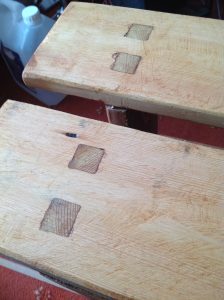
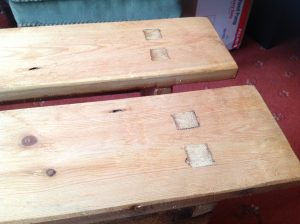
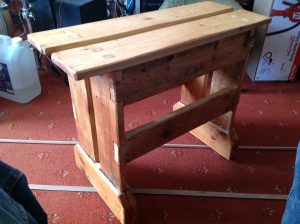
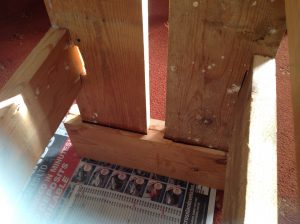
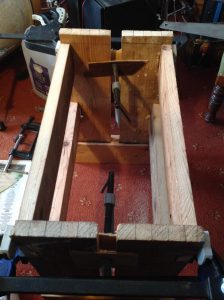
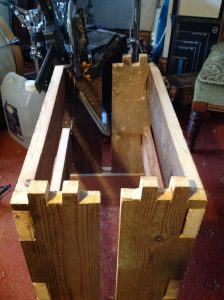
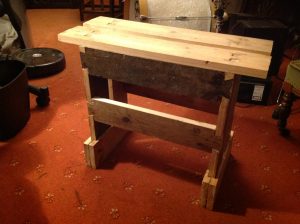
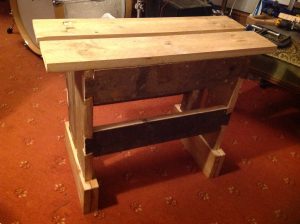
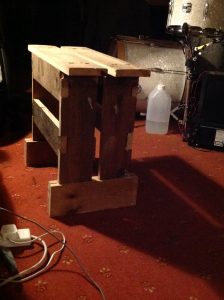
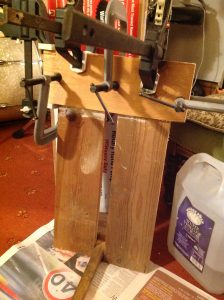
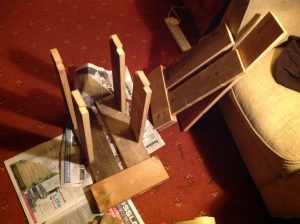
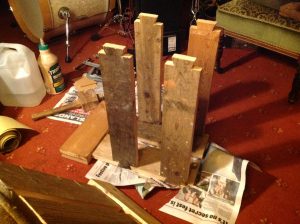
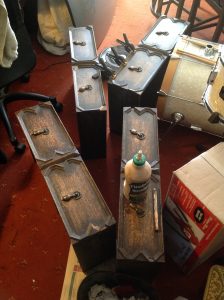
After time-consuming and unsuccessful attempts at removing the bitumen type fixative from the underside of some parquet tiles, I knocked up a ‘quick’n’dirty’ table-saw, and proceeded to trim the wooden bricks. A lot of work. And a lot of – ‘cough’ – sawdust.

I went through two circular saw blades, losing teeth and dulling them pretty durn quickly under the heavy workload. Laying the floor wasn’t easy, and I haven’t fond that good a job. But I’m happy enough with the result. It’s sooo much nicer than the horrid worn carpet we inherited from the previous owner.


The next areas of floor to get a make-over were the stairs and upstairs hallway. Ripping out and disposing of the carpeting was a dirty unpleasant job. But I kind of enjoyed it, ’cause I hated the carpet.

The stairs steps, which are a decent enough wood, were sanded and varnished, with the front vertical faces – which appear to be a cheap plywood – painted in an off-white.

The upstairs hallway – is thus what’s sometimes called the ‘landing’? – was chipboard. I tore this up and kept it, for use as scrap wood. I recycled the floor itself from my Freecycle floorboard stash.

The tongue and groove profiles had been badly damaged when these old floors were torn out. It was quite a job finding segments that still had any profiling left. And in the end I gave up on trying. So some of this flooring interlocks, and some doesn’t.

One issue still unaddressed is the discrepancy of the skirting board height. They were fixed over the now missing carpet, and consequently there’s a gap ‘twixt them and my newly installed floorboards.

On one evening, the day, or rather the night I finished laying the floorboard, I made that classic mistake of working too long and too hard. It was approaching midnight, and I’d been hard at it (titter) all day. But, with the end in sight, rather than stop and continue the following day, I ploughed on.

And, with just one small area to put boards into, I lost my balance, and put my foot through the ceiling below, punching out a segment of plasterboard. Winded and wounded, I sat a while. But after a few minutes regaining my composure, I went back to work. And the flooring was complete.

The hole in the living-room ceiling stayed in a pretty sorry raggedly punctured state for over a year. It was only fairly recently I neatened the aperture into a small rectangle, and patched it with some plasterboard I had in the workshop.


With the hallway floor done, I then removed the appalling heavily textured Artex from the walks. Even using the massively expensive and reasonably effective Ex-Tex, this was a massive and horrible job. How I loathe Artex!

For colour, I wanted a bright, warm, vivid green. Something string, and full of character. None of your tepid Magnolia! An ornate gold-framed mirror at one end, over one of our several ‘nursing’ chairs, and a Freecycle sourced bookcase at the  other, with a picture or two between, and this area is more or less done.

Some time later Teresa badgered me into putting up a curtain rail at the top of the stairs. I’m not sure what I make of this idea. It’s hardly practical. Indeed, it’s only really ornamental. The curtain pole and fittings we bought for a few quid from a local house-clearance bric-a-brac yard, whilst the green velvet is from the haberdashery section of Ely City Cycle Centre.


The original plan had been parquet for the box room, and then floorboards in the rest of the upstairs rooms. But, after the intensity of the work involved in doing the box room and hallway/stairs, when it came to the next room – our guest room – after removing more wallpaper and Artex (not sure which I hate most!?), I couldn’t face doing the floor as well.

So in the guest room I’ve currently simply ripped out the carpet, and then sanded and painted the chipboard flooring. This looks a bit rough. But, in that super-tough grey floor paint, it looks kind of cool as well.

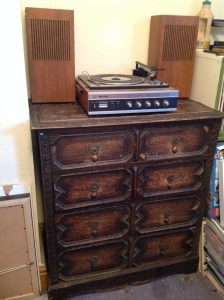
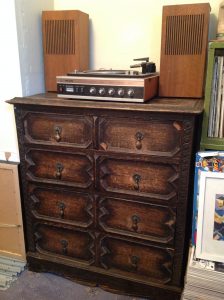
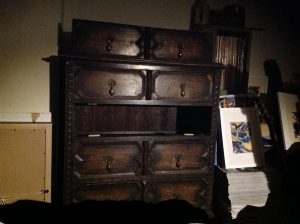
This room also got a very vivid coloured paint job. The blue I was after should really be paler, and less intense than what we wound up with. And with a restored chest of drawers (Freecycle!), some bookshelves (ditto), and Hannah!’s nice old Victorian bed, all set off by a colourful Kilim from Alistair Hull, the room is both vibrant and full of character.

We considered letting this room to a full-time lodger. But as I really don’t want to share our home with other full time occupants, instead we’re letting it via Air&B. I was worried the strong blue might put people off. But it doesn’t appear to have.

HOME/DIY: Workshop – Saw-bench progress.

Saw bench legs & foot
One foot and two legs, gluing up.

Yesterday I made one foot and two legs of my saw-bench. Pretty badly, truth be told. Today I made the other. Much better.

This time, instead of sawing down to depth and then chiselling out across the grain, I used my ‘quick’n’dirty’ table saw to hog out the half laps. This produced a much better more uniform finish, which just needed minor tweaking with (sharpened!) chisels.

I then drew out and cut the dovetails on the stretchers, using my go to rip-saw. I cut the corresponding holes to receive them in the leg that’s glued up, whilst the second and better executed foot/legs glue. The stretchers are now also in place and gluing up.

Bench saw
Both legs glued, and stretchers in one side.

So it’s just a case of waiting for everything to set up, and the glue to harden, before combining the base elements. Once the feet, legs and stretchers are all in place, I can work on the top.

When I was planning this I thought it might make another one day project. But it’s alteady taken three days, and looks set to keep me busy into the week. It’s coming out rough and rustic. But I’m learning all the time.

Saw bench
I rather like the stretchers.

Home Improvement: upstairs doors.

Another archival post, covering installation of three upstairs doors.

When we bought our current home, there were no doors at all in the upstairs doorways. This seemed a bit odd. But no big deal; I could get and install some, in the the fullness of time.

A combination of purchases from the local dump-cum-recycling centre – solid wood doors, one for £5, one for £10 – and one or three off Freecycle (some for use elsewhere, e.g. my shed/workshop, our art/music studio, and even some gates; more on these later), furnished the required doors.

It was only when I went to hang the doors that I realised why there were none. All the door-frames are out of square. Some of the frame elements were fairly okay, others were appalling, being both out of alignment and bowed or twisted.

The whole upstairs of the building has been reconfigured, with a third bedroom added at the rear, and a stairway that ran up the middle of the house, cross-wise to the axis of the property, having been turned through 90°, and now running up the side, along the length of wall.

As a result of all of this, and some of the work being fairly shoddy, all the doors required a degree of planing, some more, some less, to make the fit the openings. Two of the three doors went well enough. Only one was a bit of a mess. But I hung all three anyway.

The worst and hardest was the door coming from the upstairs hallway to our master bedroom. I had to chop out recesses for the hinges and door hardware on the inner side (although there was no door, these elements had been cut into the opposite inner side of the frame), so the door wouldn’t intrude on the space in the room when open.

And the frame itself bows inwards as it goes down the wall on the inner side, where our wall separates us from the neighbouring property. Given that this is the side on which I want the door to hinge, I had to correct this as best I could.

In the end all the doors have been trimmed and hung. None are perfect. And none shut as cleanly and smoothly as I would like. But they are all pretty nice solid wood doors. And they’re all now in situ, painted, and working.

So, far from perfect. But nevertheless, job done. And Teresa and I are happy enough with the results, which is what really counts.

Workshop: shooting board verdict, saw-bench & drawers, cont.

Well, my first ever shooting board is complete rubbish! I had to sand down the outer wall of the guide track, so the plane would ride flat on its side. That was ok. But the big boo-boo is the block that holds the workpiece, which just doesn’t have a properly flat face on which to register.

Columbo cooks
A recipe for disaster…

I’ll have to make a new and better shooting-board. And I’ll need to sharpen the plane blade a lot better, as it wasn’t shaving off wood so much as hacking it off. And even then not very well. Leaving me pretty hacked off. Oh well, you live and learn.


The chest of drawers renovation continues. Pictured below are the four drawers, with various rescued bits of trim gluing up. I also fabricated a few corner pieces, using some wood taken from the wardrobe I acquired from the same Freecyclers.

Drawers
Gluing trim to the drawer fronts.

I’ll need to make a new runner/guide thing for one of the drawers. Some drawer stops, and some of the profiled trim. I’m wondering if the trim profile is a common or standard one? And therefore whether I might be able to get some in a DIY store?


I cut the saw-bench timber to size today. That was really enjoyable. My tenon saw is, despite sharpening it, still rubbish. I tried using it, but it needs re-sharpening. Again. My rip saw, on the other hand, is great.

Then I tried to saw and chisel some half-laps for the legs and feet. This was awful. I made a right pig’s ear of it! My chisels clearly aren’t sharp enough. It took bloody ages, and I only did one side!

Saw bench legs & foot
One foot and two legs, gluing up.

Despite the right royal hash I made of this, it’s gone together, and is now gluing up. Looks like it might even turn out tolerably okay. Hopefully the second one will go a bit more smoothly? The amount of mistakes I’m making, I should be learning a helluva lot!