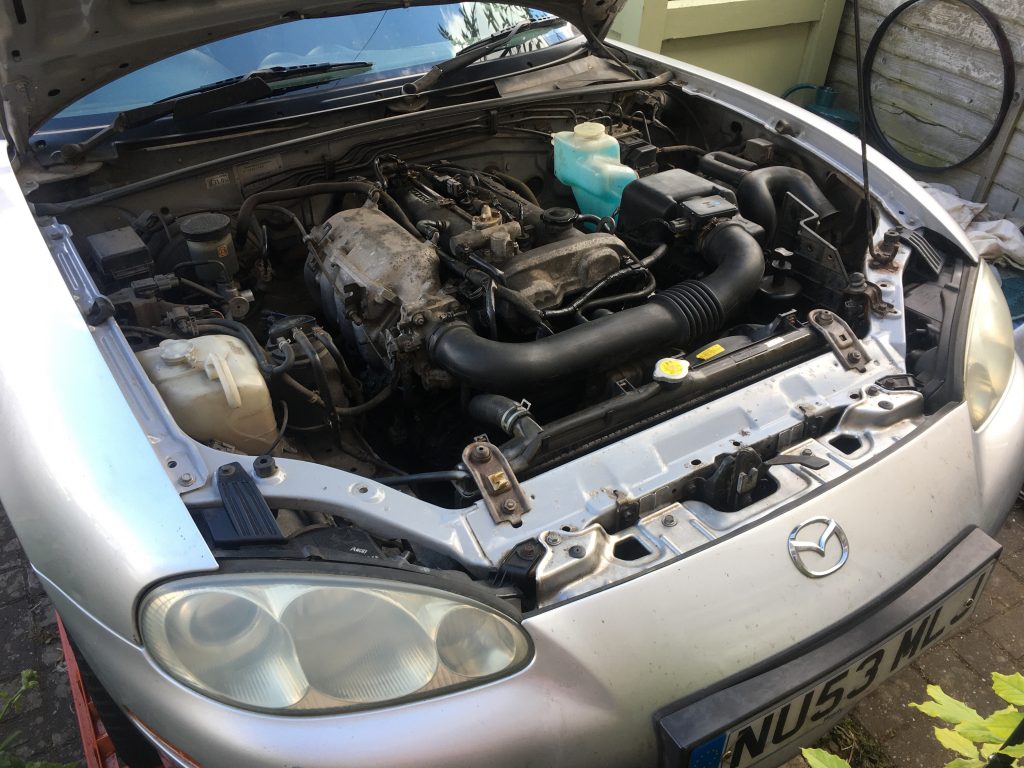
At this point I’m starting to lose count of how many times I’ve taken stuff apart and put it all back together. But I guess it’s all good, in a way? As with repetition comes better facility.
I’m posting this in its proper timeline sequence, but retrospectively. And as a result I’m a bit sketchy on detail. But I think at this point I had the engine back to life, running. But it wasn’t sounding strong or healthy.
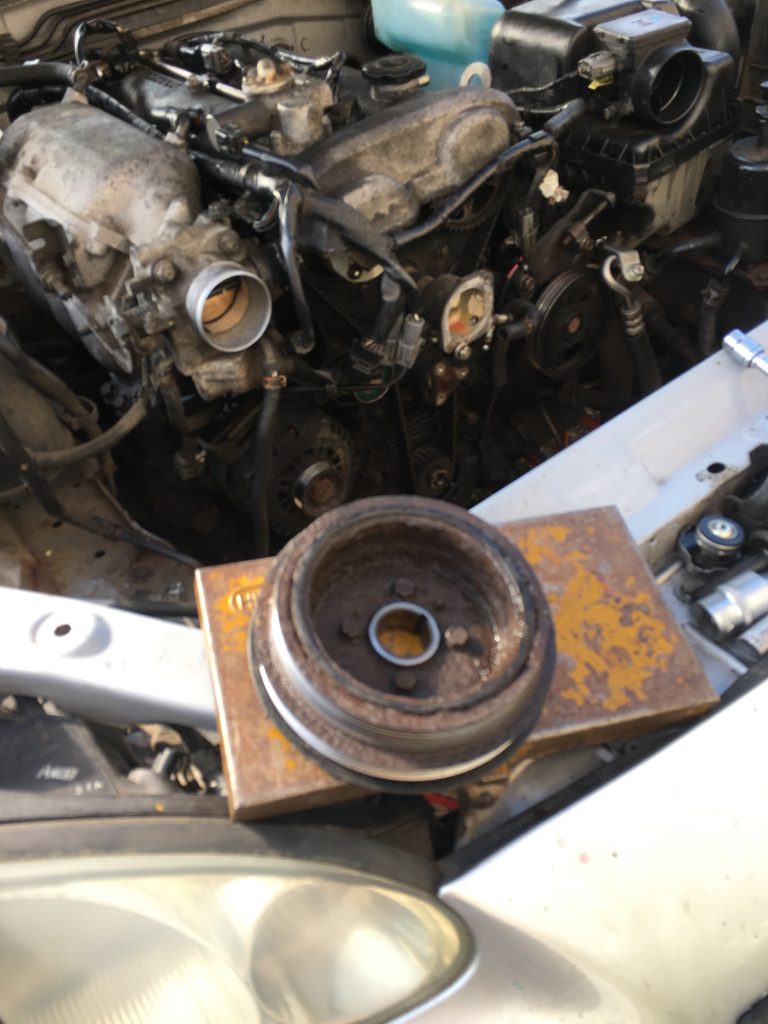
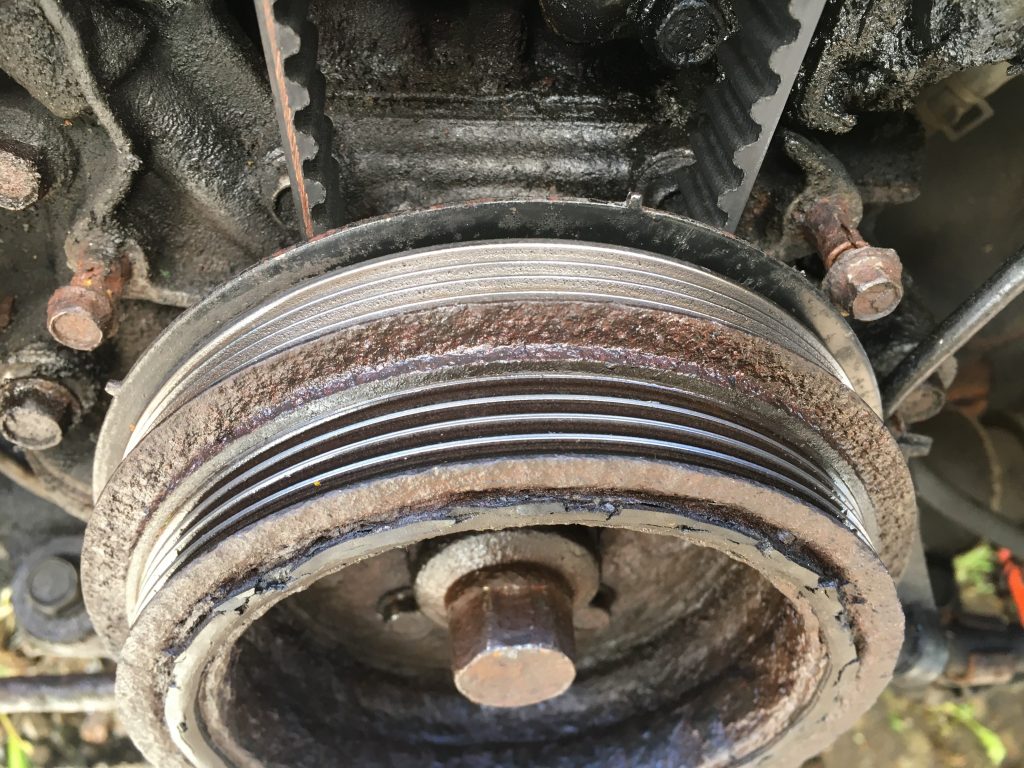
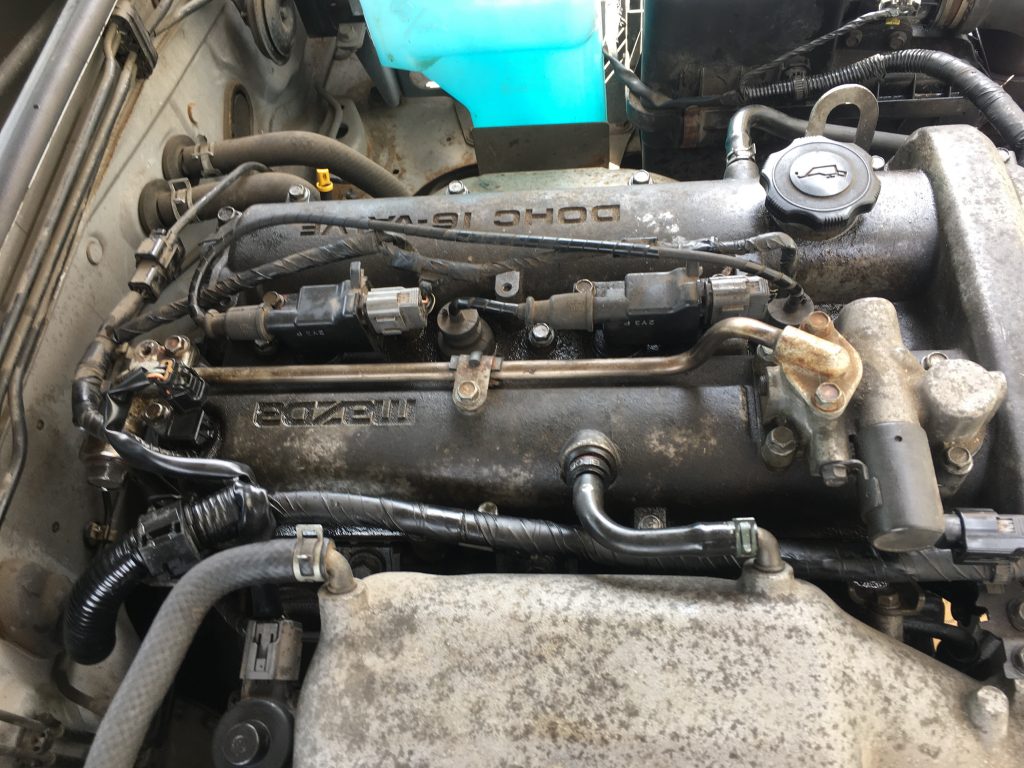
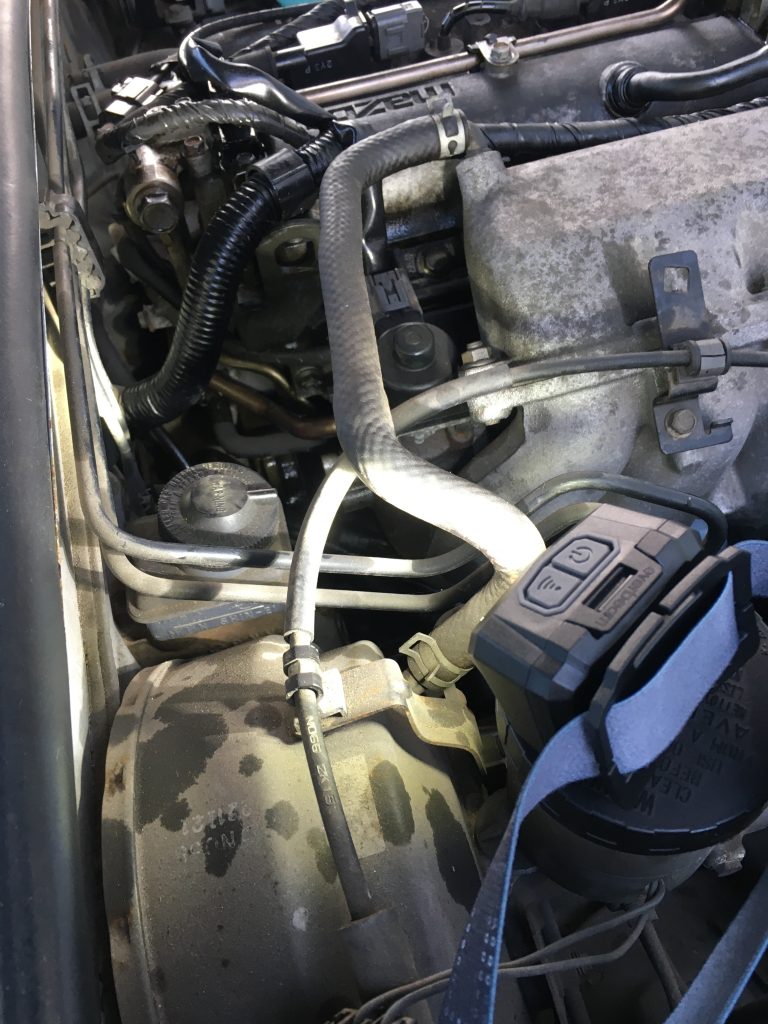
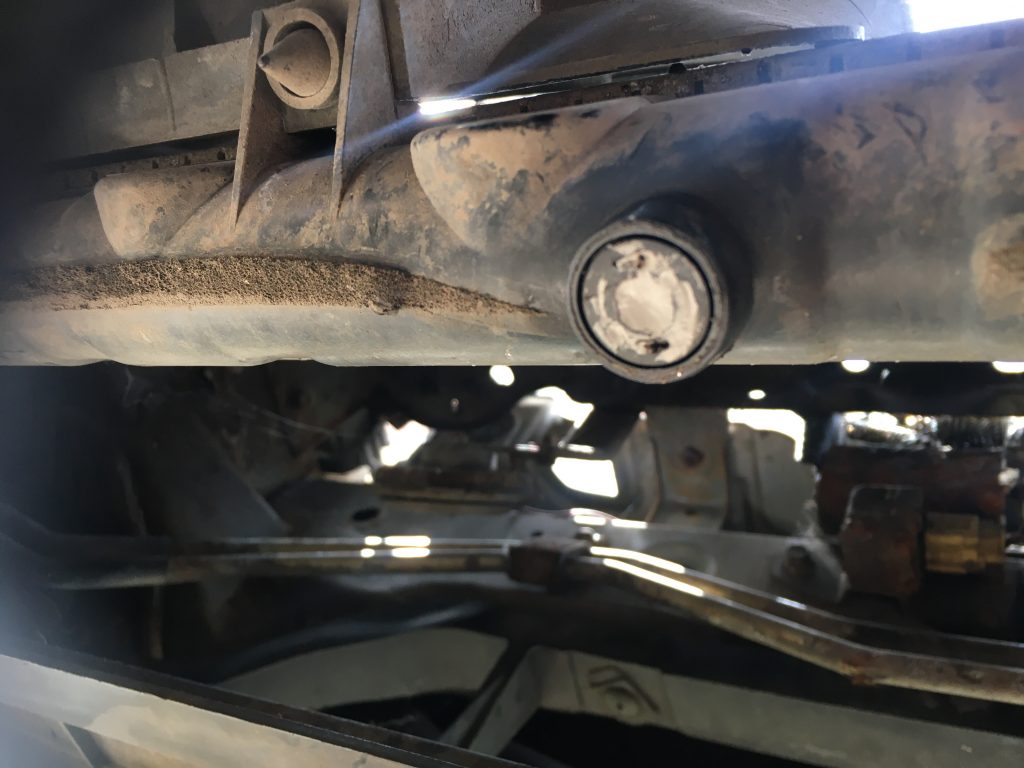
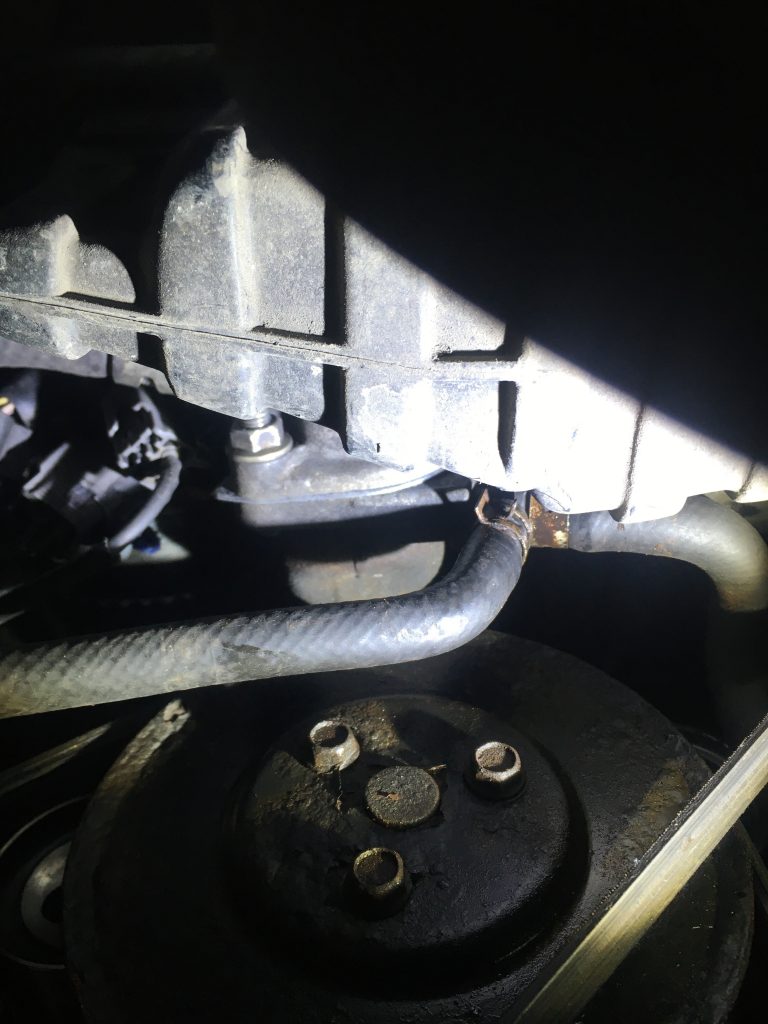
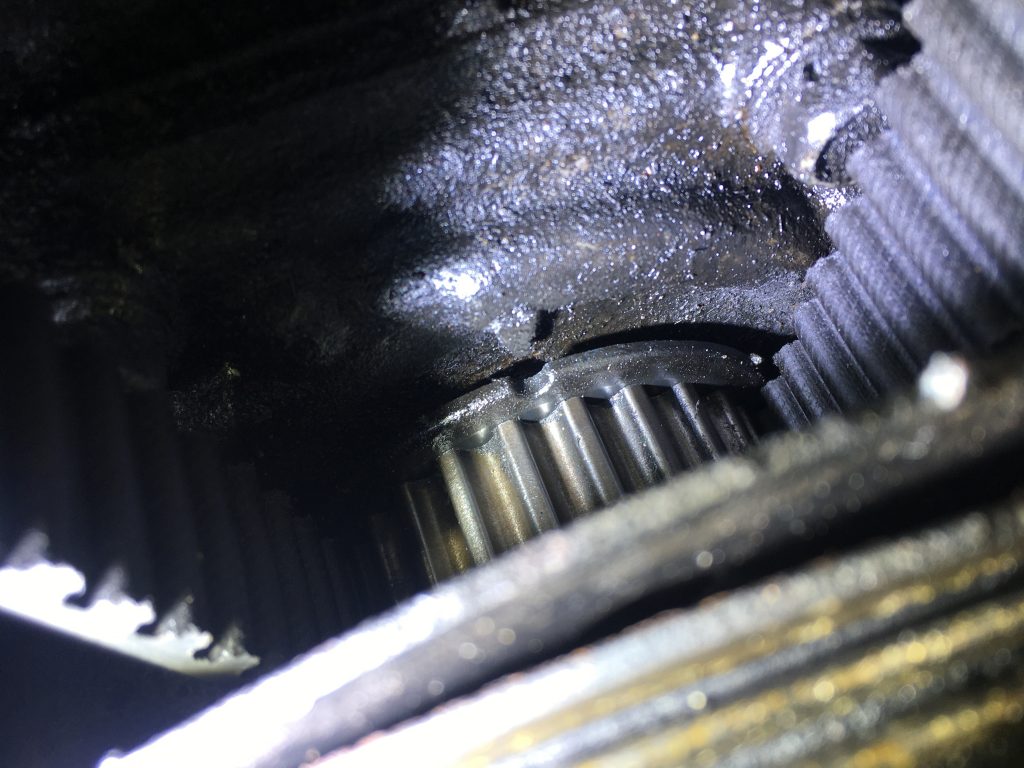
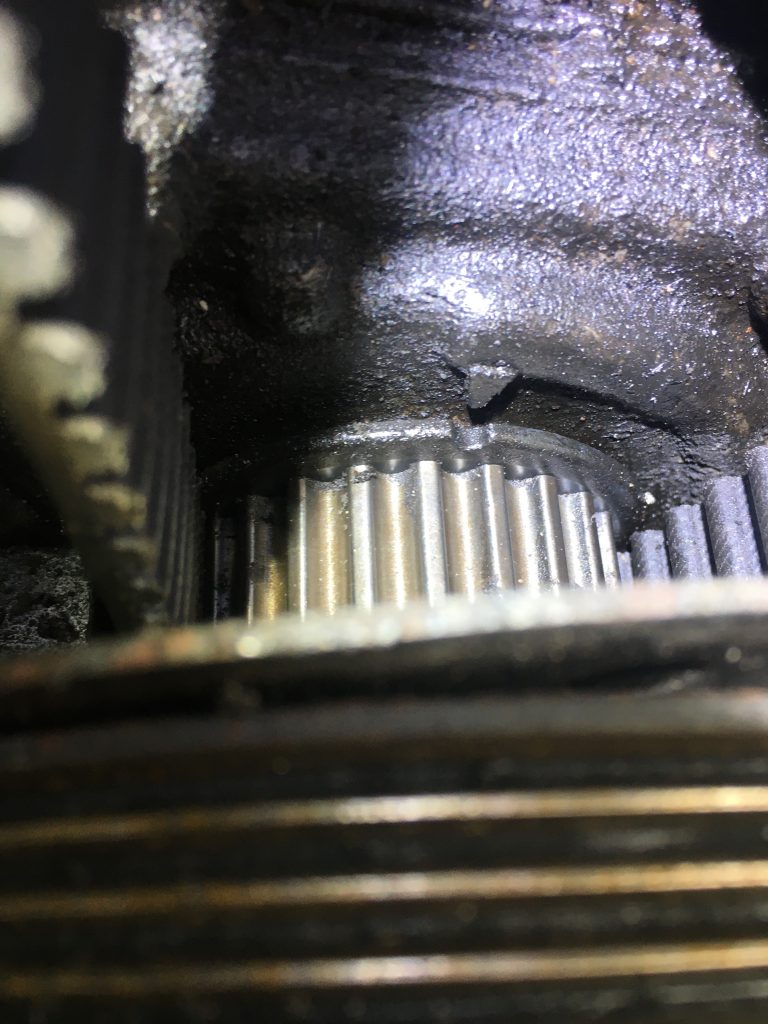
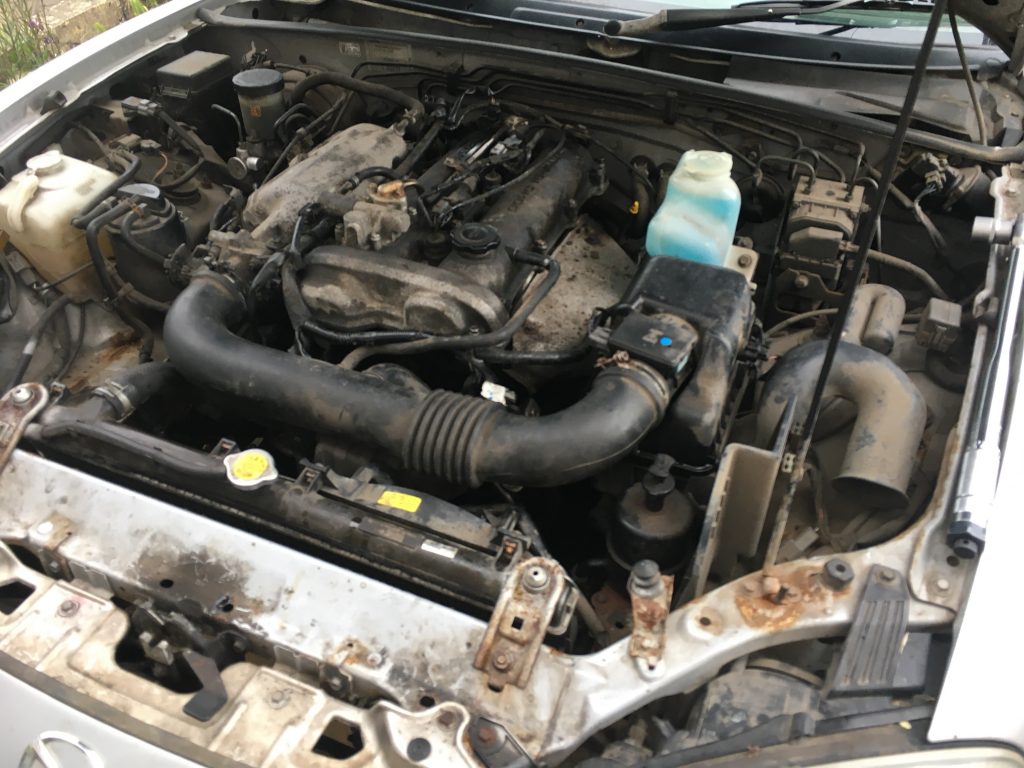
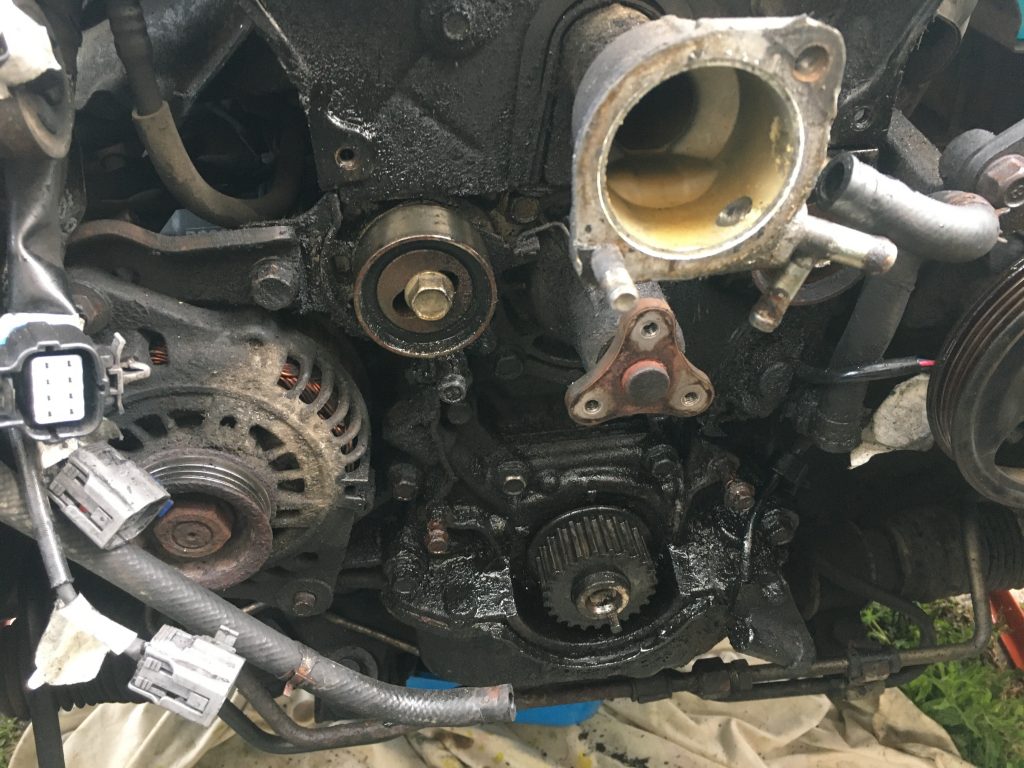
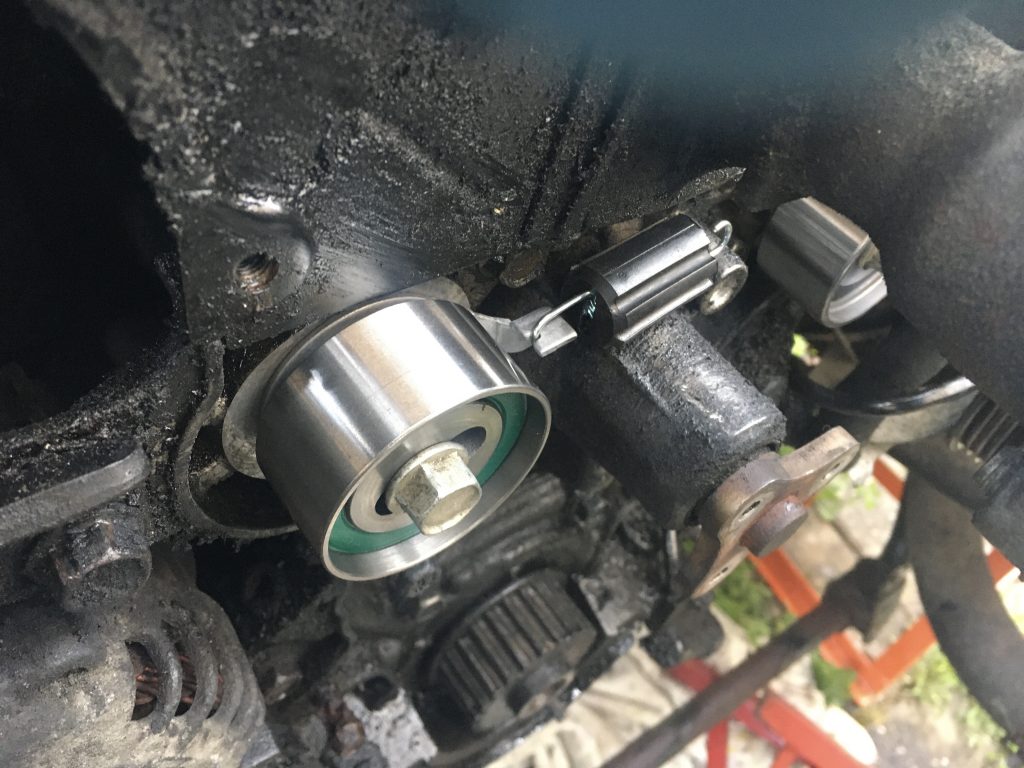
Behind the harmonic damper, lies the four-toothed trigger wheel.
I.e. the timing was still out somehow. My intuition told me that it was probably the trigger wheel. which can be seen behind the harmonic damper in the above image. Just two of the teeth are visible in this shot.
In removing all of this stuff initially – trigger wheel, damper/pulleys, and central crankshaft wheel – I’d needed to use mucho persuasion! This lead to the trigger wheel getting somewhat deformed, by the time I’d banged/prised it orff…
I used numerous hammers, mainly large heavy soft-headed types, and some vice compression action, to flatten the bugger! And then I re-installed it, making sure it was properly aligned: concave face forward, convex rearward, locator pin in hole, and engine TDC, resulting in the top tooth (of just four!) being just past 12 o’clock.
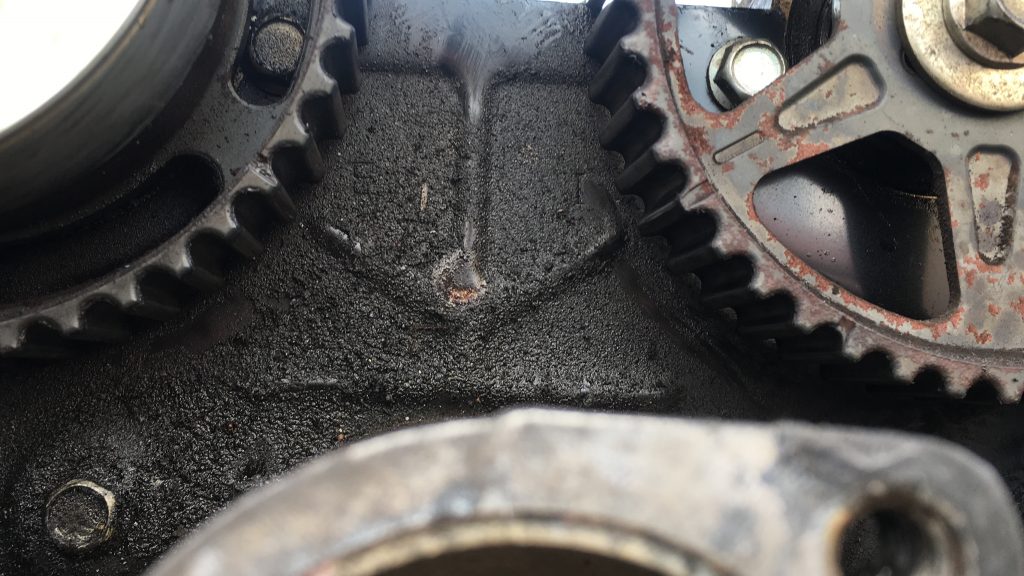
Checking timing alignment hasn’t shifted out of whack.
With the trigger wheel replaced and hopefully now in its proper position, I had to once again set up the timing. By now I’m getting quite good at this. That said, it’s always hard work!
Ditto…
I didn’t super document any of this, given I’d done it all before. Instead I photographed the bits that were specific to the days’s work
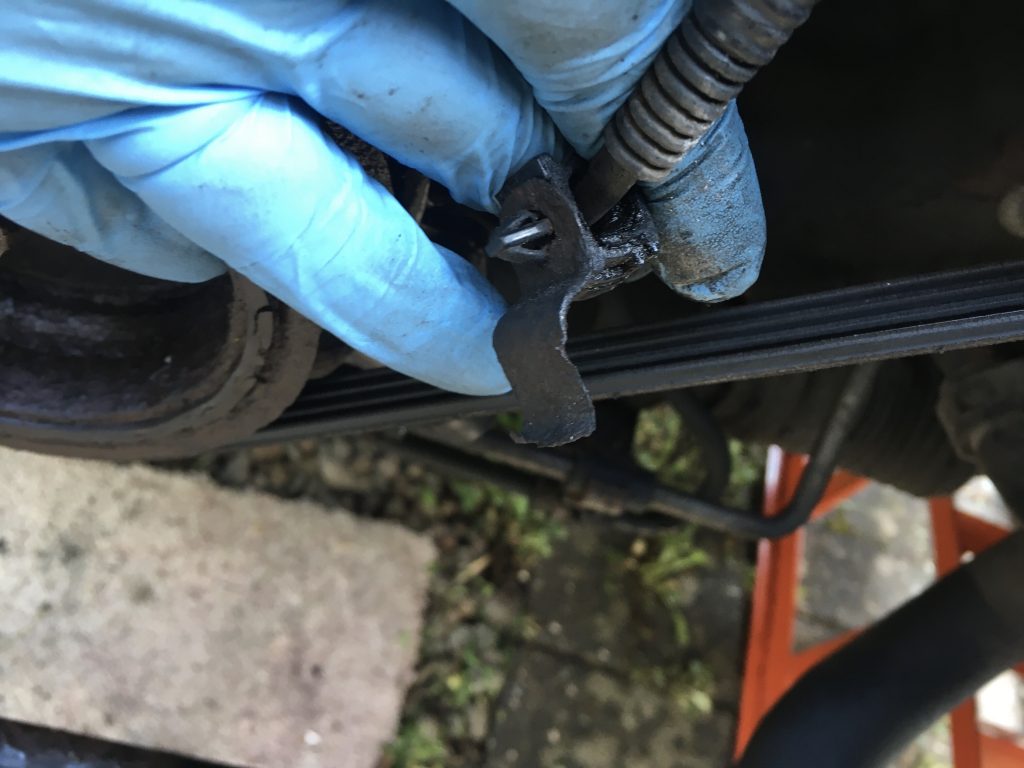
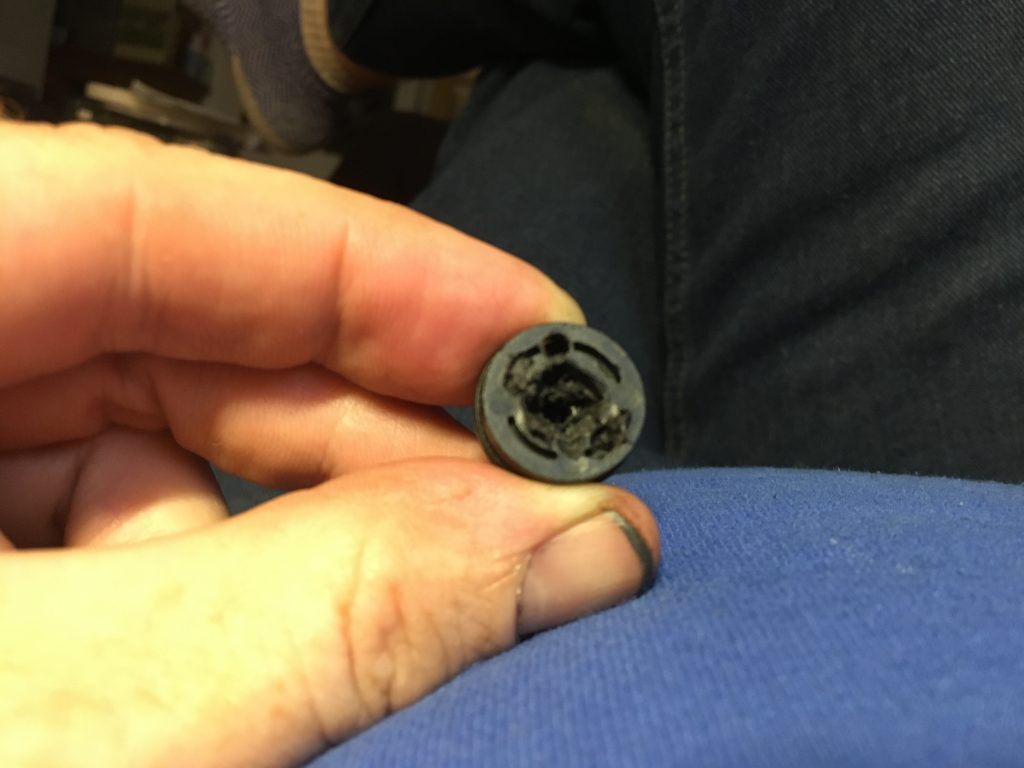
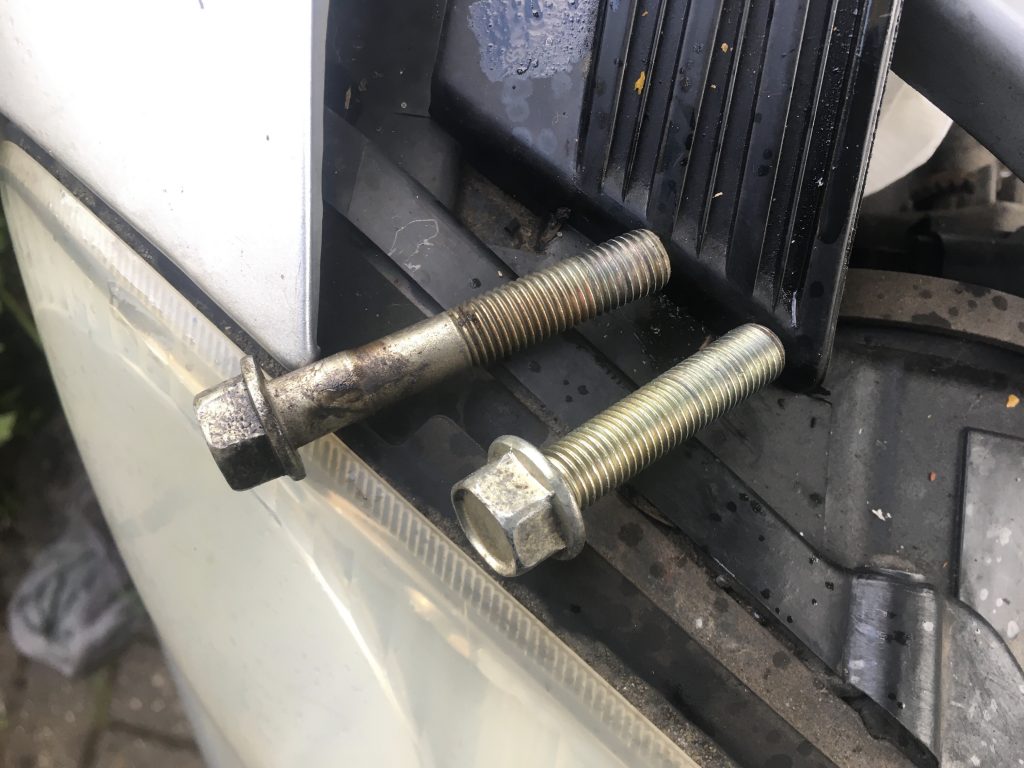
Pictured below was a bit of lower engine detail I’d missed before. The plastic clip and metal doodad I’m holding should be affixed to part of the three-part front engine cover, which protects the cam-belt and pulleys. but two thirds of that isn’t back on, due to it being k-nackered!
A sundry fixing item, to be removed.
Once this fixture was removed I cable-tied the lead out of harms way. All of this business required, once again, the drainage and removal of the radiator and various pipes and hoses.
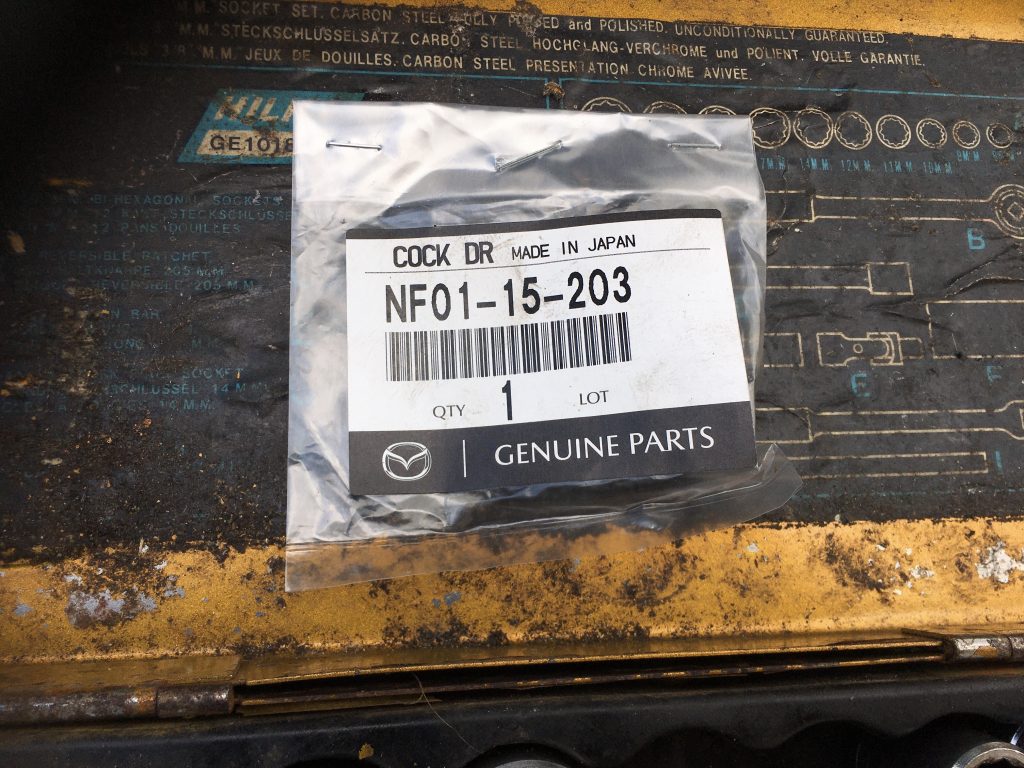
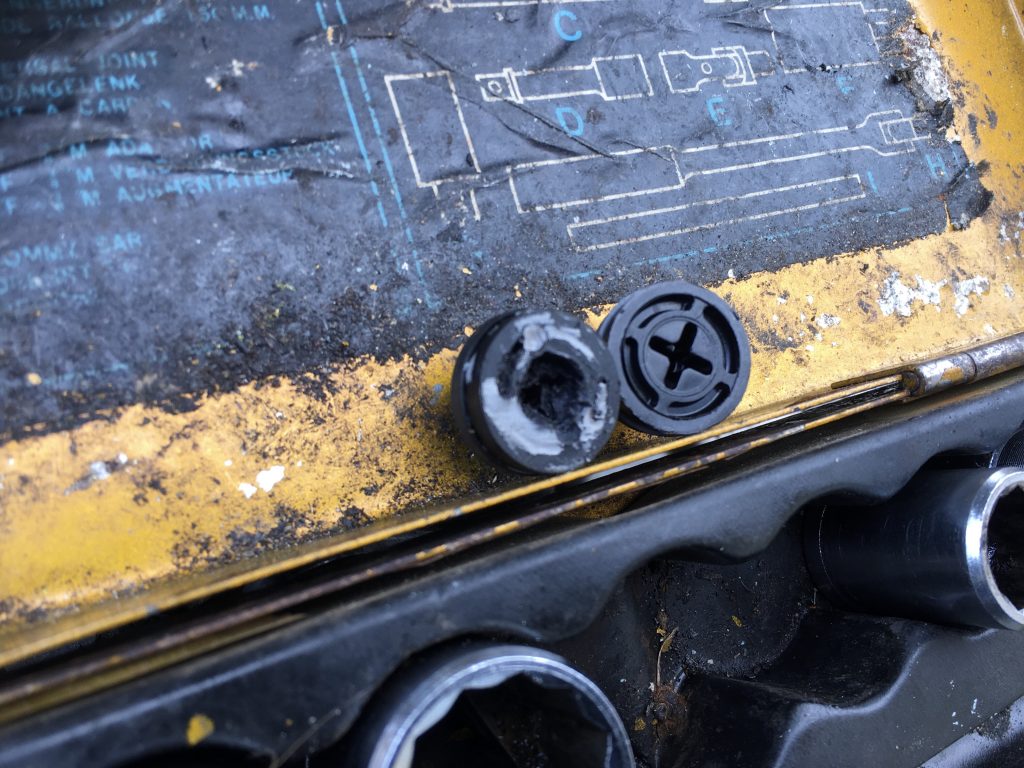
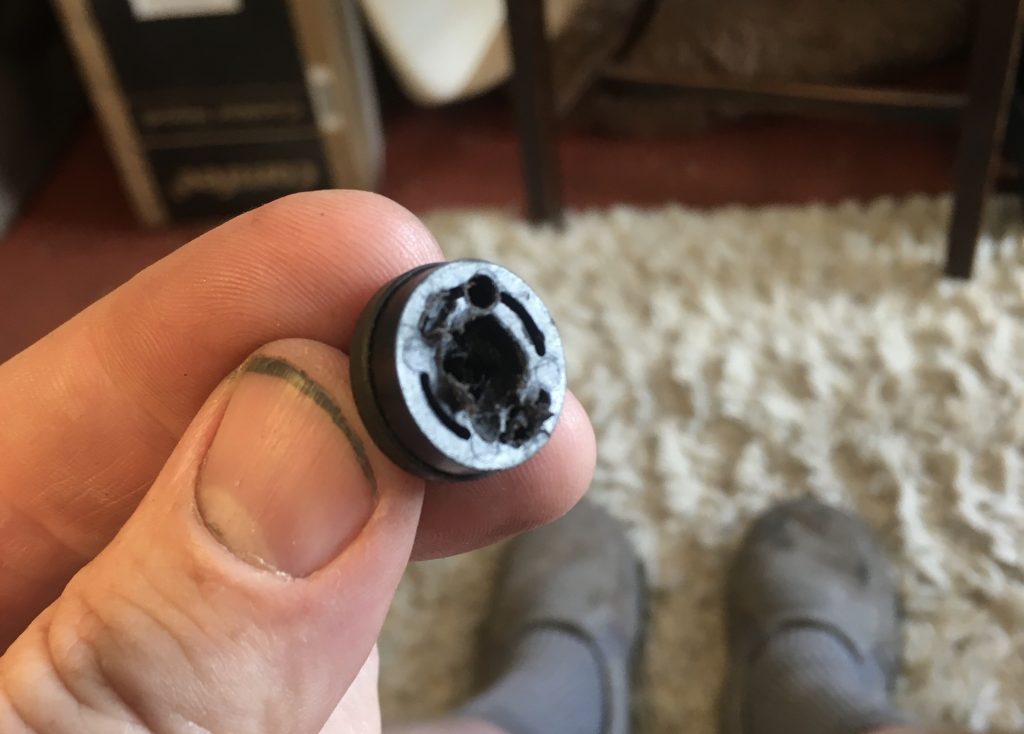
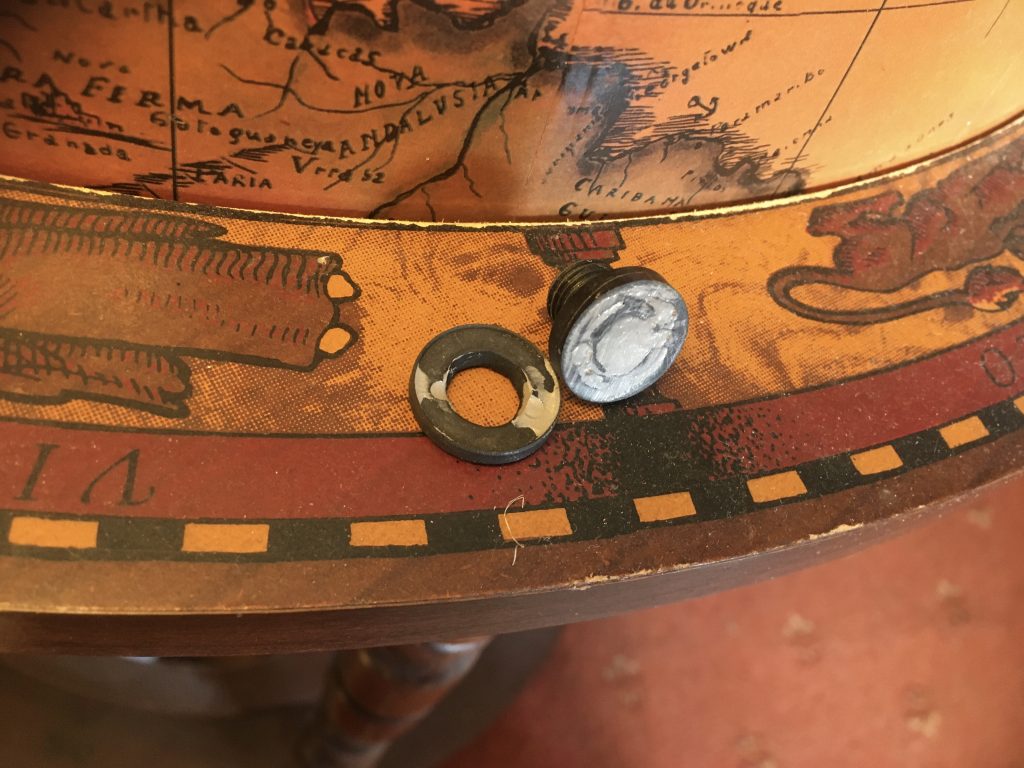
A rather pricey Mazda plastic radiator plug.
Having lived with a bodged radiator plug fix up till now, the arrival of a new genuine Mazda radiator plug was most welcome. There they are, directly below, and facing the same way. The old one is completely jiggered!
Old and busted vs the ‘new hotness’!
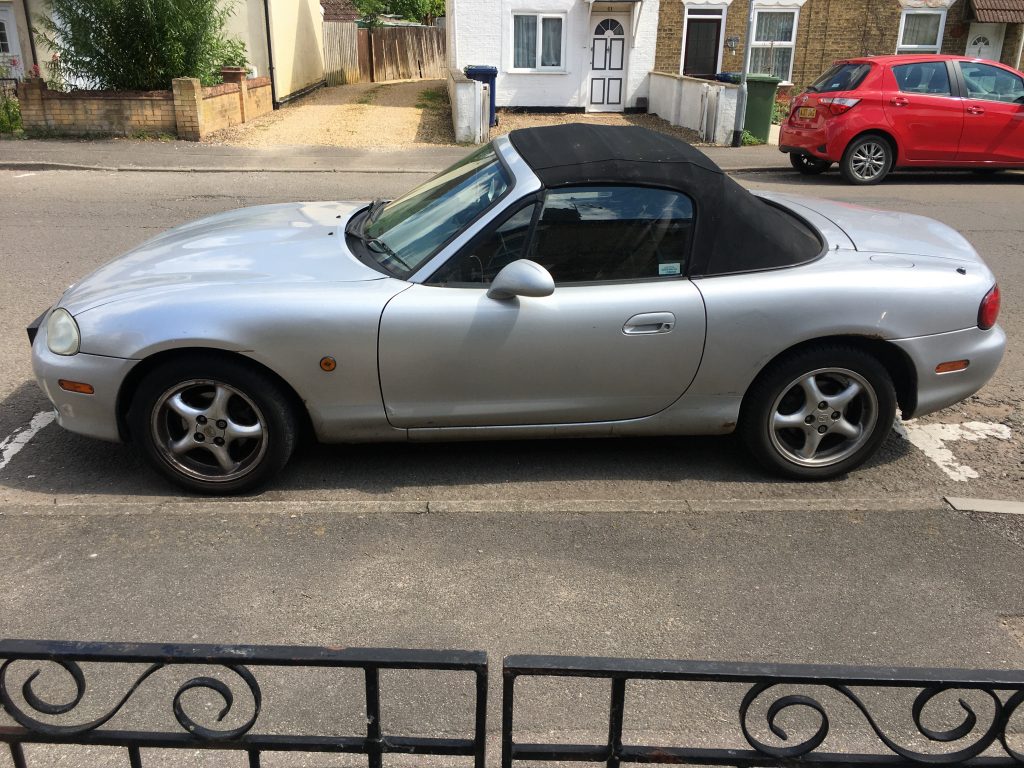
With the trigger wheel properly installed, and the new radiator plug allowing a coolant refill, I took her around the block, and then parked her up in her accustomed spot. And all was well! (Aside from the persistent coolant leak!)
Finally she’s off the drive and back on’t road!
By close of play today the engine was running much more smoothly. And where before she’d struggled as you increased revs, she was now sounding consistently healthy across the whole range. Result!
Spark-plugs reminder photo.Working in dazzling sunshine.Note that banjo bolt (rear of VVT) leaketh not!Later in’t day, torch now required.Happy grease monkey; engine starts!
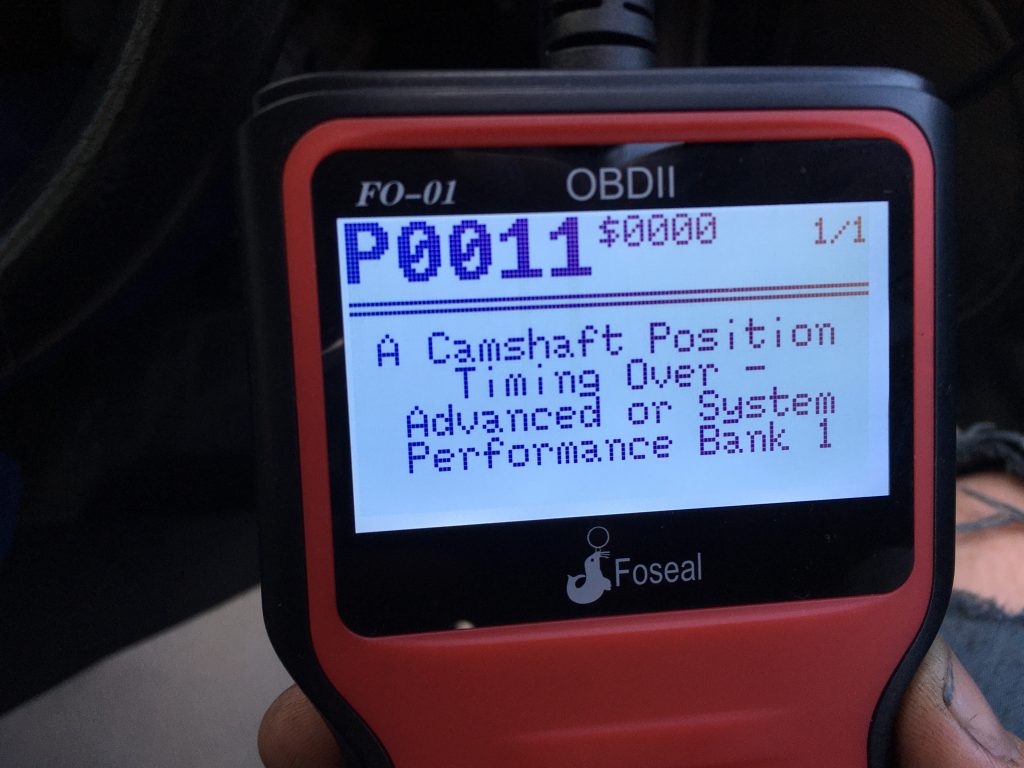
And lo, it came to pass, that ye olde engine was fix-ed! Hence the happy mien, and Churchillian two finger salute above. The image below is just a reminder of an earlier – and at this point gratifyingly absent – OBD fault diagnosis.
Adopts Inspector Clouseau voice ‘Yes, I know that, you fool!’
But at this point I still have a major coolant leak.
Whilst I suspect nobody cares about this opinion, and probably rightly so, here goes… I’ve always disliked opera. In fact I’ve pretty much always hated it.
It has always evoked the spirit of the gentry playing at being shepherds like the overprivileged tits they are. The mannered vibrato heavy self-satisfaction that opera singers favour is, after little girls screaming (I’m surprised no military has weaponised that awful sound), and death metal screaming/grunting, possibly my least favourite type of sound the human voice can make!
Over the years a few pieces have snuck through chinks in my anti-opera armour. But today I think I might’ve found a doorway into appreciating this appallingly overblown art-form. At least sonically. The answer/trick? Turn it way, way, way down!
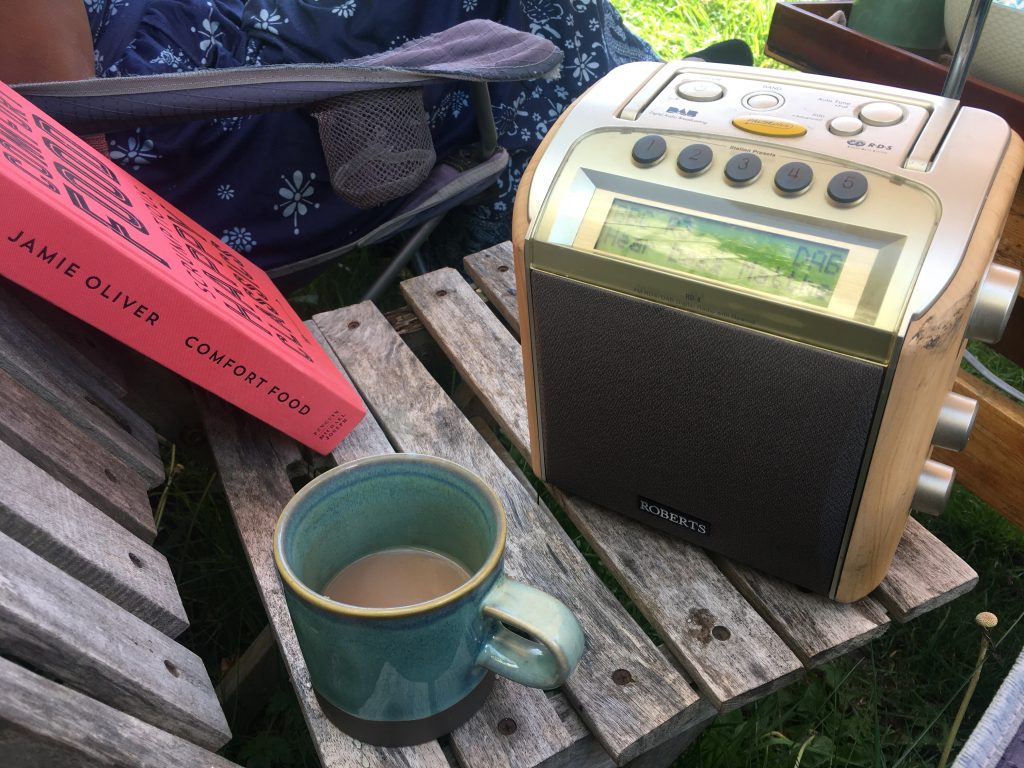
We’re out in the garden, it’s beautifully sunny, birds are chirruping, and all is well with life. We brought a DAB radio my mum recently gave us – thanks, ma! – out with us. And I put BBC Radio 3 on.
Bass singer Matthew Rose is presenting Inside Music, and I’m really digging his choices. Even though they are quite often a bit off my usual musical map.
Oh dear, the humourless idiot machines are winning!
It’s kind of shocking when one learns that films like Idiocracy turn out not to be mere satire, but Über-Nostrodamian prophecies, or even just simple documentaries.
As Iain Overton says, in his book, The Price Of Freedom, and others do elsewhere (for example Sam Harris, in The End of Faith), the responses to perceived threats are sometimes more damaging – usually by dint of curtailing the freedoms of the more docile many in order to supposedly more fully control the errant few – than the threats that supposedly prompt them into existence.
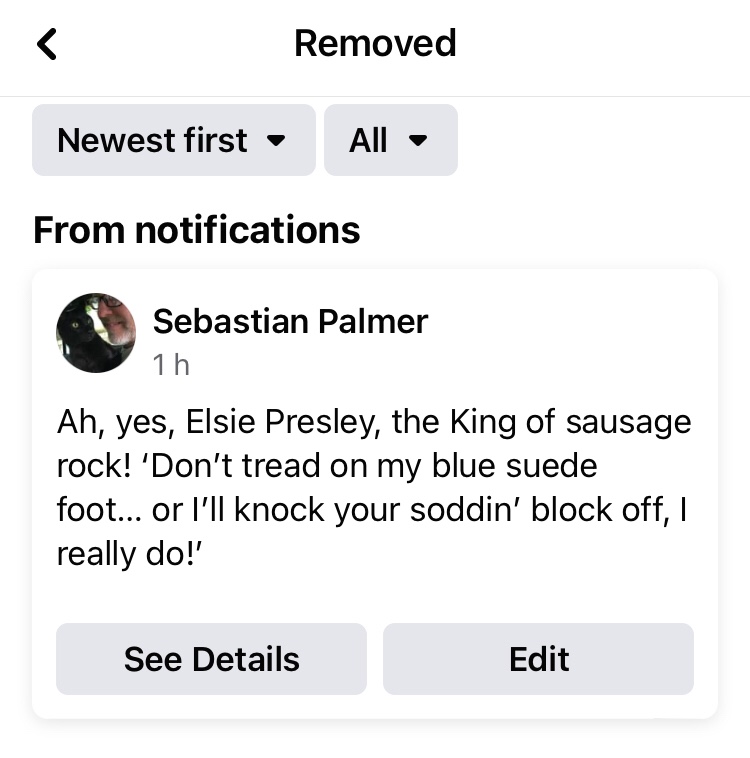
So I can’t make a particular joke, quoting Count Arthur Strong, in a FB group dedicated to him, because a human will do the bidding of a robot that doesn’t understand or can’t differentiate between my innocent humour – and let’s not forget it’s a quote, so it’s not even me saying the allegedly egregious thing – and a genuine incitement to violence.
This is of course utterly ridiculous. Those intent on acting out violence will both do so, and find ways to express themselves, regardless of what anybody else does. And such folk are, thankfully, are a very small minority.
Meanwhile, a much larger and more benign majority have their freedoms curtailed, in a very real way, and to no real benefit. The idea that maybe one day we’ll be the slaves of robots is grotesquely outdoated. We already are!
And, in a tip of the reality had to the apparently ludicrous fantasies of The Matrix series of films – whose overall adolescence of aesthetics rather undercuts the more sinister and prescient ideas about what constitutes reality, and our relationships with technology – we, the soft machines, are already becoming the willing collaborators and enforcers of this joyless, soulless, brainless automaton culture.
My reply to the citing of ‘evidence’ re a former ‘offender’.
It doesn’t bode well for the future of the species!
Little did I expect it to be a flippant and lighthearted response to a Count Arthur themed post, in a Count Arthur based group, that would bring this home so forcefully!
Adopting the CA voice, ‘Well, I mean… is it any wonder we tire of this ceaseless handholding? And you robots, you have to meet us at least halfway. Honestly, you couldn’t make this stuff up!’
How things looked at the start of today.My radiator coolant plug, with temp’ repair.
Today I didn’t do that much on the car. I re-filled the radiator with coolant. My sealant gasket fix of the radiator sump plug seems to be working, which is great (although I also have a brand new plug on the way to me).
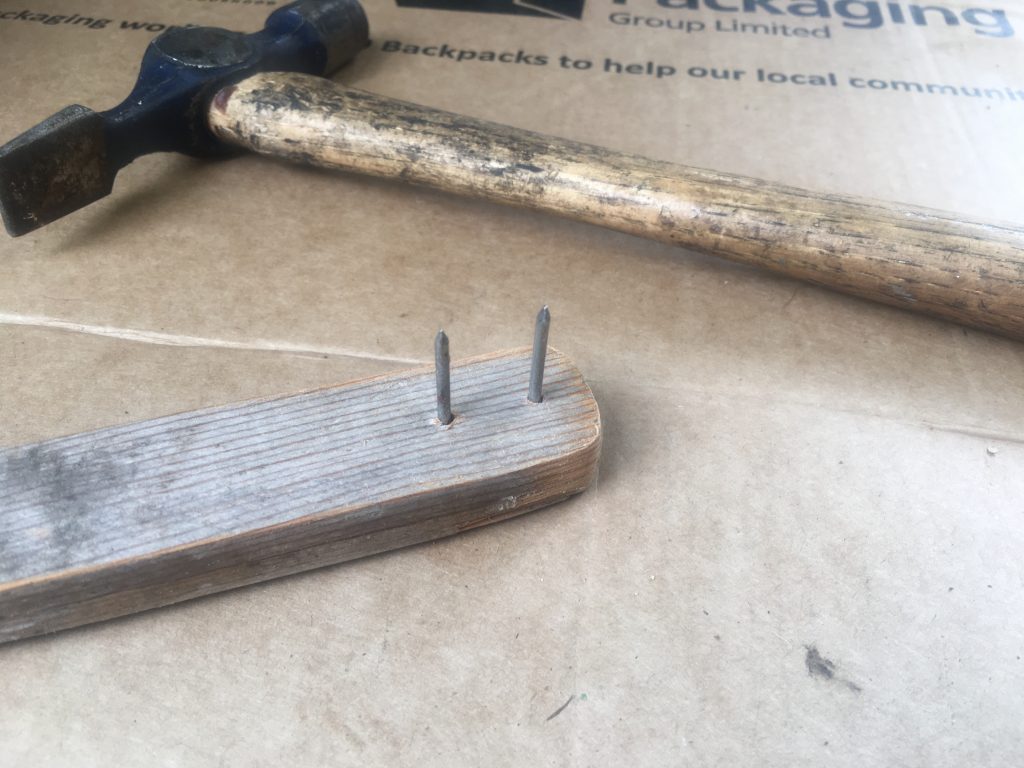
I made this tool for securing the plug!*
[video?]
I also torqued the crankshaft main bolt, to 160 NM, which required dropping the sway bar again, and removing some o’ the upper pipe works. And then, not forgetting to reconnect the negative terminal on the battery, it was time to have another go at starting her up. I was totally convinced it would be exactly as before, and not work at all!
So it was gobsmackingly amazing when the engine actually fired and turned over. I’m not a religious man, but… Hallelujah! Seems my timing belt change was successful after all. Sadly this state of bliss didn’t last long; the engine, whilst running, sounded bally awful, spluttering and struggling. So I switched her off, pronto.
Going round to the engine bay revealed an almost explosive looking oil leak had occurred at the rear of the engine. So I had to clean that up, and then take off and re-seat the cam cover. Whilst I was at it I cleaned up and removed the previous gasket sealant. I then refreshed the latter, with a new application, and re-seated the cam cover. Sadly I don’t have a small/low enough torque wrench for the final buttoning up.
The small torque wrench set I’ve just ordered.
So I’ve ordered a smaller (5-25NM) torque wrench, via Amazon (pictured above). That ought to arrive tomorrow. Once I’ve torqued off all the bolts topside, it’ll be time to try again. Third time lucky!?
I’ve learned a lot, and enjoyed working on the car. That said, there were some hairy/sweary moments. And occasionally it was too much like hard work. That one episode where I worked on one nut/bolt for about three hours was not a favourite moment!
And we’re still not there yet. There are at least three things still outstanding: 1) Have I sorted out the oil leak? 2) There’s also a very slight drip-drip-drip type coolant leak from somewhere on the thermostat housing (despite the new gasket). 3) Did I bugger the trigger-wheel when struggling to get the crankshaft pulley off?
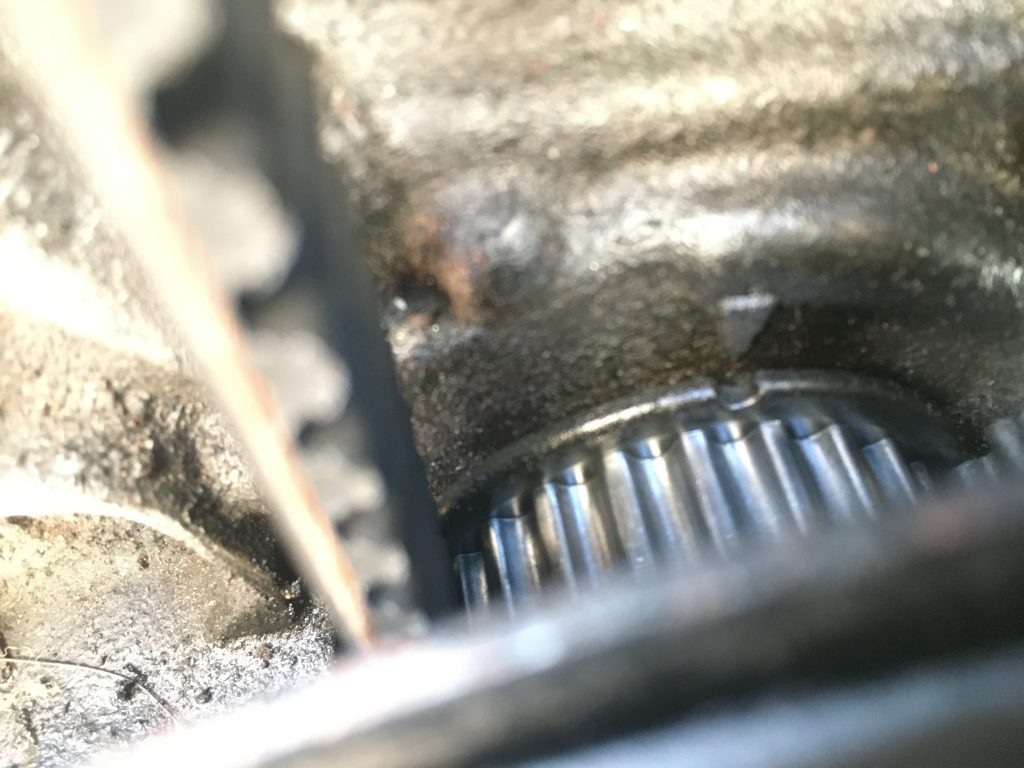
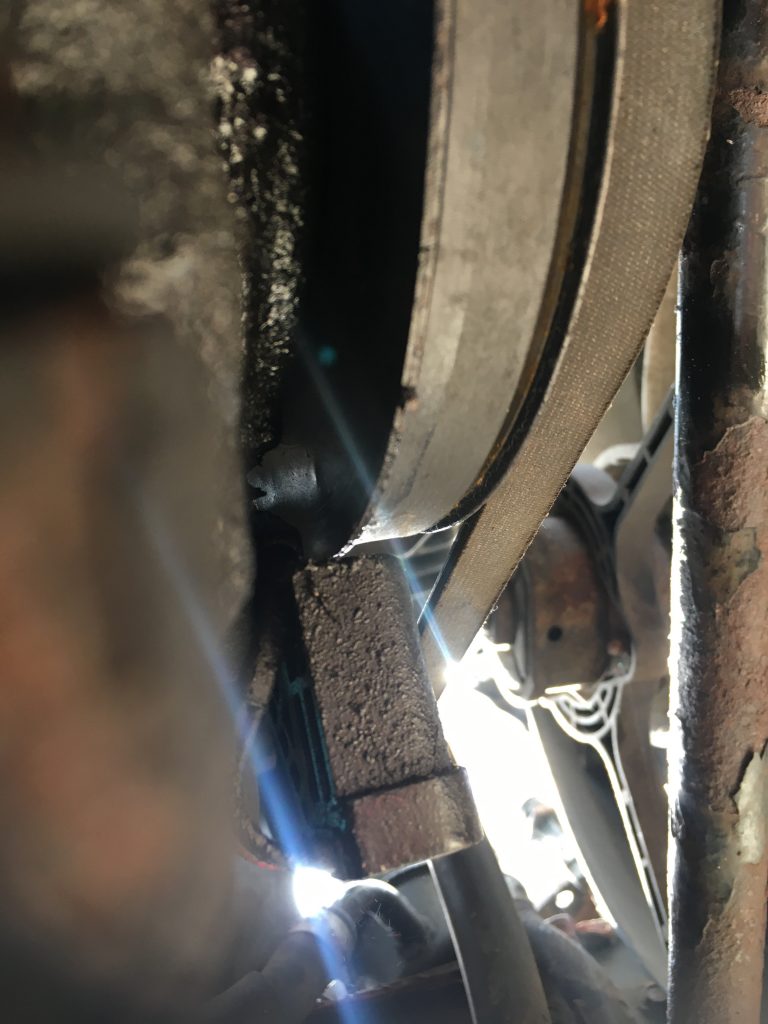
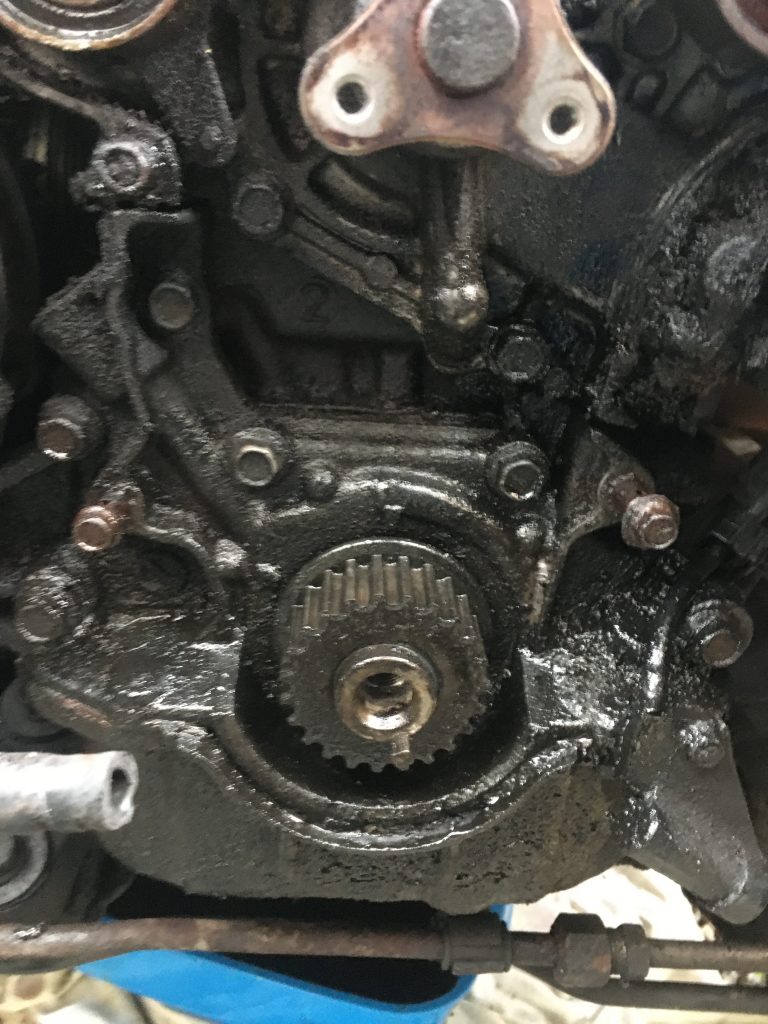
Oblong is sensor; note single tooth on trigger wheel!
This last is a bit of a worry, as it concerns the accuracy of the timing, as did the whole cam-belt replacement shenanigans. Apparently it can quite easily by put on the wrong way round. It’s also supposed to be quite specifically aligned. I’m not sure mine is right in any of these respects!?
My thoughts at close of play today are that I’ll have to wait for the smaller torque wrench, then tighten off ye engine and try it again. If she runs and doesn’t haemorrhage oil again, I’ll take her for a shirt run around the block. But I’ll most likely need to get her to a garage to have someone competent look over her… hmmm!?
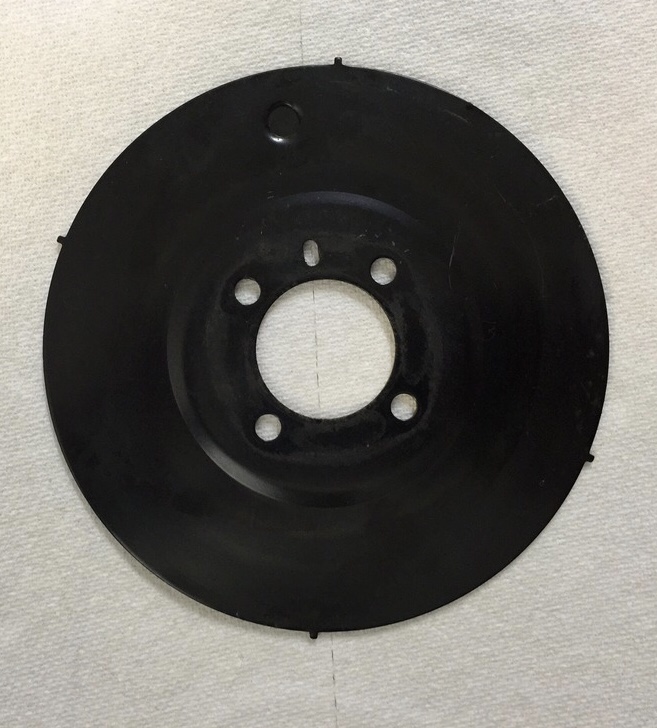
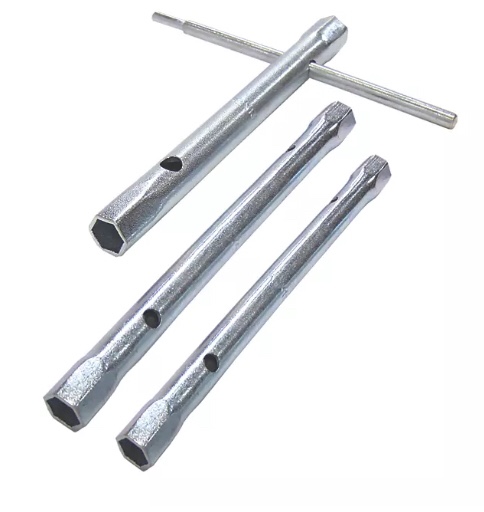
A trigger wheel off’t interweb.
And finally, what about work? Last Friday I did a full days’ teaching, for the first time in two weeks. My journeys were long and very arduous: two trains, a bus, and a long walk either end of the day, with a taxi journey in the middle!
Will I be able to teach tomorrow? It looks unlikely. I don’t want to lose that school and those pupils! Perhaps, if I get the car running tomorrow, all will be well and back to normal? But what about getting to a garage and checking the trigger wheel, etc?
* It didn’t work, sadly. So I wound up using a pair of circlip pliers, instead.
Yesterday a thermostat gasket and engine under-tray bolts arrived. I fitted the thermostat housing gasket quite late in the day. I’m holding off on the under-tray until she’s working again, or whatever else may transpire (gulps!).
The new gasket; no signs of any leaks.*
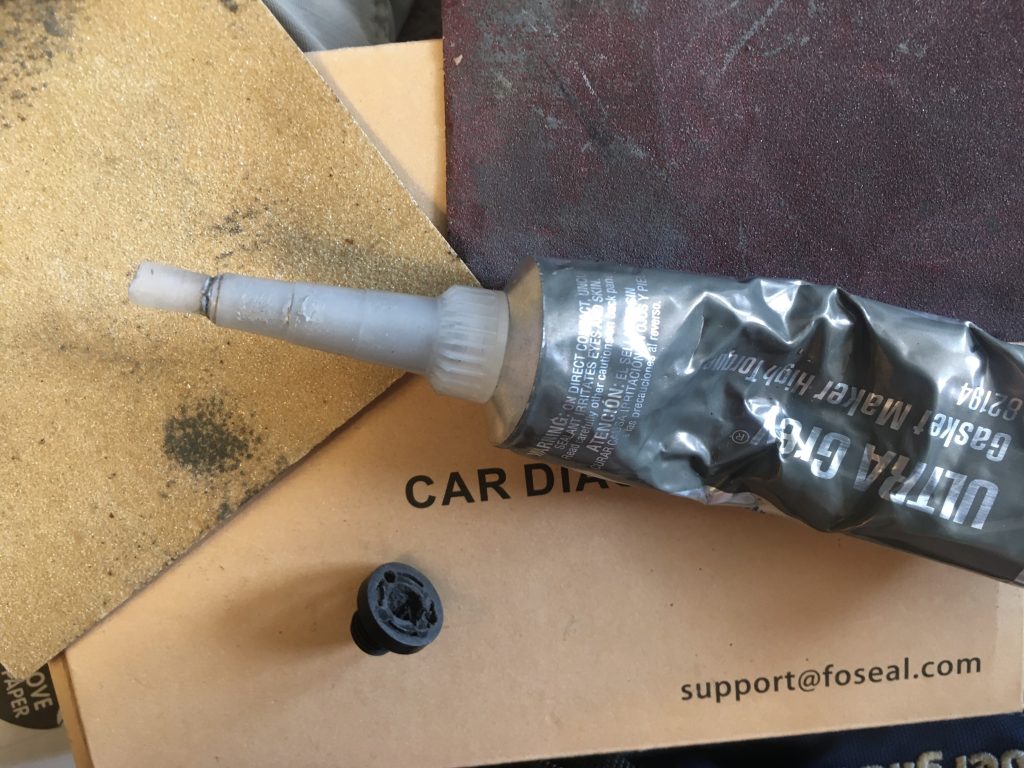
I ordered a radiator sump plug replacement from MX5parts, which won’t get here til Monday or Tuesday, and being impatient to get the 2nd fix tested, I thought I’d attempt a DIY repair of the old damaged plug.
The damaged radiator sump plug.Prepping the plug for repairs.
I sanded it down with two grits of sandpaper, and cleaned up with a scalpel. I then used the gray gasket sealant I was supplied by BOFIracing. Just checked that… ‘Allow 24 hours to fully cure’ ! Well, that will still give me a potentially usable plug a day or two earlier than waiting for the new part.
There are two parts: plug and gasket-ring.Plug back in situ.
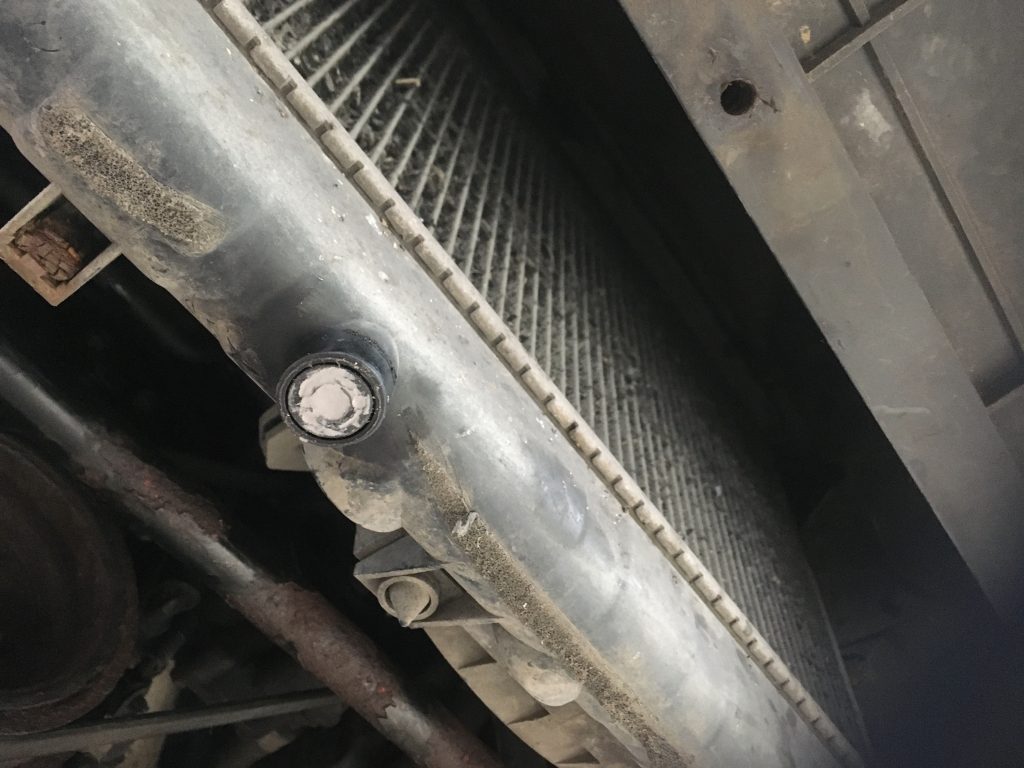
I’ve let it cure for about six or so hours, and installed it. It went in very easily and nicely. It may need tightening up a little bit more. I’ll wait till tomorrow, and test it with a wee bit of coolant.
As can be seen from some of these photos. I got under the car, partly to put the radiator plug back in. Let’s hope it holds! Whilst under there I got shots of other things, like the oil sump plug. No leakage there. Very gratifying!
Very pleased this isn’t leaking.
Did a load of other stuff around the home today: put the towel rack that had fallen off back up; cleaned the living room window and frame; cleaned and refreshed the lounge to kitchen door paint, which had gotten mucky and grim looking.
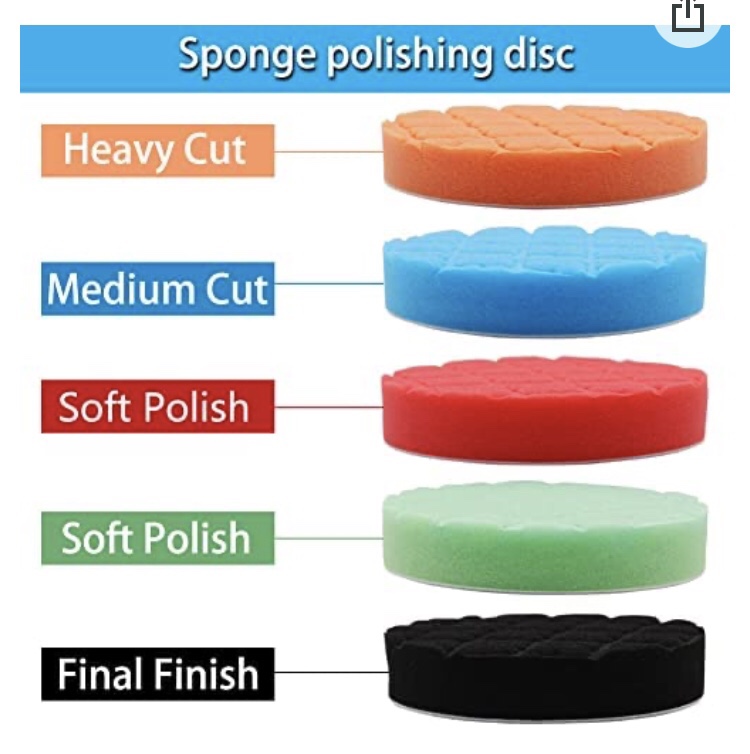
The disc grades.
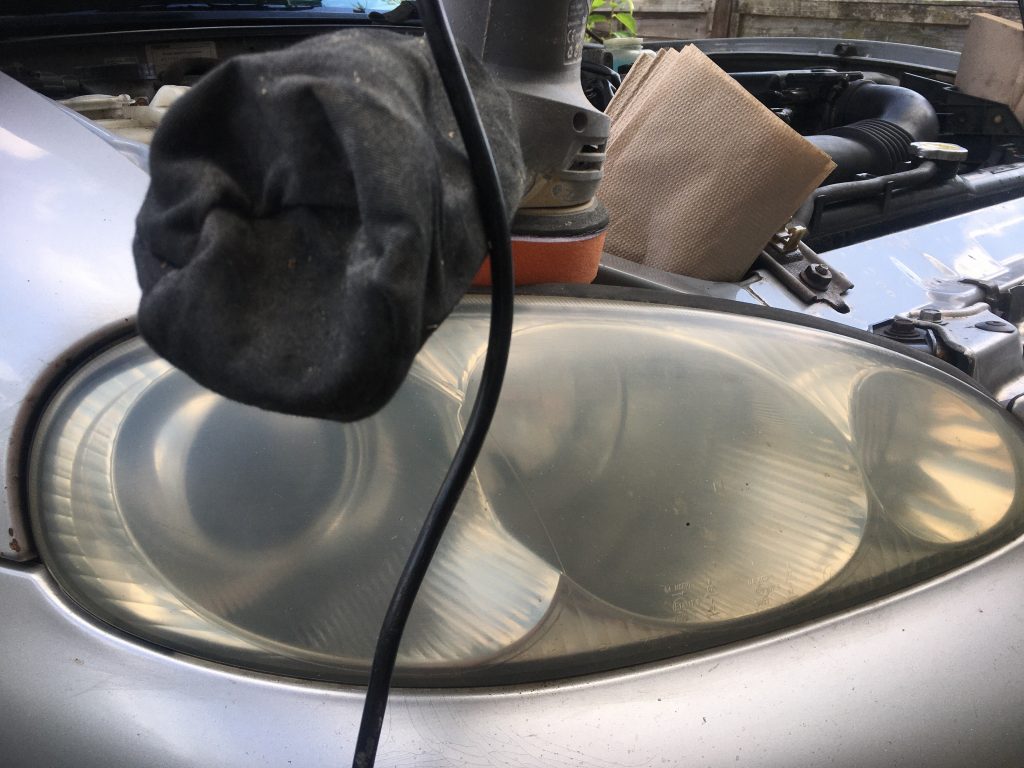
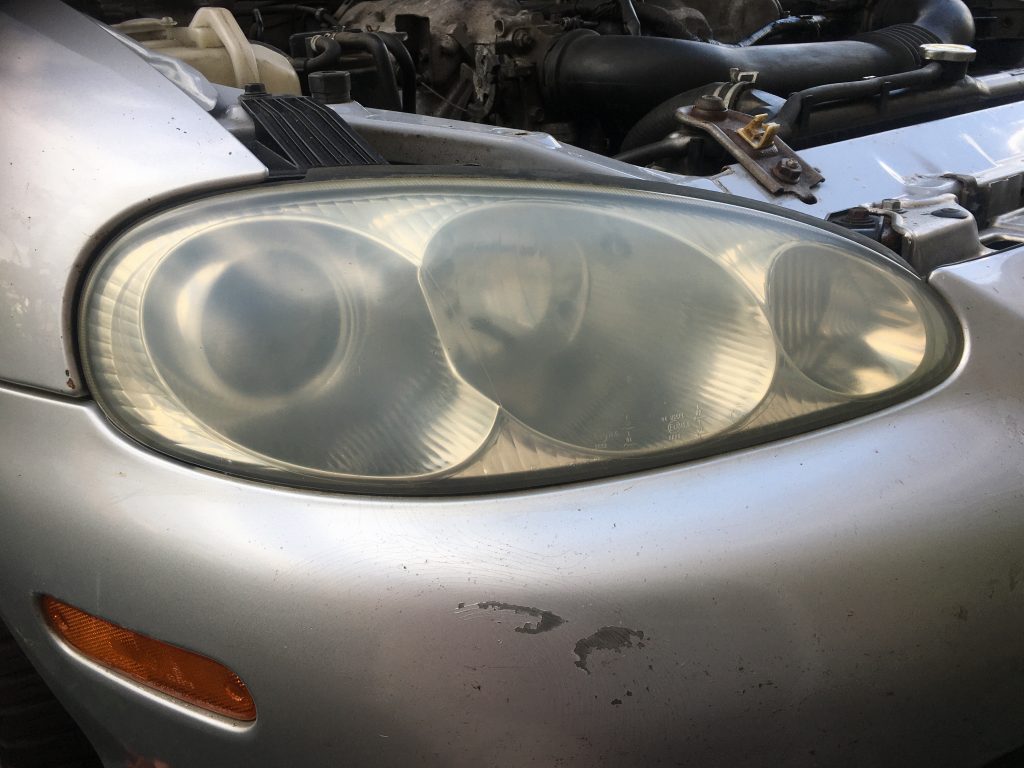
Also tried a set of buffing pads – pictured above – I got from Amazon Vine, on the headlights. The plastic over these has become very cloudy and dull. This means the headlights are a lot weaker, as the plastic is nearly opaque!
Before buffing the headlamps…
I have to say that I’m not sure the five grades of pad, coarse to smooth, really did very much. The pics here suggest a very minor improvement. If any!?
After; is there any change?
I’m itching to try the car again. but I need to torque up the crankshaft bolt, and I’m scared that doing so will knock the timing out of alignment. I’ll wait till tomorrow. And I can try out the radiator coolant as well.
* I’m an idiot! Of course there aren’t any leaks… I haven’t re-filled with coolant yet. Dumbkopf!!!
Whilst engaging in a spot of FB banter/lurking, this topic somehow hove into view, along with a parallel thread in which ‘Trane was compared with that other modern deity, Elvis (Baz Luhrmann has a biopic on the latter coming out soon, God help us!)
I wondered, did the Oops, er… oops? I mean the Pope (I love that predictive rendered Pope as Oops!), know of this beatification?
Gadzooks!
A bit of Googling revealed that John’s elevation to sainthood was actually a demotion from godhead! And not via the ‘purple inflatability’ of the Oops. Oh no! It was the AOC, or African Orthodox Church (of America) that sanctioned this sanctifying:
‘In September 1982, Coltrane was officially canonized as a saint by the AOC.’
I love a great deal of John Coltrane’s music. And I also dig a great deal of Alice Coltrane as well. She was a super-spiritual sort as well. It’s kind of cool, as well as downright weird, that ‘A Love Supreme’ has become a kind of hymn and regular service at the church that bears his name.
I find it all totally understandable. John and Alice have made music with tremendous emotional and psychic or spiritual power. But these are vexed terms and ideas, for me.
Not going to say much about it all here and now. Just observe that these things are whatever they may be. They exist!
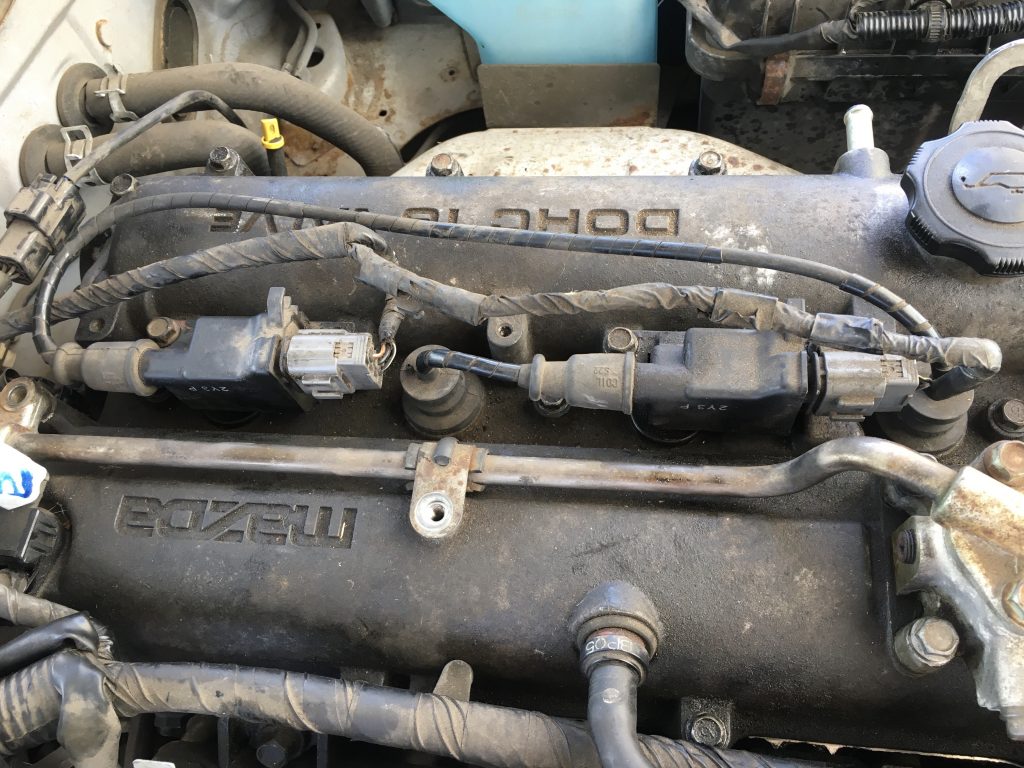
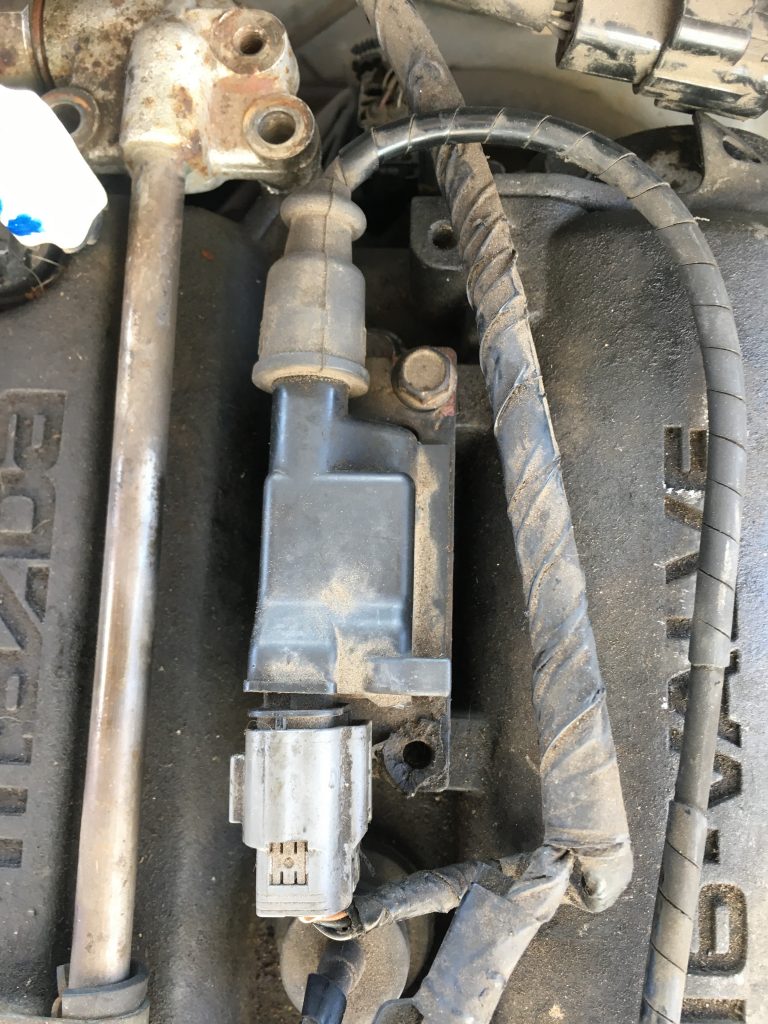
First few pics are just ref re spark plug fittings.
After the crushing disappointment of yesterday, having re-assembled everything only to find the engine still not working, I was back at it again today.
I do feel I’ve learned a bit. As I was able to dis-assemble everything I needed to, tweak it – the timing, in particular – and then re-assemble it all, much much more quickly and competently than I did first time.
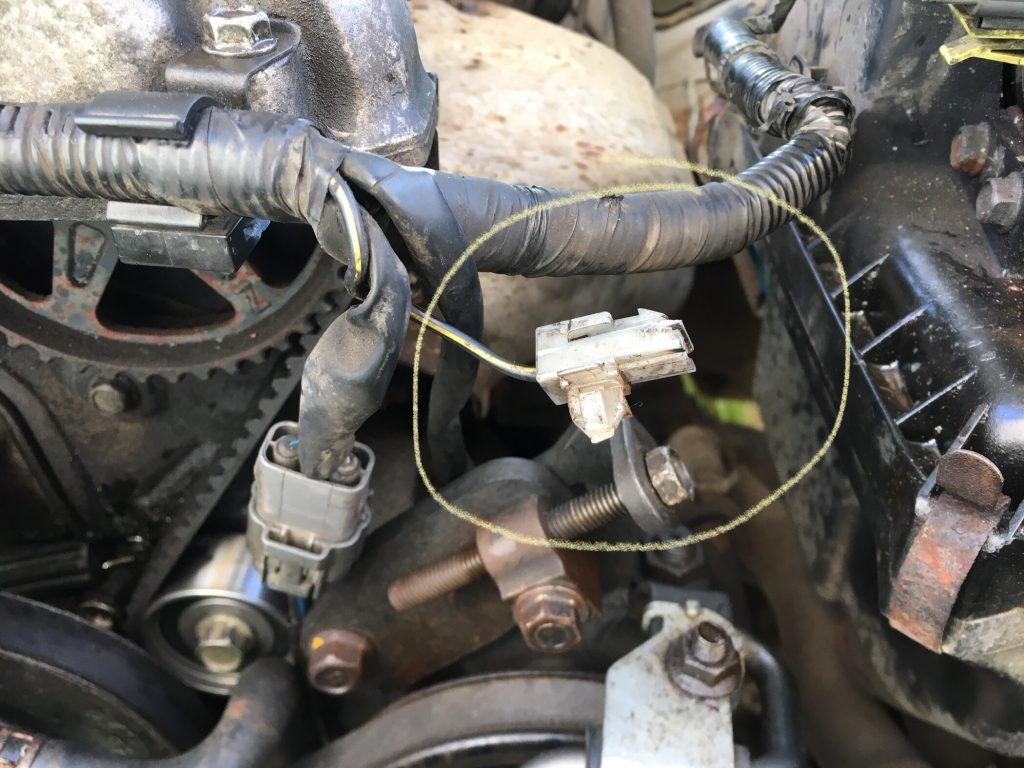
Rear sparks; note missing bolt!Front sparks.
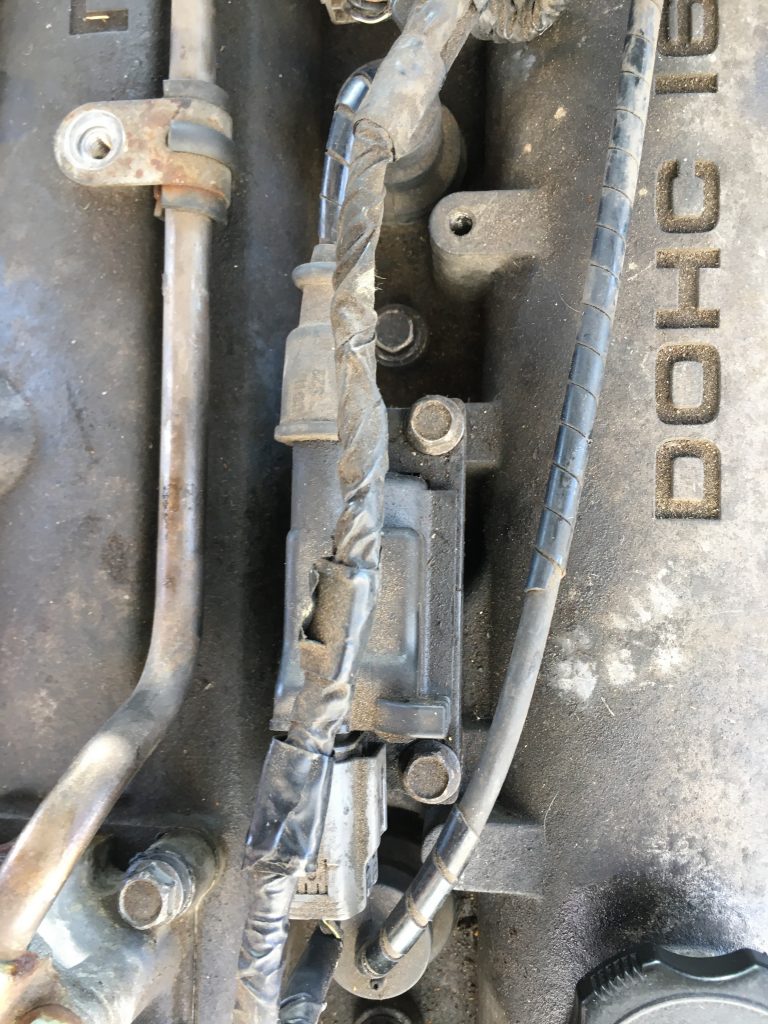
I called BOFIracing, and also emailed both them and MX5parts with a pic, regarding an extra and errant lead/connector that I can’t match up with a socket. Neither could tell me straight off what it was (BOFI got back to me saying it’s something to do with AC). But it was suggested that whatever it is, it isn’t the reason the engine still doesn’t start.
The mystery orphan connector!?
Talking to BOFI was a bit different today. I bought the cambelt set and cam cover gasket from them. And they’ve been pretty patient and helpful thus far. But the guy I spoke to today seemed a bit impatient. He recommended I watch a video that would tell me ‘everything you need to know’.
The video he linked to (here) is a carpassion video that I’ve already watched several times. And whilst it has some helpful info, it’s far from ‘everything you need to know.’ In order to get all the necessary knowledge, I’ve had to watch loads of YT videos, and cobble together an entire process from many disparate bits and bobs.
By way of explanation, the VVT timing belt video the BOFI guy recommended – linked to above – is done with the engine outside the vehicle. So there’s nothing in it about how to remove the cam cover top, VVT swing arm doodad, or loosen the alternator, etc, to remove the belts.
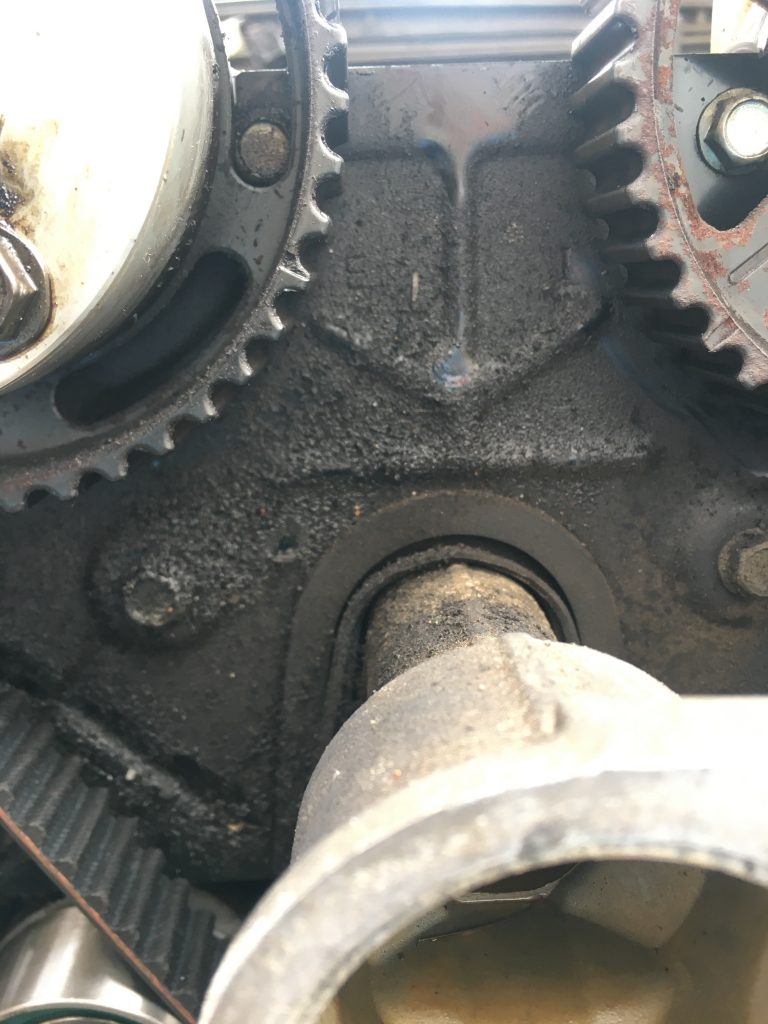
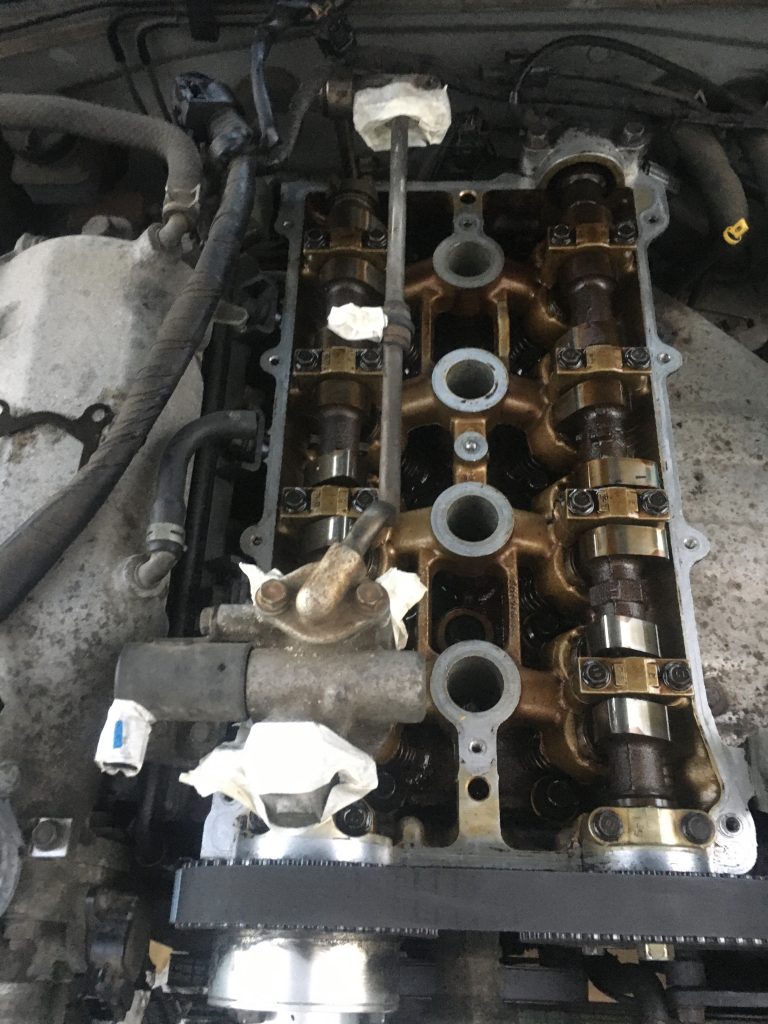
First, align these…Then check these… they’re both off!
Anyway, today’s work went a lot quicker and smoother than on previous days. And as the first two photos directly above attest, the timing wasn’t aligned as it should have been.
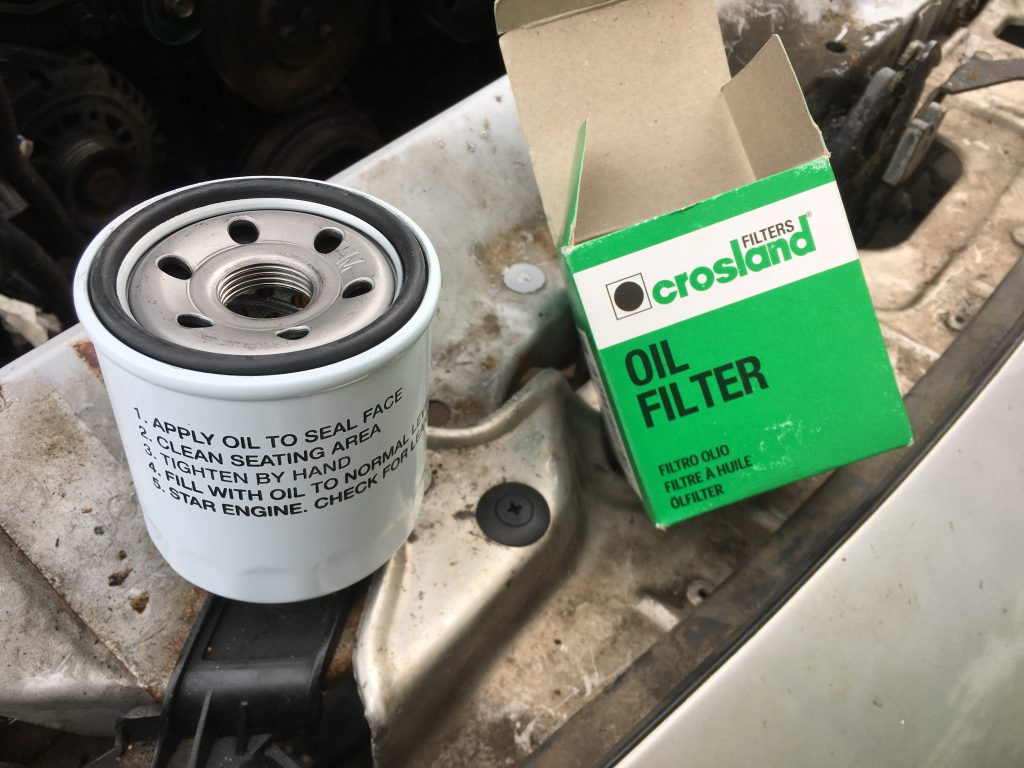
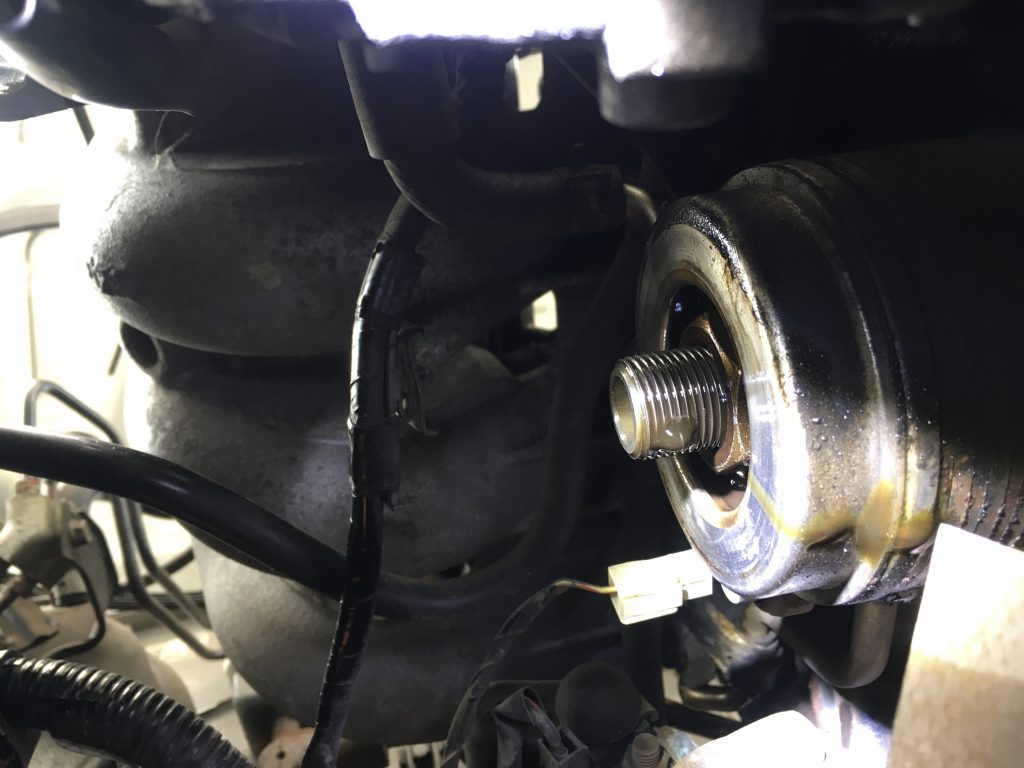
But to find this out required, as previously, quite a lot of dis-assembling: I drained the coolant again, and took the rad’ off, again. I also drained the (new!) engine oil. The latter was leaking a little under the sump. But despite the little leak the main thing was I’d bought and wanted to fit a new oil filter.
The new oil filter.Viewed from below: getting the old filter off and cleaning up was hard!
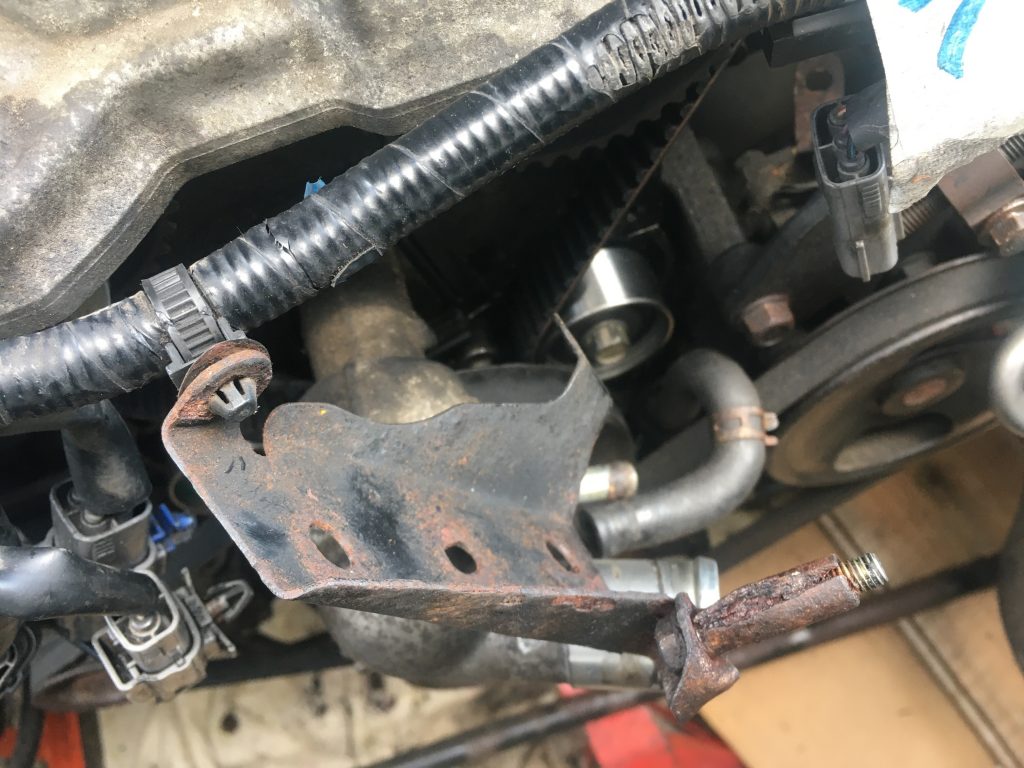
To get the old oil filter off, and the new one on, I had to remove a chunky metal part (the intake manifold brace, acc. to Greg Peters). Prior to this I couldn’t get a grip on the old filter. The extra bit of space created by removing the mysterious metal member meant I could not only remove the old filter, but I could also install the new one. Very little of this job has been easy!
So my disassembly this time was a wee bit more complex and involved than before. But this ultimately made others tasks easier. I drained the coolant and oil, recycling both, as both were new in yesterday (and not cheap!). I had to filter the coolant, as some crud had gotten into it.
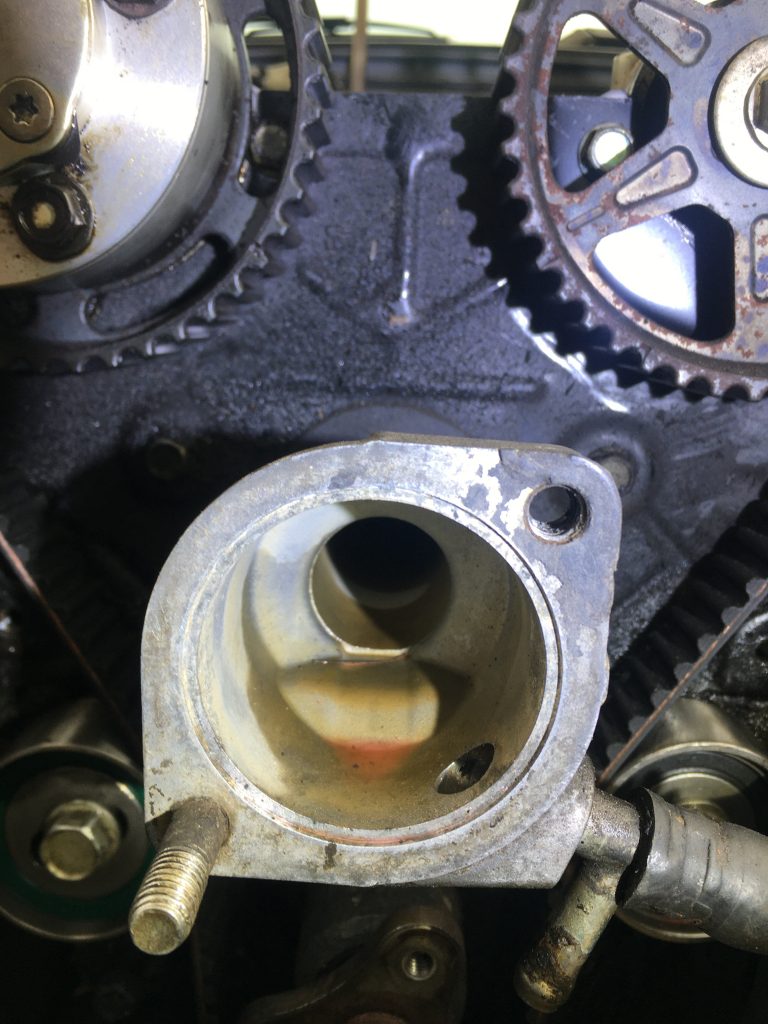
All the usual rigmarole was required: I took off the negative terminal of the car battery; the spark-plugs were removed, the VVT stuff lifted out of the way. I loosened off the alternator and the other thing (AC?), to get those two front belts off. This then allows the water pump wheel to be removed. With this, and all the pipes and wiring removed or disconnected, I could concentrate on re-setting the timing.
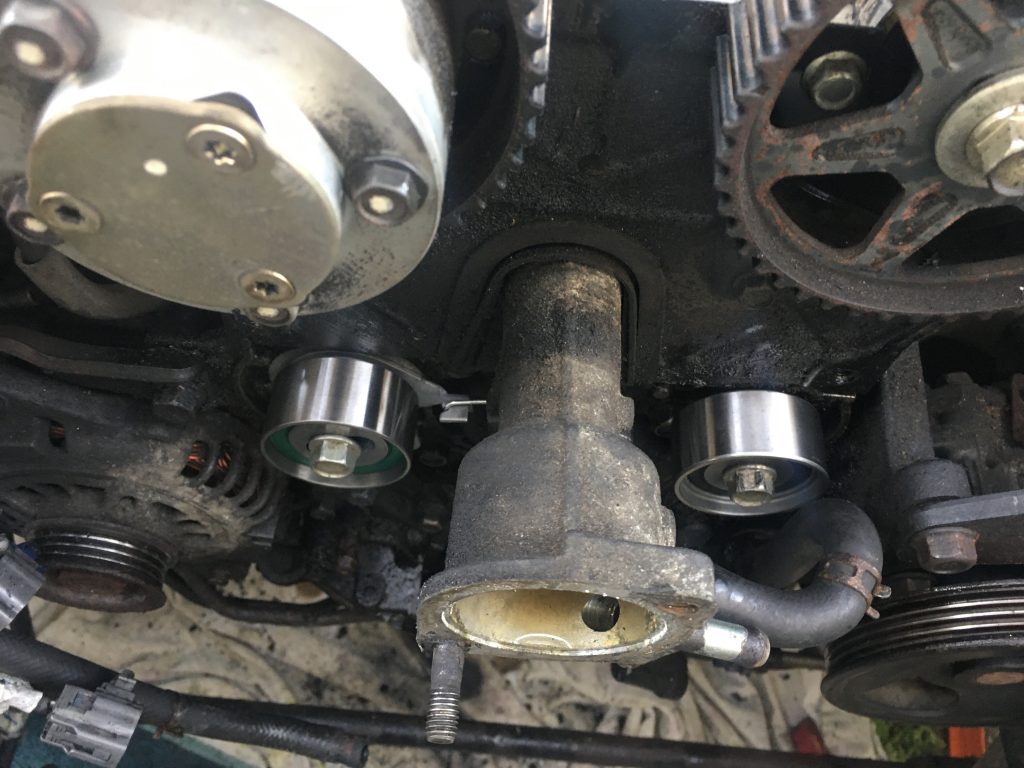
E is TDC, zip-tied, grooves at approx 8 o’clock are aligned.Groove at 4-ish aligned to back plate mark.Both marks now much better aligned.Re-checking the camshaft pulley; still good!
There were sundry things along the way, such as taking apart the thermostat housing, and cleaning the now set liquid sealant from where the two parts meet. The temporary gasket idea didn’t work! I also totally trashed the little plastic radiator drain plug. It had been in a lousy state from the get go. And deteriorated rapidly when used.
Anyway, as the three or four pics directly above show, first I aligned the cam pulley with the notch and lone locator tooth, lining them up as best as I could. Then, with the two idlers loose, I set the right (E for exhaust) cam and pulley wheel. This was a tooth or two out before. I zip-tied it off, Greg ‘carpassion’ Peters style.
Next I torqued the right non-moving idler to its specified 32 ft/lb or 42 NM (using torque settings I found here). I then adjusted the intake cam (I, and also VVT, in my case), which was a whisker out. Once that was right, I re-attached the tensioner spring on the left idler, let that find its natural position/tension, and torqued that up as well.
Snipping the zip-ties off, I then put the whole lot through two full rotations. Some folks say you should do 1 & 5/6ths rotations, but that only works – I think? – when checking against some marks on part of the cambelt cover I didn’t re-install (because those bit were all busted up!). After two full rotations everything was still aligned as I’d set it. And, as the fourth of the above pics shows, the camshaft pulley remained TDC.
I also counted 19 teeth between the two TDC (top dead centre) points. This isn’t easy on a VVT engine such as mine, because whilst the the exhaust cam pulley has an E marked at the appropriate point, the I/VVT side doesn’t. But both have marks lower down that can be aligned with recesses on the backing plate.
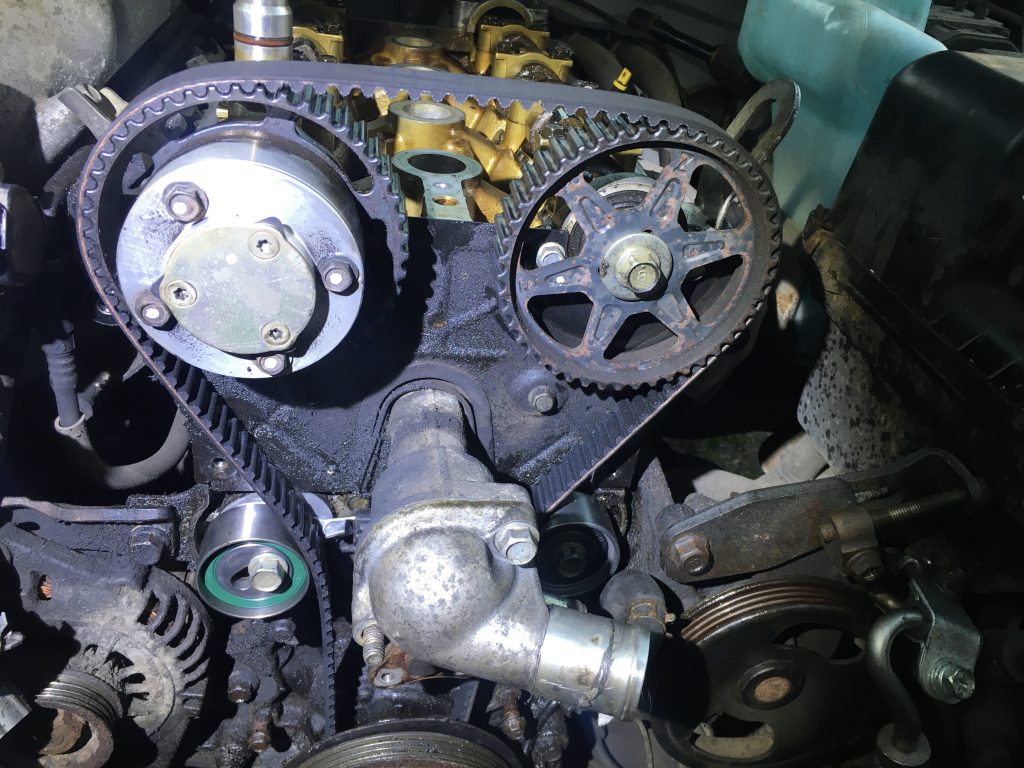
Everything back together, albeit temporarily.
With the timing set up as it should be, I re-assembled everything else. Having eventually added a new oil filter, I refilled the oil. Some has been lost, inevitably. I haven’t added the coolant however, as I need a new radiator drain plug and thermostat housing gasket. The old plug is totally, erm…. pluggered!
I’ve ordered a new thermostat housing gasket, from MX5parts. Whilst I was getting that, I also ordered four new bolts for the plastic engine under-tray. The latter was held on by just two bolts and a cable-tie! It should be fastened at six points!
Look at the state of this plug (note also grease-monkey thumbnail!)
So what remains to be done? First I need to replace the radiator plug, which was damaged to start with, and has deteriorated beyond rescue now. Then I need to install the thermostat housing gasket. With both of those things done, I should be able to refill the rad’ wi’ coolant.
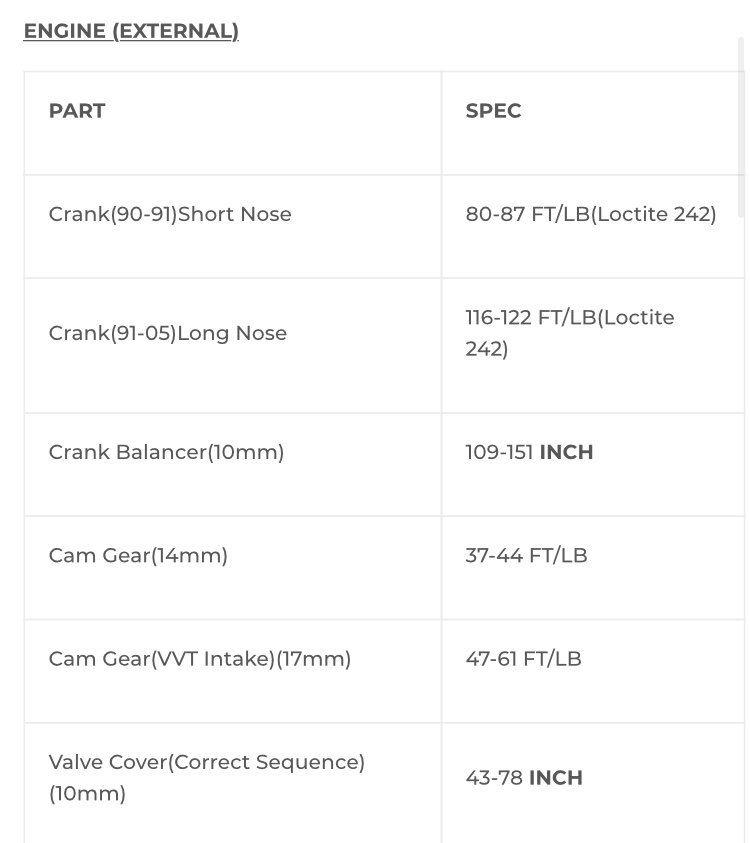
I also need to torque the camshaft bolt, to roughly 168-9 NM. This is one operation I’m a bit confused and cagey about. Do I do it purely against the natural resistance of the engine? Or should it be in gear with the handbrake on? Or do I lock it off with spanners and a wrench?
Screenshot of some (US) torque values.
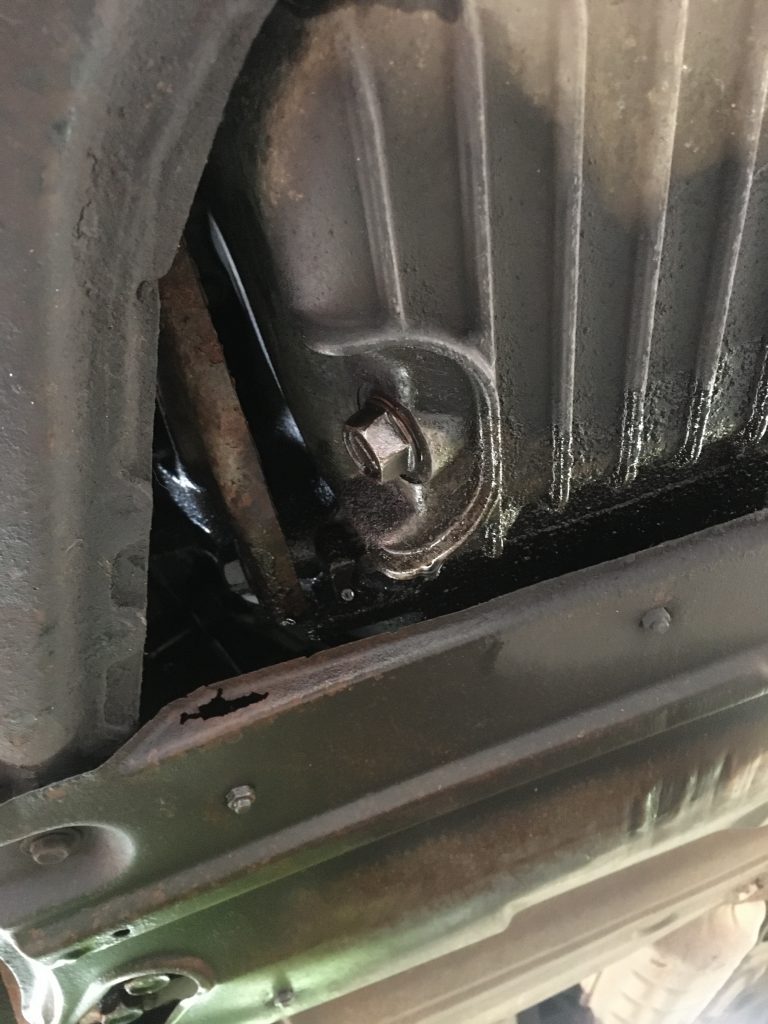
I might also need to torque the engine oil sump plug. I think I already did this? But I’d better check for oil leaks and re-check the torque setting tomorrow. And talking of torques, I better also check the cam-cover gasket bolts as well!
I don’t think I’ll bother putting the engine under-tray back on until I’ve got the car running again. Ditto for the cam belt guards. Please, oh ye Gods of the Mazda MX5… please start!
Today I hardly took any photos of the work I did. Most remiss of me! Maybe it was because today was mainly re-assembly? But frankly I really should’ve taken lots of pics!
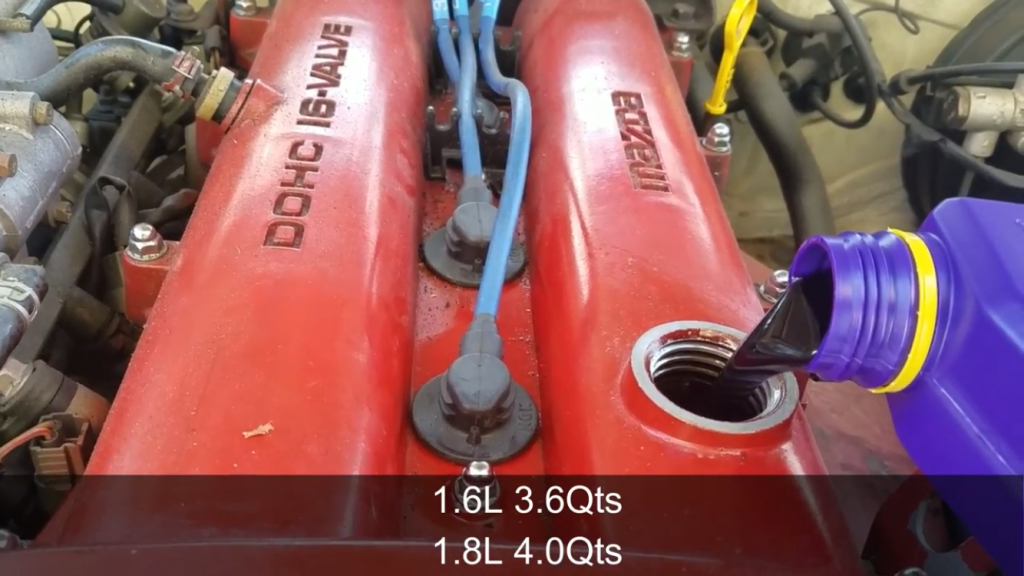
The above screen capture was taken to help me work out how much oil I needed to refill the engine with. Most of the helpful videos are American – the call their Mazda MX5s Miatas! – and everything needs to be changed from foot pounds and quarts to NM and litres.
I walked into town – not far! – and had a slice of pepperoni pizza from Dreggs. I also checked out some larger wrenches, in Boyes and what used to be Thing-a-me-bobs. I can’t recall what the latter is called now!?
I wound up buying two 300 mm x 36 mm – one foot long with an inch and a half ‘mouth’ (in old money) – Rolson adjustable spanners. At £6.99 they were a wee bit dearer than the Boyes ones; it’s the latter pictured above. But they looked and felt both bigger and better quality.
Actually, whilst they look decent enough, they’re not great. Are any adjustable spanners any good? The adjustment is always fiddly, and very prone to slipping or working loose!
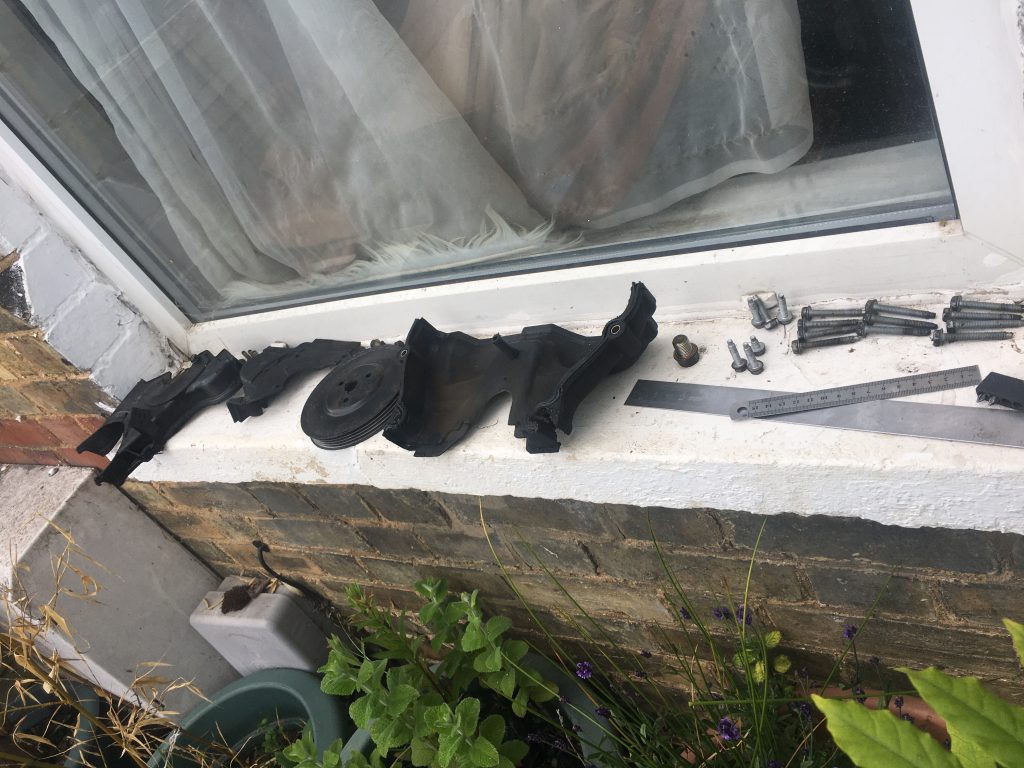
I left off all three of the cam-belt guard plastic bits, as they were pretty mangled to start with. And removing them had further damaged them. I think this metal plate screwed into one of them. There are two metal bits n this line that are not fixed back in place.
Took two shots of this bit, which now seems poss’ redundant. Ended up removing it altogether. in total there are three plastic cambelt guard sections I’ve left off, and two metal brackets, this larger one, and a much smaller one.
A chunk of today – two hours, poss’ more? – was given over to a trip to Halfords. After buying the two spanners and a bit of pizza, I caught a bus to the big roundabout on Wisbech Road, which is pretty close to Halfords.
I bought a new oil filter. I was expecting it to have a ‘crush ring’. But it didn’t. Rather tragically and annoyingly I failed to install it, as I was unable to remove the damned old one!
I wanted to catch a bus home, but didn’t want to walk to Tesco. I would up walking all the way home, with a rucksack full of heavy tool, engine oil, and even a little ‘dolly’ trolley (the latter in lieu of a larger and more expensive inspection trolley).
I stopped at The Hippodrome en-route, for a refreshing lager shandy, and to rest my poor aching feet! I’m not fit any more. The walk home was horrible!
As I said at the top of this post, I totally failed to document the re-build. I replaced the cam-cover, inc adding sealant gasket gloop where indicated.
One of the only bits of documenting I did arose out of the balls up I made of the radiator re-install. For starters I totally wasted a whole bottle of coolant/antifreeze, by failing tore-attach one of the radiators’ lower pipes.
Pouring the whole litre in, it simply drained right out, via the lower and still disconnected tube. It was a mother to re-connect that particular pipe, as the clip on it, and the end of the pipe itself, we’re not in tip too condition.
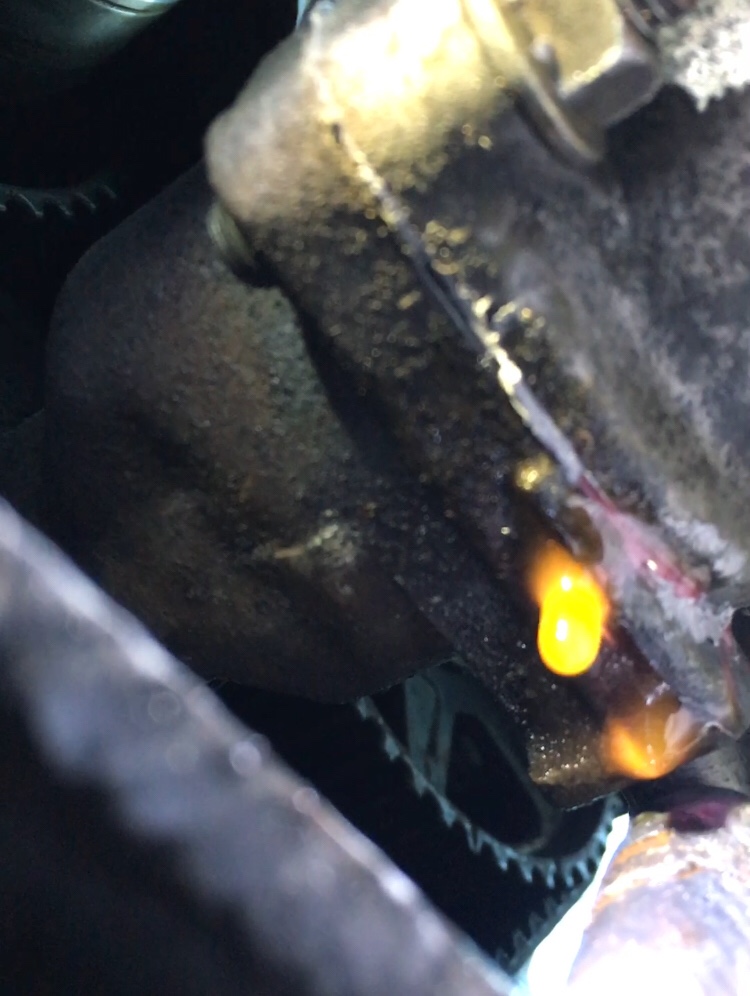
Then, when refilling the coolant mix into the re-installed radiator, I discovered further leaks due, once again, to missed connections. This was a thinner pipe-work segment, and it only haemorrhaged coolant when the radiator got pretty full.
But even after connecting all the errant lines, and tightening up all tubing and fastenings, there remained a terrifically annoying leak. This turned out to be the thermostat housing, the gasket inside of which had fallen apart.
I tried to bodge it, with gasket sealant. But I put it back together wrong; a whole 180° out of its proper alignment. So when I’d reversed it, or corrected it, the ‘temporary fix’ suggested by a BOFIracing dude, didn’t come out as planned.
So I wound up ordering a new thermostat housing gasket today, plus four new undertray fasteners, all from MX5parts.co.uk I hope they get to me ASAP!.
What was most g-g-gutting and g-g-galling, was getting everything back together only for the engine to not work, still. I have to be honest. This necessitated a bit of a lie down! I was, frankly, utterly crushed.
After about an hour of rest, I decided to go out and look at the car again. A friendly neighbour then took me to Halfords, for my second visit o’ the day – at 7.50pm, ten minutes before they shut! – where I bought some coolant.
Still from my video that WP won’t upload!
Topping up the coolant revealed several leaks. the easiest to repair was a small hose I’d missed. Next I tweaked a few of the clipped hose connectors. But, alas, coolant continued to leak. And a video under the area revealed that the thermostat gasket bodge hadn’t worked.
I tried to add that video to this post. I had to shorten it to even upload it. And then, once added in WP, the post no longer updates… gaaargh!!! So I’ve taken a still image from said vid’. Not great, but better’n nowt!
Bizarrely, the coolant, which was streaming out initially, but only dripping by the time I got my iPhone camera on it, seems to be dripping not from where the two parts meet, but just behind that. Weird!?
Anyway, that’s that for this post. I guess tomorrow I just keep on keepin’ on…
Today, Tuesday (actually yesterday, as it’s past midnight now!), was a real mofo! Certain steps in this job that seasoned mechanics might do in seconds, took me ages!
I didn’t take so many pictures today. I hope I won’t wind up regretting that? Pictured above is how things looked after a good five or six hours of work. Everything off, ready for new cambelt, and pulleys.
Getting the harmonic damper and the main cam shafts nut off was very tricky and time consuming. Rust had turned the several pieces into a single monolithic block. Much WD40, hammering, and swearing, was required!
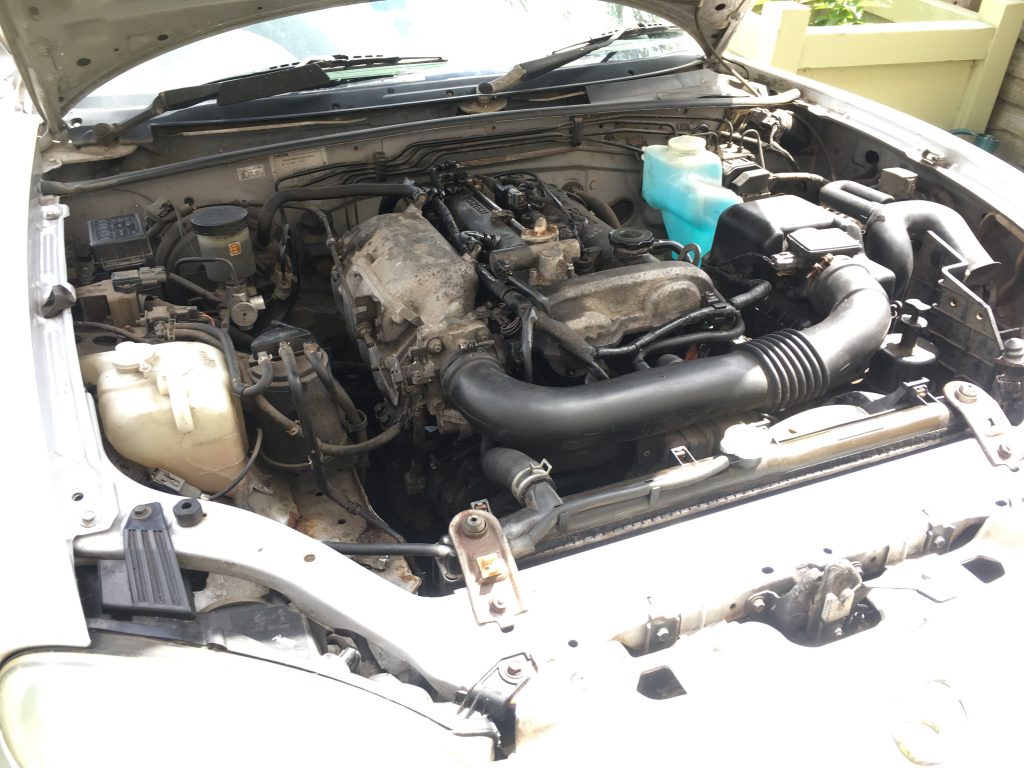
Panning out somewhat, so as to see all the gubbins.
Lining up stuff on the windowsill. Some of those plastic bits, that shield the cambelt, etc, need replacing, as they broke (due to bolts that wouldn’t come out!)
Cleaning bolts…
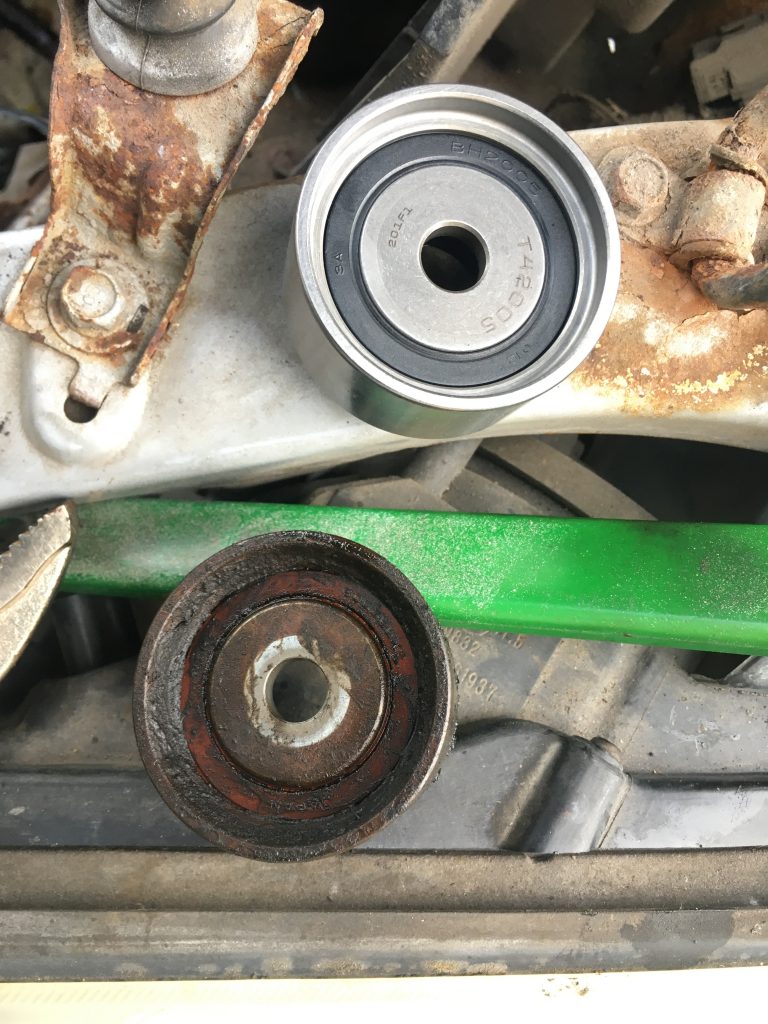
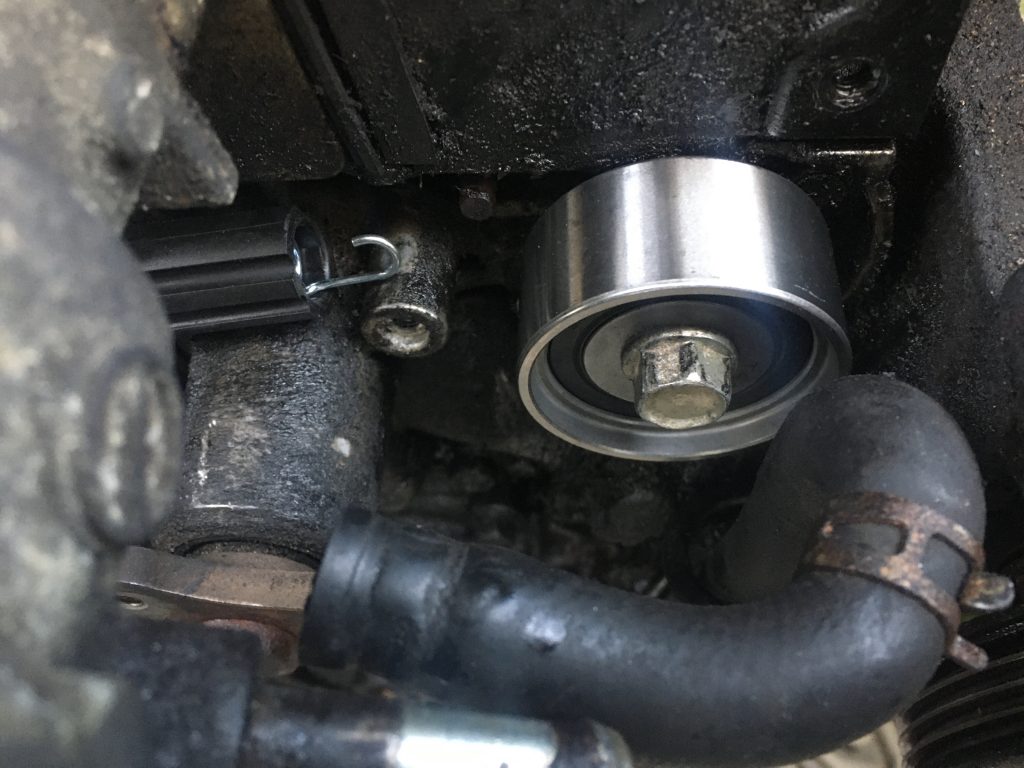
A before and after shot; cleaning up fixtures and fittings, prior to gradual re-assembly. And below, the old idler wheel and the new one. Shiny!
And, also below, the other idler, this time avec spring arrangement. For the left (alternator?) side. New pulley and spring; old bolt and spring cover, the latter both cleaned up.
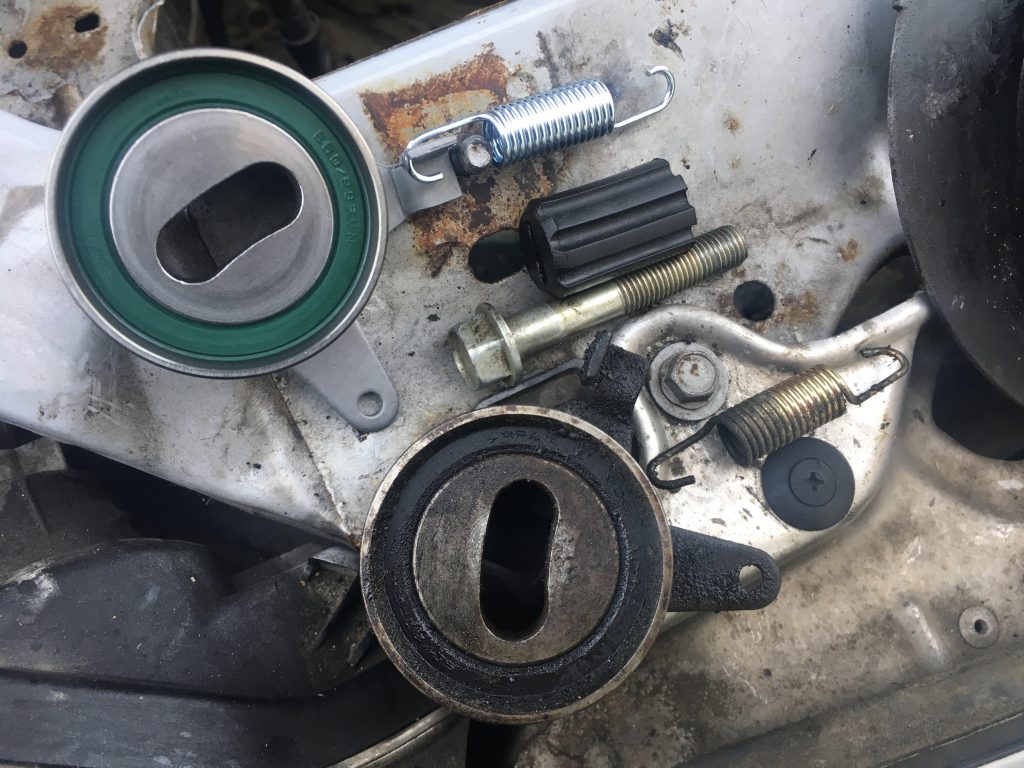
And now three pics zooming in on the new idler/pulley wheels.
And lastly, the two of ‘em, shiny and lovely.
I didn’t photograph loads of this stuff. For example, my three hour plus struggle with the hideous bolt holding the alternator at its junction with the engine block.
Today was a day of much anger, swearing and frustration! it wasn’t just the aforementioned nut that was driving me nuts. The harmonic damper was a real mother to remove. And the camshaft itself?
I thought I was going to lose it! But eventually I prevailed. And in the end the job progressed, albeit much more slowly than hoped for, to past the halfway point, as new parts were added.
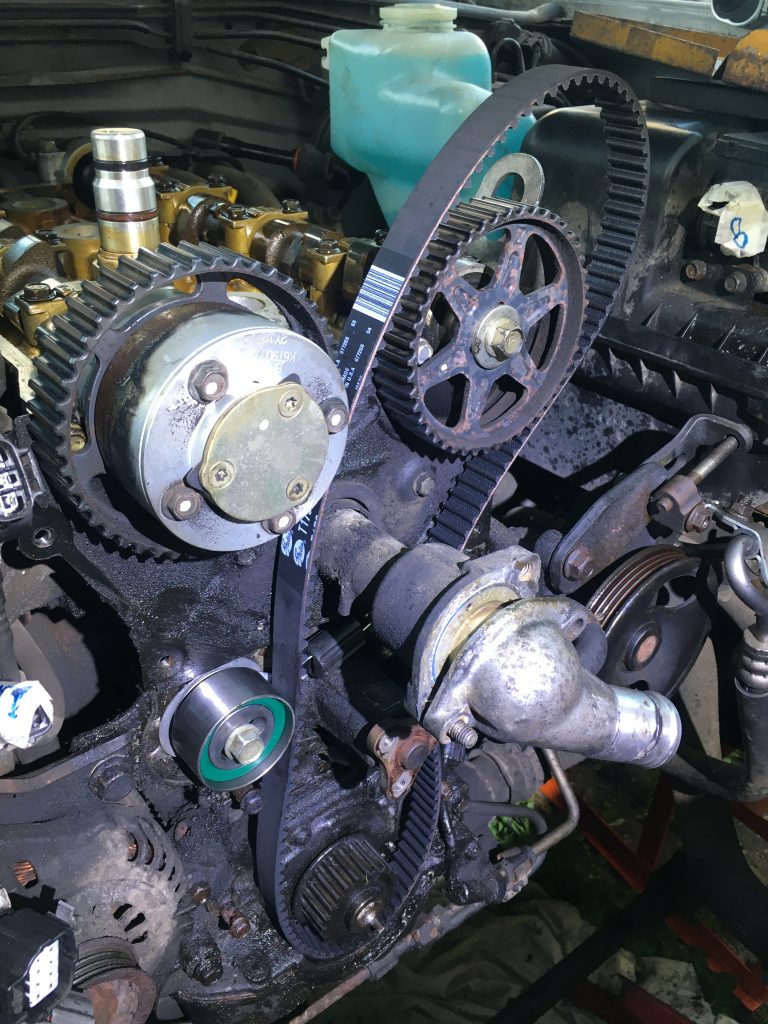
The light was starting to fail, after 12 hours more or less solid work. So Teresa held a torch for some of the following photos. Above, the cambelt goes on.
With help from Teresa, we got the damned cambelt installed. I also set the harmonic ding-dong to its intended position.
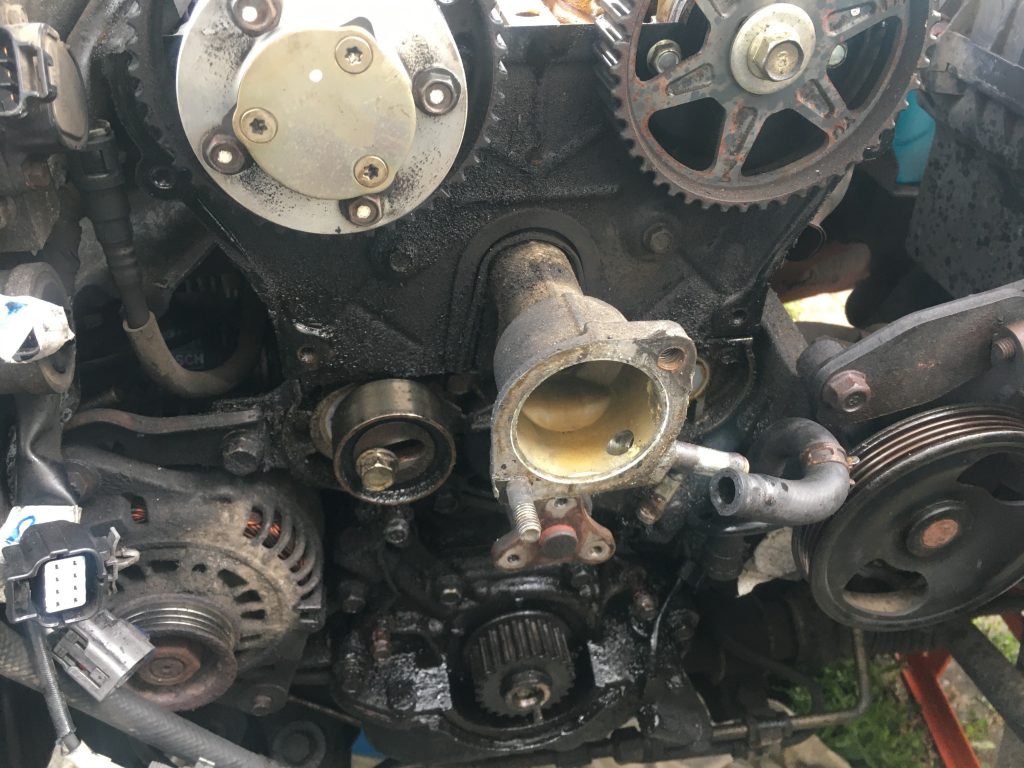
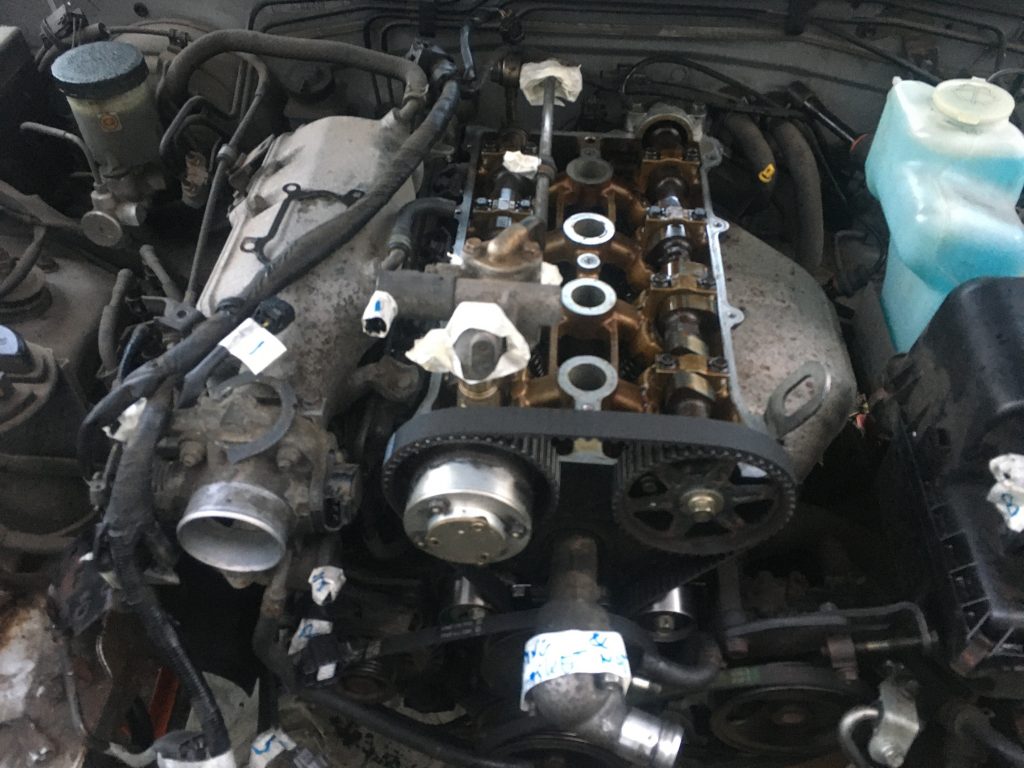
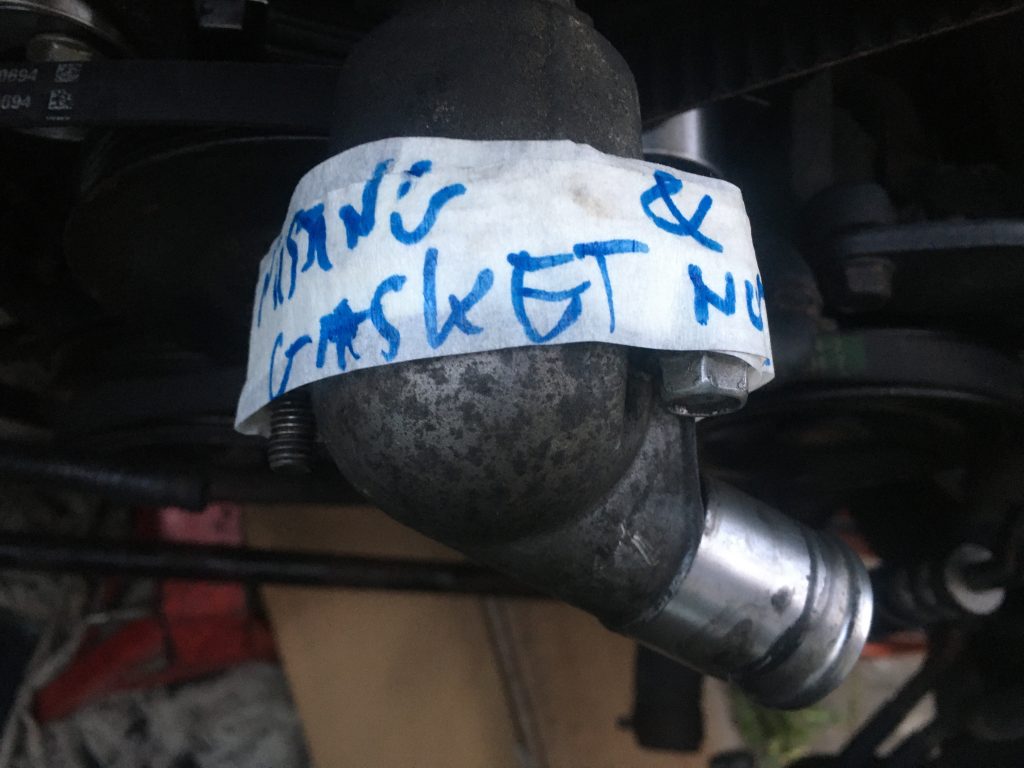
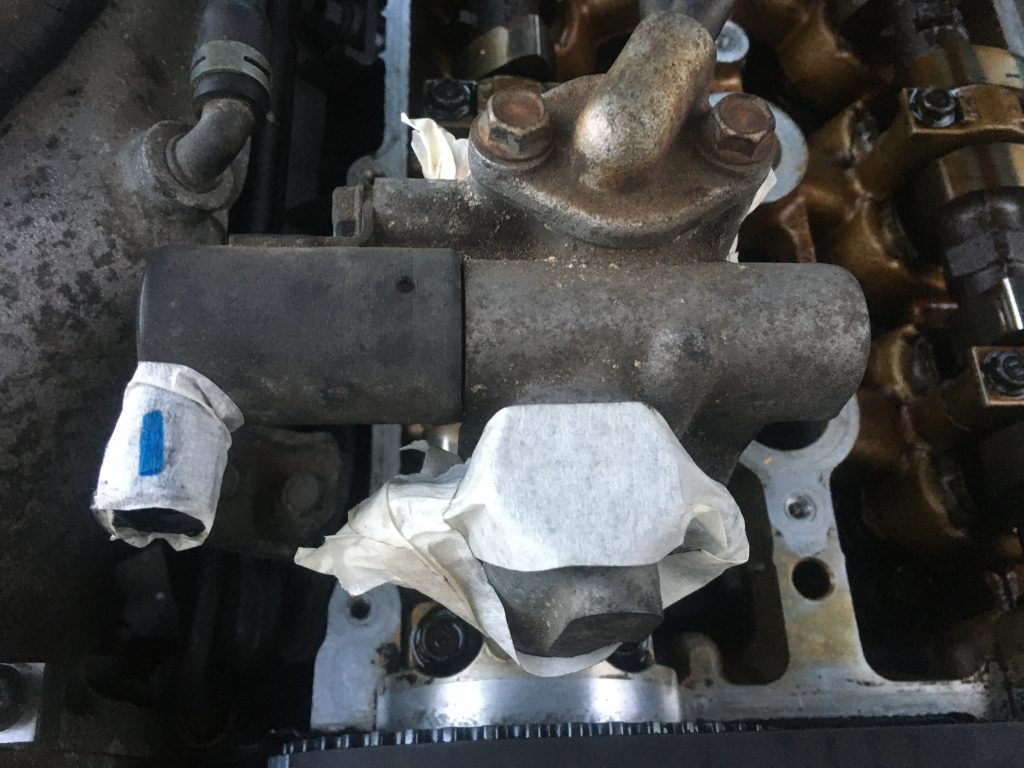
Teresa snapped me working under the car.Some of the wiring labelling is visible here.A reminder re the missing gasket.The VVT stuff, close up.Poss tools for spark-plug removal?
So, that’s it for this post. A few more pics. But not much to say. A frustrating and very tiring day. Working slowly. Oh so slowly! But getting a bit of DIY style atisfaction
The new overalls!
Last of all, in my working duds! And beaming in a grimy way…