A while back I enthused over a selection of stylish funky green shorts and tops. I placed an order for three or four items. An eternity later, I negotiated a refund.
I can’t recall offhand if I got a complete refund or not. I think not? If that site (whose name I forget now) carries on like that in high volume, which I suspect they do… then they’re making lots of money out of chumps like me, whilst supplying nothing in return (except frustration disappointment and anger!).
Those items (see these posts) were, I later discovered, probably just photos of more expensive clothing blithely nicked off some other legit site, and then re-used to tempt schmucks like me into spur of the moment or impulse purchases.
And FB doesn’t effectively police such underhand dealings. Indeed, I expect the whole FB edifice is mostly built on scamming and exploitation.
Most users naively see FB and use it thinking of it as a fun friendly furry entity. But it is the giant behemoth it is because it has been a very effective selling platform or tool. And for the money folk, the bottom line is the, er… bottom line!
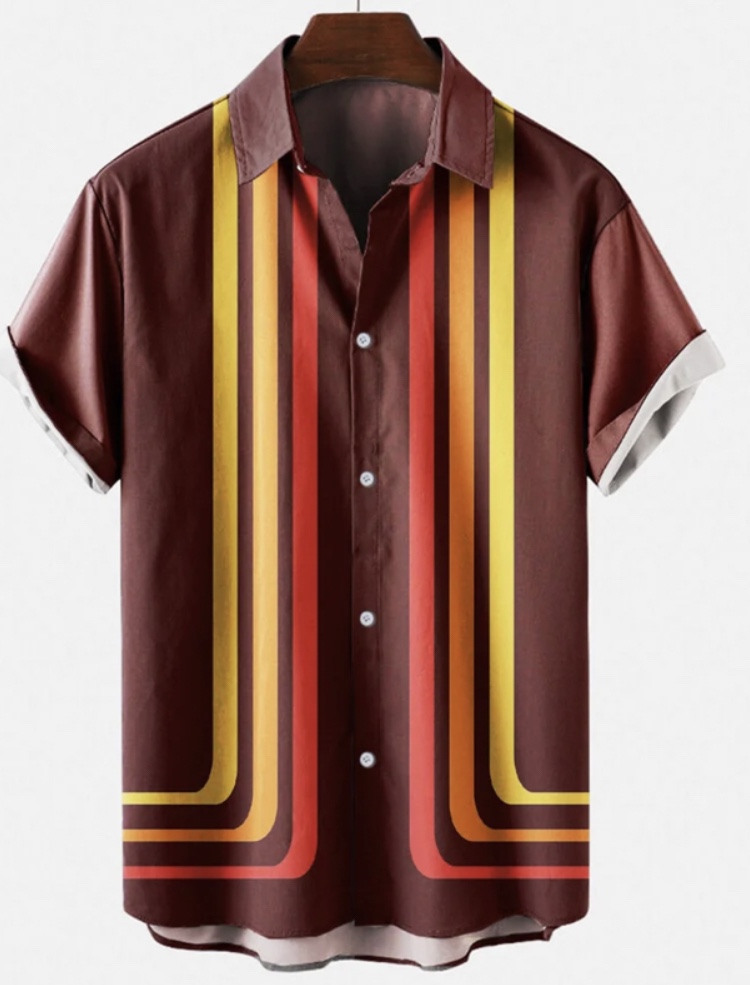
The shirt pictured at the top of this post perfectly captures a style I went with for my covers band, Capricorn. We played jazz funk soul and Latin, and our ‘colour scheme’ was essentially just like this shirt!
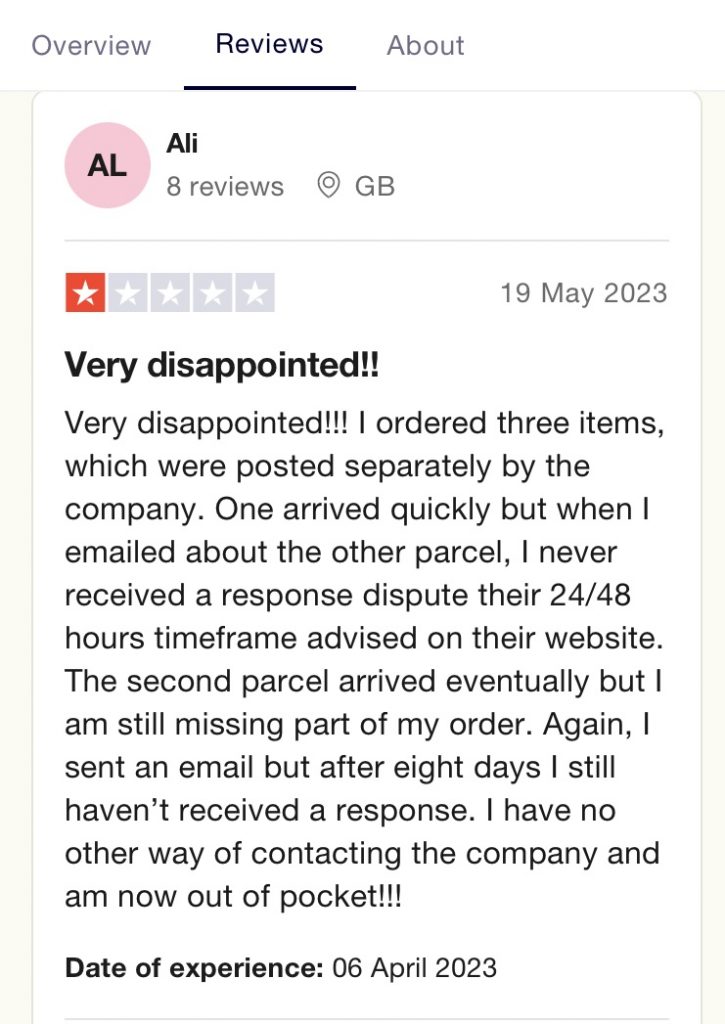
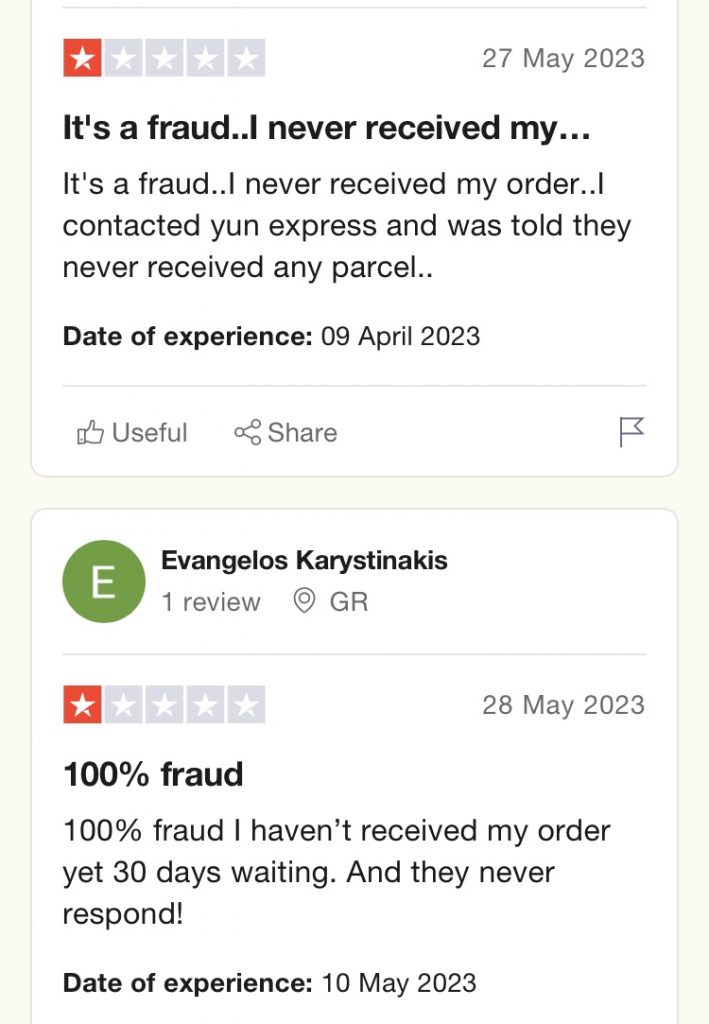
A review from Truspilot.
I’d love a shirt like that. But a quick check on ceballi.com returns too many ‘definitely a scam’ type comments. So I shall exercise caution and restraint. Damn nice shirt though!
Today was a real scorcher. No mistake! I love warm sunny days. But I have to be careful, being pale of complexion. And if I’m working in the heat? Phew…
I was supposed to do two delivery shifts today, for Amazon Flex. The first went off ‘according to plan’, inasmuch as I picked up my packages from an Amazon Hub in Peterborough, and then drove about delivering them.
Most Flex shifts are actually somewhat shorter than the advertised or contracted time. But today’s deliveries – lots to strange addresses (e.g. the many chalet like places within a marina), and not very well sequenced (I’ll come back to this) – were very arduous and time consuming. So on this occasion it took most of the two and a half hours allocated to do all the deliveries
The major headache with the first Flex shift was that where the app usually sequences deliveries very sensibly, today for some reason, it wanted me to be go off hither and yon, and then back again, when many of the deliveries were in fact very close to each other. And the poor Flex app couldn’t handle the layout of Buckden Marina at all!
Still, that shift got done, and done within the allocated time. So all was well, albeit I was really struggling with the heat, which reached a high of 28°.
I then drove to the Cambourne Morrisons, one of my most regular hubs (I wish they gave me more deliveries out of Wisbech Morrisons, it’s so much closer!). But once there – and I was about 30 minutes early (the Flex app advises being there 15 minutes early) – I was unable to get network coverage. This meant I couldn’t sign in and do my shift.
This situation persisted all the time I was there. And whilst it’s pretty much always a weak signal there, it’s normally strong enough that the app works. But not today. I tried calling the Amazon Flex driver support line. But again, no signal meant no dice!
The calls are cancelled because I wasn’t getting through.
Eventually I got through to them, using the Morrisons in-store landline. I was advised to email Amazon Flex support about it, which I duly did. I hope I get paid for this shift! It was no fault of mine I couldn’t do it. And it was a long way to come, and a waste of both time and money on my part, if they don’t recompense me.
As a result of all this, I don’t yet know quite what this weeks Flex earnings will be. And I feel I’ll have to do another shift or two tomorrow, to be sure I’m bringing enough in. But I’m soooo, soooo, SOOOO, SOOOO, SOOOO tired!
Me, in my ‘happy place’ (naked in/on our bed!)
Do I look tired? I don’t really know anymore!
My pal Rod called. Needed to unload, bless ‘im! Psychologically, that is, for any filthy minded Les Patterson types who might be sniggering at that choice of phrase. Speaking of Les P, we watched a show of his yesterday, in memory of the recent passing of Barry Humphries. Very funny!
What a great character!
Whilst chatting with Rod, whose latest band seems to be falling apart before it even gets going, I recalled passing two blackbirds on my Amazon Flex delivery route: on my way to a very remote delivery drop, I passed what appeared to be one immobile (injured?) blackbird, which didn’t budge when I drove by, as another blackbird sensibly hopped out of the road/way.
Of course I swerved to miss the apparently injured bird. Even though it was a one track dirt road with very little wiggle room. It was quite gratifying in the return down that king and winding lane to see them again – in the same spot. This time both hopping about (and hopping out of harms way).
It got me thinking about all the critters I see when driving around, and their short lives. Sadly often all too brutally curtailed by us, in the shiny beasts we rush around in (read more about this here).
It was the apparent contrast between most animal life – which appears to be so much simpler (is it really, one wonders?) – and the insanity of human vanity, and all our projects and goals and desires to achieve, or be seen to achieve, etc.
All of that brought me back again, as it often does, to that Judaeo-Christian Garden of Eden thing, whereby human consciousness is rendered as some kind of curse. And it certainly can feel that way!
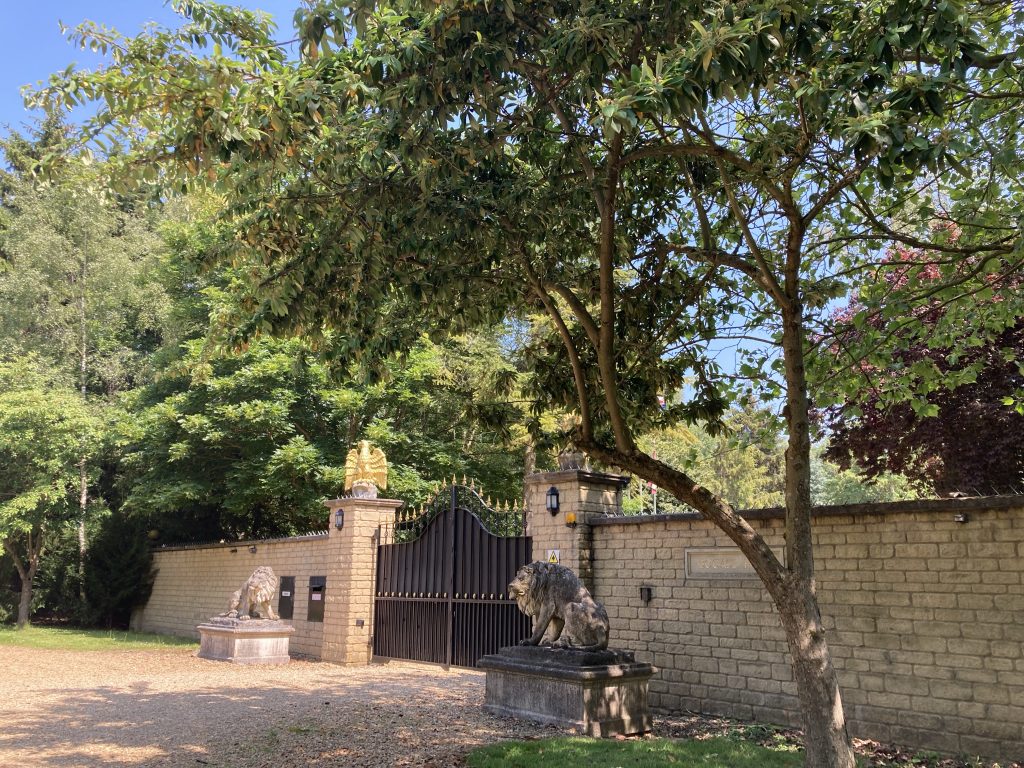
An example that’s thrown up when I’m delivering is seeing the incredible variety in how we live; from the many lower rent places – like, in all frankness, where we live – to the ludicrously large and luxurious mini-palaces of the better off. Pictured below is the gated entrance to one such from one of my recent routes.
The folk inside these gates appear to be loaded.*
* But of course I know nothing of whether they actually are or not. One assumes so, on account of the outward show of grandeur, and the very out of the way location in a rural idyll. but I also spotted several wheelchairs and similar conveyances. Who knows what their full story is?
When I deliver to the latter, I can’t help but wish that I/we lived in a much more salubrious location and style! Still, as William DeVaughan sang, we all gots to Be Thankful For What You Got!
Not had a bout of insomnia for a while. But I’m definitely having one tonight! Shouldn’t be, as I’m utterly exhausted. For one thing I was working on an oak tabletop for Hannah today, using wood (from Simon and Claire’s recent kitchen refurb) that required lots of scraping and sanding (and I didn’t have access to power tools!).
Anyhoo…
I can’t be sure quite where I started, but I went down a musical rabbit hole, possibly beginning with Cortex’s Troupeau Bleu album. That lead me to Troc’s Kali Lo, a track I absolutely adore. Andre Ceccarelli drums on it, and his drumming is my idea of musical perfection.
Much later I found the above Ceccarelli drum solo, from a jazz gig with singer Dee Dee Bridgewater. The freedom and intensity of his playing put me in mind of another French Drummer, Magma’s Christian Vander.
And that lead me to the video at the top of this post. I’ve watched it before. But every time I see it, I’m astounded. His ‘in the moment’ commitment, and technique – but technique at the service of expression – are sooo intense.
These guys have – insomnia jokes aside – awoken me from a drumming trance, I think (or is that hope?). I need to stop being an equivocating pansy, man up, and go fully mental! Is this an epiphany? I do hope so!
I’m not a ‘real ale twat’, or even anything approaching an alcoholic beverage connoisseur. But I do have opinions, esp’ as booze is getting to be so expensive.
I’ve drunk San Miguel a little on and off. And I always felt that I quite liked it. But today I bought a four pack of 568 ml tinnies, and have decided it is – or at least these cans are/were – disgusting!
I actually wound up giving two of the four cans away, to a neighbour and his partner, as a ‘thank you’ for a little bit of help he gave me, when I was recently replacing my MX5 wheel bearing.
But I must confess I think most tinned lagers are pretty shite, these days. ‘Who cares what you think of beers?’ I hear nobody say. Well, this is my blog. I do!
And my low opinion of San Miguel is a cumulative thing; it’s the result of several disappointments in recent times. Culminating in a feeling that this last lot was nigh on undrinkable.
I read Gilot’s autobiography some years ago. Very enjoyable. I’ll have to dig out my review, if it still exists, and post it here.
She was, like all Picasso’s ladies, very beautiful. A muse and a model. She was also a talented artist in her own right. Perhaps unsurprisingly, her time with Picasso left lasting impressions, both on her, as a woman, and as an artist.
There’s another book about her, by Malte Herwig, entitled The Woman Who Says No, which I’ve heard is something Picasso called her. Not read that one.
Today I had my current fullest teaching day. Which I’m currently doing remotely, using Teams. I’m not mad keen on remote lessons, to be honest. But more about that elsewhere!
During my teaching some stuff arrived from Amazon, for a job I’ve meaning to do for ages. A breaker bar, and some larger sized nut attachments for various tools. I only ordered them yesterday. They arrived today. Amazon Prime is pretty cool.
This breaker bar (and attachments) arrived today.
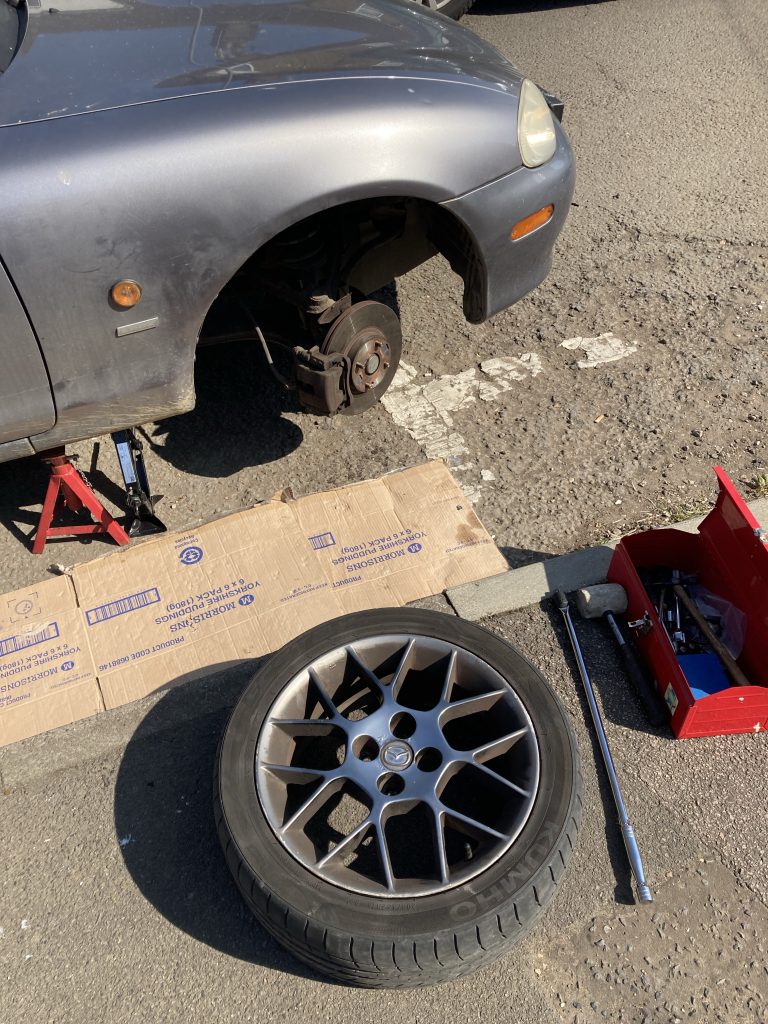
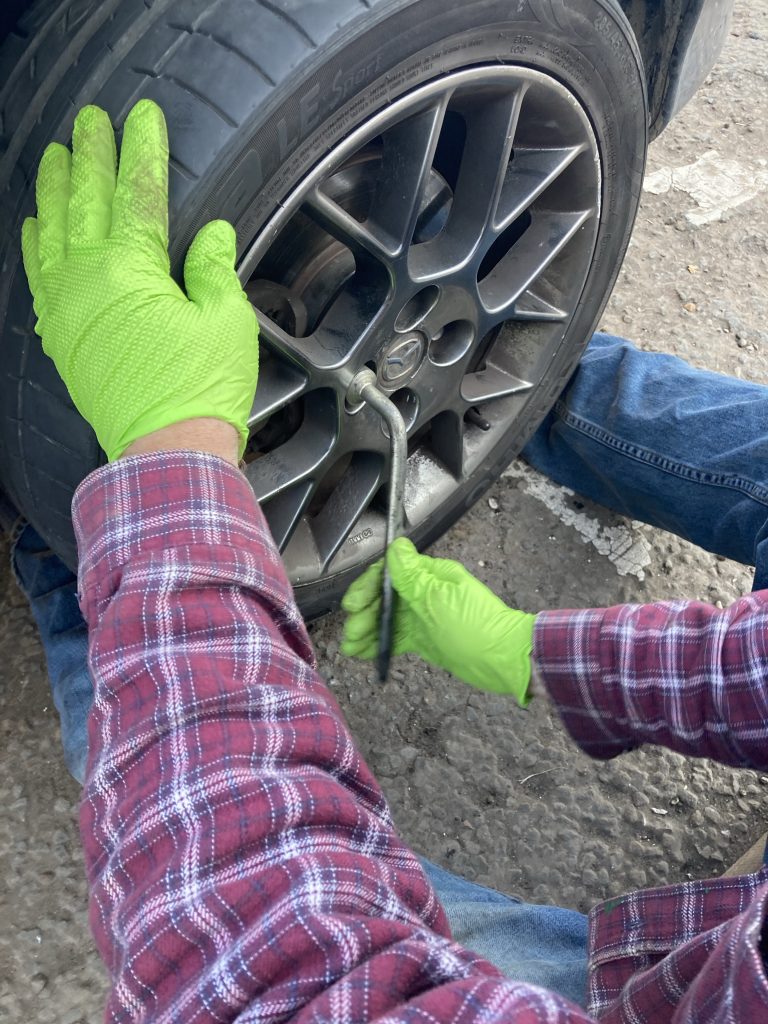
Four Paw Racing, who replaced both stolen CATs, on my old and new Mazdas, gave a me a long list of other recommended jobs/faults, etc. One of those was replacing the driver’s side front wheel bearing. Which they said was damaged, and very noisy.
Until I successfully replaced said wheel-bearing, I wasn’t sure exactly how much noise it was causing. Turns out it was indeed really making a racket!
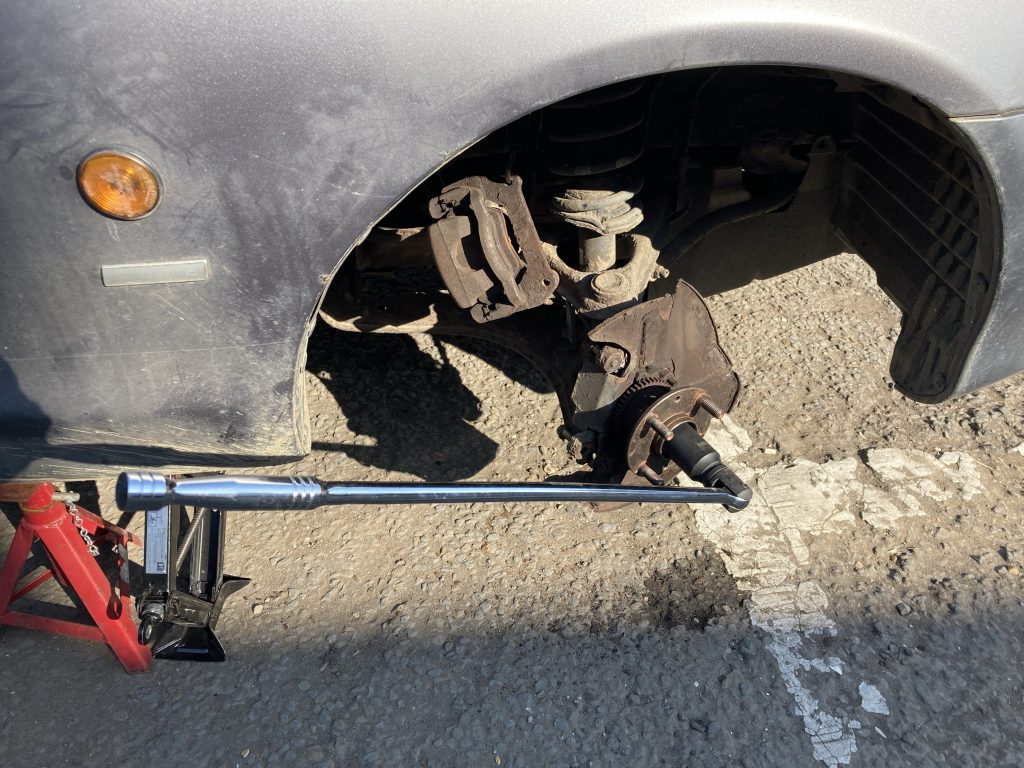
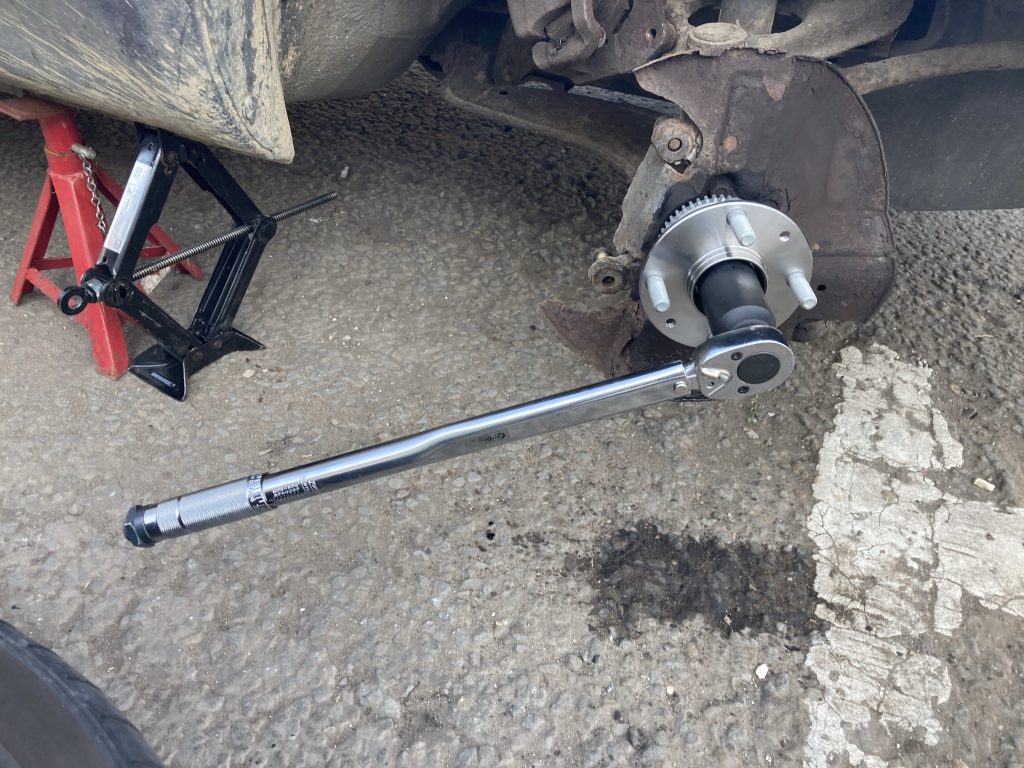
This length o’ pipe added mucho leverage.Woah! Getting this old nut off was really hard!
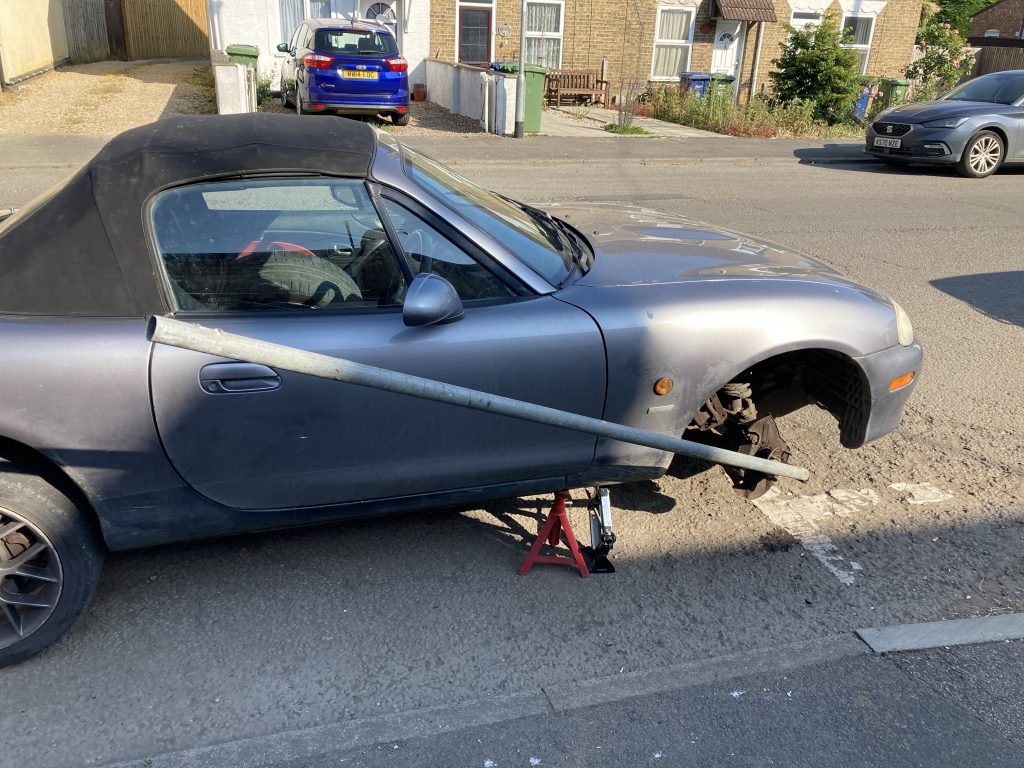
With the new wheel-bearing in place, it’s abundantly clear the old one was very, very, very noisy. It’s soooo much better now. The car is still a bit noisy (some exhaust blow and rattle, etc.). But it is quieter. Much quieter. And, very importantly, it feels a heck of a lot safer to drive.
Prior to this I wasn’t really too happy going over 45 mph. The noise was outrageous. I had to wear ear plugs! And the car just felt awful. Dangerous, even. Now she’s much quieter and smoother. And feels fine, and safe, all the way to 70 mph plus.
This was my ‘go to’ reference for this job.
The job of changing the wheel-bearing was nowhere near as easy as some YouTube videos I watched made it appear. For starters I needed some new tools; hence the breaker-bar and large socket set.
Sadly I broke my smaller torque wrench, undoing the bolts that hold the front calliper in place. Bummer! I was actually really worried I’d break the new breaker-bar, trying to remove the large 29mm nut that holds the wheel bearing assembly in place.
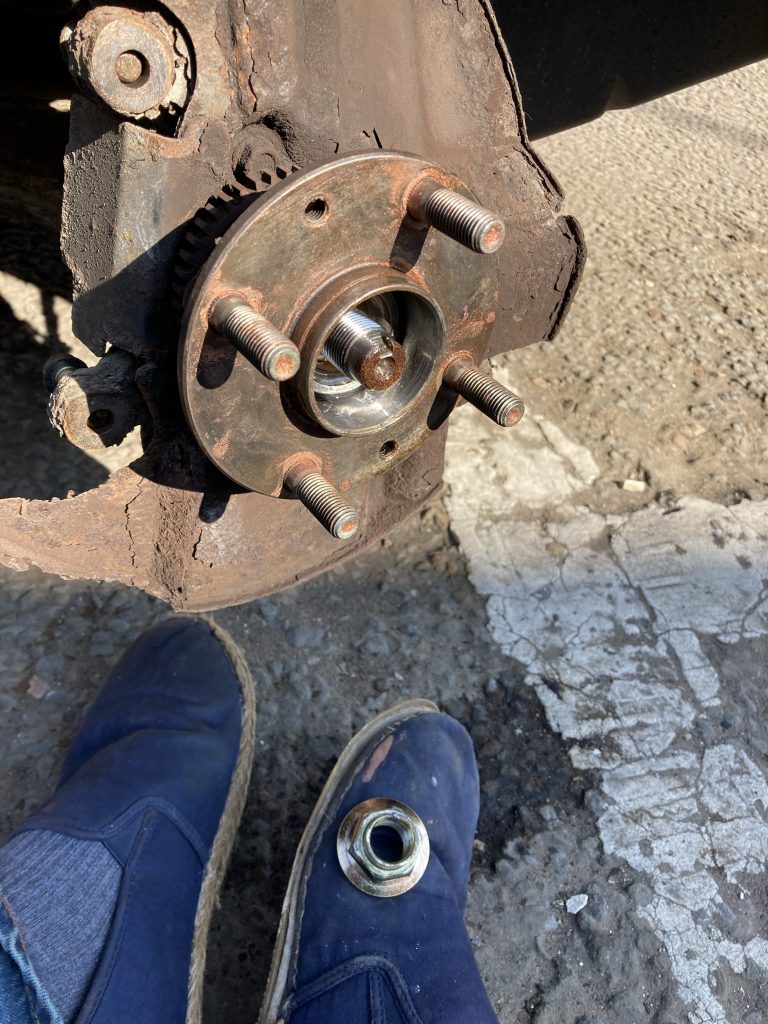
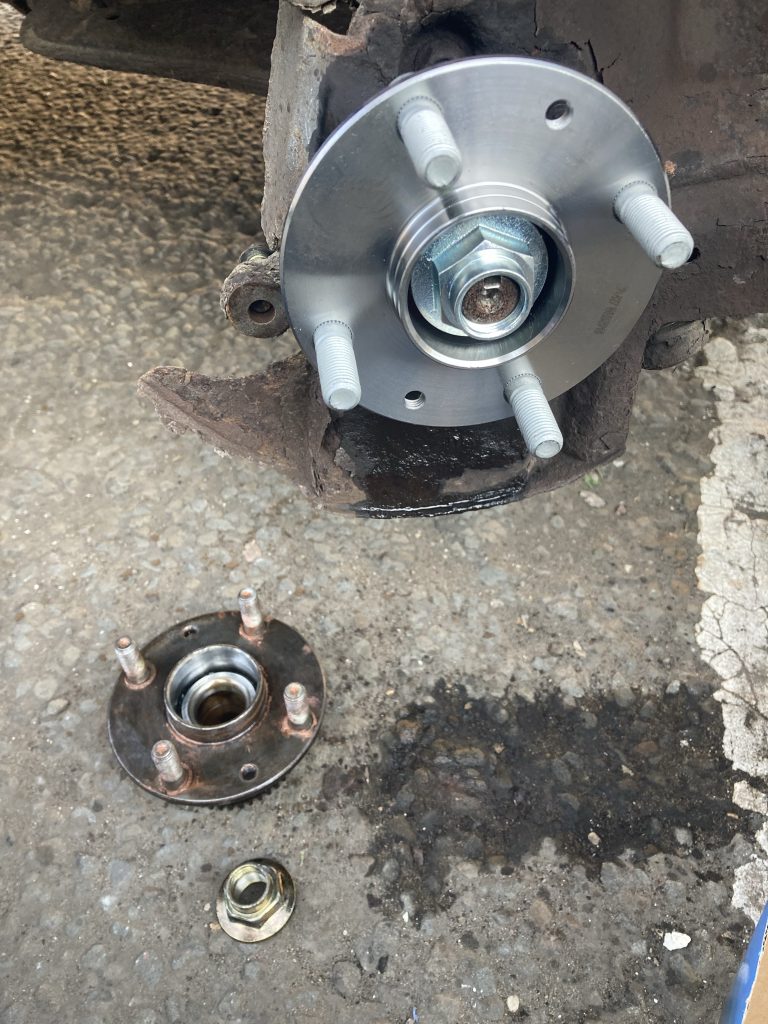
The old removed, the new in place.
I had to cadge a length of scaffolding type pipe, from a neighbour (which I must return!), slather the nut in WD40, and let that soak in. And just persist in working on it. And, lo and behold, after many attempts (and a short spell of despondency, during which I figured I was doomed to fail), the nut moved a micron.
Once it had moved at all, I knew I was onto a winner. But getting that nut off was a real mother, no mistake! Going back a bit, so was removing the cap that allows one to get to the nut. As also was removing the calliper bolts. Almost nothing, esp’ on the dis-assembly side, was easy!
Torquing the big nut to approx 200 NM!
So, finally, I was down to the wheel bearing assembly itself. And that was stuck fast as well. So, a copious application of WD40, half an hour to let that do it’s work, and lots of gentle hammering, to unseat it. And once again, persistence bore fruit.
So, long before day’s end, I’d not only done a full days teaching. I’d also successfully replaced the faulty wheel-bearing. And boy does the car sound and feel sooo much better. Very gratifying.
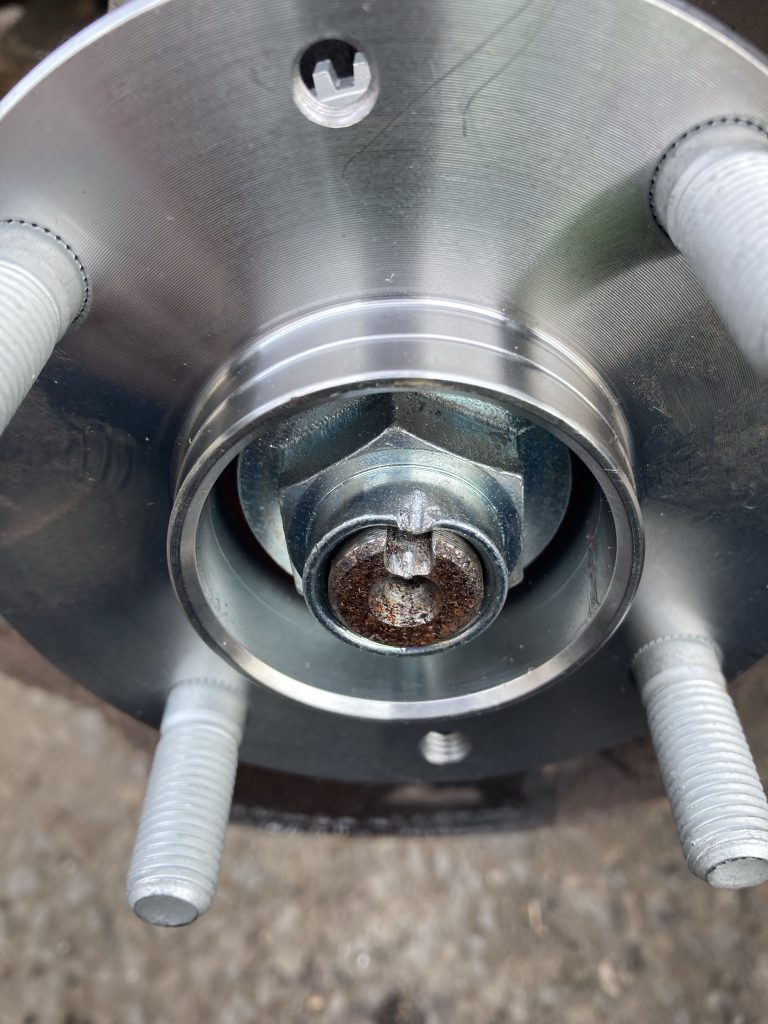
Shiny! Banged in a ‘divet’ to key the new wheel bearing in situ.
Putting everything back together was a lot easier than taking it apart. And was achieved relatively quickly and smoothly. I now have another area of newly acquired car maintenance skills, and a few useful tools. Not to mention a better running motor.
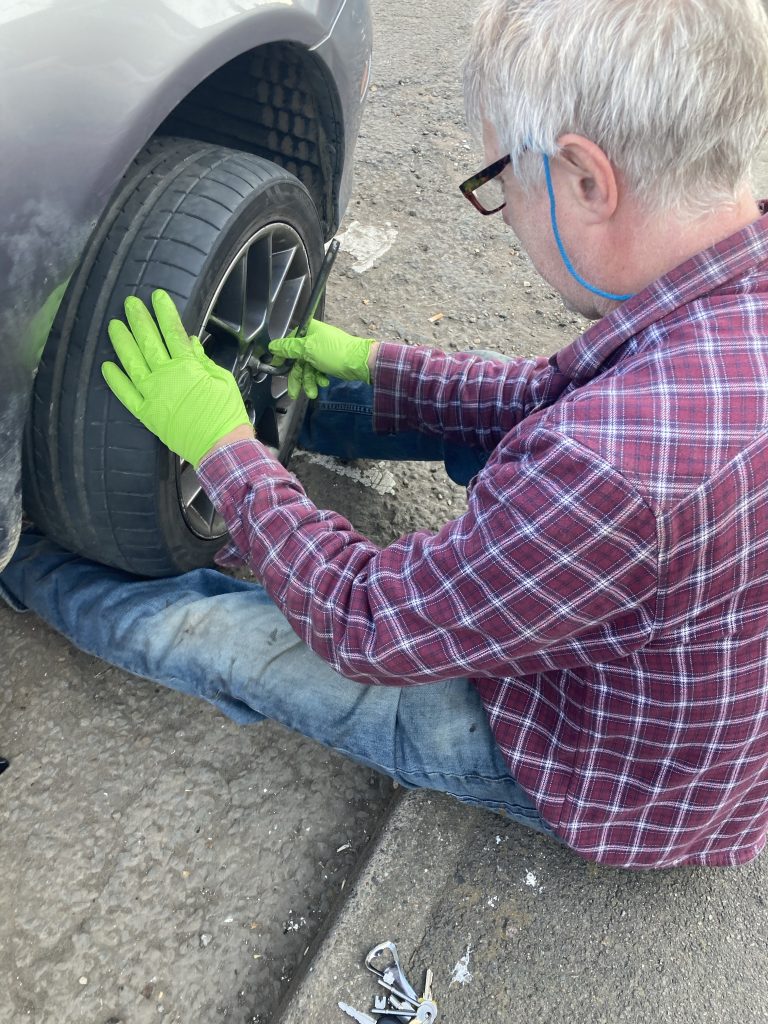
Teresa snapped me cynching up the wheel nuts at job’s end.Last one, tightened up good n’ solid.
I took her – the car, that is – out for a ten mile or so test drive. And baby, she was singin’! Very satisfying.
Feeling utterly washed out. Which is a bit of a bummer. Decided that lots of TV sports might be the tonic.
First up, The French Open. A dramatic and engaging end to Garcia vs. Blinkova, with the latter ending the home favourites’ run.
Tenacious!
Then watched a bit of men’s tennis, with Masetti vs Shevchenko. Both new names to me. Ageing, eh!?
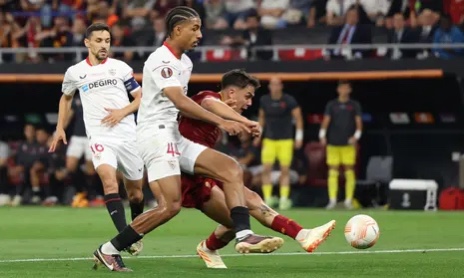
And at eight o’clock, switched over to watch the UEFA European final, Sevilla vs. Roma. I hope it’s a good match. I need some visceral brainless fun!
The match is in Budapest, a place I’d love to visit.
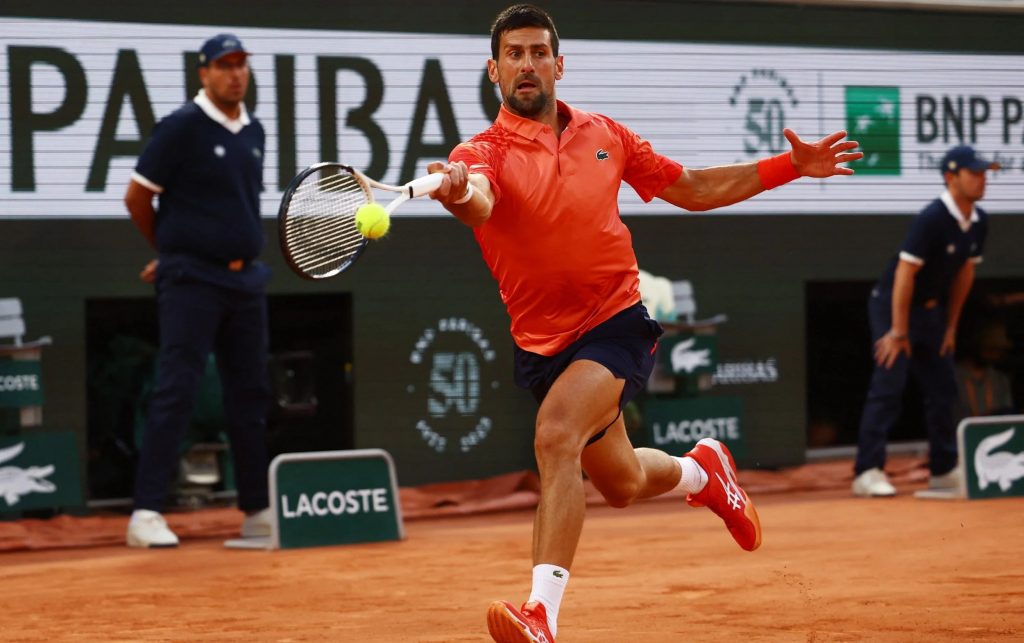
Hmm? Decided to bail out of the footy, at half time. 1-0 to Roma, but not very exciting. Went back to the French Open, and have opted to stick with Djokovic vs Fucsovics.
Novak I know, of course. His Hungarian opponent, however, is less well-known to me. I think I’ve seen him before. But he’s not as familiar.
Novak in action a Paris.
I came to this match just as they completed an epic hour and a half long first set, including an amazing 33 shot rally. Sadly, the next set was looking very one sided, Novak crushing the Hungarian.
So I’ve gone back to the football, where it’s now 1-1 (both goals scored by Roma!). Which is still dull! Back to Roland Garros… and Novak eventually wins in straight (as opposed to gay?) sets.
Dybala’s goal.
So… back to Budapest. And it’s looking very much like it’ll go to penalties. Hey ho. I’m going to stick with it to’t end! A sporty evening, to chill and still my still somewhat troubled mind. And it’s doing the job.
But, wait… what’s this? The BT Sport coverage of the match has just stopped. Before the match is even over. Que pasa?
Today is my youngest sister’s birthday. We were invited, but it was too far away and at an awkward time for us. so in the end we couldn’t make it. Sorry Abbie!
Instead we did a ‘big shop’, at Tesco’s (goddammit food prices have gone mad!), then took a picnic to Wimpole Hall, and after that picked up a free TV from a Cambridge FreeCycler.
The day started cloudy, and less than warm. It as it went on it warmed up. We were going to have a BBQ this evening. But we’re too tired, and have already eaten enough.
After our Tesco shop, I augmented Teresa’s chicken n’ mushrump pasta with some fried pork n’ onions. Teresa steamed some kale, so we had a bit of green. ‘Twas lovely!
YouTube has thrown up another new groop for me to enthuse over, Jazzbois. I love their stripped down mellow funky grooves.
Rhodes, drenched in tremolo, very fluid basslines, and stone grooves from a very minimalist drum set up. Poifeck!
Taking the essence of seventies cosmick grooves, with a ‘dope’ bit of head noddin’ towards the kind of laid back hip-hop that sampled so much Blue Note, and the like.